
Subscribe to Our Youtube Channel
Related Manuals for Gates Mectrol Novitool AERO

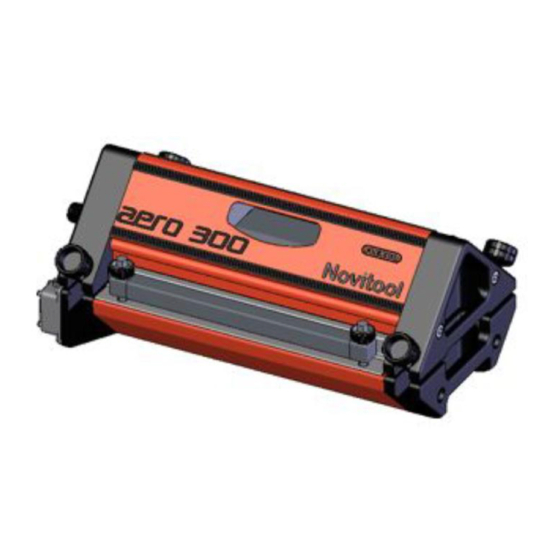
Summary of Contents for Gates Mectrol Novitool AERO
- Page 1 Welding Guidelines Novitool® AERO™ Portable Splice Press Novitool® AERO™ Portable Splice Press Welding Guidelines – V6 Last Updated: 10-06-15...
-
Page 2: Table Of Contents
Novitool® AERO™ Portable Splice Press Welding Guidelines Table of Contents Introduction ..............................2 Cautions ................................. 3 PC10 and PC20 .............................. 4 Belt Preparation ..........................4 Press Assembly ..........................7 Welder Operation ..........................11 Welding Parameters ......................13 CC40 ................................15 Belt Preparation .......................... -
Page 3: Introduction
Flexco to determine the root cause. o Gates Mectrol can confirm weld integrity through tensile and accelerated life cycle testing. For tensile testing, submitted samples must be at least 3” wide with 12” of belt length on each side of the weld. -
Page 4: Cautions
Novitool® AERO™ Portable Splice Press Welding Guidelines Cautions Overall Safety Rules To Avoid Severe Personal Injury or Property Damage, Read Carefully and Understand the Following Safety Precautions. DANGER Terminate electrical hazards by removing power cord from wall receptacle or machine base inlet. WARNING Terminate pressure related hazards by pressing the red pressure relief button. -
Page 5: Pc10 And Pc20
Novitool® AERO™ Portable Splice Press Welding Guidelines PC10 and PC20 Belt Preparation – PC10 and PC20 “Split Tooth” Cut Directions The split tooth technique is recommended for two reasons: 1. The greater the bonded surface area, the greater the weld strength. When compared to base belt thickness, bonding in the tooth area increases the weld surface area by 240% for the PC10 and 380% for the PC20 2. - Page 6 Novitool® AERO™ Portable Splice Press Welding Guidelines PC10 and PC20 2. Cut the belt. A. Insert one end of the belt into the cutting fixture. (Must have ~ 3 teeth of extra material on the scrap side that will be cut off. This will keep the belt in place while cutting.) Ensure that the belt is fully engaged in the cutting guide groove.
- Page 7 Novitool® AERO™ Portable Splice Press Welding Guidelines PC10 and PC20 3. Clean the prepared ends with alcohol (91% or higher) and a clean rag. Clean top and bottom surfaces at least 5” to 6” from the joint. A cleaned surface will provide a better, stronger joint. Clean Prepared Ends Novitool®...
-
Page 8: Press Assembly
Novitool® AERO™ Portable Splice Press Welding Guidelines PC10 and PC20 Press Assembly – PC10 and PC20 1. Place one end of the belt into the press. Belt in Cutting Guide 2. Load the other end of the belt into the press from the opposite side. Belt Loaded in Opposite Side 3. - Page 9 There can be no gaps or open areas on the platen bed Filler Strips 5. Apply a 1.5” wide strip of blue urethane foil across the top and bottom splice (Gates Mectrol PN 15260, sold in 50’ lengths). Tape Positioned Over Belt Novitool® AERO™ Portable Splice Press Welding Guidelines – V6...
- Page 10 Novitool® AERO™ Portable Splice Press Welding Guidelines PC10 and PC20 6. Place the clamping bars and tighten clamps. Position Clamping Bars 7. It is recommended that the two belt halves are tack welded together using a soldering gun with a smooth tip (Weller PN 6160, Weller offers a cordless (battery powered) powered portable soldering iron PN BP860MP for added convenience).
- Page 11 Novitool® AERO™ Portable Splice Press Welding Guidelines PC10 and PC20 9. Set the top press beam on the Teflon sheet. Position Welder Top 10. Hand-tighten the side bolts until they stop. Do NOT use any tools to tighten the bolts. Tighten bolts by hand only! Novitool®...
-
Page 12: Welder Operation
Novitool® AERO™ Portable Splice Press Welding Guidelines PC10 and PC20 Welder Operation – PC10 and PC20 1. To power the welder A. Connect cable from the top of the welder into the bottom platen and then plug it into the power cord (Voltage from 230V to 460V). - Page 13 Novitool® AERO™ Portable Splice Press Welding Guidelines PC10 and PC20 B. Pre-dry option – If the working environment is humid or wet, it will be necessary pre-dry the belt. Failure to do so will cause pinholes created by the steam escaping from the belt during welding. The pre-dry temperature and time must be set manually.
-
Page 14: Welding Parameters
Novitool® AERO™ Portable Splice Press Welding Guidelines PC10 and PC20 D. The settings in the following tables are recommended as starting points only. Note that final belt temperature is influenced by the material, the environment and the Aero press itself. For use with any other manufacturer's platen press, the "Minimum Actual Belt Readings"... - Page 15 Novitool® AERO™ Portable Splice Press Welding Guidelines PC10 and PC20 4. Cooling and removing the belt. Maximum temperature before opening the press is 150° F. When the welder completes the welding and cooling cycles: A. Release the pressure using the RED button on the bottom next to pressure regulator digital screen. B.
-
Page 16: Cc40
Novitool® AERO™ Portable Splice Press Welding Guidelines CC40 Belt Preparation – CC40 CAUTION, WEAR PROTECTIVE GLOVES! To prepare belt ends for a Finger Clamp Punch (chevron cut) the following items are needed: Hammer Cutting Fixture Cutting Clamps Fixture ... - Page 17 Novitool® AERO™ Portable Splice Press Welding Guidelines CC40 2. Place one end of the belt into the cutting fixture. A. Use a square edge to align one edge. For example, if it is a left edge make sure you do the other end from the same edge and place it into the fixture the same way.
- Page 18 Novitool® AERO™ Portable Splice Press Welding Guidelines CC40 B. Using a flat head screw driver, pry the blade out of the cutting fixture. C. If the blade does not cut through the belt, use a nylon or rubber hammer to complete the cut. Use light hammer pressure.
-
Page 19: Press Assembly
Novitool® AERO™ Portable Splice Press Welding Guidelines CC40 Press Assembly – CC40 Upper Alcohol Platen Clamps Teflon Sheet Tape Like-Belt Material and Lower Silicone Platen Endcap Strips Soldering Clean Cloth Welder and Accessories 1. Once both ends are cut/punched, place one end of the belt into the press. Novitool®... - Page 20 Novitool® AERO™ Portable Splice Press Welding Guidelines CC40 2. Place the other belt end in the press and align the belts. 3. Use the soldering gun to tack the cut in place. Add filler strips of like-material against the belt edges, place a narrow strip (at least .015”...
- Page 21 Novitool® AERO™ Portable Splice Press Welding Guidelines CC40 4. Apply a 1.5” strip of blue urethane foil across the belt over the top and bottom splice (Gates Mectrol PN 15260, sold in 50’ lengths). Tape Positioned Over Belt Joint 5. Place Teflon sheet over the joint area. Be careful to keep it aligned with the welding area.
- Page 22 Novitool® AERO™ Portable Splice Press Welding Guidelines CC40 6. Set the top of the welder on the Teflon sheet. Position Welder Top 7. Hand-tighten the side bolts until they stop. Do NOT use any tools to tighten the bolts. Tighten bolts by hand only! Hand Tighten Side Bolts Novitool®...
-
Page 23: Welder Operation
Novitool® AERO™ Portable Splice Press Welding Guidelines CC40 Welder Operation – CC40 1. To start the welder power A. Connect cable from the top of the welder into the bottom press beam and then plug it into the power cord (Voltage from 230V to 460V). B. -
Page 24: Welding Parameters
Novitool® AERO™ Portable Splice Press Welding Guidelines CC40 B. Pre-dry option – If the working environment is humid or wet, it will be necessary pre-dry the belt. Failure to do so will cause pinholes created by the steam escaping from the belt during welding. The pre-dry temperature and time must be set manually. - Page 25 Novitool® AERO™ Portable Splice Press Welding Guidelines CC40 3. Remove the clamps completely before starting the weld cycle. Push the start button on the top platen above the digital screen twice (green button). A. All temperature control options must be completed. Green Start Button 4.
-
Page 26: Fc9 And Fc12
Novitool® AERO™ Portable Splice Press Welding Guidelines FC9 and FC12 Belt Preparation – FC9 and FC12 Finger Cut Directions 1. Flat belt should be prepared following a traditional flat belt finger pattern such as 20mm x 70mm. In the event that a finger cannot be punched, the belt preparation process described in CC40 section can be used. - Page 27 Novitool® AERO™ Portable Splice Press Welding Guidelines FC9 and FC12 2. Place one end of the belt into the press. Belt on Press 3. Load the other end of the belt into the press from the opposite side. Second Belt Half on Press Novitool®...
- Page 28 Novitool® AERO™ Portable Splice Press Welding Guidelines FC9 and FC12 4. Tack the belt with soldering gun. Tack with Soldering Gun 5. Fill out the balance of the platen with like-belt material and use a narrow silicone strip (approximately1” wide and at least 0.015” thinner than the belt itself) at each outside platen end to cap the end of this like-belt material.
- Page 29 There can be no gaps or open areas on the platen bed Add 1.5” foil over splice (Gates Mectrol PN 15260, sold in 50’ lengths) 6. The effective heating area is indicated by two notches on the black frame of the press approximately five inches apart.
- Page 30 Novitool® AERO™ Portable Splice Press Welding Guidelines FC9 and FC12 7. Place silicone pad over embossed side Pad Added 8. Install clamping bars. Position Clamping Bars Novitool® AERO™ Portable Splice Press Welding Guidelines – V6 Page 29...
- Page 31 Novitool® AERO™ Portable Splice Press Welding Guidelines FC9 and FC12 9. Set the top platen on the pad. Position Welder Top 10. Hand-tighten the side bolts until they stop. Do NOT use any tools to tighten the bolts. Tighten bolts by hand only! Hand Tighten Side Bolts Novitool®...
-
Page 32: Welder Operation
Novitool® AERO™ Portable Splice Press Welding Guidelines FC9 and FC12 Welder Operation – FC9 and FC12 1. To power the welder A. Connect cable from the top of the welder into the bottom platen and then plug it into the power cord (Voltage from 230V to 460V). -
Page 33: Welding Parameters
Novitool® AERO™ Portable Splice Press Welding Guidelines FC9 and FC12 B. Pre-dry option – If the working environment is humid or wet, pre-dry the belt. Failure to do so will cause pinholes created by the steam escaping from the belt during welding. The pre-dry temperature and time must be set manually. - Page 34 Novitool® AERO™ Portable Splice Press Welding Guidelines FC9 and FC12 3. Before starting the weld cycle, remove the clamping bars completely from the press. Push the start button twice on the top platen above the digital screen (green button) to start the cycle. A.
- Page 35 Novitool® AERO™ Portable Splice Press Welding Guidelines FC9 and FC12 5. IMPORTANT: Do NOT run the belt immediately. The belt requires an additional 30 to 60 minutes cooling time. Novitool® AERO™ Portable Splice Press Welding Guidelines – V6 Page 34...
-
Page 36: Troubleshooting
Novitool® AERO™ Portable Splice Press Welding Guidelines Troubleshooting Problem Solution Unit will not turn on. Check power supply. Thermostat safety switch may have determined that the press had overheated. Be sure that the platen is fully Unit turned off on own loaded with material as an opening above the thermostat will cause the temperature in that area to climb above that recommended for the press. -
Page 37: Contact Information
Tel. +1 (800) 394-4844 Fax +1 (603) 890-1616 email: contact@gatesmectrol.com Gates Mectrol is a registered trademark of Gates Mectrol Incorporated. All other trademarks used herein are the property of their respective owners. © Copyright 2015 Gates Mectrol Incorporated. All rights reserved. 10/15 GM_NAG_15_V5 Novitool®...
Need help?
Do you have a question about the Mectrol Novitool AERO and is the answer not in the manual?
Questions and answers