
Related Manuals for Boutique Camping OXFORD BELL TENT


Summary of Contents for Boutique Camping OXFORD BELL TENT
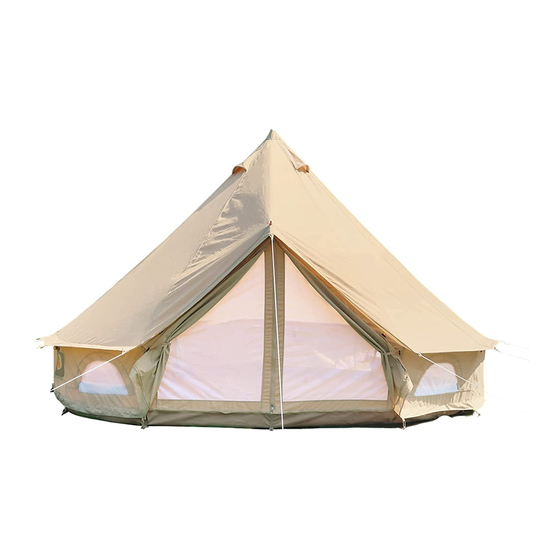
- Page 1 OXFORD BELL TENT INSTRUCTION MANUAL www.boutiquecamping.com +44 (0)203 394 2986 info@boutiquecamping.com...
- Page 2 SETTING up YOuR OXFORD BELL TENT • Unpack the bell tent and lay out on the tent with the • Attach all guy ropes to all cotton loops at the end of groundsheet down. Find the door and rotate the tent. the seams. so it’s facing the desired direction. • Take the small pegs and, pulling the groundsheet • Take the main straight pole through the door, find the tight, peg it out. centre of the cone and push the pole and tent up until it’s vertical. www.boutiquecamping.com +44 (0)203 394 2986 info@boutiquecamping.com www.boutiquecamping.com +44 (0)203 394 2986...
- Page 3 • Zip the door shut and attach the extra long guy rope above the door. Then using the thicker ribbed peg, peg out the guy ropes around the whole tent without putting any of them under too much tension. • Put the A frame together and place inside the door - it’s easier to get it through the door if you complete putting it together once inside. Put the spike through the hole at the top of the door and at the feet into their holding pockets. Then go outside the tent and screw the rain cap on. • N.B. All the guy ropes need to follow the lines of the seams in the roof. Adjust the guy rope slider so you have approx 50cm of loop to the peg. This allows adjustment in both directions. It is important to make sure the Bell Tent stays symmetrical and that the tension is evenly spread. The pegs should be at least 1m from the tent.
- Page 4 ROLLING up ThE SIDES • Once all the pegs are in, adjust the guy ropes to create the desired tension. By doing it this way and following the seam lines your Bell Tent will look like this: perfect and without creases. • TIP: If the door seems too tight move the two guy ropes either side of the door in towards the middle of the door to relieve some tension. • All our bell tents come heavy duty zipped in groundsheets, so you can enjoy the breeze on a warm day. Simple unhook the elastic rings from the pegs and unzip the the 2 zips from front to back. And then use the toggle and loop system to hold the walls up. Don’t forget to deck it out with your personal touches. www.boutiquecamping.com +44 (0)203 394 2986 info@boutiquecamping.com...
- Page 5 hOw TO pack up YOuR BELL TENT • Take all the poles and pegs out of the tent whilst keeping the canvas off the grass - this helps keep your tent clean and grass stain free. Without standing on the canvas, fold half of the tent over so you have a half moon with the groundsheet facing up. The following steps will tell you how to pack up your Bell Tent after use. As stated all over the set up instructions it is vital that your tent is stored bone dry otherwise it will get attacked by mould. It’s fine to take it down damp, however, you must ensure you hang it up to dry within 24 hours. You don’t have to set the tent up again, just hang it on a washing line, over a car or over some chairs - basically it just needs some air. • Let that half of the groundsheet dry out and you might • Once the condensation has dried off you need to turn want to wipe off any mud or worm casks. If it’s not a dry the half moon over so the other half of the groundsheet day you’ll need to dry the tent out when you get home.
- Page 6 • Once the whole tent is dry, you now need to fold • Use the ties to secure the tent as a roll. the sides into center and then fold over on itself so you end up with a strip the a width of the tent bag. • Now fold the strip in half and place the pole bag and peg bag at one end. • Next, roll the whole thing into a tight bundle. • Next, lift one end, slip the bag over the tent and place everything else inside. Enjoy your bell tent and remember please only store it bone dry. Many thanks and feel free to call us if you get stuck. www.boutiquecamping.com +44 (0)203 394 2986 info@boutiquecamping.com www.boutiquecamping.com +44 (0)203 394 2986 info@boutiquecamping.com...
- Page 7 OThER INFORmaTION The canvas has been impregnated to protect it from dirt, ultraviolet the canvas, which could eventually lead to damage. To ensure your important to store your tent dry so no fungus or other stains radiation and fungus. This makes it mould-resistant but not tent stays set up correctly daily guy rope maintenance is necessary. can appear. If you have to store the tent wet temporarily, be mould-proof. If the canvas remains damp, in a place where mould sure to remove the mud and dirt from the bottom of the tent can grow, eventually mould will grow. If you put your tent up in a • It is in your interest to keep the canvas as clean as possible and put your tent back out to dry within 48 hours. damp corner of the garden, next to a hedge, or under a tree long remove stains when created. Dust and dried mud is best removed term it will eventually get mouldy (as would a car or anything left once the canvas is dry by brushing with a clean, hard brush like a • In order to limit fungus and stains on your tent, store your there). Therefore it’s worth considering the right spot which has floor scrubbing brush.
- Page 8 ENJOY YOuR GLampING EXpERIENcE! We would love to share some pictures on our social media, so please do email us your images to info@boutiquecamping.com www.boutiquecamping.com +44 (0)203 394 2986 info@boutiquecamping.com...
Need help?
Do you have a question about the OXFORD BELL TENT and is the answer not in the manual?
Questions and answers