
Related Manuals for Seresco NG Series

Summary of Contents for Seresco NG Series
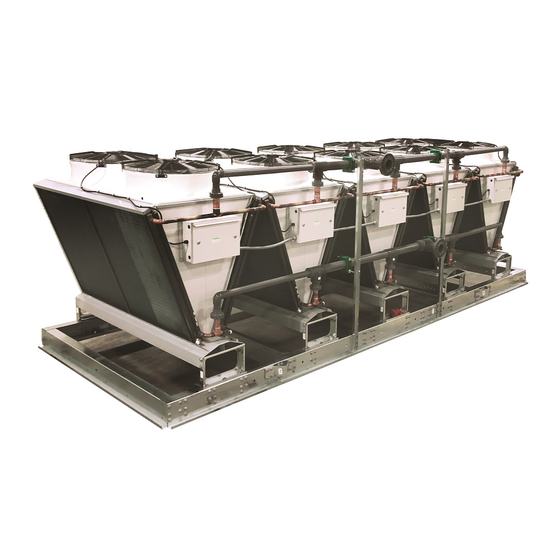
- Page 1 DRY COOLERS NG Series INSTALLATION MANUAL S e r e s c o D e h u m i d i f i e r s . c o...
-
Page 2: Table Of Contents
Table of Contents General Information ............................2 Operating Safety (Warnings, Cautions, and Notes) ....................2 Reference and Additional Information ........................2 Delivery and Storage............................4 Receiving Checklist..............................4 Shipping Damage Handling ............................4 Storage ..................................4 Mechanical Installation ............................ 5 Lifting and Rigging .............................. -
Page 3: General Information
General Information This manual provides basic information about various installation aspects of the applicable equipment and its additional and auxiliary systems and devices. Important information regarding operation and maintenance of said equipment is normally provided with the equipment and can also be obtained from the manufacturer (see Contact Us below). Operating Safety (Warnings, Cautions, and Notes) FOR YOUR SAFETY: READ BEFORE PERFORMING ANY INSTALLATION OR OTHER TASKS! Only qualified technicians should install, operate, maintain or service mechanical equipment! - Page 4 Installation, start up, maintenance etc. are not within warranty scope. Refer to the manufacturer standard warranty statement for more details on warranty conditions, scope and coverage. Contact Us Seresco 1-833-DAS-POOL (327-7665) 1071 Ages Drive Schedule / Modify a Start-up: Ottawa, ON K1G 6L3 Startups@DehumidifiedAirServices.com...
-
Page 5: Delivery And Storage
Delivery and Storage. Receiving Checklist It is highly recommended to thoroughly check for both visible and concealed damage upon the equipment arrival and before signing the receiving papers. As applicable: Visually inspect exterior of the equipment for damages (scratches, dents, missing elements, etc.) Verify the proper operation of latches and hinges on all access doors and panels Inspect all coils for damage to the fin surface coating, headers or coil connections Inspect the fan housings for any foreign objects... -
Page 6: Mechanical Installation
Mechanical Installation WARNING! All work must be done by qualified personnel in accordance with local and national Codes, Standards and Regulations as well as respective design and submittal documentation and manufacturer recommendations. CAUTION! Obtain all necessary documentation (manufacturer manual(s), submittal documentation, drawings, etc.) and familiarise yourself with it before performing installation or any other related tasks. -
Page 7: General Mechanical Installation Requirements
Anchor (secure, fasten etc.) light-weighted equipment to the horizontal mounted surface (concrete pad etc.). This applies mostly to NG series fluid coolers models NG-Z, NG-V-01, NG-V-02, NG-V-11 and NG-V-12. Pic. E.2 NOTE: distance between the fluid cooler and the other equipment it serves affects the connecting pipe line set (length, size etc.). -
Page 8: Mechanical Installation - Special Cases
Mechanical Installation – Special Cases The placement requirements outlined above apply to all models of NG series fluid coolers. Model NG-Z Fluid Coolers’ Mounting/Support Set Field Assembly The NG-Z model fluid coolers can be provided in vertical or horizontal airflow configuration and may require field assembly of respective mounting/support set (legs): Vertical airflow configuration (for mounting on a horizontal surface such as ground, roof, etc.) –... - Page 9 Horizontal airflow configuration (for mounting on a vertical surface such as wall etc) - see Pic. E.4. In this case, use the same mount kit as above. Note that the mount legs are assembled slightly differently. Uncrate/unwrap the equipment and mounting kit. Assemble left and right mount legs as shown with provided bolts, nuts, and washers (except for joint point (a) –...
-
Page 10: Piping Connection
Piping Connection WARNING! All work must be done by qualified personnel in accordance with local and national Codes, Standards and Regulations as well as respective design and submittal documentation and manufacturer recommendations. CAUTION! When connecting the equipment to external mechanical and electrical systems, refer to submittal documentation and equipment labels and stickers for piping connection details. - Page 11 Piping Ensure proper piping support and bracing is in place – fluid cooler pipe terminations do not provide structural support for pipe line set. Follow proper piping practices (cleaning, sanding, reaming, wet-ragging during soldering, etc.) and bonding methods, respective to pipe and fittings material (soft soldering, gluing, etc.).
- Page 12 Pressure Testing and Charging • Refer to the fluid cooler (and/or equipment it serves) data (main label, submittal documentation etc.) for operating pressure and cooling media selection. One of the typical media is a mixture of food grade propylene glycol (with rust inhibitors added) and distilled water is used as a cooling fluid.
-
Page 13: Electrical Connection: Power And Control
Electrical Connection: Power and Control WARNING! All work must be done by qualified personnel in accordance with local and national Codes, Standards and Regulations as well as respective design and submittal documentation and manufacturer recommendations. WARNING! Refer to equipment electrical data (provided via main label, submittal documentation etc.) as well as equipment labels and stickers for selecting proper wire gauges, other electrical apparatuses and wiring connection details. - Page 14 Pic.H.1 Equipment Control Wiring Connection Connect control wirining to control terminal (d) in main electric panel. Subsecuent electric panel(s) and Pump Package(s) (if any) are factory-wired and do not, typically, require field wiring. Ensure proper wire selection - gauge, number of conductors, insulation/protection selection (exposure to cold weather, UV light, etc.) Typically, copper wire gauge 18 multi-strand conductors is acceptable.
Need help?
Do you have a question about the NG Series and is the answer not in the manual?
Questions and answers