Table of Contents
Advertisement
Quick Links
Advertisement
Table of Contents

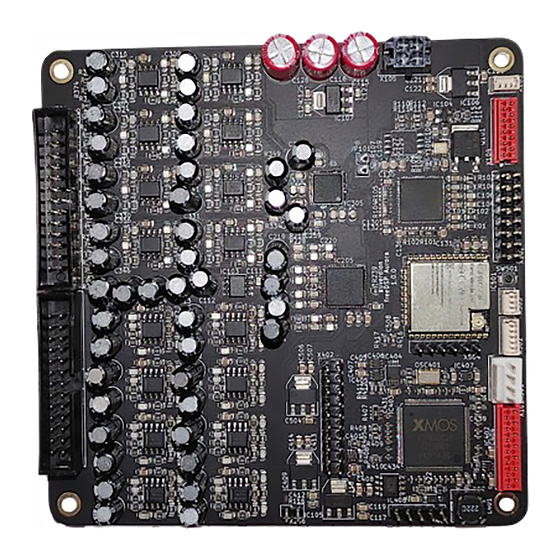
Summary of Contents for FreeDSP AURORA
- Page 1 USER MANUAL FREEDSP-AURORA auverdion...
-
Page 2: Revision History
REVISION HISTORY Revision Description Date v1.0.0 Initial Version 01 Jul 2019 v1.0.1 Regulatory Information and WiFi setup rewritten 31 Jul 2019 v1.0.2 Updating ESP32 firmware via USB 30 Aug 2019 v1.0.3 Fixed wrong picture for X102, added pinout for USBi, added 13 Sep 2019 WiFi antenna connection v1.1.1... -
Page 3: Table Of Contents
Important Information Features Quick Start System Information Block Diagram Connectors Recommended Operating Conditions Optional Input and Output AddOns How To Get freeDSP-aurora Up And Running Hardware Installation Software Installation Examples for optional peripherals Volume Potentiometer Rotary Encoder IR Receiver Display... - Page 4 HomeCinema71 4FIRs Updating the Firmware via USB Preparing for Update Uploading the Firmware Updating the Firmware via webOTA Uploading the Firmware Disclaimer Warranty Regulatory Information Licenses Useful Web Links auverdion...
-
Page 5: About Freedsp-Aurora
DSP plugins. For more information please refer to the Analog Devices website (https://www.analog.com/en/design-center/evaluation-hardware-and- software/software/ss_sigst_02.html#software-overview). FreeDSP-aurora offers a wide range of DSP processing options and interface controls with easy programmability. It can be used in various audio applications, e.g.: Room compensation / system equalization Digital crossovers in active loudspeaker concepts... - Page 6 Bluetooth connectivity and handles peripherals like rotary encoder, display, temperature sensor, PWM controlled fan and IR sensor. The complete schematics and all software for the freeDSP-aurora board are published under a Creative Commons Attribution ShareAlike 4.0 International (CC BY-SA 4.0) license, which allows the unrestricted use and modification of the module.
-
Page 7: Important Information
Please read and understand this manual before starting to work with your board. Adjust all hardware settings and configure your software before connecting any audio equipment to freeDSP-aurora. Always start with low volume on your amplifier and slowly increase the level to reduce the risk of damaging your audio system. -
Page 8: Features
• Support for display, rotary encoder, volume potentiometer, temperature sensor, PWM controlled fan, IR sensor • One freeDSP expansion header • USB Audio Class 2 Bidirectional streaming with 8 channels in and 8 channels out, full-duplex. Works with ASIO driver under Windows 10 and driverless under macOS and Linux. -
Page 9: Quick Start
QUICK START For a quick start with your brand new freeDSP-aurora you just have to do the following steps: 1. Get some chocolate. 2. Connect your add on (if you have one) to your freeDSP-aurora. 3. Connect your audio equipment to freeDSP-aurora (or the addon). -
Page 10: System Information
SYSTEM INFORMATION BLOCK DIAGRAM auverdion... -
Page 11: Connectors
CONNECTORS power supply volume potentiometer USBi 8 channel analog freeDSP output pin expansion header IR remote Rotary Encoder 8 channel analog PWM fan & temperature input pin header sensor ADAT S/P-DIF Wordclock Power LED USB Audio 2 auverdion... -
Page 12: Recommended Operating Conditions
FreeDSP-aurora has to be placed in an enclosure with enough airflow. Please mount the PCB with spacers on a solid surface. None of the four mounting holes is connected to any voltage or signal on the board. -
Page 13: Optional Input And Output Addons
OPTIONAL INPUT AND OUTPUT ADDONS FreeDSP-aurora was designed to support as many applications as possible. Therefore, all inputs and outputs are on pin headers or ribbon cable connectors. This way user can adapt the front-ends to their needs. Some add-on boards will be available for this project. These boards will cover the most common used input output configurations, e.g. -
Page 14: How To Get Freedsp-Aurora Up And Running
ASIO. Please note, that ASIO is only needed if you want to use the 8 input channels for recording audio. If you just want to use freeDSP-aurora to stream audio data to your audio equipment, ASIO is not needed and you can skip the asio4all installation. - Page 15 WiFi Antenna Your freeDSP-aurora comes with a WiFi antenna. If you want to control your DSP via WiFi you have to connect the antenna on the antenna connector of the WiFi module (ESP32). auverdion...
- Page 16 Analog Audio Connections Analog audio input connections can be made on pin header X201. The audio inputs are designed for balanced operation at +6 dBu maximum input level. Unbalanced sources can be connected as well by grounding the negative input. In the latter case you may have to change the gain of the input stage to improve the signal to noise ratio.
- Page 17 Pin 1 Pinout Analog Input Pin 1 Pinout Analog Output auverdion...
- Page 18 X102 is the an expansion header for additional input and output boards. The pinout complies with the I2S expansion header specification of the freeDSP project. If you want to connect a I2C display please connect it to this header, too.
- Page 19 USBi Connector On connector X104 you can connect an USBi programmer. The pinout complies the pinout of the programmer from Analog Devices but you have to make a flatband ribbon cable with a MicroMatch connector on one side. Connector: MicroMatch-10, 2.54 mm pitch, TE Connectivity AMP Connectors, 1-215079-0 Pin 1 Pinout USBi Connector...
- Page 20 (typically used in computer hardware). Always confirm the pin-out with the manufacturer, or you could easily cause damage to your computer or freeDSP-aurora. Usually the GND-pins 4 and 5 can be identified by a black wire, but you can never be sure unless you checked the manufacturer’s specifications of the connector.
- Page 21 Pinout Power LED Power Supply freeDSP-aurora needs a power supply on X105. Together with the board you received a power cable. The white wires identify the positive voltage, the black wires are GND. Attention: Apply power to the board only after all connections have been made and you have double-checked everything.
-
Page 22: Examples For Optional Peripherals
EXAMPLES FOR OPTIONAL PERIPHERALS In this chapter you can find some examples for how to connect optional peripherals. Please note, these are only suggestions. You can always try other components. For some alternatives (e.g. displays) you may have to change the firmware, others like volume potentiometers or encoders may work without any change. -
Page 23: Volume Potentiometer
VOLUME POTENTIOMETER On X103 you can connect a potentiometer for volume control. The wiring ist almost self- explaining: Connect the center tap of the potentiometer to pin 2 of X103 and the other two pins of the potentiometer to pin 1 and 3 of X103. If the turn behavior of the potentiometer is inverted swap the wires on pin 1 and 3 of X103. -
Page 24: Rotary Encoder
ROTARY ENCODER On X502 you can connect a rotary encore module like the KY-040. This module comes already with the required pull-up resistors and is available from several shops, eg. here: https://www.az-delivery.de/products/drehimpulsgeber-modul? _pos=1&_sid=642f6443a&_ss=r The rotary encoder is enabled as soon as you connect it. The default functions are: Turn left/right: Decrease/increase the master volume or switch between presets. -
Page 25: Ir Receiver
IR RECEIVER On X503 you can connect a IR receiving module like the KY-022, which is available from several shops, eg. here: https://www.az-delivery.de/products/ir-empfanger-modul?_pos=2&_sid=c79b147b1&_ss=r auverdion... -
Page 26: Display
DISPLAY Your freeDSP-aurora comes with support for 128 x 64 pixel monochrome display driven by a SH1106 controller via the I2C bus. Such a display you can get e.g. from here: https://www.az-delivery.de/products/1-3zoll-i2c-oled-display? _pos=15&_sid=98d3e8a33&_ss=r The wiring is shown in the drawing below. GND and the I2C signals you can pick up on X102, the required +3.3V (VDD) for the display you can get from pin 2 of X502 or pin 2 of X503. -
Page 27: Working With The Web Application
WiFi connection for your computer. Note: If you have configured your freeDSP-aurora already for your local WiFi (see below) you don’t need to connect to the access point. Your router has assigned an IP number to your board. -
Page 28: Overview
OVERVIEW When you open the web application on your freeDSP-aurora you will see a user interface (UI) of the currently installed DSP plugin. The UI is slightly different for each DSP plugin. On the left side you see the AddOn control. - Page 29 Under the grid with the filter blocks you find the buttons for switching the presets. For the currently selected preset the button is displayed with a green filled background. On the most right side you see a menu bar with the additional functions. auverdion...
-
Page 30: Config Device
CONFIG DEVICE By clicking on Config Device you can open the device configuration dialog: Here you can make some basic settings for the configuration of your freeDSP-aurora. AddOn Here you can select the AddOn you have connected to your freeDSP-aurora. - Page 31 This summation result is output on Analog 1 only. Volume Potentiometer If you have connected a potentiometer to X103 you can enable it by activating this option. After clicking on Store your settings are sent to your freeDSP-aurora and stored non-volatile. auverdion...
-
Page 32: Wifi Configuration
WIFI CONFIGURATION If you want to add your freeDSP-aurora to your local WiFi network, please click on Config WiFi. This opens the WiFi configuration dialog. Now you can enter the SSID of your desired WiFi network and the password. Once you click on Store WiFi your inputs are sent to your board and stored non-volatile. -
Page 33: Uploading A Dsp Plugin
UPLOADING A DSP PLUGIN A new freeDSP-aurora comes with the 8 Channels DSP plugin installed. If you want to install another DSP plugin click on Upload Plugin. This opens a new dialog for selecting a new plugin. DSP plugins are packed in folders. Click on Select Files to open a file dialog and browser to the location where you have stored the DSP plugin (e.g. -
Page 34: Storing Parameter Settings
Once you cycle power off and on your settings will be lost. If you are satisfied with your settings and you want to store them on your freeDSP-aurora board you have to click on Store Preset. This will store all settings for the currently selected preset on your freeDSP-aurora board. -
Page 35: Importing Parameter Settings
If for some reason (e.g. power failure) the upload of a plugin failed, you can upload it again via the fallback access. To do so, you have to connect your computer to the AP-freeDSP-aurora access point and enter the URL http://192.168.5.1/fallback... -
Page 36: Dsp Plugins
Note: Changes of filter settings are only transferred to the DSP by pressing the Send button. Pressing the Bypass button immediately changes the bypass status. 8CHANNELS The 8channels DSP plugin is the default DSP plugin for any new freeDSP-aurora. It provides eight channel strips with identical configuration. Block diagram of 8channels plugin Each channel holds: •... - Page 37 auverdion...
-
Page 38: Homecinema71
HOMECINEMA71 The Homecinema71 DSP plugin is a speaker management for your home cinema. It consists of 7 satellite channels and 1 subwoofer channel. Each satellite channel contains a crossover formed by a highpass and a lowpass filter. The output of the highpass filter is forwarded to the following signal processing blocks of the channel while the output of the lowpass filter is mixed into the subwoofer channel. - Page 39 • Lowpass filter up to 48 dB/oct roll off steepness • Insert point for satellite lowpass output sum • Allpass filter • Polarity Inversion • Delay up to 100 ms per channel • Gain Note: All analog inputs are forwarded to the USB Audio port and therefore available on your computer.
-
Page 40: 4Firs
4FIRS The 4FIRs DSP plugin provides four channels each with a FIR filter of 4096 taps combined with 10 PEQs. Block diagram of 4FIRs plugin Each channel holds: • Input channel select • FIR filter with 4096 taps • 10 parametric EQs •... - Page 41 Note: All analog inputs are forwarded to the USB Audio port and therefore available on your computer. Note: In the Phase filter block, the polarity inversion is independent of the bypass status. auverdion...
-
Page 42: Updating The Firmware Via Usb
Please make sure that your module works with a logic level of +3.3V. Modules with +5V logic level can damage your freeDSP-Aurora. You may need to install a driver for your USB2Serial module. Please read the manual of your module. -
Page 43: Uploading The Firmware
UPLOADING THE FIRMWARE For uploading a new firmware to your freeDSP-aurora do the following steps: 1. Download the latest release from github: https://github.com/freeDSP/freeDSP-aurora If you want to install a alpha or beta version (preview versions) instead you may have to switch to the right feature branch by selecting it in the branch drop down menu, e.g. - Page 44 4. Install a jumper or make a connection between pin 5 and 6 of X504. The update tool will remind you of this jumper. auverdion...
- Page 45 5. Connect GND of your USB2Serial module with pin 1 of X504. 6. Connect TXD of your USB2Serial module with pin 4 of X504. auverdion...
- Page 46 7. Connect RXD of your USB2Serial module with pin 3 of X504. 8. Connect your USB2Serial module with your computer. 9. Power up your freeDSP-aurora. 10. Open a terminal (command prompt) and change to script directory by entering cd <path_to_repository>/SOURCES/WEBAPP/ESP32/updater 11.
- Page 47 14. Now follow the instructions on your screen. The update script will ask you twice to briefly press and release the SW501 button. You can find this button here: 15. After a successful update remove the jumper from X504 and turn your freeDSP- Aurora off and on.
- Page 48 19. Your selected plugin will now be installed. 20. After successful installation restart your freeDSP-Aurora, reconnect to access point AP-freeDSP-aurora and in your web browser type in the address 192.168.5.1. You will see now the web interface of your selected plugin. You can now start to configure freeDSP-Aurora for your application.
-
Page 49: Updating The Firmware Via Webota
UPDATING THE FIRMWARE VIA WEBOTA Besides the update via USB you can update the firmware of your freeDSP-aurora wireless by webOTA. This chapter guides you through all the steps to perform a firmware update. No additional software is required. If you are updating from version 2.x.x please export your presets first and import them after the update again. - Page 50 5. Alternatively you can connect you computer to the same local WiFi network your freeDSP-aurora is connected to and replace the ip 192.168.5.1 by the ip your board got from your router. 6. Click on the button to select the firmware binary from your hard disk. The filename of the firmware is usually aurora.ino.esp32.bin.
-
Page 51: Disclaimer
WARRANTY Auverdion warrants freeDSP-aurora to be free from all provable material and production defects for the duration of 12 months starting from sales. All damage, which is caused by wrong or inappropriate operation, incorrect connection, improper or undocumented use, modification or alteration of the board in any way is excluded from the warranty. -
Page 52: Regulatory Information
REGULATORY INFORMATION The product complies with the basic requirements of the relevant EU directives as well as the directive 2011/65/EU (RoHS) and directive 2004/108/EU (EMC) and directive 2014/53/EU (RED). A copy of the full Declaration of Conformity may be requested by mail. auverdion... -
Page 53: Licenses
LICENSES The U8g2lib code (http://code.google.com/p/u8g2/) is licensed under the terms of the new-bsd license (two-clause bsd license). See also: http://www.opensource.org/licenses/bsd-license.php ============ BSD License for U8g2lib Code ============ Universal 8bit Graphics Library (http://code.google.com/p/u8g2/) Copyright (c) 2016, olikraus@gmail.com All rights reserved. Redistribution and use in source and binary forms, with or without modification, are permitted provided that the following conditions are met: * Redistributions of source code must retain the above copyright... - Page 54 IRremote Arduino Library code (https://github.com/z3t0/Arduino- IRremote) Copyright 2009-2012 Ken Shirriff auverdion...
-
Page 55: Useful Web Links
USEFUL WEB LINKS Please visit https://github.com/freeDSP/freeDSP-AURORA for updates, bugfixes and new DSP plugins. The development story of freeDSP-aurora: https://www.diy-hifi-forum.eu/forum/showthread.php?15019-Verst%E4rkermodul-mit- DSP-600W-1-4Kan%E4le-low-budget-high-quality FreeDSP-aurora at diyaudio.com: https://www.diyaudio.com/forums/digital-line-level/334055-freedsp-aurora-dsp-8-os-usb- audio-dif-adat-bluetooth-wifi-contro.html The freeDSP project: http://www.freedsp.cc How to connect to a wireless access point on iOS: https://support.apple.com/en-us/HT202639 How to connect to a wireless access point on macOS: https://support.apple.com/en-us/HT201735...
Need help?
Do you have a question about the AURORA and is the answer not in the manual?
Questions and answers