Advertisement
Quick Links
Introduction
Purpose
This manual provides instructions for installing the Passport
Table of Contents
Topic
Introduction
Pre/Post Installation Checklist for Express Ordering Kiosk
Installing Express Ordering Kiosk
Express Ordering Kiosk Internal Components
Troubleshooting
Required Tools
The following tools are required to install the Passport PX60 Express Ordering Kiosk:
• Flat-blade Screwdriver
• Phillips
• USB QWERTY Keyboard
• USB Mouse
• USB Thumb Drive - provided by Gilbarco
Parts List
The following table lists the spare parts required to install the Passport PX60 Express Ordering
Kiosk:
Item Description
1
2
3
4
MDE-5183C Passport® PX60 Express Ordering Kiosk Installation Guide · May 2018
Screwdriver
®
Double Data Rate (DDR) 3 Dynamic Random Access Memory (DRAM),
4 GB, 1066/1333 MHz
PX60 Motherboard with Q67 Chipset
Cable Assembly, Serial RJ-45 to DB9 15"
Hard Drive, 2.5", Serial Advance Technology Attachment (SATA),
V32.8.06 REBUILT
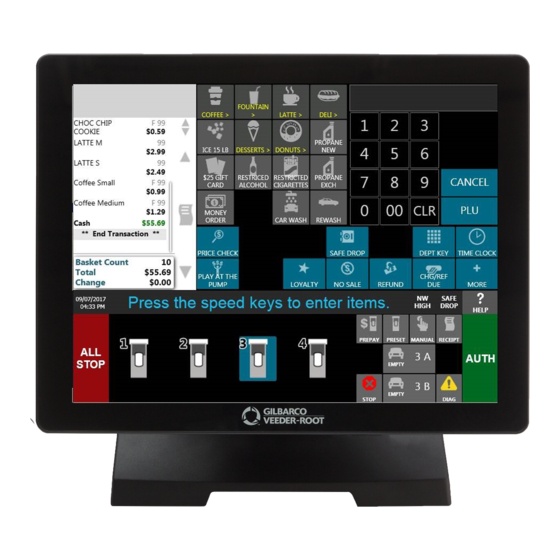
Passport
PX60 Express Ordering Kiosk
®
PX60 Express Ordering Kiosk.
®
Page
1
4
6
64
66
Veeder-Root
®
®
Part Number
M09219B002
M09219B003
M09747B010
KS702A0022D
MDE-5183C
Installation Guide
May 2018
Quantity
1
1
3
1
Page 1
Advertisement

Summary of Contents for GILBARCO VEEDER-ROOT Passport PX60
- Page 1 • USB Thumb Drive - provided by Gilbarco Veeder-Root ® ® Parts List The following table lists the spare parts required to install the Passport PX60 Express Ordering Kiosk: Item Description Part Number Quantity Double Data Rate (DDR) 3 Dynamic Random Access Memory (DRAM), ...
-
Page 2: Technical Support
Introduction Technical Support If you need to contact Gilbarco Technical Assistance Center (TAC), call 1-800-743-7501. To contact Gilbarco Support Center, call 1-877-503-4971. If you need assistance installing or configuring the kiosk software, contact Xpedient ® technical assistance at 1-888-501-8836, or e-mail support@xpedientsoftware.com. If you need assistance configuring and troubleshooting the Kitchen Monitor system, contact MicroPlus Inc. - Page 3 Introduction Term Description Technical Assistance Center TCP/IP Transmission Control Protocol/Internet Protocol Training Effectiveness Analysis Uninterruptible Power Supply Universal Serial Bus VESA Video Electronics Standards Association Video Graphics Adapter MDE-5183C Passport® PX60 Express Ordering Kiosk Installation Guide · May 2018 Page 3...
- Page 4 Installer from the USB drive provided by downloaded to the kiosk at the time of installation. Ensure all windows are ® Gilbarco Veeder-Root. closed prior to installing. Obtain all equipment serial numbers and e-mail them This is required to be performed prior to installation of the system to ensure to Xpedient (support@xpedientsoftware.com) to...
- Page 5 Pre/Post Installation Checklist for Express Ordering Kiosk INSTALLATION CHECKLIST Check if OK Procedure Description Expand the DMZ IP Range in the Passport Router For proper programming, refer to MDE-4954 Passport 10.5.60.30-40. Start-up and Service Manual for the Cisco Firewall Router ...
- Page 6 Installing Express Ordering Kiosk Installing Express Ordering Kiosk To install the Express Ordering Kiosk, proceed as follows: Ensure that the pre-installation checklist has been completed. following Note: This must be done to complete many of the steps. Unpack the system components. Set the DIP switch settings on all printers (default setting may not work).
- Page 7 Installing Express Ordering Kiosk Connect the printer communication cable. To connect the printer communication cable from the kiosk to the printer without the dongle: • Red: M11247B050 connected to printer. • Connect the CAT5 cable to COM port 5 on the kiosk. After the setup is complete, USB keyboard and mouse (temporarily installed) can be removed and retained for reuse.
- Page 8 Installing Express Ordering Kiosk Select Chipset > South Bridge. Figure 4: Navigating to South Bridge Select 2nd LAN Controller. Figure 5: Navigating to 2nd LAN Controller Select Enabled, then press Enter. Figure 6: Enabling 2nd LAN Controller Press F4 on the keyboard. The dialog box shown in Figure 7 opens.
- Page 9 Installing Express Ordering Kiosk Once the unit loads and the dialog box shown in Figure 8 opens, rename the computer from the Standard Client Image convention. Name kiosks based on the standard naming convention (KIOSK001, KIOSK002, KIOSK003), and then click OK. Note: You cannot name the kiosks the same system name or you will have issues with Kitchen Monitor printing.
- Page 10 Installing Express Ordering Kiosk Select Start > Control Panel > User Accounts. Figure 10: Selecting User Accounts Select Manage another account. Figure 11: Selecting Manage Another Account Select Passport. Figure 12: Selecting Passport Account Page 10 MDE-5183C Passport® PX60 Express Ordering Kiosk Installation Guide · May 2018...
- Page 11 Installing Express Ordering Kiosk Select Change the account type. Figure 13: Changing Account Type Select Administrator > Change Account Type and exit. Figure 14: Selecting Administrator Login Close the User Accounts window, and reboot the system to start as Passport. MDE-5183C Passport®...
- Page 12 Installing Express Ordering Kiosk Configure LAN1 network adapter settings. To configure LAN1 adapter, proceed as follows: Select Start > Control Panel > Network and Sharing Center. Figure 15: Selecting Network and Sharing Center Select Change Adapter Settings. Figure 16: Changing Adapter Settings Right-click Local Area Connection on the upper-left and select Properties.
- Page 13 Installing Express Ordering Kiosk Select Internet Protocol Version 4 > Properties. Figure 18: Configuring LAN1 Adapter Enter the supplied IP address information and select OK. (This should have been obtained from the site IT personnel and recorded on the pre-installation checklist.) Figure 19: Entering IP Address for LAN1 MDE-5183C Passport®...
- Page 14 Installing Express Ordering Kiosk Configure LAN2 network adapter settings. To configure LAN2 adapter, proceed as follows: Right-click the Local Area Connection 4 on the upper-right and select Properties. Figure 20: LAN2 Adapter Properties Select Internet Protocol Version 4 [TCP/IPv4] > Properties. Figure 21: Configuring LAN2 Adapter Page 14 MDE-5183C Passport®...
- Page 15 Installing Express Ordering Kiosk Enter the appropriate IP address information from the following table for the kiosk being installed and select OK. Kiosk Unit IP Address Subnet Mask Default Gateway Kiosk001 10.5.60.31 Kiosk002 10.5.60.32 Kiosk003 10.5.60.33 255.255.255.0 10.5.60.14 Kiosk004 10.5.60.34 Kiosk005 10.5.60.35 Figure 22: Entering IP Address for LAN2...
- Page 16 Installing Express Ordering Kiosk Select C:\ > File > New > Folder. Figure 24: Creating New Folder Name this folder Xpedient. Figure 25: Naming Folder to Xpedient From the left plane, select Removable Disk (D:). Figure 26: Selecting Removable Disk Drive From the toolbar, select Edit >...
- Page 17 Installing Express Ordering Kiosk Select all items on the USB drive as shown in Figure Figure 28: Selecting USB Drive Files From the toolbar, select Edit > Copy to folder. Figure 29: Selecting Copy to Folder in Menu Select the C:\ Xpendient folder and click Copy. Figure 30: Copying to Xpedient Folder MDE-5183C Passport®...
- Page 18 Installing Express Ordering Kiosk Figure 31 opens indicating the files are being copied. Figure 31: Copying Files Once all the files are copied, remove the USB storage device from the system. Install Adobe Flash. To install Adobe Flash, proceed as follows: Select Start >...
- Page 19 Installing Express Ordering Kiosk Click Finish. Figure 34: Completing Installation of Adobe Flash Player Install TeamViewer (remote support software for Gilbarco Support). To install TeamViewer, proceed as follows: Select Start > Windows Explorer > C: > Xpedient > TeamViewer Host. Double-click Teamviewer_Host_Setup.exe.
- Page 20 Installing Express Ordering Kiosk Select Both of the above, and then click Next. Figure 37: Selecting TeamViewer Environment Agree to the terms and click Next. Figure 38: Accepting License Agreement Terms Click Next. Figure 39: TeamViewer Setup Wizard Screen Page 20 MDE-5183C Passport®...
- Page 21 Installing Express Ordering Kiosk Enter and confirm password 911Tech and click Next. Figure 40: Entering TeamViewer Password Select I don’t want to create a TeamViewer account now and then click Next. Figure 41: Selecting TeamViewer Account Option MDE-5183C Passport® PX60 Express Ordering Kiosk Installation Guide · May 2018 Page 21...
- Page 22 Installing Express Ordering Kiosk When the screen shown in Figure 42 opens, do not enter any information, only click the Finish button. Figure 42: Completing TeamViewer Wizard Once TeamViewer is installed and connected to network, you should see that the unit is online and you have a unique TeamViewer ID.
- Page 23 Installing Express Ordering Kiosk Install Epson OLE OPOS drivers and test printer functionality. To install the OPOS printer, proceed as follows: Select Start > Windows Explorer > C:/ > Xpedient > OPOS. Double-click OPOSN1.12.17.exe. Select Unzip, and OK when it is successfully unzipped and close the file. Figure 44: Extracting OPOS Printer Setup File (ii) Close the Winzip Self-Extractor window.
- Page 24 Installing Express Ordering Kiosk Click Next on the Welcome screen to continue the installation. Figure 47: Welcome Screen On the License Agreement screen, select I accept the terms of the license agreement and click Next. Figure 48: Accepting License Agreement Terms Page 24 MDE-5183C Passport®...
- Page 25 Installing Express Ordering Kiosk Select User as the type of setup required. Click Next to proceed. Figure 49: Choosing Setup Type Select all the check boxes (Serial, Parallel, USB, and Ethernet) as communication method and then click Next to proceed. Figure 50: Choosing Communication Method for POS Printer - 1 The installer displays the current settings before copying files.
- Page 26 Installing Express Ordering Kiosk Click Next to proceed. Figure 51: Copying Files Select No, I will restart my computer later when asked to reboot. Click Finish to proceed. Figure 52: Completing Installation Page 26 MDE-5183C Passport® PX60 Express Ordering Kiosk Installation Guide · May 2018...
- Page 27 Installing Express Ordering Kiosk Installing Receipt Printer Install the Receipt Printer. Click the Start > All Programs menu to confirm that EPSON OPOS for .NET is installed. Figure 53: EPSON OPOS for .NET Right-click SetupPOS to open the context menu and select Run as administrator. Figure 54: Context Menu Click Add.
- Page 28 Installing Express Ordering Kiosk On the Add Device screen, change the Logical Device Name to LOCAL (must be ALL CAPS). Select the appropriate printer model from the Device Name drop-down list and click Next to proceed. Note: In this example, TM-T88V is selected as the Device Name. Figure 55: Adding Device Turn off your receipt printer, press Print Feed, and then turn on the receipt printer power to obtain the printout of printer serial specific settings.
- Page 29 Installing Express Ordering Kiosk Return to the Add Device window and set the Serial Specific settings to match the printer receipt. After verifying that the information is correct, click Next. Figure 57: Verifying Serial Specific Settings Note: Port name must be configured for COM5. When the dialog box shown in Figure 58 opens, click Done.
- Page 30 Installing Express Ordering Kiosk Click Save to permanently update the printer configuration. Figure 59: POS Printer Test the printer to ensure that it is functioning correctly. This can be done using the CheckHealth Utility located under Start Menu > All Programs > EPSON OPOS for .NET. Figure 60: CheckHealth Utility Click the + sign beside PosPrinter and click LOCAL to select the specific receipt printer.
- Page 31 Installing Express Ordering Kiosk Click CheckHealth. Figure 61: Selecting Specific Receipt Printer Click Print on the POSPrinter Service window. If your printer is successfully set up, the printer generates a small receipt and the POSPrinter Service window opens with a “Complete”...
- Page 32 Installing Express Ordering Kiosk To configure Passport for third-party interface, proceed as follows: Sign onto the Passport Manager Workstation (MWS) with the proper credentials and select Feature Activation. Figure 63: Selecting Feature Activation Verify that the Third Party Data Interface bundle is activated. If the bundle is not activated, call the Gilbarco Help Desk at 1-800-800-7498 for activation.
- Page 33 Installing Express Ordering Kiosk After validating or activating the Third-party Interface bundle, select Set Up in MWS. Figure 65: Selecting Setup On the Set Up menu, select Store. Figure 66: Selecting Store MDE-5183C Passport® PX60 Express Ordering Kiosk Installation Guide · May 2018 Page 33...
- Page 34 Installing Express Ordering Kiosk On the Store menu, select Third-party Data Interface. Figure 67: Selecting Third-party Data Interface In the Price Book section of the interface configuration, it is necessary to check all boxes for Export price book when price book is imported from an external source, Export price book on a nightly basis, and Copy inbound item List Combo And Match files.
- Page 35 Installing Express Ordering Kiosk Provide the current call center credentials for access and click Login. Figure 69: Call Center Credentials When the System Maintenance toolbar opens, select Call Center and then Adv User. Figure 70: Call Center Credentials - Adv User MDE-5183C Passport®...
- Page 36 Installing Express Ordering Kiosk When the Advanced User login dialog box opens, enter the appropriate username and password. Username PassportTech Password 911Tech Figure 71: Logging In - Adv User When the Passport Image Control Panel opens, select Administrative Command Prompt. Figure 72: Selecting Administrative Command Prompt Page 36 MDE-5183C Passport®...
- Page 37 Installing Express Ordering Kiosk When the command prompt opens, navigate to the C:\Program Files\advantage pos\bin\ directory. To access the correct path, type the following and press Enter: cd \program files\advantage pos\bin Figure 73: Navigating to Bin Directory of Advantage Pos Once in the appropriate directory, type the following and press Enter: PricebookExporterJob.exe Figure 74: Executing PricebookExporterJob...
- Page 38 Installing Express Ordering Kiosk Passport Secure Router Setup To set up the Passport Secure Router, proceed as follows: On the Passport Image Control Panel, click Internet Explorer (10.5.48.1). Figure 75: Passport Image Control Panel When the security dialog box opens, click Continue to this website (not recommended). Figure 76: Passport Security Dialog Page 38 MDE-5183C Passport®...
- Page 39 Installing Express Ordering Kiosk Enter GVR as the username and GVRRV042 as the password when the login screen opens. Figure 77: Passport Router Login Note: For locations with the Linksys Secure Router, enter the following credentials: ® Username admin Password GVR09RV042 On the System Summary section, select Setup.
- Page 40 Installing Express Ordering Kiosk Program the DMZ IP address to 10.5.60.1 and the Subnet Mask to 255.255.255.0 and click Save. Figure 80: Programming DMZ On the System Summary section, select Firewall and then Access Rules. Figure 81: Firewall Access Rules At the bottom of the page, click Add.
- Page 41 Installing Express Ordering Kiosk Verify that all the settings match the example shown in Figure Figure 83: Verifying DMZ Settings Click Save. When the dialog box shown in Figure 84 opens, click Cancel. Figure 84: Confirming DMZ Settings When the Access Rules page is displayed, verify that the new rule is enabled and programmed properly.
- Page 42 Installing Express Ordering Kiosk Close the Internet Explorer page, Passport Image Control Panel and the System Maintenance ® tool bar. Set up third-party router. Third-party Router Setup To set up third-party router, proceed as follows: IMPORTANT INFORMATION The following information is intended for the Passport Cisco Firewall Router. Refer to MDE-4954 Passport Start-up and Service Manual for the Cisco Firewall Router (Q13708-08), if necessary.
- Page 43 Installing Express Ordering Kiosk Disable your laptop’s wireless adapter and connect a CAT5E cable to the network connection on your laptop and then to the port 1 of the router. Figure 87: Connecting CAT5E Cable Open Internet Explorer and navigate to 192.168.1.1. When the security dialog box opens, click Continue to this website (not recommended).
- Page 44 Installing Express Ordering Kiosk On the System Summary menu, select System Management. Figure 90: System Management On the System Management menu, select Backup and Restore. Figure 91: Backup and Restore In the Backup and Restore section, click Browse and navigate to the location where you previously saved the configuration file on the Gilbarco FTP.
- Page 45 Installing Express Ordering Kiosk When the confirmation dialog box opens, click OK. Figure 93: Confirming Restore When the dialog box shown in Figure 94 opens, enter the password as GVRRV042. Figure 94: Restore Password During this time, you will lose connection to the router as the configuration is loaded. Close Internet Explorer.
- Page 46 Installing Express Ordering Kiosk Select Internet Protocol Version 4 (TCP/IPv4), and click Properties. Figure 96: Protocol Version Properties Select the option Use the following IP address, and click OK after entering the following parameters: IP Address 10.5.60.15 Subnet mask 255.255.255.192 Default gateway 10.5.60.14 Figure 97: Protocol Settings Open Internet Explorer, and navigate to 10.5.60.14.
- Page 47 Installing Express Ordering Kiosk When the security dialog box opens, click Continue to this website (not recommended). Figure 98: Protocol Settings Security Dialog Enter GVR as the username and GVRRV042 as the password when the login screen opens. Figure 99: GVR Login Screen Once the RV042 System Summary screen is displayed, click DHCP in the left navigation column.
- Page 48 Installing Express Ordering Kiosk In the Dynamic IP section, enter the Range Start and the Range End IP addresses necessary for all units to communicate. Figure 101: Dynamic IP Section Site Setup IP Range Variances Equipment Start Food Service Only 10.5.60.31 10.5.60.39 Food Service/Back Office...
- Page 49 Installing Express Ordering Kiosk Connect all Kiosk LAN CAT5E cables and the Back Office LAN CAT5E cable to ports 2, 3, and 4 of the secondary router. IMPORTANT INFORMATION For locations running more than two kiosk units, a 10/100 LAN switch will be required for proper operations.
- Page 50 Installing Express Ordering Kiosk Mapping Z Drive for Pricebook Synchronization Note: Mapping the pricebook is ONLY to be performed on the main kiosk (Kiosk001). Map Z Drive for Pricebook Synchronization. To map Z Drive for Price Synchronization, proceed as follows: On Kiosk001, click the Windows shortcut key on the keyboard and select Windows Explorer.
- Page 51 Installing Express Ordering Kiosk Ensure that the Reconnect at logon and Connect using different credentials check boxes are selected. Click Finish. When the credentials window opens, enter the following credentials: Username PPXMLDATA Password LØØk4MyD@ta Figure 107: Entering Windows Security Credentials Once the username and password credential information have been entered, select the Remember my credentials check box, and then click OK.
- Page 52 Installing Express Ordering Kiosk Enter IP address of MicroPlus EPAD when prompted; confirm IP address is reachable from kiosk that is currently on the network (run ping test from Kiosk001). Figure 108: Mapping Primary Kiosk to Network Drive MicroPlus Kitchen Monitor Bump Pad...
- Page 53 Installing Express Ordering Kiosk Click Extract All. Figure 110: Extracting Xpedient Compressed File When the screen shown in Figure 111 opens, ensure that the box is checked for Show extracted files when complete, and click Extract. Figure 111: Extracting Xpedient Compressed File MDE-5183C Passport®...
- Page 54 Installing Express Ordering Kiosk When the new folder opens, double-click KioskInstallationPackage.msi. Figure 112: Executing Kiosk Installation Package File Select Accept to accept the Xpedient License Agreement, and click Next. Figure 113: Accepting Xpedient License Agreement Terms Page 54 MDE-5183C Passport® PX60 Express Ordering Kiosk Installation Guide · May 2018...
- Page 55 Installing Express Ordering Kiosk Leave both the optional settings check boxes cleared, and click Next to proceed (do not select Replace OS Shell or Utilize Auto Login). Figure 114: Xpedient Auto-Login The Kiosk Settings screen has three tabs that require data entry or review before you can begin the installation.
- Page 56 Installing Express Ordering Kiosk The following is description of the fields in each of the three tabs: • Order Numbers The order number range is 1-200 for the main kiosk, 201-400 for the second kiosk, and 401-600 for the third kiosk. Each kiosk order number range starts at the next number after the last and will have 200 order numbers.
- Page 57 Installing Express Ordering Kiosk • Price Sync (NAXML) This is where you enter the path to the Passport Server to retrieve the price book. The path is Z:\\10.5.60.1\PPXMLDATA\Pricebook. If the Z: drive has already been mapped to this directory, you only need to enter Z:\ for this field. Figure 117: Kiosk - Price Sync (NAXML) •...
- Page 58 Installing Express Ordering Kiosk Click Install on the Selection Review screen. If successful, the installation displays the “The installation has completed successfully” dialog box. Figure 119: Xpedient Installation - Successful If the error shown in Figure 120 opens, you need to correct the mapped drive issue. Figure 120: Xpedient Installation - Error Once the issue is resolved, continue with installation.
- Page 59 Installing Express Ordering Kiosk Click OK and restart the system. Figure 121: Xpedient Installation - Confirmation After the system restarts, select the Kiosk ID and select Set Kiosk ID. Figure 122: Setting Kiosk ID Enter the License Code and select License Kiosk as shown in Figure 123.
- Page 60 Installing Express Ordering Kiosk Add remote printer configuration to kiosks 2 and higher. For all express ordering kiosks numbers 2 or higher, attachment to the Kitchen Monitor via TCP is only driven by the primary kiosk. All subsequent kiosks must have the remote printer added to their configuration. To add remote printer configuration to kiosks 2 and higher, proceed as follows: On the keyboard, press CTRL + Shift + Alt + F12 simultaneously to minimize the Xpedient software.
- Page 61 Installing Express Ordering Kiosk Install the Kitchen Monitor system. Note: For assistance on configuring and troubleshooting the kitchen monitor system, contact MicroPlus Inc. at 1-919-816-9222/1-919-816-9333. Connect to corporate network if not already connected. Note: Best practice is to have a controller box attached to the screen using Video Electronics Standards Association (VESA) mount screws.
- Page 62 Installing Express Ordering Kiosk To change the settings on the Kitchen System for a secondary screen or to add routing characters, plug in a keyboard into the MicroPlus system and proceed as follows: Press M for menu then press O to change the existing configuration file EDIT GILKIOSK.DAT.
- Page 63 Installing Express Ordering Kiosk Figure 130: Order Confirmation Figure 131: Accepting Orders Verify transaction is visible on the Kitchen Monitor. Also, verify that the bump bar and printer are functional. If bump bar and printer are not functional, verify system name on all kiosks. Validate the QR code on the Passport system by scanning and verifying all items accounted for are on the receipt.
- Page 64 Express Ordering Kiosk Internal Components Express Ordering Kiosk Internal Components Hard Drive: SATA Hard Disk Drive (HDD) SATA HDD (see Figure 132) provides mass storage for the Express Ordering Kiosk. CAUTION HDD is very sensitive to shock and vibration. Keep HDD in the original packaging materials until installation to avoid damage.
- Page 65 Express Ordering Kiosk Internal Components Replace the HDD by sliding the caddie back into the backplane and securing the HDD door [see Figure 133 (iii)]. Figure 133: Installing SATA HDD (iii) (ii) Replacing the HDD is now complete. Connecting SATA HDD The SATA HDD connects directly to the Express Ordering Kiosk HDD backplane through a slide-in tray.
-
Page 66: Troubleshooting
Troubleshooting Troubleshooting The following table describes the symptoms, causes, and possible solutions to troubleshoot Express Ordering Kiosk: Express Ordering Kiosk Component Symptom Probable Cause Possible Solutions All-in-One (AIO) Blank screen No Power Check power switch, touch and release power switch. Look at Light Emitting Diodes (LEDs) visible on kiosk (lower-right corner of monitor). - Page 67 Troubleshooting Express Ordering Kiosk Component Symptom Probable Cause Possible Solutions Printer Not printing Power Look at the power LED, if it is off, check the power switch, check receipt connections, bad AIO motherboard (check for test points). If it is a bad printer, swap with a known working printer.
- Page 68 Troubleshooting Express Ordering Kiosk Component Symptom Probable Cause Possible Solutions Communication Cannot ping IP configuration on kiosk Ensure IP of each unit is set to the correct LAN configuration (kiosk must kiosk be a static IP to avoid future issues). Router DHCP settings Ensure DHCP addresses are expanded to accommodate all kiosks.
- Page 69 Troubleshooting Express Ordering Kiosk Component Symptom Probable Cause Possible Solutions Kitchen Monitor Not displaying Connections on kiosk If the site has more than one kiosk, verify if the symptoms are for one or all. printer kiosk Screen black, check connections and power. Display has power but is not transactions Y-cable and gender displaying orders, check connections at KMS interface (MicroPlus...
- Page 70 Adobe and Flash are registered trademarks of Adobe Systems Inc. Cisco is a registered trademark of Cisco Systems Inc. Epson is a ® ® ® ® registered trademark of Seiko Epson Corporation. Ethernet is a registered trademark of Xerox Corporation. Gilbarco and Passport ®...
Need help?
Do you have a question about the Passport PX60 and is the answer not in the manual?
Questions and answers