Table of Contents
Advertisement
Quick Links
Advertisement
Table of Contents

Summary of Contents for Instantel Minimate Pro Series
-
Page 2: Warranty
To protect your warranty, you must complete and return a Warranty Registration Certificate, or complete the online Warranty Registration Form, within ten days of purchase. Units will be assumed out of warranty if there is no warranty card on file at Instantel. Retain this portion and the proof of purchase for your records. -
Page 3: Table Of Contents
Table of Contents Customer Support: .................. 2 Warranty: ....................2 Warning: ....................2 Table of Contents..................i 1. Before You Begin ................1–1 1.1. Check the Package Contents .................. 1–1 1.2. Record the Minimate Pro Identification Numbers ..........1–1 1.3. Complete and Return Your Registration Card ............1–1 1.4. - Page 4 7.5. GPS [Optional] ...................... 7–4 7.6. Series IV Sound Level Microphone [Optional] ............ 7–4 7.6.1. Installing the Sound Level Microphone ..........7–5 7.6.2. Microphone Installation Procedure ............. 7–5 7.6.3. Sound Level Microphone – Unit Compliance Setup ......7–6 7.6.4. Sound Level Microphone – Unit Advanced Setup ......7–6 7.6.5.
-
Page 5: Before You Begin
All you have to do is complete the registration card included with your Minimate Pro and return it to Instantel by mail or facsimile within thirty (30) days of purchasing your new monitor. You may also register your product online at: http://www.instantel.com/servicecalibration/warranty.aspx... -
Page 6: Waste Electrical And Electronic Equipment Directive
For EU countries, this product must be collected and discarded separately from household waste. In an effort to be as gentle as possible on the environment, Instantel has embraced the Waste Electrical and Electronic Equipment Directive (WEEE). This product contains electrical or electronic materials, including batteries. -
Page 7: Battery And Memory Overview
Authorized Instantel Repair Facility. The unit should be returned to an authorized Instantel service center for service. Any attempt to service this product will void any and all warranties offered by Instantel. Service enquiries should be made via your dealer. - Page 8 (1) The Minimate Pro initially displays the Instantel logo, followed by the Minimate Pro software version and date of release. (2) The unit then displays the results of a File System Check diagnostic tool. This is the same File System Check that is run in the Maintenance menu, Self Check (reference Section 9.6.e) option.
-
Page 9: Check The Memory And Battery Status
(3) The next screen displayed shows the Battery Level and Available memory, followed by the number of Events and how much disk space is being used in size and percentage. The final screen indicates that the Minimate Pro is Ready to Monitor. 2.2. -
Page 10: Battery Instructions
Plug the other end into an electrical outlet. The battery charging indicator light turns on. Instantel recommends using the 12V, 1.0A AC adapter supplied with each unit, with the description of the maximum adapter as shown on the Power connector label: When storing the instrument for long periods of time, ensure that you charge the battery for at least 24 hours and then use the Disconnect Battery command within the Maintenance Menu. -
Page 11: Battery Life
The Instantel Warranty does not cover this type of damage. 2.3.2. Battery Life The Minimate Pro battery life depends on current draw, aggregate sample rate, battery longevity, and ambient temperature. - Page 12 Notes: 2–6 Minimate Pro Operator Manual...
-
Page 13: Handling Precautions
Do not operate the equipment if it has been significantly dropped or the casing is damaged. Immediately turn the instrument off and have an Authorized Instantel Repair Facility inspect it for possible damage. Do not use the AC Adapter if it is damaged or not fully inserted into the power outlet. - Page 14 Notes: 3–2 Minimate Pro Operator Manual...
-
Page 15: Unit Label Instructions
Press Start Monitor to enter Monitoring Mode. Note A: If you have just received the unit, as a new product or from an Authorized Instantel Service and Calibration Facility, you must connect the battery by plugging in the Instantel AC adapter and pressing the On/Off key. - Page 16 Notes: 4–2 Minimate Pro Operator Manual...
-
Page 17: Introduction
The Minimate Pro™ offers advanced monitoring technology with unequaled versatility and flexibility to meet current needs and future requirements. As a smart device, your Minimate Pro can be programmed for new features as they are released by Instantel® through the Blastware® Compliance Module, the software companion provided with your monitor. -
Page 18: Suggested References
5.1.1. Suggested References ISEE, International Society of Explosives Engineers www.isee.org EFEE, European Federation of Explosives Engineers members.efee-web.eu FMGM, Field Measurement in GeoMechanics www.fmgm.no Vibrations from Blasting, by David E. Siskind, Ph.D., published by ISEE, ISBN 1-892396-11-4 The Effects of Vibrations and Environmental Forces, by Lewis L. Oriard, published by ISEE, ISBN 1-892396-10-6 Construction Vibrations, by Charles H. -
Page 19: Minimate Pro4 ™ And Minimate Pro6 ™ Models
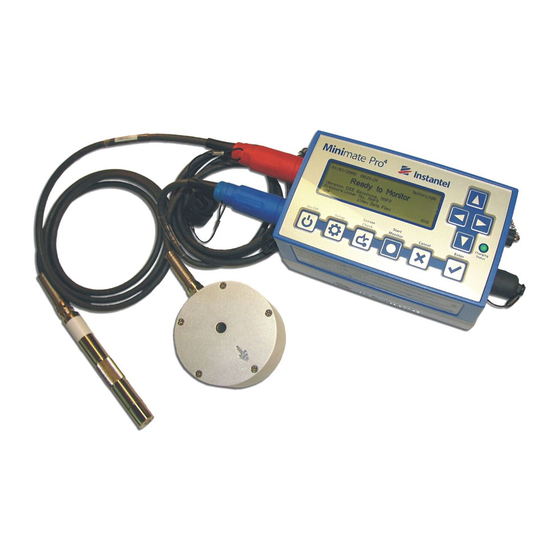
INIMATE ODELS The Instantel® Series IV monitors include two models based on a specific number of recording channels. The Minimate Pro4 model offers four recording channels and can be set up with one Series IV Triaxial Geophone (ISEE or DIN) and an ISEE Linear Microphone. A second model, the Minimate Pro6, offers six recording channels with your choice of two Geophones (ISEE or DIN) or a Geophone (ISEE or DIN) and an ISEE Linear Microphone. -
Page 20: Minimate Pro4 And Minimate Pro6 Comparison
6.1. Minimate Pro4 and Minimate Pro6 Comparison Series IV Instrument Minimate Pro4 Minimate Pro6 Standard Features: Number of Channels 4 Channels (ISEE or 6 Channels (ISEE or DIN DIN Geophone, and an Geophone on both connectors, ISEE Linear or an ISEE or DIN Geophone Microphone) and an ISEE Linear Microphone) - Page 21 √ √ Histogram Combo Sensors √ √ ISEE Geophone √ √ DIN Geophone √ √ Linear Microphone √ 2 Geophones or a Linear Microphone and a Geophone Features Sample Rates 512, 1024, 2048, and 512, 1024, 2048, and 4096 per 4096 per channel channel Memory...
-
Page 22: Minimate Pro Specifications
6.2. Minimate Pro Specifications Range Up to 254 mm/s (10 in/s) Vibration Monitoring: ISEE/DIN Geophones Resolution 0.00788 mm/s (0.00031 in/s) Accuracy (ISEE/DIN) +/- 5% or 0.5 mm/s (0.02 in/s), whichever is larger, between 4 and 125 Hz / DIN 45669-1 standard 2.13 g/cc (133 lbs/ft Transducer Density Frequency Range (ISEE/DIN) 2 to 250 Hz, within zero to -3 dB of an ideal flat response / 1 to 315 Hz... - Page 23 Ambient Operating Environmental Temperature Range -20 to 45 °C (-4 to 113 °F) -40 to 45 °C (-40 to 113 °F) Electronics -20 to 45 °C (-4 to 113 °F) Battery -20 to 50 °C (-4 to 122 °F) ISEE Microphone -40 to 50 °C (-40 to 122 °F) ISEE and DIN Geophone IPC67 –...
-
Page 24: Minimate Pro Physical Attributes
6.3. Minimate Pro Physical Attributes Make additional copies of the image below. It may be used as a template for mounting the unit to a surface or within a security box for long-term or remote monitoring applications. 6–6 Minimate Pro Operator Manual... -
Page 25: Features And Benefits
6.3.1. Features and Benefits The Minimate Pro offers outstanding features unequaled in the industry. The following lists some of the features. Please see the specifications located in the Appendix of this manual for a complete list. Two Year Warranty – Full two year parts and labor warranty on the monitor. A calibration and equipment check at the one year mark is required to ensure continued reliable performance and the second year of the warranty. - Page 26 NOTE: Data points appearing outside of the report indicate the recorded data was outside the range of the report. In the DIN 4150 example, some peaks occurred at frequencies greater than 100 Hz and were therefore drawn outside the boundaries of the report. A list of National Frequency Standards included with Blastware: National Frequency Analysis Standards Australian Standard –...
-
Page 27: Unit And Accessory List
EMI shielding, built-in noise and anti-aliasing filtering; both sensor ports are isolated from the ground. 6.4. Unit and Accessory List Instantel’s complete line of Minimate Pro units and related accessories: Part No. Item Description... - Page 28 Minimate Pro6. Linear “L” Microphone for air pressure 720A1801 ISEE Linear Microphone measurements. Record unattended monitoring of noise, such as building activities, construction, traffic, and 720A5101 Sound Level Microphone mining operations. With adjustable leveling feet and integrated ISEE Geophone Leveling 714A1801 bubble level.
- Page 29 301-000034-000). Up to 1 km (.62 Miles) supported Series IV 301-0000 Series IV Extension Cable, extension cable for the DIN Geophones. Must be 34-000 Custom Length purchased with connectors and assembly (Part No. 720A3305) Series IV Extension Cable, Male and Female connectors only. Customer to 720A3801 Connector Kit supply and build cables...
-
Page 30: Unit Keypad And Menu Navigation Overview
6.5. Unit Keypad and Menu Navigation Overview Before starting the Basic Tutorial, Section 7, familiarize yourself with the following two Subsections, Unit Keypad Overview and Unit Menu Navigation. 6.5.1. Unit Keypad Overview The display has a variety of commands used to navigate the menus, enter or edit data, or perform actions. -
Page 31: Unit Menu Navigation Overview
6.5.2. Unit Menu Navigation Overview When the Minimate Pro is initially turned on, the following two screens appear after a few seconds: These two screens are followed by the Main Display Screen: ACTIVE STATUS OF UNIT DISPLAY DATE TIME OR COMMAND PROMPT CURRENT SETUP FILE NAME AREA: ATTACHED... - Page 32 SYMBOL REPRESENTING A RECORDED HISTOGRAM NUMBER OF EVENTS IN STORAGE EVENT SYMBOL REPRESENTING A RECORDED WAVEFORM OR A SOUND LEVEL MICROPHONE RECORDING Within the View Data window, select the Right Arrow key to display the Detail of a selected Waveform Event. Below is an example of the Detail feature for a Waveform Event: i.
- Page 33 i. Press the Right Arrow key to review more data associated with the selected Event, or the Cancel key to go Back to the previous menu: ii. Press the Right Arrow key to review more data associated with the selected Event, or the Cancel to go Back to the previous menu: When these different types of recorded Events are transferred to the Blastware Event Manager, each one is given a specific character to denote the Type of file it is, as indicated below:...
- Page 34 6–16 Minimate Pro Operator Manual...
-
Page 35: Optional Features
The optional Wire Break/Make Trigger Cable (Part No. 720A3501) for the Series IV units is available for purchase from your authorized Instantel Dealer Representative and is shipped with an installation and setup sheet. The Wire Break/Make Trigger Cable is used to trigger up to six Minimate Pro units;... -
Page 36: Remote Alarm [Optional]
Remote Alarm [Optional] The optional Remote Alarm (Part No. 720A3901) for the Series IV units is available for purchase from your authorized Instantel Dealer Representative, and is provided with an installation instruction sheet. The Remote Alarm Controller indicates normal and over-triggering at a remote site. Use an optional extension cable to extend the length of the input cable;... -
Page 37: View Real Time Histogram Data [Optional]
View Histogram data in real time over the Internet with Ethernet® connectivity, is available with the purchase of the Blastware Advanced Module, and the Ethernet Communications option. Contact your authorized Instantel Dealer Representative for more information. Ethernet is a high-speed network standard of communication protocol that is primarily used for Local Area Networks (LAN) to connect end-systems, in this instance, the Series IV units to a network. -
Page 38: Gps [Optional]
Event Reports. GPS devices locate your exact longitude and latitude from orbiting satellites. Tools and Materials Required: Series IV Unit GPS unit must be NMEA 4800 compliant (Instantel supports the Garmin® eTrex® handheld GPS unit). 7.6. Series IV Sound Level Microphone [Optional] The Series IV Sound Level Microphone can perform unattended monitoring of noise, such as building activities, construction, traffic, and mining operations. -
Page 39: Installing The Sound Level Microphone
Pro4 or Minimate Pro6 monitors. It is the Operator‟s responsibility to ensure that the Sound Level Microphone has been calibrated at an Instantel Authorized Calibration facility, at the Instantel Factory or in the field. Refer to the Maintenance Menu section of this manual for the calibration instructions. -
Page 40: Sound Level Microphone - Unit Compliance Setup
The microphone windscreen does not affect the microphone response and is acoustically transparent. Some microphone windscreens can attenuate the response – it is recommended NOTE: that this is confirmed prior to using any windscreens other than the one provided with the Sound Level Microphone. 7.6.3. -
Page 41: Using The Sound Level Microphone
7.6.5. Using the Sound Level Microphone Sensor Check is only available in Compliance Mode. Press Sensor Check on the Minimate Pro to ensure that the sensor is properly attached. A successful Sensor Check will return results similar to this; MicA Pass Freq= N/A Amp=563 mv... - Page 42 Range Automatic +/- 100 Pa (Normal), +/- 25 Pa (Sensitive) Trigger Levels 33 dB - 140 dB 0.448 - 100 Pa (Normal), 0.0142 Pa - 25 Pa (Sensitive) Sample Rate 1024 sps Recommended 64 Ksps Recommended Cable Length 6 ft. (2 m) 6 ft.
- Page 43 18. The Minimate Pro4 and Minimate Pro6 monitors use rechargeable lithium-Ion batteries. These batteries are not serviceable unless returned to the factory or to an authorized Instantel Calibration Site. There is no internal access to the batteries that provides for user maintenance without disassembly of the monitor and breach of warranty.
- Page 44 Notes: 7–10 Minimate Pro Operator Manual...
-
Page 45: Basic Tutorial
ASIC UTORIAL In this basic tutorial, you will set up your computer and the supplied Instantel® Blastware program to work together with the Instantel® Minimate Pro™. You will then create a sample Event using the Manual Record Mode, and transfer the Event file from your Minimate Pro to the computer. - Page 46 USB adaptor. Step 4: Turn the Unit On If you have received your Minimate Pro directly from an Instantel Dealer, or from an Authorized Instantel Service and Calibration Facility, the battery will be deactivated for shipping safety and battery life conservation.
- Page 47 NOTE: A Charging Status LED is mounted next to the Down Arrow key and indicates the following: a. The light is not on - the charger is not connected to a power outlet, or the charger is not functioning properly. b.
- Page 48 Step 5: Start the Blastware Program Click on the Windows Start button in the lower left of the screen, select Programs, and then click on the icon for the previously installed Blastware program. Step 6: Setup Communications Ensure that the check box for Series IV is selected at the lower left of the Blastware software window, as follows: This tutorial assumes that you are using the supplied serial communications cable with the USB adaptor.
- Page 49 Communication with a Minimate Pro and your computer is configured using the Communications Setup dialog box located under the Unit menu. Open the Unit menu and choose Communications. The Communications Setup dialog box appears, as shown below: If required, we will only adjust the Port dropdown menu. The other menus, Baud Rate, Retries, and Modem Type should have the same settings as the dialog box pictured above.
- Page 50 1. Open the Report Options Menu by clicking on the icon, or access it from the File Menu. 2. Change the Report Title. You can change the Report Title to a title of your choice. Position the mouse pointer in the Report Title text box.
- Page 51 The software will open the Setup Filename dialog. Enter a setup name in the text box and click on OK. After the Setup Filename has successfully been sent to the unit, the following message will appear: Select OK to return to the Compliance Setup dialog. Step 9: Creating a Sample Event Refer to Section 6.5, Unit Keypad and Menu Navigation Overview, to become familiar with the menus of the Minimate Pro prior to proceeding with this step.
- Page 52 Press the Down Arrow key until the View/Edit Setup File menu item is highlighted. Press the Enter key to access this menu. Highlight the Record Mode menu option and press the Right Arrow key to access the menu. Continue to press the Right Arrow key until the Waveform Record Mode option appears.
- Page 53 Lightly tap the surface next to the geophone, or gently on the geophone itself – the Peak Vibration results and Zero Crossing (ZC) Frequency of the recorded Event appear on the display: 10. Press the Right Arrow to Change between Peak Vibration and Peak Overpressure results.
- Page 54 A list of recorded Events will appear. Press the Up or Down Arrow keys on the unit to highlight Next/Prev Events. Press and hold the Down or Up Arrow key to quickly scroll. Waveform or Histogram Events have a different icon displayed: SYMBOL REPRESENTING A RECORDED HISTOGRAM EVENT SYMBOL REPRESENTING A RECORDED WAVEFORM EVENT Press the Right Arrow key to display the Detail of an Event.
- Page 55 The Event Manager dialog box appears. Ensure that you are in the proper directory, c:\Blastware\Event, and set this as the default by selecting the box next to Default Directory, shown in the lower left hand of Blastware. Default Directory Step 12: Copy All the Events to Your Computer Copy Events from the Minimate Pro to your computer, by pressing the Copy/Print icon.
- Page 56 Monitor Log Waveform Advanced Waveform Processed Waveform Histogram Processed Histogram NOTE: Different recording selections (i.e. Waveform or Histogram) will produce a filename with a different Type noted. In the picture above, two Events have a “P” as part of their designation –...
- Page 57 automatically view reports using the Auto Open selections, highlight an Event and then double click your left mouse button on the desired Event, and the reports will be created in a new window based on the settings you have defined within the File menu, Report Options dialog. The settings of your PC monitor (i.e.
- Page 58 Below is an example of a Series IV Event Report using the Waveform Record Mode: 8–14 Minimate Pro Operator Manual...
-
Page 59: Unit Menu Overview
VERVIEW 9.1. View Data Files From the Main Display, select the Down Arrow key on the unit to access View Data Files. A list of recorded Events will appear. Press the Up or Down Arrow keys on the unit to highlight and select Next/Prev Events. - Page 60 Within the View Data window, select the Right Arrow key to display the Detail of a selected Histogram Event. Below is an example of the Detail feature for a Histogram Event: i. Press the Right Arrow key to review more data associated with the selected Event, or the Cancel key to go Back to the previous menu: Each Event has several pages of data.
-
Page 61: Select Setup File
9.2. Select Setup File Previously saved setup files can be selected as the default setup file or deleted. These files are created when you have edited and saved settings within the View/Edit Setup File menu, or when you have edited settings within the Blastware Setup menu and downloaded them to the unit. From the main menu on the monitor, select the Setup key on the unit to access the main setup selection menu. -
Page 62: View/Edit Setup File
Within the Operator screen, you can also Add, Delete, and Rename an operator. Select the Enter key to access the popup Menu. Access the Rename Operators command by highlighting the Operator and using the Right Arrow key to access the editing screen. a. - Page 63 From the main menu on the monitor, select the Setup key on the unit to access the main setup selection menu. Use Down Arrow key and highlight the View/Edit Setup File menu item. Press the Enter key to select View/Edit Setup File. Press the Up or Down Arrow keys on the unit to highlight Next/Prev Setup options.
- Page 64 Use the Waveform Record Mode in conjunction with the Monitor Scheduler feature to record in the future, Once, Daily, Weekly, repeated as required, or set it to Off and record continuously based on the Trigger Level – the monitor records all Events whose activity exceeds the preset Trigger Level for the ISEE/DIN Geophone(s) and/or Linear Microphone.
- Page 65 During recording, the Peak results and Zero Crossing (ZC) Frequency of the recorded Event appear on the display, as shown below: Press the Right Arrow to Change between Peak Vibration (shown above) and Peak Overpressure results. Below is an example of the Peak: Pressure and ZC Frequency readouts that are dynamically displayed: NOTE: There is a 1/3 second delay between an Event ending and the level data being displayed.
- Page 66 Press the Enter key to Save the new Record Mode setting. Press the Enter key again to Save the new Current Setup by overwriting the name displayed, or by creating a new Setup File name. Press the Cancel key to return to the Ready to Monitor display. Dynamic Recording Information –Waveform Manual Record Mode (1)2.
- Page 67 After recording, you can push the Up Arrow key to turn Levels Off and the display will no longer show the Peak and ZC Frequency information. Press the Up Arrow key to turn them on again. Press Cancel to return to the Main Display. Record Mode –...
- Page 68 NOTE: The Interval Size may be set from 2 – 30 in seconds, or 1 – 60 in minutes. Press the Enter key to Save the new Interval Size setting. Press the Enter key again to Save the new Record Mode setting. Press the Enter key again to Save the new Current Setup by overwriting the name displayed, or by creating a new Setup File name.
- Page 69 Second Peak: Vibration values can be viewed by pressing the Right Arrow key for each, as shown below: Record Mode - Histogram Combo: Use the Histogram Combo Record Mode for long-term recording periods such as monitoring of pile driving where you may have larger amounts of time between each pile driving operation.
- Page 70 Press the Down Arrow key and highlight Interval Size. Press the Right Arrow key to access the editing function. Press the Up or Down Arrow key to modify the Interval Size. Press the Enter key to Save the new Interval Size setting. NOTE: The Interval Size may be set from 2 –...
- Page 71 If the Interval Size within the Edit Current Setup > Record Mode menu has been set to over 30 seconds, then the Event Peak: Vibration, 1 Min. Peak: Vibration, and 30 Second Peak: Vibration values can be viewed by pressing the Right Arrow key for each, as shown below: If a Waveform recording is triggered, then the information for Pressure and Vibration is also available while the Waveform Recording message is displayed:...
- Page 72 – the frequency range of the data collected is from 1 to 80 Hz, therefore the Instantel 1-80 Hz DIN Geophone (Part No. 720A2003) is required for this type of recording, as the sample rate is reduced to 512 s/s. Multiple VDV frequency weight files may be downloaded to the monitor using the Blastware Advanced Module software.
- Page 73 Within the Record Mode menu, press the Up or Down key to locate and highlight the Record Mode menu option. Press the Right Arrow key until the Vibration Dose Value option appears. Press the Up or Down Arrow key and highlight VDV Weight File. Press the Right Arrow key to select one of the weight files.
- Page 74 b. Vibration Sensor (Minimate Pro4 and Minimate Pro6): The Vibration Sensor option represents Channels 1-3, and the connector is located on the side of the Minimate Pro and is labeled Vibration. The color of the label is blue. Scroll down to highlight Vibration Sensor Press the Right Arrow key to either select the ISEE or DIN Geophone or turn the Vibration channel Off.
- Page 75 NOTE: The selected sensors within View/Edit Setup File should match what is attached to the unit. If the Vibration Sensor channel is Off and an ISEE or DIN Geophone is attached, or if it is On, and an ISEE or DIN Geophone is not attached but it appears in the setup file, the Sensor Check will return the message, “Sensor Detection Error –...
- Page 76 e. Sample Rate: The Minimate Pro offers a number of sample rates including 512, 1024, 2048, and 4096, available on all channels. The choice of a sample rate depends on the type of monitoring you are conducting. Increasing the sample rate increases the accuracy of the waveform recording. For this reason, set the sample rate according to the location of the Geophone.
- Page 77 to edit the value. Press the Right and Left Arrow key to move from each value field. Press the Up or Down Arrow keys to change the value. To set a Pressure Trigger level for the Linear Microphone, or Pressure Trigger, press the Right Arrow key to set the Pressure Trigger to On.
- Page 78 Calculating a Recording Time The total Record Time available depends upon the amount of available memory. The unit checks your setup to determine the amount of available memory. If there is not enough memory, a warning message appears and the Record Time defaults to the maximum available.
- Page 79 Approximate Monitor Recording Times Displayed in Seconds Sample Rate Channel 1 Channel 2 Channel 3 Channel 4 Channel 6 211296 105648 70432 52824 35216 1024 105648 52824 35216 26412 17608 2048 52824 26412 17608 13206 8804 4096 26412 13206 8804 6603 4402 Approximate Monitor Recording Times Displayed in Hours...
- Page 80 i. Auxiliary I/O The Auxiliary I/O menu controls the triggering of an optional Remote Alarm (Part No. 711A1401) based on levels set for Vibration or Pressure, or for an External Trigger, using the optional Wire Break/Make Trigger Cable (Part No. 720A3501). Refer to the Optional Features section of this manual for more information.
- Page 81 Follow the directions below to set the Alarm Levels within the Auxiliary I/O menu: From the Main Display, press the Setup key to access the Main Menu. Press the Down Arrow key on the unit to highlight the View/Edit Current Setup menu option.
- Page 82 (10) Press the Enter key to Accept the new setting, or the Cancel key to exit the menu without saving the changes. (11) To set the Vibration Level value, use the Down Arrow key to highlight the option, and then the Right Arrow key to enter the edit menu, as shown below: NOTE: If you are using a Minimate Pro6 monitor with a geophone and a microphone attached, than there are options to edit the levels for both sensors.
- Page 83 Press the Up or Down Arrow keys to highlight the Scaled Distance setting. It will be listed as being On - Edit or Off - Edit. Press the Right Arrow key to access the Scaled Distance menu. Press the Right Arrow key to toggle the Scaled Distance option On or Off. If you have decided to use the Scaled Distance feature, press the Down Arrow key to highlight the Distance from Blast option.
- Page 84 GPS unit is required. Instantel has tested and recommends the Garmin® eTrex®. Ensure that you have read the manufacturers instructions that came with your GPS device unit prior to proceeding. Collect the waypoint information for the Vibration Source and Sensor(s).
- Page 85 If you are editing the Setup File, then press the Right and Left Arrow key to move from each character field. Press the Up or Down Arrow keys to change the character of each field. You are able to enter up to 40 characters. Press the Enter key to Save the file, or the Cancel key to return to the previous screen.
-
Page 86: View/Edit Preferences
section. Job numbers range from 1 to 9999 and start with the initial number input in this menu. Select Job Number from the Edit Current Setup menu. The information input into the Press the Up or Down Arrow keys on the unit to highlight Job Number. Press the Right Arrow key to access the menu. - Page 87 a. Sensor Check: Use the Sensor Check feature to determine if the attached sensors are connected, oriented, and working properly, or to ensure that the sensors match the current settings within the View/Edit Setup File menu if it has been set to Before or After an Event. The results of the Sensor Check and the associated information for each sensor, including Serial Number, Calibration Date, and Calibration Location, appear on the Event Report.
- Page 88 Check all cable connections. Check cables and connectors for wear, bent pins, or foreign debris. If required, return the sensor to an Authorized Instantel Representative for further testing. Example 1: An example of a Sensor Check set to Before Monitoring on a Minimate Pro6 that did...
- Page 89 geophones and measures the response. If the geophone‟s response falls within a specified range, the monitoring operations can continue. If the geophone‟s response does not fall within a specified calibration range, the geophone is not setup or functioning properly. You cannot record Events until you fix or replace the geophones.
- Page 90 Press the Right Arrow key to set the Measurement System to Metric or Imperial. All system responses and Event Reports involving measurement values will be displayed in the selected Measurement System. Press Enter key to Save any changes, or the Cancel key to return to the Preferences menu.
- Page 91 Press Enter key to Save any changes, or the Cancel key to return to the View/Edit Preferences menu. Backlight: Use this feature to either help conserve power, by turning it Off, or turn it On to provide a better view of the information in low-light conditions. Use the Down Arrow key to highlight Backlight.
- Page 92 13. Press the Right Arrow key to access this feature. 14. Press the Up or Down Arrow key to change the value. The smaller the number, the lighter the display. The allowable contrast range is from 12 to 40. 15. Press Enter to Save the changes. 16.
- Page 93 installed and set to obtain the IP Address automatically from the DHCP server. Static IP Address A set (non-dynamic) IP address. If you have a Static IP Address, it is recorded in the DNS (Domain Name Server), which are servers located throughout the Internet that handle the routing of Internet and email.
- Page 94 Press the Right and Left Arrow keys, as required, to place the cursor under the desired numeral. Press the Up or Down Arrow keys to edit each field. Press the Enter key to save the new setting. Reset: Use the Reset command to return all Ethernet settings to the factory default. This command also assigns a new Auto IP Address to the unit.
- Page 95 Press the Down Arrow key to highlight Call Home Session Timeout. Press the Right Arrow key to enter the editing mode. Press the Right and Left Arrow keys, as required, to place the cursor under the desired value. Press the Up or Down Arrow keys to edit each field. Press the Enter key to save the new setting.
- Page 96 From the main menu, press the Setup key > View/Edit Preferences > Date and Time. Current Time: To set the Current Time, press the Setup key and press the Down Arrow key until View/Edit Preferences is highlighted. Press the Enter key. Press the Down Arrow key until Date and Time is highlighted, than press the Right Arrow key to access the menu.
- Page 97 The UTC Offset menu appears and is used to adjust the UTC GPS time zone to your location. If you are unsure of the time zone in relation to UTC, please refer to the link below: http://tycho.usno.navy.mil/tzones.html Press the Right Arrow key to access the edit value fields. –...
-
Page 98: Maintenance Menu
A message appears, “Unit Set to Factory Defaults” – press the Enter key to Continue. 9.6. Maintenance Menu The Maintenance Menu provides several options to help Instantel Technical Services diagnose any reported errors. Select the Setup key on the unit to access the main setup selection menu. Use Down Arrow key and highlight the Maintenance Menu item. - Page 99 Press the Cancel key to return to the Maintenance menu. b. View Channel Data The View Channel Data menu is a diagnostic tool that an Instantel Technical Services Representative may ask you to describe the information shown. Press the Down Arrow key to scroll and highlight the View Channel Data menu option.
- Page 100 Service Technician can assist you in determining how to repair or describe a workaround for returning the monitor to a working state. Press the Down Arrow key to scroll and highlight the Self Check menu option. Press the Right Arrow button to activate Self Check – Now. Press the Enter key to Continue to each screen until you are returned to the main display.
- Page 101 (2) Select the Right Arrow key to Remove Offsets, or press the Cancel key to return to the Maintenance Menu. (3) If you have selected to Remove Offsets, a message appears, “Removing A/D offsets. Please wait…” (4) The unit responds with the message, “Offsets removed.” (5) Press Enter to Continue.
- Page 102 2) If the measured signal is greater than 94 dB: “Error Calibrating Sound Level Microphone. Calibration reference signal too large. Existing Calibration retained.” Press the Enter key to continue. (11) If the monitor and field calibration instrument are unable to calibrate the microphone, the following message appears, “Error calibrating the Sound Level Microphone.
-
Page 103: Sensors
10.1.4. Minimate Pro Sensor Check Feature The only purpose of the Sensor Check feature on Instantel vibration monitors, is to ensure that the sensors have been connected and installed correctly. If a sensor was not level, or was upside down, the monitor would indicate a failed Sensor Check. -
Page 104: Series Iv Sensor Specifications
The following sections apply to the Minimate Pro with a Series IV ISEE or DIN Geophone, as supplied by Instantel. To help differentiate between the two geophone types, the DIN Geophone has a blue lid, whereas the ISEE Geophone has a silver lid. -
Page 105: Soft Surface Installations
10.4.1. Soft Surface Installations Always install and use the ground spikes provided with the Geophone. For the best installation, it is suggested to bury the Geophone, or for very low level velocities, place a sandbag on top of it. a. Burying and using the Ground Spikes with the Geophone Screw the three ground spikes into the bottom of the Geophone and tighten. -
Page 106: Hard Surface Installations
Refer to the illustration above and follow the installation instructions below: The sandbag must be of sufficient size to cover the entire Geophone and the surrounding surface. The sandbag should weigh at least 25 pounds (12 kg) and contain sand or 1/4” washed gravel. - Page 107 Refer to the illustration above and follow the installation instructions below: NOTE: If the Geophone is being mounted to the ceiling, the directional arrow must be mounted against the ceilings surface to ensure that the orientation of the internal vertical transducer is correctly positioned.
- Page 108 Refer to the illustration above and follow the installation instructions below: Position the Geophone with leveling plate on the surface and mark the position of the bolt hole, which is located at the center of the Geophone. Use a 3/8 inch (9.5 mm) bolt or threaded rod. Install the bolt into the hard surface according to the manufacturer‟s instructions.
-
Page 109: Geophone Theory Of Operation
10.4.3. Geophone Theory of Operation This section describes how Instantel’s Geophones operate. A Geophone measures ground vibrations. The actual mechanism inside the Geophone is called a transducer. Geophones have either one transducer, called Uniaxial Geophone, or three transducers, called Triaxial Geophones. - Page 110 The coil, because of its inertia, does not move and the resulting magnet versus coil motion induces a voltage which is proportional to particle velocity. b. Geophone Calibration Requirements Instantel’s Geophone must be calibrated annually by Instantel or an Authorized Instantel Service Facility. Contact your dealer for further information. 10–8...
-
Page 111: Installing The Isee Microphone
Rubber Mallet, as required Refer to the illustration above and follow the installation instructions below: Instantel Series IV Microphones come with a sectional three foot (one meter) mounting stand. Locate the position of interest where you will be inserting the mounting stand. -
Page 112: Microphone Theory Of Operation
The linear scale records sound pressure without modification in the 2 to 300 Hz range. Measurement units may be in absolute, Pascal, or relative dB scales. b. Microphone Calibration Requirements Instantel’s ISEE Linear Microphone must be calibrated annually by Instantel or an authorized Instantel service facility. Contact your dealer for further information. 10–10... -
Page 113: Operator Maintenance
Replace Dust Caps If required, replacement dust caps for the connectors on the unit are available from Instantel. Replacement dust caps located on the sensor cables must be replaced at an authorized repair facility or at Instantel. ... - Page 114 OTES 11–2 Minimate Pro Operator Manual...
-
Page 115: Technical Reference
12. T ECHNICAL EFERENCE 12.1. Anti-alias Filters Aliasing occurs when a high–frequency signal appears as an erroneous low frequency because the waveform was sampled at too low a sampling rate. An anti-aliasing filter solves this problem by removing the high–frequencies. 12.2. - Page 116 the result of two or more major frequency components representing compound waveforms as illustrated in the figure below. It is therefore only an approximation of the frequency of the Peak Particle Velocity. Waveforms may have the same Peak Particle Velocities but different Zero Crossing Frequencies depending on the shape of the waveforms involved.
- Page 117 complex, or if it contains a large offset value, the zero crossings may lie outside an acceptable window. Whenever a frequency cannot be calculated the message "<1 Hz" displays. The message N/A indicates an entire waveform was not captured and therefore no frequency could be calculated.
-
Page 118: Sound Pressure
Calculating the Peak Vector Sum The Minimate Pro calculates the peak vector sum for each point of the sampled waveforms and displays the largest value. Note that this is not necessarily at the peak velocity for an individual waveform. 12.2.2. Sound Pressure The Minimate Pro calculates two sound pressure indicators, peak sound pressure and zero crossing frequency. -
Page 119: Nearly Triangular Waveforms
Maximum Displacement (mm) b. Calculating Acceleration: Maximum Acceleration (in./s Maximum Acceleration (mm/s 12.2.4. Nearly Triangular Waveforms Motion is irregular and has large amplitude. Manual Waveform Calculations on Nearly Triangular Waveforms a. Calculating Displacement: Maximum Displacement (in.) ... -
Page 120: Irregular Waveforms
Manual Waveform Calculations on Compound Waveforms a. Calculating Displacement: Maximum Displacement (in.) Maximum Displacement (mm) b. Calculating Acceleration: Maximum Acceleration (in./s ... -
Page 121: Index
Index Cleaning, 11–1 Company, 9–27 A or C Weighting., 7–6 Compliance Report, 8–6 AC Adapter, 3–1 Compliance Setup, 8–6 Acceleration, Displacement, 6–4 Compound Waveforms, 12–5 Accessories, 6–9 Condensed Instructions, 1–2, 4–1 Accuracy, 6–4 Connect the Unit, 8–2 Activating the Battery, 2–1 Copy/Print, 8–11 Add Post Event Notes, 8–13 Cube Root, 9–24... - Page 122 Fast, 7–6 Job Number, 9–27 Features, 6–3 Features and Benefits, 6–7 FFT, 8–12 Keypad, 6–7 Firmware Release Number, 2–4 Fixed Record Time, 9–19 Frequency Analysis, 6–4 Frequency Range, 6–4 LAN, 9–34 Frequency Response, 6–4 Level Installation, 10–2 Frequency Weighting, 10–2 Linear L measurement scale, 10–10 specifications, 6–4...
- Page 123 Operator Maintenance, 11–1 Sampling Rate, 6–4 Overswing Ratio, 9–31 Sandbagging, 10–3 Scale Distance Graph, 9–24 Scaled Distance, 9–24 Select Modem, 9–36 Password Protection, 9–39 Select Operator, 9–3 Peak Acceleration, 12–3 Select Setup File, 9–3 Peak Displacement, 12–3 Self Check, 9–41 Peak Particle Velocity (PPV), 12–1 Sensor Check, 9–29 Peak Sound Pressure (PSP), 12–4...
- Page 124 Warning Alarm, 9–23 geo alarm level, 9–22 Unfiltered, 7–6 Warranty, 4–1, 6–4, 6–7, See the title page Unit Keypad, 6–12 Waveform, 9–19 Unit Menu Overview, 9–1 Waveform Manual, 9–19 USB Adaptor, 6–10 WEEE, 1–2 Weight, 6–4 Weighting Scales, 6–4 Wire Break/Make Trigger Cable, 6–8, 6–10, 7–1, 9–22 Vibration Alarm Level, 9–22 Vibration Dose Value (VDV), 6–3, 7–3 Vibration Sensor, 9–16...
Need help?
Do you have a question about the Minimate Pro Series and is the answer not in the manual?
Questions and answers