Table of Contents
Advertisement
Advertisement
Table of Contents

Subscribe to Our Youtube Channel
Summary of Contents for Itho Daalderop HRU 400
- Page 1 Itho Daalderop HRU 400 Installation & use...
- Page 2 Original document.
- Page 3 Although this manual has been compiled with the utmost care, no rights can be derived from it. Itho Daalderop reserves the right to change products and manuals without prior notice. Due to our continuous process of improving our products, this document may differ from the product delivered to you.
-
Page 4: Table Of Contents
Content 7.4. Locking Safety and regulations 7.5. Diagnosis of faults 1.1. Security 1.2. Standards and guidelines Service parts 1.3. Air supply and exhaust system requirements Warranty Product information 2.1. Living comfort and energy savings 2.2. Versions 2.3. Accessories 2.4. Technical Specifications 2.5. -
Page 5: Safety And Regulations
In the event of defects, switch off the Prevent children from playing with the ● product and contact your installer or the product and/or system. Itho Daalderop service department immediately. ● Do not use the product in the presence of flammable or volatile substances such Never switch off the product unless ●... - Page 6 Wants to carry out maintenance on the appliance. The government advises closing windows and doors in the event of a calamity. ● Take care not to damage the electrical circuit. ● The electrical connection must always be easily accessible in order to switch off the power supply.
-
Page 7: Standards And Guidelines
1.2. Standards and guidelines 1.3. Air supply and exhaust system requirements The air supply system shall comply with the regulations in force. ä Warning! ● The ducts to and from the house: steel spiral tube, The specifications and settings of the appliance only comply internal diameter Ø... -
Page 8: Product Information
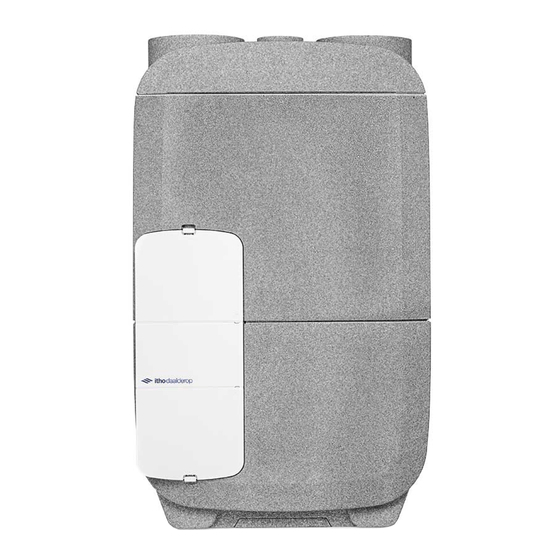
One of these advanced devices is the Itho Daalderop The HRU 400 helps to reduce the humidity in your bathroom by ventilation system HRU 400. means of the internal RH (Relative Humidity) sensor. -
Page 9: Versions
03-00065 Spider Gateway Spider Gateway 04-00087 RF-Repeater RF-Repeater 591-1070 FGD 180-50 Sound-absorbing flexible hose, Ø 180 mm, length 50 cm 591-1270 FGD 180-100 Sound-absorbing flexible hose, Ø 180 mm, length 100 cm 04-00109 PS HRU 400 Pot set HRU 400... -
Page 10: Technical Specifications
2.4. Technical Specifications Description Unit HRU 400 DIMENSIONS AND WEIGHT Dimensions (HxWxD) 1064x640x 580 Weight CONNECTIONS Channel connections top side 4x Ø 180 internal Side duct connection 2x Ø 180 internal Drainage of condensation Ø 32-40 mm external Frost valve Ø... -
Page 11: Product Card Information
2.5. Product card information Itho Daalderop Description Symbol Unit Specific energy consumption class — — Specific energy consumption, under moderate kWh/( climate conditions Specific energy consumption, under warm kWh/( climate conditions Specific energy consumption, under cold kWh/( climate conditions Residential ventilation unit (RVE) Type of ventilation unit —... -
Page 12: Capacity Charts
2.6. Capacity charts HRU 400 HRU 400 170300Pa200Pa 160150Pa 150250Pa 140100Pa 12050Pa 5505 7702 Q [m³/h] HRU 400... -
Page 13: Capacity, Pressure And Power
Automatic mode without CO2-sensor 40 of mode 3 Auto-night stand 60 from stand 3 The values given here are the standard values at which the appliance is delivered. * These values can be set with the Itho Daalderop service app. -
Page 14: Dimension Drawings
2.8. Dimension drawings 1) Minimum clearance around the ventilation unit. Legend Adischarge air from dwelling Power cable right Flow air to dwelling Power cable left Supply air from outside Exhaust air to the outside Spigots connection diameter: Ø 180 mm Supply air to frost valve Freeze-flap connection diameter: Ø... -
Page 15: Schemes
Auto/Auto night mode. house with less, or completely without, heat transfer. The Itho Daalderop heat recovery unit HRU 400 is supplied as standard with a bypass valve integrated in the unit. This valve works automatically. The bypass valve ensures that the extracted indoor air is guided around the exchanger. -
Page 16: Filters
2.10. Filters 2.11. Interface The HRU 400 has two filters, one for each airflow. Both filters The device is equipped with an interface with two buttons and two are placed in the ventilation unit in such a way that they protect LEDs. -
Page 17: Valves
2.12. Valves 2.13. Application in a new home The quantity of air to be extracted is regulated by law, and the Every new home contains a large amount of building moisture. This quantity of air to be blown in must be in balance with this. In other moisture comes from wet building materials such as concrete, words, as much air has to be extracted as is supplied. -
Page 18: Scope Of Delivery
2.14. Scope of delivery Note Report damage and/or missing parts to your point of sale. Legend Ventilation unit* Power cable Wall bracket set Documentation * The ventilation unit is put into operation with an app. 2.15. Unpacking and checking a) Carefully take the equipment out of the box. b) Check the nameplate details and type for correctness as shown on the sticker on the outside of the box. -
Page 19: Installation
1.8 m. in the vicinity of a siphon with connection to the The HRU 400 can be mounted on the wall using the supplied wall sewerage system (for connection of the condensate bracket set. - Page 20 After taking the measurements (see the dimension sketch for the b) Then tilt the appliance against the wall. spaces to be kept free around the appliance), you can attach the c) Then the u-shaped part fits in the top bracket and in lower bracket to the wall using suitable dowels and screws.
- Page 21 3.2.2. Mounting positions The ventilation unit can be mounted directly on the floor or on the ä Attention wall with the supplied wall bracket set. A pot set (optional) is also available. Attach the ventilation unit to a concrete surface, not to a wooden or plaster surface or to a surface with insufficient load-bearing The pictograms on the top of the appliance, near the duct capacity (˂...
-
Page 22: Connecting The Channels
3.3. Connecting the channels 3..4. Exhaust air to the outside In order to prevent condensation, the duct coming from outside and the duct going out to the ventilation unit must be insulated thermally and vapour-tight. 3..1. Supply air from outside Via this spout, the ventilation unit discharges the exhaust air to the outside. -
Page 23: Connecting Electrically
ä Attention The condensation hose must not have any sharp bends! MAX 70 mm ä Attention The distance between the underside of the appliance and the never condensation drain must exceed 70 mm (lower may be). Mounting with knee pad. The condensate drain (with dry siphon) can be connected either right or left-handed. -
Page 24: Operation
4. Operation The HRU 400 is operated by means of a wireless control, ● Position 2, middle position: for day or night when , RH sensor or the Spider climate controller, all of which sensor more than one person is present. -
Page 25: Controls And Sensors
To use the Itho Daalderop service app, an internet You can register up to 20 wireless control switches and/or sensors connection is required. on an Itho Daalderop ventilation unit or system. Note The HRU 400 cannot be operated with a wired control switch. -
Page 26: Subscribe And Unsubscribe Accessories
4.4.2. Log off accessories The connection and disconnection of wireless controls, sensors ä Attention and the Spider climate controller to the HRU 400 is controlled via the Itho Daalderop service app. After logging off, all wireless controls and/or sensors must be logged on again. -
Page 27: Commissioning
Itho Daalderop service app. Controls already notified remain notified on the ventilation unit. 5.2. Commissioning Commissioning of the HRU 400 is done via the Itho Daalderop service app. a) Bring the ventilation unit under tension. b) Use the button on the unit to set the unit to Commissioning mode (Wi-Fi mode). -
Page 28: Inspection And Maintenance
6. Inspection and maintenance The correct functioning of the ventilation system, its performance ä Attention and service life can only be guaranteed if the system is inspected and maintained in accordance with the regulations below. These When the ventilation system is operating under severe operating regulations are based on normal operating conditions. -
Page 29: Filter Warning
6.2. Filter warning 6.3. Cleaning or replacing filters On the device: ä Attention The control of the ventilation unit keeps track of when the filters The filters can be cleaned once and must be replaced at the need to be cleaned or replaced. If a dirty filter is detected, it is next service. - Page 30 ä Warning! door is at the correct opening in the holder on the ventilation unit. The HRU 400 must be fitted with the matching original filters at all times! Without filters, the unit can suffer irreparable ä Attention damage. Each service door has an A or B on the outside. This A or B corresponds to the A or B on the service door holder on the ventilation unit.
-
Page 31: Reset Filter Warning
5 seconds. Then press the touch button between 5 and 7 seconds until the orange flashing stops and the status LED e) Put the HRU 400 back into operation by plugging the plug flashes green 3 times briefly. back into the wall socket. -
Page 32: Detach Or Replace Electronics Compartment
6.6. Detach or replace b) Remove the cover plate on top of the electronics compartment. electronics compartment Required tools: Torx 20 Note To remove the electronics compartment, it is not necessary to dismantle the top of the appliance. The electronics compartment can be removed in the following way: a) Loosen the screw on the cover plate on the top of the electronics compartment. - Page 33 d) The underside of the cover plate hooks under the electronics compartment. Tilt the cover plate upwards before removing it. Legend Label cable Connection bypass valve Bypass Frost valve connection Frost Connection control cable supply fan e) Remove the underside of the cover plate from Drain fan control cable connection the electronics compartment.
-
Page 34: Access To Internal Components
6.7. Access to internal components e) Remove the cover plate on top of the electronics compartment. Required tools: Torx 20 and socket spanner 10. Go through the following steps to gain access to the internal components: ä Attention Always carefully loosen and tighten the screws of the upper part! a) Disconnect the ventilation unit from the power supply. -
Page 35: Cleaning Or Replacing Internal Components
6.8. Cleaning or replacing internal components b) The underside of the cover plate hooks under the electronics compartment. Tilt the cover plate upwards before removing it. Required tools: Torx 20 and socket spanner 10. ä Attention Always carefully loosen and tighten the screws of the upper part! a) Inspect the inside for dirt. - Page 36 h) Disconnect the connector of the frost valve (2). Legend Label cable Connection bypass valve Bypass Frost valve connection Frost Remove the frost flap from the ventilation unit. Connection control cable supply fan Clean or replace the frost valve. Drain fan control cable connection k) Install the cleaned or new bypass valve or frost valve in Supply fan connection reverse order.
- Page 37 h) Tighten the upper part with the 5 EPP screws. ä Attention Reconnect the channels. Make sure that the right module is placed back in the right If necessary, also install the condensation drain. place: the cables of the supply module are marked M1 and the k) Bring the ventilation unit back under tension.
-
Page 38: Malfunctions
7. Malfunctions 7.1. Fault reports 7.1.1. Error messages on the Interface The device is equipped with an interface with two buttons The appliance has various fault messages that are displayed and two LEDs. on the appliance, on the app and on the Spider climate thermostat: ●... -
Page 39: Locking
7.2. Warning ä Attention The device remains in operation. Disconnect the device from the power supply before you solve the problem. Thermostat Description Filter dirt (volume measurement) Filter dirt (time measurement) 7.4. Locking Flow warning discharge volume* The device is no longer in operation and is locked. All functions Flow warning supply volume* are disabled. -
Page 40: Diagnosis Of Faults
7.5. Diagnosis of faults Filter dirt (volume measurement) Oorzaak Solution The ventilation unit detects that the ● Disconnect the appliance from the filters need to be cleaned or replaced. power supply and clean or replace (based on volume measurement) the filters. ●... - Page 41 The ventilation unit detects that the ● Replace the humidity sensor in the supply is a) corresponding fan defective. module. The ventilation goes to the maximum position.
- Page 42 Internal temperature sensor fault Oorzaak Solution The ventilation unit detects that the ● Replace the electronics internal temperature sensor is a) compartment and perform defective. commissioning again. Re-register all controls and sensors. The ventilation goes to the maximum position. Close the frost valve and the bypass valve.
- Page 43 Fault valve zone 3 Oorzaak Solution The ventilation unit detects that the ● Connect the relevant valve correctly. damper for zone 3 is not, or not properly Replace the valve in question. ● connected or defective. The ventilation unit functions normally, but the air flow may be out of balance.
-
Page 44: Service Parts
Error volume sensor supply Oorzaak Solution The ventilation unit detects that the Replace the ● inlet a) volume sensor is corresponding fan defective. module. The ventilation unit stops. Error fan module drain Oorzaak Solution The ventilation unit detects that the ●... - Page 45 8. Service parts Exploded view...
-
Page 46: Warranty
Order Article number Description number ....05-00645 Fan module 05-00646 Bypass valve 05-00647 Frost valve 04-00110 Wall bracket set 05-00648 Cover caps set (2pcs) 05-00649 Electronics compartment 05-00650 Filter set ISO16890 Coarse 65% (G4) (2pcs) 05-00651 Filter set ISO16890 ePM2.5 70% (F7) (2pcs) 05-00652 Service door set complete 05-00653... - Page 47 9. Warranty All Itho Daalderop products come with a standard two-year manufacturer's warranty. Within this period, the product or parts thereof will be repaired or replaced free of charge. Provisions and exclusions are included in our guarantee conditions. See the product page on our website for full warranty terms and/or additional warranty terms or conditions.
- Page 48 EC declaration of conformity Itho Daalderop Group BV PO Box 7 4000 AA Tiel Netherlands Declares that the product : Balanced ventilation unit with heat recovery HRU 400 complies with the provisions : Richtlijnen Harmonised European standards Directive 2009/125/EC (Ecodesign) ●...
- Page 49 The Netherlands Itho Daalderop Admiral de Ruyterstraat 2 3115 HB Schiedam E idsupport@ithodaalderop.nl I www.ithodaalderop.nl Installers only: T 010 427 85 65...
Need help?
Do you have a question about the HRU 400 and is the answer not in the manual?
Questions and answers