Table of Contents
Advertisement
Quick Links
Advertisement
Table of Contents

Related Manuals for Kumpan 54i

Summary of Contents for Kumpan 54i
- Page 1 USER MANUAL iconic | impulse | ignite - 1 -...
- Page 2 GmbH Dieselstraße 28 53424 Remagen, Germany www.kumpan-electric.com 1st edition, Remagen, Sept. 2020 © 2020 e-bilty GmbH All rights reserved. This user manual is for the following models: • 54 iconic (25/45 km/h) • 54 impulse (70 km/h) • 54 ignite (100 km/h)
-
Page 3: Table Of Contents
Charging Outside of the Vehicle P. 34 The Kumpan 54i P. 14 Charging in the Vehicle P. 35 Bluetooth Key P. 15 12 V Back-up Battery P. 37 Start-Stop Button P. 15 Switching the Kumpan On and Off P. 16 - 3 -... - Page 4 Contents Display/Operation Main Stand P. 54 P. 38 Side Stand P. 54 Retracting P. 55 Display/Touch Screen P. 39 Feet Rests P. 56 Display / Touch Screen – View while Driving P. 40 Operating the Touch Screen P. 41 Maintenance and Care P.
- Page 5 Foreword Congratulations, you’re the proud owner of a Kumpan 54i! We hope you have loads of fun with your new two-wheel companion. This manual primarily serves to provide you with instructions and references to allow you to handle your Kumpan in a safe and careful way.
-
Page 6: Safety Instructions
Any improper use of the vehicle will void both the manufacturer’s warranty and statutory warranty. Kumpan 54 iconic restricted at 25 km/h All interventions to improve the performance, speed, and other interventions that fundamentally alter the scooter’s properties are punishable and legal - From 15 years with a moped certificate steps will be taken. -
Page 7: Check & Start
Check & Start Loading & Unloading Wet & Slippy Conditions Before every trip, inspect the scooter Always load the Kumpan carefully and Transporting people or animals on Exercise particular caution when to make sure it is safe for use on the beware of overloading. -
Page 8: Cold Weather
Safety Instructions DANGER Cold Weather Body & Soul Spirit & Knowledge should carefully be “braked dry” at Before every trip, make sure that all The taking of certain medicines, Never stand up while driving. Always a secure location, to ensure proper moving parts operate without fault, alcohol, non-prescription drugs or drive with focus and care. -
Page 9: Law & Order
Kumpan electric contract partner. They will check your Kumpan and all safety- relevant components and devices. To make it easier to carry out necessary... -
Page 10: Clothing For Head & Body
The use of accessories not approved appropriate and tight-fitting clothes Kumpan. by Kumpan electric might void both of a fall. suitable for the weather conditions. Ensure that the accessory is properly the manufacturer’s warranty and attached to the vehicle to avoid risky statutory warranty. -
Page 11: Checklist Before Your First Drive
Checklist before your first drive Everything ready? Everything set? Go explore! When using your vehicle, you must carry the following identification documents and papers with you - ID card/passport - Driver’s licence/moped certificate - Insurance certificate - Registration plate/insurance tag - Vehicle certificate of conformity (CoC) –... - Page 12 Checklist before your first drive 2.6 bar 2.2 bar Did you read through the Quick Battery/batteries charged and stowed Mirrors mounted and set correctly? Proper tyre pressure: Starter Guide/Manual? in the battery compartment? Are the unused slots covered with the cap? Under one-person load: Insurance tag (54 iconic) 2.2 bar front...
- Page 13 Checklist before your first drive Do all signalisation and lighting Checked the brake system for proper Helmet and protective clothing on? Feet rests extended if you’re systems work properly? functioning – confirmed the brake planning on bringing a passenger? pressure point? Regularly check all signalisation and lighting systems for proper functioning, if necessary with a...
-
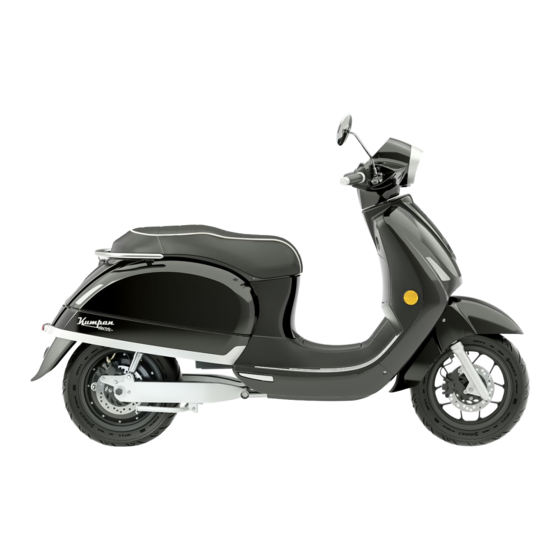
Page 14: The Kumpan 54I
The Kumpan 54i Detailed look at the components of your Kumpan - 14 -... -
Page 15: Bluetooth Key
The Kumpan 54i Bluetooth key Start-Stop button 1. Switch on your Kumpan 3. Start-Stop Button 2. Switch off your Kumpan - 15 -... -
Page 16: Switching The Kumpan On And Off
Switching the Kumpan Note Switching on switching off On and Off • With our “Kumpan Key” app, You can only switch on the scooter if: Cruise control only works after both • Press the Start-Stop button you can also teach your smartphone •... -
Page 17: Rearview Mirror
Kumpan. handlebar. the rearview mirror should run The mirror head has a ball joint for parallel to the handlebar grip. -
Page 18: Overall View Left
The Kumpan 54i Overall View Left 1. Headlamp 2. Rearview Mirror 3. Seat 4. Handle 5. Hub motor 6. Main Stand 7. Feet rests 8. Side reflector - 18 -... -
Page 19: Overall View Right
The Kumpan 54i Overall View Right 1. Leg compartment with beverage holder 2. Glove compartment with 12 V socket 3. Disc brake front wheel 4. Side reflector 5. Feet rests 6. Chassis number (VIN)/type plate 7. Disc brake rear wheel... -
Page 20: View From The Front And Rear
The Kumpan 54i View from the Front and Rear 1. Turn signal front 2. Brake lever front wheel 3. Brake lever rear wheel 4. Cruise control/touch screen display 5. Gas handle 6. Rear light/brake light 7. Turn signal rear 8. Licence plate lighting 9. -
Page 21: Switch Unit Left
The Kumpan 54i MAX. MIN. Switch Unit Left 1. Full-beam/anti-glare light switch 2. Turn signal switch 3. Horn 4. Filling level indicator brake rear - 21 -... -
Page 22: Switch Unit Right
The Kumpan 54i MAX. MIN. Switch Unit Right 1st Emergency-Off switch/warning lights 2. Control pad 3. Cruise control* 4. Filling level indicator brake front *The cruise control can only be switched on after both brakes have been applied once. - 22 -... -
Page 23: Glove Compartment/Leg Compartment
The Kumpan 54i Glove Compartment/ Leg Compartment 1. Glove compartment 2. 12 V socket (max. 4.5 A) 3. Lighting 4. Lock to unlatch the seat 5. Leg compartment with beverage holder *Press these spots to open the glove and leg compartments. -
Page 24: Seat/Battery Compartment
The Kumpan 54i Seat/Battery Compartment 1st Seat 2. Seat lock* *Press this symbol at the top-left of the display to open the seat. Note: Alternatively, you can open the seat using the lock in the glove compartment. - 24 -... - Page 25 The Kumpan 54i Seat/Battery Compartment 1st Battery compartment (3 slots) 2. Battery 3. Illuminated storage compartment *This symbol appears at the top-left of the display when the seat is open. - 25 -...
- Page 26 Battery Kraftpaket 2.0 How to charge your Kumpan - 26 -...
-
Page 27: Technical Properties
Battery Kraftpaket 2.0 The battery is the centrepiece of your scooter. Make sure to keep the contacts clean and keep the battery away from humidity and moisture. If the battery is not placed in the scooter, place the cover cap onto the contact in the battery compartment. -
Page 28: Battery Displays
Battery Kraftpaket 2.0 Note Battery Displays A new battery initially fails to reach A display shows you the charge its full capacity, the full charge status at the top of the Power Pack. status only shows after several charging cycles. An additional LED strip uses a traffic- light system to visualise the charge status (red, yellow, green). -
Page 29: Placing And Removing The Power Pack
Kraftpaket 2.0 Placing and Removing the Power Pack The Kumpan 54 iconic is delivered with one Power Pack 2.0 by default. The Kumpan 54 impulse and 54 ignite are delivered with two Power Packs 2.0 by default. After opening the seat (see pages 24 and the following/39/42/50), you can place your Power Pack into the vehicle. - Page 30 After 2–3 weeks at the most, place your Power Pack 2.0 back into your Kumpan to recharge the back-up battery for the on- board electronics. If the back-up battery happens to be drained after a longer standstill, you can open the seat using the lock in the glove compartment (see p.
- Page 31 Battery Kraftpaket 2.0 NOTE Please ensure that all Power Pack 2.0 plugs are closed using the covering cap and that the loading flap at the front of the scooter is closed. Your scooter is only ready for the road after performing this step. - 31 -...
-
Page 32: Storage
Kraftpaket 2.0 NOTE Storage • Please do not store the battery If you don’t use your Kumpan for standing up a longer period, you should always make sure that the battery is charged • Store the battery in a dry place, to at least 50%. -
Page 33: Charging Unit
Battery Kraftpaket 2.0 DANGER General information on usage: Charging Unit • Do not charge on surfaces Technical Properties: Our charging unit was specially sensitive to heat. developed for the Power Pack 2.0. • Prevent contact between the charging Input voltage: 180–240 V/50 Hz The upper side of the charging unit unit and water, acids, or bases. -
Page 34: Charging Outside Of The Vehicle
Battery Kraftpaket 2.0 Charging Outside of the Vehicle Put down your Power Pack 2.0 so that you can access the connection socket. Afterwards, connect the charging cable of your charging unit to the Power Pack. Now, all you need to do is connect the charging unit with a 220 V domestic power socket and switch on the charging unit. -
Page 35: Charging In The Vehicle
Battery Kraftpaket 2.0 Charging in the Vehicle To charge the Power Pack in the vehicle, press the Kumpan K logo on the front panelling and open the charging flap upwards. The connector is located behind the flap; attach the Kumpan charging unit to the connector. - Page 36 Battery Kraftpaket 2.0 The charging unit is first connected to Now, switch on the charging unit. The The scooter will not start if the the vehicle and then connected to a LED strips on the battery will flash. loading flap is not correctly closed 220 V domestic power socket.
-
Page 37: 12 V Back-Up Battery
Your scooter is additionally equipped with a 12 V back-up battery. It supplies your Kumpan with power to recognise your key and open the seat or topcase if no battery is inserted. After inserting a Power Pack 2.0, it will supply both the scooter with power and charge the back-up battery. -
Page 38: Display/Operation
Display/ Operation The display of your Kumpan - 38 -... -
Page 39: Display/Touch Screen
Display/ Operation 08:22 Uhr · 01.01.2020 MENU Display/Touch Screen 1. Status seat 2. Status topcase (with electric topcases) 3. Menu 4. Battery level 5. Time/date 6. Driving mode/quick overview 7. Speed display 8. Consumption display - 39 -... -
Page 40: Display / Touch Screen - View While Driving
Display/ Operation km/h Display / Touch Screen – View while Driving 1. Digital display left (can be programmed) 2. Speed display (analog representation) 3. Full beam 08:22 Uhr · 01.01.2020 MENU 4. Anti-glare light 5. Cruise control 6. General warning lights RED: Defect –... -
Page 41: Operating The Touch Screen
Display/ Operation km/h 08:22 Uhr · 01.01.2020 MENU Operating the Touch Screen The display also comes with a touch function. You can simply operate the individual elements by tapping on the display. NOTE The display should only be operated while the vehicle is not moving. -
Page 42: Scooter Functions
Display/ Operation km/h km/h LADEKLAPPE BITTE LADEKLAPPE SCHLIEßEN 08:22 Uhr · 01.01.2020 MENU 08:22 Uhr · 01.01.2020 MENU 08:22 Uhr · 01.01.2020 MENU Scooter Functions Menu Notifications/Notices Opening the Seat: Menu navigation: confirm with “OK” Tap on the seat symbol Tap on the menu item Tap “Back”... -
Page 43: Display/Touch Screen - View Of The Menu
Display/ Operation FAHRMODUS ALLGEMEINE km/h EINSTELLUNGEN SYSTEMINFO MENU BEENDEN 08:22 Uhr · 01.01.2020 MENU Menu items The “Menu” view has the following items and respective sub-menus: 1st Driving Mode 2. General Settings 3. System info 4. Close menu - 43 -... -
Page 44: Driving Mode
Display/ Operation Driving Mode In the menu item “Driving Mode”, you can make changes to the throttle response, motor power and recuperation. You can choose between the following driving modes: ECO: ECO: Energy-saving mode, maximum recuperation, gentle throttle km/h response, ideal for maximum range. RAIN Comfort: Comfort:... -
Page 45: General Settings
Kumpan. 08:22 Uhr · 01.01.2020 MENU You have the following options: Sounds: Your Kumpan gives audio feedback when signalling turns. You can adjust the volume in the menu or deactivate sounds completely. Brightness: Besides activating the automatic brightness adjustment, you can manually adjust the brightness of the touch display here. - Page 46 Download it here from the App Store and simply follow the instructions on upper left and right corners of the display. the app. Just scan the QR code shown here or search for “Kumpan Key” in your - Trip km App Store.
-
Page 47: System Info
Display/ Operation km/h 08:22 Uhr · 01.01.2020 MENU System info In the menu item “System info”, you will find the VIN number and software version of the individual control units - 47 -... -
Page 48: Control Pad Operations
Display/ Operation Control Pad Operations Operate the display using the control pad on the right handlebar unit. - 48 -... -
Page 49: Quick Overview
Display/ Operation km/h 08:22 Uhr · 01.01.2020 MENU Enter Quick overview You can select the following items: Press the right or left arrow on the (Enter) of the control pad for 2 control pad to switch between the seconds to reset the value of the Trip - Driving mode various items in the quick overview. -
Page 50: Battery Display/Charging Status
Display/ Operation km/h km/h LADEKLAPPE BITTE LADEKLAPPE SCHLIEßEN 08:22 Uhr · 01.01.2020 MENU 08:22 Uhr · 01.01.2020 MENU 08:22 Uhr · 01.01.2020 MENU 08:22 Uhr · 01.01.2020 MENU Enter Enter Enter Enter Battery Display/Charging Status Opening the Seat Opening the Topcase Notifications/Notices Use the up arrow to reach the “Battery Use the up arrow to reach the “Open... -
Page 51: Menu
Display/ Operation FAHRMODUS ALLGEMEINE km/h EINSTELLUNGEN SYSTEMINFO MENU BEENDEN 08:22 Uhr · 01.01.2020 MENU Enter Enter Enter Menu Confirm with Enter to access the Confirm with Enter to select an To get to the “Menu” item, go back menu. individual menu item (see page 44). up to the quick overview item. -
Page 52: Operating/Driving
Operating/Driving Helpful tips to operate your Kumpan - 52 -... -
Page 53: Safe Driving And Stopping
NOTE Safe Driving and Stopping Handlebar lock By turning the throttle, your Kumpan Your Kumpan 54i is fitted with an For safety reasons, the connection starts and accelerates. electric handlebar lock. The handlebar between the key and the scooter is... -
Page 54: Main Stand
Operating/Driving Main Stand Side stand* PLEASE NOTE Stand to the left of the scooter to Make sure that both support points Always check whether the scooter is Hold the scooter by the left handlebar apply the main stand. of the main stand touch the surface. in a stable position, resting on solid grip and the left side of the handle to ground. -
Page 55: Retracting
Operating/Driving Retracting DANGER New tyres primarily tend to lose The brake pads and brake discs only New tyres have a smooth surface grip on wet roads and with extreme work optimally after a certain start- which need to be roughened up cornering, risk of falling! up period. -
Page 56: Feet Rests
Operating/Driving Feet Rests The feet rests are needed when To fold up the rests, push them into transporting a passenger. If the rests the panelling as far as they go. are not being used, fold them back up to prevent damage and injury. The feed rests are folded down by pressing on them. -
Page 57: Maintenance And Care
Maintenance and Care How to care for and service your Kumpan - 57 -... -
Page 58: Brakes
Kumpan service partner. - 58 -... -
Page 59: Brake Fluid Level
NOTE: In this case, contact your Kumpan brake lever. Wear of the brake pads will cause Service partner. the brake fluid level in the container Position the vehicle on a level surface to drop. -
Page 60: Chassis
Maintenance and Care Chassis Setting the spring pre-load: You can set the spring pre-load of the rear shock absorber (increasing spring pre-load “harder spring” in the direction of the arrow). Adjust the chassis when driving with 2 persons or carrying a load by tightening the spring pre-load. -
Page 61: General Instructions
Maintenance and Care General Instructions PLEASE NOTE To reliably prevent rust from forming, Never aim a direct water jet on the Only use suitable cleaning and care we recommend thoroughly cleaning following components: agents (e.g. plastic cleaner, seat and drying the vehicle after driving in cleaner) and a soft sponge. - Page 62 The brake system can be dried Dry your Kumpan with a leather cloth. while driving by braking early and If your scooter happens to come repeatedly. into contact with de-icing grit/salt in the winter, clean immediately afterwards.
-
Page 63: Vehicle And Battery Storage Periods - Winter Break
Vehicle and Battery Storage Periods – Winter Break NOTE If you do not use your Kumpan for a longer period or store it in the winter months, please observe the following: • Thoroughly clean the vehicle before a longer period of standstill. -
Page 64: Troubleshooting
Troubleshooting How to easily identify and solve errors - 64 -... - Page 65 (see page 53/58 and the next). • Insufficient battery charge. • Connect your Power Pack to the charging unit and charge it (see page 34/35 and the next). Find a Kumpan Service partner close to you here: www.kumpan-electric.com/e-roller-haendler - 65 -...
- Page 66 (see page 30/32). If the seat is closed, you must open it Find a Kumpan Service partner close to you here: using the lock in the glove compartment. www.kumpan-electric.com/e-roller-haendler (see page 37).
- Page 67 The battery must be checked and repaired if necessary Contact your Kumpan service partner or service@ebility.de Note: The error codes shown here relate to the battery and are shown in the battery display. Find a Kumpan Service partner close to you here: www.kumpan-electric.com/e-roller-haendler - 67 -...
-
Page 68: Technical Details
Technical Details The technical details of your Kumpan - 68 -... - Page 69 Technical Details Motor Storage temperature approx. 10 to 15°C (ideal), possible range: -20 up to +60°C Model Brushless DC hub motor Charging current/charging time 6 A, 4.5 hours Maximum performance 4000 W (iconic, impulse) 7000 W (ignite) Charging Unit Maximum efficiency ≥...
- Page 70 Technical Details Chassis Dimensions Fork With spring and hydraulic support Length 1939 mm (without topcase) Spring strut Double spring strut with hydraulic Width 755 mm (without mirrors) support (adjustable spring pre-load) 779 mm (with mirrors) Brakes Height 1210 mm (without mirrors) 1352 mm (with mirrors) front/rear Hydraulic disk brake system...
- Page 71 Technical Details 1356 1921 1939 all dimensions in mm - 71 -...
- Page 72 Technical Details all dimensions in mm - 72 -...
-
Page 73: Accessories
Accessories Kumpan offers following accessories for your vehicle: 1. Topcase carrier 2. Topcase mechanical 3. Topcase electric 4. Crash bar 5. Side Stand For details and additional accessories, visit: www.kumpan-electric.com - 73 -... -
Page 74: Key Safety Instructions
Safety Instructions Safety instructions The safety instructions have the following structure: SIGNAL WORD Danger type and source! Consequences of non-compliance. DANGER This combination of symbol and signal word points out a hazardous situation. Failure to observe the instruction can lead to death or serious injury and/or damages to property and the environment. - Page 75 WE WISH YOU e-bility GmbH | Dieselstraße 28 | (D) 53424 Remagen A SAFE AND 0049 (0) 2642 - 999 800 info@ebility.de www.kumpan-electric.com PLEASANT DRIVE WITH Social Media YOUR KUMPAN! LinkedIn Facebook Instagram YouTube - 75 -...
Need help?
Do you have a question about the 54i and is the answer not in the manual?
Questions and answers