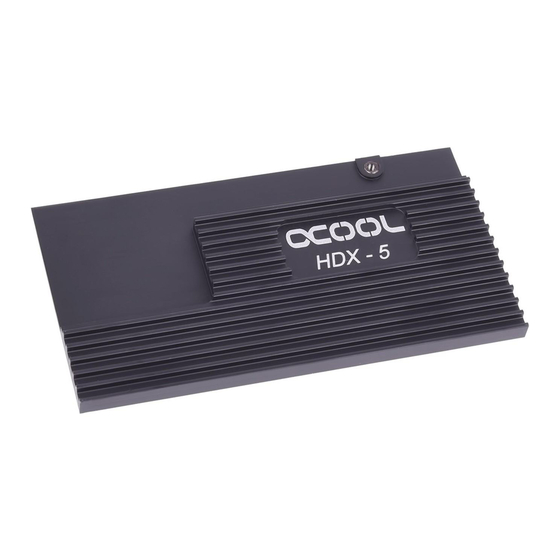
Summary of Contents for Alphacool HDX - 5
- Page 1 HDX - 5 Scope of delivery - Lieferumfang - Contenue de livraison 60x 1 8x 1 mm 60x 1 8x2mm 1 5x 1 5x3mm M2 nuts thermal pads...
- Page 2 Cooler mounting - Kühlermontage - Montage du refroidisseur 1. Lay your RAID card onto an anti-static mat. Place two of the 1mm thick thermal pads in front of the M2 slots, as pictured. 1. Legen Sie Ihre Raidkarte auf eine antistatische Unterlage.
- Page 3 Cooler mounting - Kühlermontage - Montage du refroidisseur nuts M2 SSD M2x5 2. Plug in your M2 SSDs and fasten them with the included M2x5 screws and washers 2. Stecken Sie Ihre M2 SSDs ein und verschrauben Sie diese mit den beiliegenden M2x5 Schrauben und den Muttern. 2.
- Page 4 Cooler mounting - Kühlermontage - Montage du refroidisseur 3. Turn the card and place the square 3mm pad onto the chip, as shown 4. Place the upper cooling block onto the card and turn the card again. 3. Drehen Sie die Platine und legen Sie das quadratische 3mm Pad, wie gezeigt, auf den Chip.
- Page 5 Cooler mounting - Kühlermontage - Montage du refroidisseur on empty sides on occupied sides 5.Place the corresponding thermal pads onto the M2 SSDs. A 2mm thick pad goes onto empty sides, and a 1mm pad onto sides with components. 5. Legen Sie die entsprechenden Wärmeleitpads auf ihre M2 SSDs.
- Page 6 Cooler mounting - Kühlermontage - Montage du refroidisseur 6. Now place the backplate onto your RAID card and screw the cooler together with the three M3x12 screws. Fasten the screws crosswise carefully. 7. The passively-cooled controller card is now ready for use. You can attach the card onto your motherboard and connect additional hard drives via SATA if necessary.
- Page 7 Installation / Confi guration Installation / Confi guration Setting up drivers and utilities Installation / Konfi guration Installation / Konfi guration 10-11 10-11 Einrichten von Treibern und Diensten Installation / Confi guration Installation / Confi guration 12-13 12-13 Confi guration des pilotes et des services...
-
Page 8: Installing Drivers
Installation / Confi guration Setting up virtual drive 1. Plug in RAID controller 2. Start up PC, press CTRL+M during startup 3.This will launch Marvell Bios Utility (MBU) 4. Use the arrow keys to select HBAO:Marvell 0 and confi rm with Enter 5. -
Page 9: Installing Utilities
E:\2010A2\Marvell\92XX\Betriebssystem_wählen\amd64 3. If you do not have access to a CD drive, download the drivers from the website Alphacool.com 4. If you are not prompted to select the location of the drivers, you can also install them through the device manager Installing utilities 1. -
Page 10: Treiber Installieren
Installation / Konfi guration Virtuelles Laufwerk erstellen 1. Raidcontroller einstecken 2. PC starten, während des Hochfahrens STRG+M drücken 3. Marvell Bios Utility (MBU) startet 4. Wählen Sie mit den Pfeiltasten HBAO:Marvell 0 und bestätigen Sie mit Enter 5. Wählen Sie den Konfi gurations-Assistent und Erstellen Sie mit Enter ein virtuelles Laufwerk 6. - Page 11 E:\2010A2\Marvell\92XX\Betriebssystem_wählen\amd64 3. Falls Sie kein CD Laufwerk verwenden können, laden Sie die Treiber von der Webseite Alphacool.com runter 4. Falls Sie nicht nach dem Standort der Treiber gefragt werden, können Sie die Treiber über den Gerätemanager installieren Dienstprogramm installieren 1.
- Page 12 Installation / Confi guration Création d’un lecteur virtuel 1.Insérer contrôleur Raid 2. Démarrer PC, appuyer sur CTRL+M au démarrage. 3. Démarrer Marvell BIOS Outil (MBU). 4. Sélectionnez, avec les touches directionnelles, HBAO:Marvell 0 et confi rmer avec Entrée. 5. Choisissez l’assistant de confi guration et créez un lecteur virtuel en confi rmant avec Entrée.
- Page 13 E:\2010A2\Marvell\92XX\Betriebssystem_wählen\amd64 3. Si vous n’êtes pas en capacité d’utiliser le CD, le pilot est disponible en téléchargement sur la site web Alphacool.com 4. Si vous n’êtes pas invité à sélectionner l’emplacement des pilotes, vous pouvez donc les installer par le gestionnaire de périphériques...
- Page 16 Imprint: Alphacool International GmbH Marienberger Str. 1 38122 Braunschweig Head Office: +49 (0) 531 28874 - 0 Fax: +49 (0) 531 28874 - 22 E-Mail: info@alphacool.com General Manager: Fabian Noelte WEEE-Reg.-Nr.: DE 54464644 Trade Register: Amtsgericht Braunschweig HRB 202390 VAT.ID.Nr.:...


Need help?
Do you have a question about the HDX - 5 and is the answer not in the manual?
Questions and answers