Table of Contents
Advertisement
Quick Links
Advertisement
Table of Contents

Related Manuals for NTT docomo NEXT Series

Summary of Contents for NTT docomo NEXT Series
- Page 1 L-06D JOJO INSTRUCTION MANUAL ’12.8 ©LUCKY LAND COMMUNICATIONS/SHUEISHA...
- Page 2 Introduction Thank you for purchasing "L-06D JOJO". Before or while using, be sure to thoroughly read this manual to ensure its correct use. Download the latest information of this manual from DOCOMO website. Also you can check the latest information from this terminal. ■...
-
Page 3: Supplied Accessories
Quick Start Guide Supplied Accessories About other optional accessories and related equipment → P236 L-06D JOJO (with warranty) Earphone/microphone L01 (with warranty) Stylus Pen (sample) mini UIM In-out tool (sample) -
Page 4: How To Use This Manual
How to Use this Manual ★ Any reprint of this manual is prohibited. Description Operation description ★ This manual is subject to change without at the bottom of the prior notice. "System screen, and then tap "System ★ "This terminal" indicates "L-06D JOJO" in this settings"... -
Page 5: Table Of Contents
Contents docomo Palette UI ……………………… 84 Supplied Accessories …………………………… 1 How to Use this Manual ………………………… 2 Switching Home Application …………………… 84 Before Using this Terminal ……………………… 6 Viewing the Home Screen ……………………… 85 Safety Precautions (ALWAYS FOLLOW Home Screen Management …………………… 85 THESE PRECAUTIONS) …………………………... - Page 6 Mail / Web Browser ………………… 115 Application ……………………………… 163 sp モードメール (sp-mode mail) ……………… 115 dmenu ……………………………………………… 163 SMS ………………………………………………… 115 dmarket …………………………………………… 163 Email ………………………………………………… 117 Play Store ………………………………………… 164 Gmail ………………………………………………… 120 Osaifu-Keitai ……………………………………… 166 Early Warning "Area Mail" ……………………… 121 mobacas ……………………………………………...
- Page 7 Using Overseas ……………………… 227 Appendix / Index ……………………… 236 Overview of International Roaming Introduction of Options and (WORLD WING) …………………………………… 227 Related Devices ………………………………… 236 Available Services ……………………………… 228 Samples …………………………………………… 236 Confirming before Using ……………………… 228 Troubleshooting (FAQs) ……………………… 237 How to Make and Receive Calls at your Smartphone Anshin Remote Support ………...
-
Page 8: Before Using This Terminal
★ Because this terminal operates using radio Before Using this Terminal waves, there are possibilities that a third party intercepts your telephone call. However, ★ All copyrights of the contents and LTE, W-CDMA and GSM/GPRS systems applications related to " ジョジョの奇妙な冒 support the privacy function to all telephone 険... - Page 9 ★ This terminal does not support accessing ★ In order to improve the quality of this terminal, the i-mode site (programs) and i- α ppli, etc. sometimes the OS is upgraded through ★ This terminal automatically performs software updates. Therefore, it is required to communication for some functions, for always use the latest version of OS.
-
Page 10: Safety Precautions (Always Follow These Precautions)
★ Backup your data such as images, videos and Safety Precautions (ALWAYS music on PC. For details about connection FOLLOW THESE PRECAUTIONS) method, refer to "File Management" (P151) and "External Device Connection" (P160). ■ Before using this terminal, read these Also, it is recommended to use various on- "Safety Precautions"... - Page 11 ■ The following symbols indicate special ■ "Safety Precautions" are explained in the warnings regarding product usage. following eight sections. General Precautions for Terminal, Adapter, miniUIM …………………………… P10 Denotes things not to do Precautions for Terminal ………………… P12 (prohibition). Precautions for Adapter …………………… P16 Precautions for miniUIM ……………………...
-
Page 12: General Precautions For Terminal, Adapter, Miniuim
Do not get this terminal and its General Precautions for accessories wet with water, drinking Terminal, Adapter, miniUIM water, pet urine, etc. Fire, burns, injury, or electric shock may result. DANGER ★ For waterproofness, refer to P30. Do not use or leave this terminal and Use the adapter specified by NTT its accessories in places with a high DOCOMO for this terminal. - Page 13 Keep conductive materials (metal If the equipment starts giving off a pieces, pencil lead, etc.) away from strange smell, overheats, becomes coming in contact with the microUSB discolored or deformed during use, connection terminal or earphone/ charging or in storage, immediately microphone terminal.
-
Page 14: Precautions For Terminal
If children use this terminal and Precautions for Terminal its accessories, a guardian should explain the precautions and correct ■ The type of internal battery of this terminal operations. Also make sure that the is as follows. instructions are followed during use. Display Battery type Injury may result. - Page 15 WARNING Do not get liquids such as water or foreign objects such as metal pieces or flammable materials into the docomo miniUIM Slot of this terminal. Do not aim the Infrared Port toward Fire, burns, injury, or electric shock eyes. may result.
- Page 16 When talking on the phone with Turn off this terminal in places near speaker on or when this terminal is high precision electronic devices or ringing, keep it away from your ear. devices using weak electronic signals. And, when connecting the earphone/ Electronic devices may be adversely microphone etc.
- Page 17 When the display or camera lens is Do not use a broken terminal. accidentally broken, be careful of Fire, burns, injury, or electric shock may broken glass or exposed internal parts result. of this terminal. Since the reinforced glass is used When using the motion sensor, ensure on the surface of the display and the the safety of you and those around...
-
Page 18: Precautions For Adapter
If you use this terminal in a car, contact Precautions for Adapter the car manufacturer or dealer to ask about the effect from radio waves. WARNING Depending on the type of car, in-car electronic devices could be adversely affected. In this case, stop using this Do not use it if the adapter cord gets terminal immediately. - Page 19 Do not make the charging terminal Only use with the specified power short out while being connected to source and voltage. When charging the outlet or cigar lighter socket. Do overseas, use a compatible AC not touch the charging terminal with a adapter.
-
Page 20: Precautions For Miniuim
When you connect the AC adapter Always remove the power plug from to an outlet, do not fail to properly the outlet or cigar lighter socket connect to the outlet. when cleaning the equipment. Fire, burns, or electric shock may result. Fire, burns, or electric shock may result. -
Page 21: Precautions On Using Near Electronic Medical Equipment
Turn off this terminal in crowded Precautions on Using near trains or other public places where Electronic Medical Equipment implanted cardiac pacemaker or defibrillator wearers could be nearby. ■ The description below meets "Guideline on Operation of an implanted cardiac the Use of Radio-communication Equipment pacemaker or implanted defibrillator may such as Cellular Telephones - Safeguards... -
Page 22: Material List
Material List Part Material Surface Treatment Part Material Surface 1seg/mobacas NCVM antenna Treatment microUSB Spin treatment+ Outer Display Tempered Rear Printed connection Buffing+ case Glass terminal cover Chrome plating Front UV G20% OneTouch Spin treatment+ case (SC1004A LGD- Memo button Buffing EM59P) AN036(UV) -
Page 23: Precautions For Sample (Stylus Pen)
Keep out of reach of babies and small Precautions for sample children. (Stylus Pen) Accidental swallowing or injury may result. WARNING Precautions for sample Do not point the stylus at people. (miniUIM In-out tool) May result in injury or loss of vision to oneself or others. -
Page 24: Handling And Care
★ If this terminal is wiped with alcohol, paint Handling and Care thinner, benzine or detergent, the printing may disappear or color may fade. General Usage Guidelines ■ Keep the connector contacts clean with a dry cotton swab. Clean the connector contacts with a dry ■... - Page 25 ■ Do not rub or scratch the display with metal. ■ Do not insert a microUSB connection The display may get scratched and it may terminal, earphone/microphone terminal cause malfunction or damage. crookedly or pull them strongly. Damage or malfunction may result. ■...
- Page 26 ■ The internal battery is a consumable Notes about the Adapter accessory. Replace the internal battery if this terminal ■ Charge the internal battery in an has extremely short operation time on a environment with the proper ambient full charge, though it may vary by operating temperature (5℃...
- Page 27 ■ Do not insert miniUIM into this terminal with Notes about the miniUIM labels or stickers attached on. Malfunction may result. ■ Do not put excessive force on the miniUIM when inserting into or removing from this Notes about the Bluetooth terminal.
- Page 28 ■ Frequency band ■ Bluetooth Device Cautions Frequency bands used for this terminal's The operating frequency band of this terminal Bluetooth function/Wireless LAN function is used by industrial, scientific, consumer are as follows. and medical equipment including microwave ovens, premises radio stations for identifying 2.4FH1/DS4/OF4 mobile units used in the manufacturing lines of plants (radio stations requiring no license)
- Page 29 ■ 2.4 GHz Device Cautions Notes about Wireless LAN The operating frequency band of the WLAN (WLAN) device is used by home electrical appliances such as microwave ovens, industrial, scientific, Wireless LAN (WLAN) uses radio waves to consumer and medical equipment including enable communications between compatible premises radio stations for identifying mobile devices, thus allowing connection to a local...
- Page 30 ■ 5 GHz Bandwidth Cautions ■ Do not cover the display with protective film. According to radio law, 5 GHz band width is Protective film materials might cause limited to indoor usage. misoperations. ■ Do not use the terminal in extremely hot or Handling the FeliCa Reader/ cold places.
- Page 31 Please do not use this terminal during the Handling the Samples time when technical standard compliance is (miniUIM In-out tool) being invalid, since you are in violation of the law of Electromagnetic Compatibility. ■ Do not place excessive force on the miniUIM ■...
-
Page 32: Waterproofness
You can use this terminal in the rain, in a Waterproofness kitchen, at a poolside etc. However, make sure to observe the following points to avoid water This terminal provides waterproofness of ingress. IPX5 * , IPX7 * with firmly closing miniUIM slot ★... - Page 33 Before Using Opening/Closing the docomo miniUIM slot cover ★ Make sure to close miniUIM slot cover before using. Even a tiny dust (tiny fiber, hair, sand etc.) gets stuck, water exposure may result. Opening ★ Do not pour or put in liquid etc. other than Insert a fingernail into the groove water at room temperature shown in the illustrations below.
- Page 34 Closing Note Insert the tab of cover into the ★ Make sure that the miniUIM is securely attached to this terminal when closing groove beside docomo miniUIM card the cover. If the miniUIM is attached slot (a), press the entire cover insufficiently, there will be gap between firmly (b) to reattach the cover this terminal and the cover when closing...
- Page 35 ★ Do not put directly on beach. Precautions - Sand etc. may get inside of earpiece (receiver), microphone, speaker or ■ This terminal earphone/microphone terminal. etc., and ★ Do not subject this terminal to severe the volume become low. shocks, or drop it. Deterioration of - Sand etc.
- Page 36 ■ miniUIM slot cover Draining water ★ The rubber seal of cover is important to maintain the waterproofness. Do not peel or When this terminal is wet, drain the water in damage the seal. Also, avoid the seal from the following steps. dust ★...
- Page 37 Use only after removing the moisture completely ★ Even after following above mentioned procedures, there might be moisture remaining in this terminal. Dry it naturally for a while before use. Gently press this terminal to a dry ★ In case water drops are remaining inside and clean cloth to wipe off water of this terminal after wiping off, the water remaining in the gap such as earpiece...
-
Page 38: Confirmation And Settings Before Using
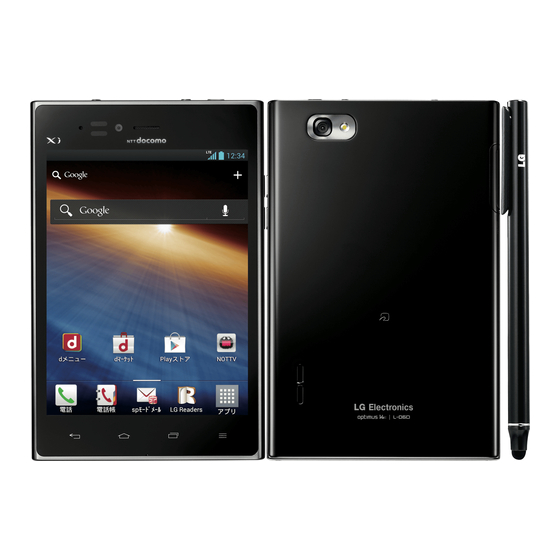
Confirmation and Settings before Using GPS antenna Part Names and Functions area * Bluetooth/Wi-Fi Infrared port antenna area * Microphone for Main camera speakerphone Flash Proximity sensor * Back cover * Illuminance sensor mark Display Speaker (touch screen) Xi/FOMA antenna Microphone area * (mouthpiece) - Page 39 There are four keys on the front of this Earphone v wx terminal. The roles of these keys are shown microphone below. terminal OneTouch Memo Back key button * Tap this key to return to the microUSB previous screen. It also closes connection a dialog box, an options menu, terminal...
-
Page 40: Miniuim
Inserting the miniUIM miniUIM How to insert/remove the miniUIM by using miniUIM is an IC card that stores informations provided miniUIM In-out tool is described below. of each customer. ★ You cannot use some of this terminal Open the miniUIM slot cover (P31) functions if the miniUIM is not inserted. - Page 41 Insert the miniUIM without removing Removing the miniUIM from the miniUIM In-out tool into the Open the miniUIM slot cover (P31) miniUIM slot Gently push the miniUIM with the tip ★ Make sure the position of the miniUIM slot cover is the same as the illustration of miniUIM In-out tool below.
-
Page 42: Imei Number
Hook the tongue of miniUIM In-out IMEI number tool to the IMEI plate, and pull out in IMEI number is required if you contact a repair the direction of the illustration below counter specified by DOCOMO for terminal damage. Confirm your IMEI as described below. IMEI plate Open the miniUIM slot cover (P31) ★... - Page 43 Confirm the number "IMEI: XXXXXX- When the IMEI plate touches the XX-XXXXXX-X" inside of this terminal, push the tab of IMEI plate gently all the way inside by the tip of miniUIM In-out tool IMEI number Note ★ Make sure not to get hurt your finger or fingernail by the tab of IMEI plate when pulling out or inserting the IMEI plate.
-
Page 44: Charging
★ If you start charging when the internal Charging battery is empty, you may not be able to power ON this terminal for a while. ★ Make sure to unplug the power plug of AC Internal battery Life adapter after finishing charging. ★... - Page 45 Usage Time (estimate) Charging with the AC Adapter How to use the optional AC adapter 03 * to A list of the charging time (estimate) of a fully charged battery is shown below. The usage charge this terminal is described below. time varies depending on the usage conditions * AC adapter 03 consists of AC adapter and and the internal battery condition.
- Page 46 Insert the microUSB connector of Charging with a PC microUSB cable into the microUSB Connect this terminal to a PC with the Micro connection terminal of this terminal USB Cable 01(optional) to charge. ★ Insert the MicroUSB cable horizontally Slide the cover of microUSB with the USB mark facing up.
-
Page 47: Turning On/Off The Power
Turning on Backlight Turning ON/OFF the Power To prevent unintended operation and to save Turning ON the Power power, the backlight turns off after a set period. If you then turn on the backlight to Press and hold the power key for release the screen lock, the screen that was over 1 second displayed before the backlight was turned off... -
Page 48: Basic Operations
Unlock the Screen Lock Basic Operations Swipe to unlock it outside the circle The display of this terminal has a touch screen that allows you to perform various operations by touching it. ★ In case "Lock screen" is set, unlock with the method you have set beforehand. - Page 49 Checking or Unchecking Options Note ★ Do not press Tap an item that has a checkbox with the stylus pen. ★ If the checkbox was unmarked, a check mark now appears in it. ★ If the checkbox was marked, the check Touch Screen Operations mark now disappears from it.
- Page 50 Zooming In or Out Using Motion Gesture Some applications allow you to zoom in Various functions can be operated simply by on small text that is difficult to read. After moving this terminal. zooming in, you can also zoom out to a full- ★...
- Page 51 Changing Screen Orientation Capturing Screen Shot This terminal screen automatically rotates to You can capture the display on screen and horizontal (landscape) or vertical (portrait) save it as an image. views, depending on the direction in which it is Hold down the power key and turned.
- Page 52 OneTouch Memo : Lock front key ( Without having to launch the Memo or u select where you want to Notebook applications, you can simply write a memo just by pressing the OneTouch Memo save the note button. You can also input texts or illustrations ★...
-
Page 53: Initial Settings
"Sign in"/"Get an account"/"Not now" Initial Settings on the "Make it Google" screen u set by following screen instructions First-time Settings until the "Thank You!" screen appears u "Done" When the power is first turned ON, you need to set the language and date for this terminal. Once "OK"... - Page 54 "Location providing ON"/"Location Configuring Wi-Fi Settings providing OFF"/"Unknown blocking" This terminal connects to the Internet via on the "Location providing setting" access points for Wi-Fi networks or public screen u "Next" wireless LAN services. To connect, you must configure the access "Send"/"Not send"...
- Page 55 Connecting to a Wi-Fi network Note From the Home screen, ★ Packet communication can be connected, even when Wi-Fi function is ON. However, "System settings" u "Wi-Fi" while Wi-Fi is available, Wi-Fi is prioritized. ★ The "Wi-Fi" screen appears. When the Wi-Fi network is disconnected, Turn "Wi-Fi"...
- Page 56 Notifying when Wi-Fi network with no Note security protection is detected ★ Open network and protected network are two types networks that are available. From the Home screen, The network type is indicated by an "System settings" u "Wi-Fi" icon to the network name. represents ★...
- Page 57 Adding a Wi-Fi network Changing the Wi-Fi network password From the Home screen, From the Home screen, "System settings" u "Wi-Fi" "System settings" u "Wi-Fi" ★ The "Wi-Fi" screen appears. ★ The "Wi-Fi" screen appears. Turn "Wi-Fi" ON Touch and hold down the Wi-Fi network name "ADD NETWORK"...
- Page 58 Ignoring unavailable radio waves Setting Wi-Fi connection while the screen is OFF This function enables re-connection with the available access point when the access point Disconnect Wi-Fi while the screen is OFF and is recognized as an unavailable one by Internet specify the timing of switching this terminal to due to no reply is received from your desired data communications.
- Page 59 Adding an online service account Manually synchronizing online service data From the Home screen, From the Home screen, "System settings" u "Accounts & "System settings" u "Accounts & sync" sync" ★ The "Accounts & sync" screen appears. ★ The "Accounts & sync" screen appears. "ADD ACCOUNT"...
-
Page 60: Screen Display/Icons
Deleting an online service account Screen Display/Icons From the Home screen, "System settings" u "Accounts & Status Bar sync" The status bar is displayed at the top of the ★ The "Accounts & sync" screen appears. screen. This terminal status and notifications Tap the account that you want to are displayed in the status bar. - Page 61 Main status icons Connected to Wi-Fi Communicating through Wi-Fi Signal strength Using Wi-Fi Direct Out of service area Battery level (White) Bluetooth Function ON The battery needs to be charged (Purple) Connected to Bluetooth device The battery is charging Roaming available Airplane mode activated Communicating through roaming...
- Page 62 Main notification icons Free space on memory of this terminal is getting low New Gmail Uploading data New SMS message Data Upload completed Problem with an SMS message Downloading data New Google Talk message Data download completed Making a call or during a call Problem with login or synchronization Call on hold Installing application is complete...
- Page 63 Notification Panel Note ★ is displayed when the internal storage Notification icons are displayed in the is out of space. Notification panel. You can open notifications, ★ When is displayed, you may not able such as messages, reminders, or event to install an application even after notifications, directly from the Notification panel.
- Page 64 Icon Switch GPS between on and off. Touch Drag to right and left to display the non and hold down to display the "Location displayed icon. services" screen. Switch Airplane mode between on and Adjust the brightness of screen in 3 off.
-
Page 65: Character Entry
Viewing notification details Character Entry Tap the notification message on the This terminal has an on-screen keyboard that Notification panel is displayed in the touch screen for character entry. ★ The notification details are displayed in The original predictive conversion dictionary the appropriate application. - Page 66 ■ On-screen 10-key keyboard Reverse order key/Back key This keyboard is the similar input method as Displays the previous character (reverse mobile phone (multi-tap). sequence). When "Back" is displayed, cancel the previous operation. a b c d Left cursor key/Arrow key The cursor moves to the left.
- Page 67 Right cursor key ■ On-screen 10-key keyboard (arrow key The highlight moves to the right. Touch and mode selected) hold down this to move it continuously. It can also widen the conversion range. Change Input Panel key/Conversion key Displays the "Change Input Panel" menu. Execute consecutive segment conversions.
- Page 68 Space key ■ mazec-T handwriting converting keyboard Insert space. Cut key Cut the selected characters. Paste key Paste the copied/cut text. Copy key Copy the selected text. Handwriting area When a character is written, "^" is displayed under the character. Tap "^" to display a list of recognition candidate and you can modify the character.
- Page 69 Flick input Note Flick input makes it easier to input when using ★ The key display varies depending on the 10-key keyboard. entry screen or character mode. Touch the key where the text to ★ For information on switching the type of on-screen keyboard, refer to "Switching input is allocated keyboard"...
- Page 70 Switching the character mode Using Emoji Quick Each time you tap on a character entry while on-screen keyboard is displayed screen, the character mode switches in to display "Emoji Quick" where you can check the order of "Hiragana-Kanji" u "Half-width the history of pictograms recently used.
- Page 71 Changing character entry settings Auto Space Mark this checkbox to Input automatically insert half- Touch and hold down on a character entry width space after selecting screen to display "LG Keyboard Menu". Tap "LG a character when inputting Keyboard Settings" to change the character alphabet.
- Page 72 10-KEY KEYBOARD CONVERSION Flick Input Mark this checkbox to change Input If you mark this checkbox, the input method on the Word the phrase confirmed by the onscreen 10-key keyboard Learning conversion process is learned by to flick input. Unmark this iWnn IME.
-
Page 73: Home Screen
Home Screen DICTIONARY Japanese Tap this to display the You can customize the Home screen by User "Japanese User Dictionary" adding or moving shortcuts or widgets, and by Dictionary screen. Tap to register, edit changing the wallpaper. or delete words, or to delete The Home screen has 7 screens to add the entire Japanese User shortcuts or widgets. - Page 74 Google search field Viewing the Extended Screens Search from contacts and applications in to the Right or Left this terminal, as well as inside websites. Widget Drag the Home screen to the right Tap to launch or operate the widgets or left (applications placed on the Home screen).
- Page 75 Changing to photo icon Widgets You can layout Widgets. You can use a photo from camera and gallery Wallpapers You can choose the wallpaper as icon on the Home screen. for the Home screen. Touch and hold down shortcut icon ★...
- Page 76 Creating Shortcuts Moving Shortcuts, etc. Touch and hold down the Home From the Home screen, touch and screen hold down the icon you want to move ★ Home screen customizing screen appears. Drag the icon and release your ★ You can also operate by tapping finger the Home screen.
-
Page 77: Viewing The Application Screen
"Apps" tab Viewing the Application Display the list of applications. Screen "Downloads" tab You can create shortcut from a list of pre- From the Home screen, "Apps" installed application that is able to uninstall ★ Groups of applications are displayed as and downloaded application. - Page 78 Application List icon Application Description Calendar View calendar and Some applications need to be applied manage schedule. separately (paid). (P211) icon Application Description Gallery A software to view still 7notes with You can input images (photos) and mazec-T characters by videos.
- Page 79 icon Application Description icon Application Description ドコモバック This is the application Maps View current location, アップ for using "Data Security search places or routes. (docomo Service" or " 電話帳バッ (P206) backup) ク アップ (Phonebook Messaging Available to send and backup)". You can receive SMS.
- Page 80 icon Application Description icon Application Description dmenu This is a shortcut iコンシェル This is the application application for "dmenu" (i-concier) for using i-concier. to easily find fun and This service is to convenient contents for support your life as smart phones including "butler"...
- Page 81 icon Application Description icon Application Description JOJO 電卓 This is a calculator Play Movies You can rent and (JOJO with JOJO image. four watch movies via Play Calculator) arithmetic operations is Movies, and also you available. (P212) can manage the shot videos personally.
- Page 82 icon Application Description icon Application Description Infrared This is the application SmartWorld Enables to enjoy for exchanging data various applications, such as phonebook via dramas and variety infrared. (P154) shows. (P213) Settings Set various settings. YouTube Play YouTube videos, (P127) and upload the videos you have shot to Phone...
- Page 83 icon Application Description icon Application Description しゃべってコ When you tell this HighlightCam This application is ンシェル terminal "what you used to create videos (Shabette- want to know" or "what edited automatically concier) you want to do", this after analyzing the application replies and videos or photos that you took.
- Page 84 icon Application Description icon Application Description eco モード This is the application iD 設定アプリ This is the application (eco mode) for setting "eco (iD appli) for setting e-money iD Mode" for reducing for using. battery consumption sp モード This allows you to send by adjusting various メール...
- Page 85 icon Application Description Note 地図アプリ Supplies Maps, Shop ★ This is a list of the applications that (Map Search, Navigation, have been installed in this terminal at application) Transfer and Visited the time of purchase. places functions to ★ If the software is updated, application support you when you content and icon positions may change.
-
Page 86: Docomo Palette Ui
docomo Palette UI Place a check mark in "Use by Switching Home default for this action" u "docomo Application Palette UI" The docomo Palette UI is a home application ★ If you do not place a check mark in "Use that allows you to quickly find and operate by default for this action", "Complete what you want such as access to the Web and... -
Page 87: Viewing The Home Screen
Viewing the Home Screen Home Screen Management You can customize the Home screen by What You can Add to the adding or moving shortcuts or widgets, and by Home Screen changing the wallpaper. The Home screen has up to 12 screens for You can customize the Home screen. - Page 88 Tap the item you want to add/set Drag it to displayed on the lower left and release your finger ★ A select list according to each item is displayed. ★ The icon is deleted from the Home screen. Moving Shortcuts, etc. ★...
- Page 89 Changing Folder Names Changing Wallpaper Touch and hold down the Home From the Home screen, tap a folder screen you want to change name ★ "select an action" menu is displayed. ★ The folder window opens. "Wallpaper" Touch and hold down the title bar "Gallery"/"Live wallpapers"/ Enter a new name of the folder and "Wallpaper gallery"/"Wallpapers"...
- Page 90 Adding Home Screens Deleting Home Screens You can add Home screens. Touch and hold down the Home Touch and hold down the Home screen screen ★ "select an action" menu is displayed. ★ "select an action" menu is displayed. "Home screens" "Home screens"...
-
Page 91: Viewing The Application Screen
Viewing the Application Manage Applications Screen Adding Shortcuts to the From the Home screen, Home Screen ★ Groups of applications are displayed as an icon list. From the Home screen, Touch and hold down the application Number of icon for which you want to create a applications shortcut u "Add"... -
Page 92: Group Management
Moving Applications Group Management From the Home screen, Manage groups on the application screen and sort icons. Touch and hold down the application you want to move Adding Groups Drag the application and release From the Home screen, your finger u "Add group"... - Page 93 Editing Group Names Adding Groups to the Home Screen From the Home screen, From the Home screen, Touch and hold down the group label u "Edit name" Touch and hold down the group label u "Add" Enter a new group name and tap ★...
-
Page 94: Searching Applications On This Terminal And Website
Searching Applications on Installing "Recommends" this Terminal and Website Application From the Home screen, From the Home screen, u "Search" "Recommends" ★ The Search widget starts. Enter a Tap an application to install keyword or use Voice Input to search. ★... -
Page 95: Home Application Information
Home Application Settings Home Application Information From the Home screen, "Settings" u "Home screen" You can view the operation guide for the docomo Palette UI. ★ "Home screen" screen appears. ★ The items available to edit or set differ From the Home screen, u "Help"... -
Page 96: Calling
Calling Making a Call You can use this terminal to make international calls and emergency calls, as well as standard calls. You can also enter a pause when using phone services, such as reserving tickets or checking your bank balance. From the Home screen, "Phone"... - Page 97 Entering a pause "Recent calls" tab (P98) "Favorites" tab (P111) From the Home screen, "Phone" u "Dial" tab : Dial screen appears. "Dial" Phone number entry box ★ The "Dial" tab appears. The input phone number is displayed. Enter the phone number and tap Dialpad u "Add 2-sec pause"...
- Page 98 Emergency call If you are not sending your caller ID by calling with "184" added or other means, your location information and phone number Emergency call Phone number are not notified. However, if the agency Police that received the emergency call considers your location information and phone number Fire department or necessary for important purposes, such as...
- Page 99 ★ For information about the possible countries ★ Depending on the location from which and carriers at overseas, refer to "Mobile you make an emergency call, connection Phone User's Guide [International Services]" may be made to the fire department or or the DOCOMO "International Services the police of another jurisdiction.
-
Page 100: Receiving A Call
Calls to fixed-line telephone Receiving a Call From the Home screen, "Phone" u This terminal plays a ringtone when there is "Dial" an incoming call. The ringtone does not sound when the sound profile is set as "Vibrate only" ★ The "Dial" tab appears. or "Silent". -
Page 101: Operations During A Call
Declining a call Operations during a Call When an incoming call arrives, During a call, you can adjust the volume, turn the speaker ON/OFF, mute the microphone, "Activate" u "Reject" and put the call on hold, depending on the ★ The incoming call is declined. usage conditions. - Page 102 Name and phone number Using Call Options End call During a call, you can put the caller onto Add call * speaker or temporarily mute the microphone. Hold call * Duration of call Turning the speaker ON/OFF Display dialpad During a call, "Speaker" Send DTMF.
-
Page 103: Call Log
Muting the microphone Call Log During a call, "Mute" This automatically records a history of your ★ The caller can no longer hear what you incoming and outgoing calls. You can also use are saying. the call log to call a phone number or add it to Phonebook. - Page 104 Call status icon Calling to Answer a Missed Call :Koe-no-Takuhaibin :Call icon without caller ID notification * When you have missed calls, a missed call :Call icon with caller ID notification * notification appears in the status bar. :International call history If you see in the status bar, drag Names and phone numbers...
- Page 105 Calling a Number from the Registering Phone Numbers from Call Log the Call Log to the Phonebook You can make calls to the phone numbers You can register unregistered items from the stored in the call log. call log to the Phonebook. From the Home screen, "Phone"...
-
Page 106: Call Settings/Other
Deleting the Call Log Call Settings/Other The call log is automatically added. However, Set each setting related to call. you can delete a call log or all call logs. From the Home screen, "Phone" u u "Call settings" Deleting a desired call log On "Recent calls"... - Page 107 Setting network services Second call Select connecting method settings when receiving another call Set the docomo network services. during a call. From the Home screen, "Phone" u Call You will receive a u "Call settings" u "Network service" notification notification by SMS in case you missed a call while this Koe-no- Use the service, confirm or...
- Page 108 Using advanced call settings Public Public mode (Power OFF) mode is an auto-reply service Set details for call. (power for the manner in a highly From the Home screen, "Phone" u OFF) public space. When Public settings mode (Power OFF) is set, u "Call settings"...
-
Page 109: Phonebook
"Contacts" tab Phonebook Display the list of contacts. List of contacts In Phonebook, you can enter information about your Tap the displayed icon after selecting an personal contacts, such as their phone numbers, image to call, create mail or use services on email addresses and web service accounts. - Page 110 "My profile" tab Editing Contacts Confirm your phone number, register, edit, delete etc. your profile information. Also, You can edit a contact that has already been you can display the name card data that registered. has been created by the Name card creator On "Contacts"...
- Page 111 Making Calls/Sending Viewing the Map of a Emails/Chatting via Contacts Contact's Address You can make a call directly from Contacts. If the address has been added to the Contacts, If you have added an email address or chat you can view its location in a map. account to the Contacts entry, you can also On "Contacts"...
- Page 112 Viewing the Route of a Sharing Contacts Contact's Address You can share the Contacts saved in this terminal with other applications. If the address has been added to the Contacts, On "Contacts" tab, tap a contact you can view the route to that location. On "Contacts"...
- Page 113 Adding a Contact to Favorites Changing Account of Phonebook to Display When you add a contact to Favorites, it appears on the "Favorites" tab of "Phone". The "Favorites" You can set display/non-display the phonebook tab allows you to quickly display a specific that is included in specific account or group of contact.
- Page 114 Editing / Deleting group information Deleting a contact from group On "Contacts" tab, "Groups" u touch On "Contacts" tab, "Groups" u and hold down a group select a group "Edit group" / "Delete group" u "OK" Touch and hold down a contact to delete from group Registering a contact to group Drag the contact to the registered...
- Page 115 Image and name Using My profile Profile information You can confirm your phone number, register, ★ Registered information such as phone edit, delete etc. your profile information. number, email address, address, birthday, Also, you can display the name card data nickname etc.
- Page 116 Note ★ How to start/stop using the SNS connecting functions: - Start: Tap "Set" of SNS and Blog on the My profile edit screen to start settings for SNS. - Stop: On "My profile" tab, select "General settings" u "Stop Linking to SNS"...
-
Page 117: Mail / Web Browser
Mail / Web Browser sp モードメール (sp-mode mail) You can send and receive text messages containing up to 70 double-byte characters (or This allows you to send and receive emails 160 single-byte alphanumeric characters) to using an i-mode mail address (@docomo.ne.jp). phone number as address. - Page 118 "Send" Receiving/Viewing an SMS ★ The message is sent. Message Note From the Home screen, "Apps" u ★ Tap u "Insert smiley" while entering a "Messaging" message to insert a smiley. ★ The "Messaging" screen appears. ★ To receive notification that the SMS Tap a thread message is received, tap "Settings"...
-
Page 119: Email
Email Note ★ You can change the setting later. For Using email is available by setting an account details, refer to "Changing the Setting of of mopera U or general provider. Email Account" (P120). Setting Mail Account ★ Email may not be available depending on the version of Microsoft Exchange Server Get the necessary information for settings and some functions. - Page 120 Opening Email Displaying a Received Email From the Home screen, "Apps" u Tap an email on the "Inbox" screen "Email" ★ The email is displayed. ★ The "Inbox" screen is displayed. Note ★ New message is automatically checked and received. ★...
- Page 121 Creating and Sending an Adding an Account Email You can add multiple accounts on "Email" application. on the "Inbox" screen From the "Inbox" screen, ★ The "Compose" screen is displayed. "Accounts" Input recipient's address in "To" box ★ The "Email" screen is displayed. Input subject in the "Subject"...
-
Page 122: Gmail
Changing the Setting of Email Account Gmail From the "Inbox" screen, Gmail is online email service of Google. You can send and receive emails by using Gmail in "Account settings" this terminal. ★ The account setting screen is displayed. Change settings as necessary Opening Gmail Account Set account display name. -
Page 123: Early Warning "Area Mail
Creating and Sending a Gmail Early Warning "Area Mail" From the "Inbox" screen, You can receive Earthquake Early Warnings etc. provided by the Japan Meteorological ★ The "Compose" screen appears. Agency. Enter email address in the "To" box ★ Area Mail is a free service that does not Enter a subject in the "Subject"... - Page 124 Receiving Early Warning Setting Early Warning "Area Mail" "Area Mail" From the Home screen, "Apps" u When an Area Mail is received, a dedicated "Area Mail" ringtone sounds and the text of the Area Mail ★ The "Early warning 'Area Mail' Inbox" is displayed in a pop-up.
-
Page 125: Browser
Search box Browser Tap to display the search box. Enter the text you want to search or URL to display a list of Browser allows you to view web pages in the web page candidates and search candidates same way that you can from a PC. that match the entered characters. - Page 126 Searching for a web page by voice Note entry ★ Displaying a web page that has been created for PCs, you can zoom in or Tap the search box out, or scroll the displayed page. For more details, refer to "Touch Screen ★...
- Page 127 Using Bookmark and History Changing Browser Settings Bookmarking a web page allows you to quickly From the Browser screen, access that web page. "Settings" You can also view previously visited web Change the settings if required pages by displaying your browsing history. Adding a bookmark General Configure the home page and...
-
Page 128: Google Talk
Starting Chat Google Talk Google Talk is a Google instant messaging Tap a friend's account on the "Talk" service. It allows you to chat (text chatting) screen with friends who have Google accounts. ★ The Chat screen appears. ★ To use Google Talk, you must set up your Tap the "Type message"... -
Page 129: System Settings
System Settings Settings Menu WIRELESS & NETWORKS u "System settings" on the Home Set whether to enable/disable networks and screen on this terminal to display the configure the network connection settings. "Settings" screen that allows you to configure Wi-Fi Turn the Wi-Fi function ON/OFF. various settings. - Page 130 More... Note Airplane Enable/disable this terminal's ★ If you tap "Search networks" while using mode emission of radio waves. data communication over a LTE network, the message, "Please disable data Wi-Fi Direct Connect to Wi-Fi Direct access and retry later." appears. compatible devices directly ★...
- Page 131 Wi-Fi Tethering Settings Setting Wi-Fi access point From the Home screen, Connect wireless LAN compatible device up to eight devices to the Internet simultaneously "System settings" u "More..." u using this terminal as a Wi-Fi hotspot. "Tethering" "Wi-Fi tethering" u "OK" Activating Wi-Fi tethering "Configure Wi-Fi hotspot"...
- Page 132 Connecting to VPN Connecting to a VPN (Virtual Private Network) In VPN list, tap a VPN name to connect VPN (Virtual Private Network) is a technique to access to the information protected in local Tap "Username" u Enter a user network from other networks.
- Page 133 Deleting a VPN Setting an additional access point 〈New APN〉 In VPN list, touch and hold down a From the Home screen, u "System VPN name to delete settings" u "More..." u "Mobile ★ A menu appears. networks" u "Access Point Names" "Delete network"...
- Page 134 U settings, refer to the mopera U website. mopera U mopera U is an NTT DOCOMO ISP. If you have subscribed to mopera U, you can use the Internet after making the simple settings. mopera U is a paid service that requires subscription.
-
Page 135: Device
DEVICE Quiet time Set the time to turn off all the sound except alarm and media. You can also set whether to Sound use vibration. TOUCH FEEDBACK & SYSTEM This allows you to configure various sound settings, such as the type and volume of Dial pad Set whether to play a sound ringtones, Silent mode and Vibrate. - Page 136 Display Home screen This allows you to configure display settings, This allows you to configure Home screen. such as screen brightness and animation. Theme, Animation, Screen swipe effect, Wallpaper, Scroll wallpaper, Scroll screens circularly, and Brightness Set the screen brightness. Home backup &...
- Page 137 Lock Screen Wallpaper Select from "Gallery", "Live wallpapers", "Wallpaper gallery" This allows you to configure whether to use or "Wallpapers". lock screen and the necessary settings. Scroll Set whether to scroll wallpaper ★ The display or setting items vary depending wallpaper when scrolling the Home screen.
- Page 138 Select Enter a numeric PIN to FEEDBACK screen unlock screen. Vibrate on Set whether to notice by lock Password Enter a password to touch vibration when unblocking with unlock screen. "Pattern" and "PIN". Wallpaper Set wallpaper when the Make pattern Set whether to display Pattern screen is locked.
- Page 139 Gesture Storage This allows you to enable or disable each Display free space in internal storage. motion gesture. INTERNAL STORAGE Move home You can change item locations Total space Display the total space in screen by tilting this terminal to the internal storage.
- Page 140 Power saver BATTERY INFORMATION Battery The battery level is displayed This allows you to set to reduce the function level icon in percent figure. Also display usage when the battery power gets low. whether it is charging or not. Turn Power Set the timing (percentage Battery Configure whether to display...
- Page 141 Apps Enable again the application When an application is disabled, the linked Configure the settings for applications. applications may not run properly. In such Downloaded List/delete installed applications. case, make it enable again to run properly. To make an application enable again, Running List/stop the active services.
-
Page 142: Personal
PERSONAL docomo Wi-Fi Configure to use docomo Wi- かんたん接続 Fi or Wi-Fi at home easy and docomo service, Accounts & sync, Location (docomo convenient. services, Security, Language & input, Backup Wi-Fi easy & reset etc. are configured. connection) Send Configure to send the docomo Service preinstalled preinstalled apps usage status. - Page 143 Accounts & sync Security This allows you to configure the settings of Configure the settings for password etc. accounts and their synchronization. SIM CARD LOCK Add or delete an account used in this Set up SIM Set whether to lock the SIM terminal, such as Google account.
- Page 144 Security Code and miniUIM Protection CREDENTIAL STORAGE For convenient and secure use of this terminal, Trusted Set whether to allow the you can set codes to lock this terminal and credentials application to access the network security codes to be used with secure certification and other network services.
- Page 145 PIN code ★ Your PIN unblocking key is written in the application form (copy for subscriber) The miniUIM can set security code named PIN given at the time of contract. If you code. This code is set to "0000" at the time of have subscribed at a place other than a subscription, but you can subsequently change docomo Shop, bring your identification...
- Page 146 PIN unblocking key (PUK) Changing PIN code The PIN unblocking key (PUK) is an 8-digit From the Home screen, number used to unblock the PIN code. You "System settings" u "Security" cannot change it by yourself. "Set up SIM card lock" ★...
- Page 147 Enter PIN code Language & input This the following operations if you are asked This allows you to configure this terminal's to enter the PIN code when this terminal is language and keyboard settings. You can also powered on. configure settings for voice input and output. Enter the PIN code of the miniUIM, Language Select the language used on...
- Page 148 Backup & reset mazec-T Tap and place a check mark Conversion to use. You can set various Operate initialization. settings. Shabette- Tap and place a check mark BACKUP & RESTORE Key- to use. You can set various Back up my Configure whether to backup Nyuryoku settings.
-
Page 149: System
Initializing Terminal SYSTEM From the Home screen, Date & time, Accessibility, Connectivity, "System settings" u "Backup & Developer options, About phone are configured. reset" Date & Time "Factory data reset" u "Reset This allows you to configure the date and time phone"... - Page 150 Accessibility Note ★ "Need a screen reader?" appears when Set the settings of accessibility application. purchased. SERVICES Connectivity Enable or disable the applications compatible with accessibilities. If you want Configure the settings for USB connection to set accessibility, download compatible mode and the On-Screen Phone function.
- Page 151 ● What is LG On-Screen Phone (OSP)? Activating USB Tethering LG On-Screen Phone is a function for Connect this terminal and a PC using USB displaying the screen of this terminal on a PC, connection cable to connect the PC to the and for using mouse and keyboard input on Internet using this terminal as a modem.
- Page 152 Developer options Kernel Display the version of the version kernel used in Android running Configure the settings for developing on your terminal. applications. Build Display the build number of number Android running on your terminal. About phone Software Display the software version of This allows you to display various informations version this terminal.
-
Page 153: File Management
File Management File Operation Note ★ Operating environment of a PC for file You can synchronize music with "Windows operation is as follows: Media Player" on your PC by connecting this - OS * :Windows 7/Windows Vista/ terminal with the PC via the optional MicroUSB Windows XP (Service Pack 3 or later) cable, and transfer the data between the PC - Windows Media Player:Windows... - Page 154 Folder Structure in this terminal Note ★ Shot photos and videos are saved in When you connect this terminal with PC, "DCIM" folder in this terminal. Music data the internal storage in this terminal are synchronized with Windows Media Player recognized with the name "Internal storage"...
-
Page 155: Folder And File Operations
Synchronizing Data with Folder and File Operations Windows Media Player Transferring Data with a PC This allows you to synchronize music and videos with Windows Media Player library Connect this terminal with a PC via on PC. In this way, music and videos with copyright protection can be synchronized as the MicroUSB cable (P160) well as the copyright information. -
Page 156: Infrared Communication
Disconnecting this terminal from a PC Infrared Communication Shut down safely or remove the This allows you to send and receive data with hardware on PC other terminals and mobile phones etc. that have infrared communication function. ★ For example, operate "Safety Remove ★... - Page 157 "Send all" u "Phonebook" u "Start" u Sending My profile via enter docomo apps password u "OK" Infrared Communication Enter authentication password u From the Home screen, "Phonebook" "OK" u make the recipient to waiting u "My profile" state u "OK" u "OK" u "Send via infrared"...
-
Page 158: Bluetooth Communication
liable to be adversely affected by a microwave Bluetooth Communication oven, so keep it 3 m or more away from the microwave oven while using it. Otherwise, normal Connect this terminal to Bluetooth devices connection cannot be performed when nearby wirelessly, and enable to exchange data. - Page 159 ■ Reception interference caused by wireless Turning ON Bluetooth Function to LAN devices Make this terminal Discoverable ★ As this terminal's Bluetooth device and wireless LAN devices use the From the Home screen, same frequency (2.4 GHz), reception "System settings" u "Bluetooth" interference may occur or the communications speed may lower if you Place a check mark on "Bluetooth"...
- Page 160 Pairing/Connecting with Other Note Bluetooth Device ★ Even for device requiring pass code (PIN) when pairing, once pairing is To transfer data by Bluetooth connection, performed, entering pass code (PIN) perform pairing (pairing setting) with the is not necessary to reconnect after device in advance and register it to this disconnected unless the paring is terminal.
- Page 161 ■ e.g. sending photo from Gallery When the other device requests for Paring/connecting this terminal with pairing other Bluetooth device (P158) When a screen asking for pairing for Bluetooth connection appears, tap "Paring" or enter pass From the Home screen, "Apps" u code (PIN) if required and tap "OK".
-
Page 162: External Device Connection
Receiving data via Bluetooth External Device Connection Set this terminal to discoverable Connecting this terminal with Tap "Accept" when Bluetooth a PC Authorization Request screen appears Connecting this terminal with a PC Make sure ★ is displayed in the status bar, and data that Windows Media Player 11 or later and reception starts. - Page 163 Connect the microUSB connector Connect the USB connector of of microUSB Cable to the microUSB microUSB cable to the USB port of connection terminal of this terminal ★ Insert the microUSB connector ★ This terminal is recognized automatically horizontally with the surface with the by PC.
- Page 164 "Charge only" / "Media sync (MTP)" / ★ The following operations are available from the "USB connection type" screen. "USB tethering" / "LG software" / "Camera (PTP)" Charge Select this to charge only. only (P44) Note Media Select this to synchronize ★...
-
Page 165: Application
Application dmenu dmarket This allows you to access easily to docomo's This allows you to get convenient and fun recommended sites or convenient applications. contents. From the Home screen, "dmenu" From the Home screen, "dmarket" The browser launches, and "dmenu" is ★... -
Page 166: Play Store
★ If the application needs to access data Play Store and functions on this terminal, the functions used by the application are Google Play enables you to access applications displayed. and games you like and download them to "Accept & download" (for free install into this terminal. - Page 167 ★ After purchasing application, you can application you installed. request a refund within a specified time. ★ NTT DOCOMO is not liable for any The application is deleted, and it will not be disadvantage brought to you or any third charged.
-
Page 168: Osaifu-Keitai
Uninstalling an Application Osaifu-Keitai From the Google Play screen, Osaifu-Keitai is equipped with an IC card, so holding this terminal over a reader at a shop, it u "My Apps" u Tap the application is possible to make payments or use coupons that you want to uninstall or participate in stamp rallies. - Page 169 Please use Osaifu-Keitai compatible services Using Osaifu-Keitai that provide backup services to save you important data. To use Osaifu-Keitai compatible services, from ★ We are not responsible for damages such as the Osaifu-Keitai compatible site, download the lost or changed data in the IC card, or other application for Osaifu-Keitai and then configure damages related to Osaifu-Keitai compatible settings.
- Page 170 Holding the Terminal over a Locking Osaifu-Keitai Reader Lock the Osaifu-Keitai service from being used. After locking, data cannot be acquired from the You can hold the up to a reader to enable reader. an electronic transaction. From the Home screen, "Apps" u "Osaifu-Keitai"...
- Page 171 ToruCa Note ★ The lock is not canceled even if the power ToruCa is an electronic card that can be loaded is turned off. to your mobile. It can be acquired from readers ★ The password used in Osaifu-Keitai and websites as the shop information or lock setting is required when unlocking coupons.
-
Page 172: Mobacas
mobacas ★ It is not possible to acquire ToruCa from readers while Osaifu-Keitai is locked. mobacas is a broadcast service for ★ You cannot obtain the same ToruCa smartphones. "Realtime" (realtime when you set "ON" for redundant check. broadcasting) allowing you to view programs Set "OFF"... - Page 173 ■ Broadcast signal areas Viewing via mobacas mobacas is a broadcasting service that operates on radio waves (airwaves) different Viewing programs/content from those for FOMA services and 1Seg. Therefore, you cannot receive mobacas From the Home screen, "Apps" u service in locations that airwaves cannot "NOTTV"...
- Page 174 Viewing the viewing screen Note ★ You cannot use mobacas when mock An example of viewing screen (vertical) locations setting is enabled. You can disable the setting by following procedure. From the Home screen, u "System Settings" u "Developer options" u confirm the content of the "Warning" screen and "OK"...
- Page 175 An example of viewing screen (horizontal) Searching for programs/ content Search for programs/content in a variety of ways from within the application. Searching from a program listing (Realtime) From the NOTTV home screen, tap " 番組表 (Program Listing)" ★ A Realtime program listing is displayed. Title ★...
- Page 176 Content Scheduling Note ★ Contents may not be received in From the NOTTV home screen, situations such as, when the device is tap " すべて (All)" turned off, when it has low battery, when it is out of the mobacas broadcasting Tap "...
- Page 177 mobacas settings 番組・コンテンツ Set time to obtain 情報取得 program/content listing From the NOTTV home screen, (Program & information via broadcast. Content Info u " 設定 (Settings)" Retrieve) Change the settings if required 自動コンテンツ Set data to be 表示・音声 (Display & Audio) 補完...
-
Page 178: 1Seg
1Seg ペアレンタル Set a restriction on コントロール programs/content geared 1Seg is a digital terrestrial TV broadcasting (Parental to certain ages. service for mobile devices that allows you to Control) receive data programs along with video and ブラウザ (Browser) audio. It is also possible to acquire detailed program information, participate in quiz shows, Cookie Set whether to accept... - Page 179 ● Broadcast wave ● About 1Seg antenna 1Seg is one of broadcast services, and ★ To view 1Seg, fully extend the 1Seg antenna. receives radio waves (broadcast waves) that If you give too much force when the antenna are different from FOMA/Xi service. Therefore, is not fully extended, it may be damaged.
- Page 180 1Seg Viewing Note ★ 1Seg audio cannot be output by From the Home screen, "Apps" u Bluetooth devices that are not "TV" compatible with SCMS-T. ★ The 1Seg viewing screen appears. ★ 1Seg is not compatible with the following ★ When launching for the first time, you functions due to copyright protection need to accept the licensing and create - Extracting video by connecting HDMI...
- Page 181 An example of viewing screen (horizontal) Viewing the TV operation screen Tap TV broadcasting area/Caption displaying area on 1Seg viewing screen, or drag or swipe the scroll bar to lower direction to display the TV operation screen temporarily. An example of operation screen (vertical) TV broadcast area Flick left or right to switch channels. Tap to display the TV operation screen.
- Page 182 "Programs" tab An example of operation screen (horizontal) Tap to display the program schedule of the channel you are watching. Tap on a program to display the details. Using Num. input Num. input is available for some of the data broadcast. Tap "Num." to display Num. pop-up menu.
- Page 183 Fixing the screen orientation Using the Program Schedule You can fix the screen orientation that is You can view a TV guide of both terrestrial TV currently displayed. programs and BS digital broadcast programs. From the 1Seg viewing screen, You can search programs using key words or u "Fix screen orientation"...
- Page 184 Viewing Reservations Note ★ The start of a program cannot be If you make a reservation for a program, an notified if this terminal power is OFF at alarm is notified before the program begins. the reservation time. From the 1Seg viewing screen, u "TV timer"...
- Page 185 Using TV Link 1Seg Settings Some data broadcasts may show link From the 1Seg viewing screen, information (TV link) to related sites. By u "Settings" registering a TV link, it is possible to connect ★ The "Settings" menu appears. to related sites later. Change the settings if required ★...
- Page 186 Creating a channel list OTHER Channel Switch channel lists, SETTINGS setting edit/add a channel From the 1Seg viewing screen, list, and initialize u "Settings" u "Channel setting" u channel lists. "Channel list edit" Alarm Set alarm or ★ The "Channel list edit" screen appears. setting vibrate for viewing "New"...
-
Page 187: Camera
Notes for capturing images Camera ★ The Camera employs high precision This terminal has a built-in camera that can technology, but some pixels or lines may shoot photos and videos. seem brighter or darker than others. Also, when you shoot photos in places with Before Shooting insufficient lighting, noises seen as white line increase. - Page 188 ★ Shooting a fast moving object may result in Shooting a Photo an image slightly distorted from the image displayed on the screen at the time of You can shoot photos with both horizontal and shooting, or the image may be blurred. vertical screen.
- Page 189 Scene mode Shooting a photo Set the scene mode (normal/panorama/ From the Home screen, "Apps" u continuous shooting). "Camera" Settings (while shooting photos) Set Flash/Focus/Image size/ Scene mode/ ★ The photo shooting screen is displayed. ISO/White balance/Color effect/Timer/ ★ Menus appear on the screen to allow you Geotagging/Shutter sound/ Auto review/ to configure various settings to suit the Reset/Help guide (horizontal screen).
- Page 190 Shooting Videos Note ★ Menus are displayed on the preview You can shoot videos by switching modes. screen after shooting a photo in case Videos are shot horizontally. the Auto review is not disabled. The Viewing shooting screen following operations are available. 〈Left part (Top part for vertical screen)〉...
- Page 191 Switching cameras Shooting videos Switch between the front and main cameras. on the photo shooting screen Zoom ★ The screen switches to the video Adjust zoom. shooting screen. Brightness ★ Menus appear on the screen to allow you Adjust brightness. to configure various settings to suit the Flash scene and conditions for shooting.
-
Page 192: Jojo Camera
JOJO Camera Note ★ Menus are displayed on the preview It is available to take still images (pictures), screen after shooting a video in case the or to edit the captured images with JOJO Auto review is not disabled. The following materials. - Page 193 Go to Title Viewing Still Image Editing Finish editing and go back to the Title. Screen Left arrow Return to the previous edit. Right arrow Back to the canceled edit. Trash box Delete the pasted items. Save/post Save or post the edited images. Item Display the illustrations available to paste on still images.
- Page 194 Viewing Item Selecting Screen Doctoring a captured photo From the Home screen, "Apps" u "JOJO カメラ (JOJO camera)" u " 写真 加工 (Doctor a photo)" Change to colorful materials or black-and- ★ "Select album" screen is displayed. white materials Tap an album Switch between colorful items and black- and-white items.
-
Page 195: Gallery
Gallery Note ★ The following operations are available on Gallery allows you to view photos via slide the photos/videos screen. show. Photo trimming is available. :Launch camera to shoot photos or videos. Viewing Photos and Videos :Send the selected photos via Picasa, Gmail, or Bluetooth, and the selected From the Home screen, "Apps"... - Page 196 Synchronizing Picasa Album Note ★ When "Synchronize Picasa Web Albums" You can synchronize Picasa album saved on has a check mark, Gallery of this terminal Google account with Gallery of this terminal. is synchronized on Picasa album of From the Home screen, "Apps" u Google account.
-
Page 197: Media Player
Copying Music Files and Media Player Videos to this terminal The "Media Player" application plays music files and video files saved in the internal storage. From Media Player, you can play music files Media Player supports the following file formats. and video files of your own after copying them ■... - Page 198 Quick play bar Opening the Media Player This is displayed when there is music playing/ paused. Tap this to display the Music screen. From the Home screen, "Apps" u Play/Pause icon "Media Player" This is displayed for the music playing/ paused. ★...
- Page 199 Playing Music Note ★ From the "Media Player" screen, tap In the song list, tap a song you want u "Sort" to switch the list display to play between ascending and descending ★ The Music screen appears and the song order.
- Page 200 Cover flow Note Tap to switch between display/not display ★ While a song is playing, is displayed in elapsed time, play progress bar, and song the status bar. length. ★ From the Music screen, tap Flick to right and left on horizontal view to "Settings"...
- Page 201 Elapsed time Playing Videos Play progress bar Drag to play a video from a desired point From the "Media Player" screen, tap within the video. Video information ★ A list of playable videos saved in this Displays titles/artist names. terminal appears. Video list button Tap a video you want to play Return to the video list.
- Page 202 Using Playlists Note ★ Tilt this terminal to the side while Playlists allow you to play your favorite songs displaying the Video screen to switch to in a desired order. horizontal screen display so that videos can be displayed on the whole screen. Set to view playlists Tap the screen to switch between button With the initial setting, the bottom bar of the...
- Page 203 Displaying playlists Creating a playlist From the "Media Player" screen, tap In the Playlists, tap "Create new" "Play list" Enter the playlist name u "OK" ★ Current playlists are displayed. "Add songs to playlist" ★ The following quick playlists are available. ★...
- Page 204 Editing playlists Deleting/sorting a playlist In the list of Playlists, tap the In the Playlists, tap "Edit" playlist that you want to edit ★ Tap "Delete all playlists" to delete all playlists. ★ The songs contained in the playlist are ★...
- Page 205 Setting the Media Player Arrange Drag and drop to change icons the icons displayed on the From the "Media Player" screen, bottom bar of the "Media Player" screen. u "Settings" ★ If you change the icons ★ The "Settings" menu appears. to "Play list", "Genre", or Change the settings if required "Age", you can display...
-
Page 206: Gps/Navigation
In Using GPS conditions caused by the locations of the satellites. ★ NTT DOCOMO is not liable for any damage ★ Wireless communication products (mobile caused by failure of GPS system etc. phone or data detector etc.) may intercept ★... - Page 207 - Inside of underground tunnels, underground Setting Location Services and underwater - Near high-voltage lines You need to activate GPS function beforehand - Inside of cars and trains to use the services that needs location - In poor weather such as heavy rainfall and information.
- Page 208 Using Map Note ★ It may take up to ten minutes to determine current locations when the Opening Map GPS functions are used for the first time. You can display present location, search ★ This terminal is equipped with a GPS another place, or search route by using Google receiver that uses satellite signals to map.
- Page 209 "GET DIRECTIONS" Search for Route on Map ★ A list of routes to your destination You can view a detailed route to your destination. appears. From the Home screen, "Apps" u Tap one of the routes "Maps" ★ The selected route appears. Using Latitude Enter your departure point in "Start "...
- Page 210 ★ "STARRED": Search a place with star on Using Navigation Google Map. Google Maps Navigation (beta) is route Note guidance software with voice guidance. ★ Any operation during driving should be From the Home screen, "Apps" u performed by a passenger. "Navigation"...
-
Page 211: Alarm / Clock
Alarm / Clock Puzzle Check to enable or uncheck lock to disable the puzzle setting. From the Home screen, "Apps" u Memo Add memos to alarms that "Alarm/Clock" are set. Set alarm details and tap "Save" Setting Alarm ★ The Alarm list screen is displayed. The Tap "Alarms"... - Page 212 Setting the Timer Setting the World Clock You can confirm the date and time for Tap "Timer" on the Alarm Clock registered cities in a list. screen Tap "World clock" on the Alarm ★ The Timer screen is displayed, and the Clock screen following settings are available.
-
Page 213: Calendar
Switching Calendar Display Calendar This terminal has a calendar for managing your Tap "Day"/ "Week"/ "Agenda" in the schedule. You can synchronize with scheduler change display box constructed by Microsoft Exchange Server or ★ Swipe left or right in Day or Week view to Google calendar if you have Google account. -
Page 214: Jojo Calculator
Changing/Deleting Schedule JOJO Calculator Tap "Schedule" of switching display From the Home screen, "Apps" u box on the Calendar screen "JOJO 電卓 (JOJO Calculator)" ★ Drag or swipe to right and left the Tap the schedule to change/delete part where key is displayed to switch (edit)/ (delete) "Function"... -
Page 215: Smartworld
SmartWorld SmartShare SmartShare allows you to share photo, video, From the Home screen, "Apps" u and music with other DLNA (Digital Living "SmartWorld" Network Alliance)devices that connect with ★ Open the "SmartWorld" screen. the same network. ★ Membership registration is required to ★... - Page 216 Item Description Always accept Set whether to accept request automatic sharing Discoverable Set to let other DLNA when you are requested corresponding devices to share from the other search this terminal. devices. Device name Set the name of this Receive files Set whether to accept terminal and the icon media to be uploaded...
-
Page 217: Polaris Office
Sharing Media with DLNA Polaris Office Corresponding Devices You can use Polaris Office to read or edit Word, Excel, PowerPoint files saved on this terminal From the Home screen, "Apps" u (as of August 2012). "SmartShare" From the Home screen, "Apps" u u select a library "Polaris Office"... -
Page 218: Electronic Dictionary
Electronic Dictionary Note ★ If you have not registered as a user, the user registration screen appears when Searching for a Word activating "Polaris Office". ★ Files with password may not be usable. From the Home screen, "Apps" u ★ Files created on PC may be displayed "Dictionary"... - Page 219 Switching Dictionaries Marking with a Highlighter Pen You can switch among "Obunsha ENG-JPN", From the screen where the word "Obunsha JPN-ENG" and "Obunsha JPN-JPN" meaning is displayed, to search for a word. "Highlight Pen" From the Dictionary screen, ★ The word being displayed is highlighted. "Change Dictionary"...
-
Page 220: Backing Up Data And Settings
Adding a Word to Wordbook/ Backing up Data and Viewing Wordbook Settings You can register a search result on Wordbook. From the screen where the word Backing up to SD card meaning is displayed, u "Save" You can backup phonebook, sp-mode mail, ★... - Page 221 Backing up Restoring "Backup" on the SD card backup Tap "Restore" on "SD card backup" screen screen Select the data on the "Backup From "Restore settings" screen, tap settings" screen u "Start backup" "Select" located on the right side of the data you want to restore "OK"...
- Page 222 Copying the contacts on Google Note account to docomo account ★ Do not remove the internal battery or internal storage during backing up or Tap "Phonebook account copy" on restoring. The data of this terminal may the "SD card backup" screen u get broken.
- Page 223 Backing up Phonebook Importing a phonebook from a miniUIM From the Home screen, "Phonebook" You can share the phonebook of this terminal by Bluetooth, Email, and Gmail. Also, you can u "Others" u "Import/Export" read the phonebook stored on the miniUIM in ★...
-
Page 224: 7Notes With Mazec-T
Backing up SMS Messages to 7notes with mazec-T a miniUIM You can input characters by handwriting. When you are inputting on the other application, You can copy or move up to 20 messages you can input with handwriting by changing (SMS) to the miniUIM. - Page 225 "New" Save input. Undo or redo the input. ★ Display the memo creating screen. Create new memo. ★ You can also display the memo creating Select types of character, set details on screen by tapping on the list of mazec. memo screen u "New".
- Page 226 Sharing/Backing up Memo Editing Memo Information You can send the created memo to mail, Edit title of memo or place a mark to narrow Twitter, Facebook, or backup by link with down the memo by types of mark. Also, you Evernote or Storage.
- Page 227 Narrowing down memo Setting memo On the List of memo screen, Set address, title etc. to send memo via mail, set account for Twitter, Facebook, and "Search" Evernote. Tap mark to display On the memo creating screen, ★ Tap "All" to display all memos by "Settings"...
-
Page 228: Notebook
Notebook You can save preferred image or memo. From the Home screen, "Apps" u "Notebook" ★ Select note and create on the "Notebook" screen. Note ★ Tap u "Select all" or place a check mark on memo to share u "Share" u select tool to share u select file format to attach memo to mail. -
Page 229: Using Overseas
Using Overseas Overview of International Note Roaming (WORLD WING) ★ For a country code, international call access code, and universal number The international roaming service (WORLD international prefix, available countries, WING) allows you to use your terminal in the and international network operators service areas of overseas operators affiliated refer to "Mobile Phone User's Guide with DOCOMO, with the same phone number... -
Page 230: Available Services
Available Services Confirming before Using Main communication Confirming before Departure service (GPRS) Before using this terminal overseas, check the Calls ○ ○ following in Japan. ○ ○ ● Contract Email * Check whether you have applied for WORLD ○ ○ WING. - Page 231 Pre-configuring Confirming Overseas When you arrive overseas, this terminal ● Network service configuration automatically connects to an available network If you have subscribed Network service, operator when it is powered on. voice mail service, call forwarding service, number notification service, etc. are available ●...
- Page 232 ● About date & time After Returning to Japan If the "Automatic date & time" and "Automatic time zone" checkbox in "Date & time" has When you return to Japan, this terminal been marked, the time and time zone of this automatically connects to the docomo network.
-
Page 233: How To Make And Receive Calls At Your
Making Domestic Calls How to Make and Receive Calls at your Destination You can make a call to the other party's landline phone or mobile phone in the same way as in Japan. Making Calls to Other From the Home screen, "Phone" u Countries (including Japan) Tap the "Dial"... - Page 234 Settings for making/receiving calls International Automatic conversion overseas dial assist function Configure the international roaming service to Country code make/receive calls while overseas. International prefix ★ This might not be available depending on the overseas operator. Network Configure settings service overseas for DOCOMO From the Home screen, "Phone"...
- Page 235 Receiving Calls Making a Call from Other Parties You can receive calls in the same way as in Japan. ● Having the other party call you overseas from Japan Note Have the other party call you by dialing your ★ When you receive a call while using the phone number in the same way as when you international roaming service, the call are in Japan.
-
Page 236: Settings For Network Connection At Overseas
Searching an Available Settings for Network Network and Setting Manually Connection at Overseas From the Home screen, When you use this terminal overseas, it is necessary to switch to the network of an operator that can be "System settings" u "More..." u connected to in the country you are staying. - Page 237 Automatically Selecting an Note Available Network ★ If you manually set the operator to connect, this terminal will not From the Home screen, automatically switch to another operator "System settings" u "More..." u that can be connected to when you move out of the service area.
-
Page 238: Appendix / Index
Appendix / Index Introduction of Options Samples and Related Devices ★ Samples are not included in the warranty of free repair. You can expand the range of this terminal's uses, ★ The specification and appearance are subject in both the personal and business realms, by to change without notice for upgrade. -
Page 239: Troubleshooting (Faqs)
Mini UIM In-out tool Troubleshooting (FAQs) ■ Main specifications Troubleshooting External Length : approx. 33.0 mm Width : approx. 12.5 mm dimensions ★ First, check whether a software update is Thickness : approx. 6.2 mm required. If required, update the software. Weight Approx. - Page 240 ■ Power supply ■ Charging Symptom Check item Symptom Check item Power does ★ Is the battery dead? → Cannot ★ Is the adapter plug and cigar not turn ON charge lighter plug properly inserted into power outlet or cigar Power turns ★...
- Page 241 ■ Terminal Operation Symptom Check item Symptom Check item Battery ★ Has this terminal been out of the usage network service area for a long Becomes ★ This terminal, internal battery, or time is time? As this terminal searches hot during adapter may become hot during short for radio waves in order to enable...
- Page 242 Symptom Check item Symptom Check item Keys do not ★ Has the screen been Terminal ★ An application that was respond locked? → P46 operation is installed to this terminal unstable after purchasing may Screen ★ It might occur if a large be causing a problem.
- Page 243 ■ Calls Symptom Check item Symptom Check item Terminal ★ Before starting Safe mode, operation is backup necessary data. Calls cannot ★ Is this terminal in Airplane unstable ★ Widgets that you have be made mode? → P128 created may be gone. by tapping ★...
- Page 244 ■ Screen Symptom Check item Symptom Check item Calls ★ Turn the power off and on, are not or remove and reinsert the The display ★ Has the screen backlight connected battery or miniUIM. is dim timeout been set? → P134 (The out ★...
- Page 245 ■ 1Seg Symptom Check item Symptom Check item Noise comes ★ Has the docomo miniUIM from speaker slot cover been closed 1Seg cannot ★ Are you at a location that while back cover has be viewed is outside of the digital been pressed? Since terrestrial broadcast this terminal has...
- Page 246 ■ Osaifu-Keitai ■ Overseas use Symptom Check item Symptom Check item Osaifu-Keitai ★ Is Osaifu-Keitai set to This ■ Antenna mark appears cannot be lock? → P168 terminal ★ Have you applied for WORLD used ★ Did you swipe the mark of is not WING? available...
- Page 247 Symptom Check item Symptom Check item This terminal is ★ Turn off this terminal and The other party's ★ Even if the other party not available to then turn it on again. number is not has made a call with use overseas displayed/A notification of the Caller ID...
- Page 248 ■ Bluetooth function Error Message Symptom Check item Error Message Description This terminal ★ Put the Bluetooth cannot find/ compatible device ★ Service ★ You cannot use this be connected (commercial) on standby disabled terminal because it is out to a Bluetooth and register it on this ★...
-
Page 249: Smartphone Anshin Remote Support
Smartphone Anshin Warranty and After- Remote Support Sales Service Support on operation settings of this terminal Warranty is available by sharing your terminal's screen with DOCOMO. (in Japanese only) ★ Be sure to receive a warranty at the time of ★... - Page 250 ■ Repair may not be possible in the following After-Sales Service cases ★ When, as the result of inspection, When this terminal breaks down corrosion is found due to exposure to water, condensation or sweat, or any Before requesting repairs, read of the internal boards are damaged or "Troubleshooting"...
- Page 251 ★ Magnetic components are used in the parts Precautions that are described below. Do not allow cash ★ Never modify this terminal or accessories. cards or other devices that are vulnerable - Doing so may result in fire, injuries or to magnetism to come into contact with the malfunctions.
-
Page 252: Updating Software
3G connection and Wi-Fi connection is available. damage, exposure to water, etc.). It is The NTT DOCOMO website provides recommended to back up necessary data. information about required software updates. Please note that some data, such as There are 3 methods of updating software : download data, cannot be backed up. - Page 253 ★ We recommend that you update software Before Updating Software without moving and when you have strong reception. Software update may be ★ Do not power off this terminal while updating interrupted in a place with bad reception. software. This may result in a failed update. ★...
- Page 254 Updating Software Automatically When software update is required is displayed on the status bar when update Automatically download the update file and file is automatically downloaded. install it at a preset time. ★ At a preset time while is displayed, install starts automatically and disappears.
- Page 255 Select an action. Updating Software now ★ "OK" : Return to the Home screen. Start Start software update now. the update at a preset time. To start software update, you can start from ★ "Change updating time" : Scheduled the notice screen or from menu. update →...
- Page 256 Start installing automatically after Scheduled Update of Software approximately 3 seconds of "Ready If you want to schedule the installation of the for update. Please keep application update file for a different time, you can set the clear." software update time in advance. ★...
-
Page 257: Updating Lg Software
Updating LG Software Note ★ All key operations are disabled during the It is used to up grade OS version and only update. The update cannot be stopped available when network is connected via Wi-Fi. either. LG Software update is a function that connects ★... - Page 258 Confirming Update Confirming update manually Check if there is a new software manually. Confirming update automatically From the Home screen, "System settings" u "About phone" Automatically check if there is a new software. "Check automatically" is preset. u "LG Software update" From the Home screen, "Check now for update"...
- Page 259 Downloading Software Note ★ If tap "Pause" in "Downloading" pop-up Downloading now menu, download pauses. Tap "Resume" to restart download. Tap "Download" in "Software update available" pop-up menu Downloading later ★ Confirm download progress on notification panel. Tap "Later" in "Software update ★...
- Page 260 Software Installation Installing later Tap "Install later" in "Install software Installing now update" pop-up menu Tap "Install now" in "Install software "1 hour later"/"4 hours later"/"8 update" pop-up menu hours later"/"24 hours later"/"Install ★ LG Software update starts. now" in "Set reminder" pop-up menu ★...
-
Page 261: Main Specifications
Main Specifications 1Seg watching time Approx. 230 minutes mobacas watching Approx. 130 minutes ■ Terminal time Model name L-06D JOJO Display Type TFT 16,777,216 colors Dimensions Approx. 140 mm × 90 Size Approx. 5.0 inches mm × 9.4 mm (H × W × D) (Max. - Page 262 We confirm that all Bluetooth compatible Windows Continuous playback devices including this terminal are compliant Media Audio time : Approx. 1,260 with Bluetooth standards designated by (WMA) file minutes (Supports background playback) Bluetooth SIG and are certified. However, Music playback procedures may vary and data transfer MP3 file Continuous playback...
- Page 263 ★ Continuous call time is an estimate of the ■ Internal battery battery life during a continuous call with Battery type Lithium-ion battery normal signal reception. ★ Continuous standby time is an estimate Nominal voltage 3.7 V of the battery life during a continuous Nominal capacity 2,000 mAh standby with normal signal reception.
-
Page 264: Specific Absorption Rate (Sar), Etc. Of Mobile Phones
Estimate number of photos and video Specific Absorption Rate (SAR), etc. of Mobile Phones ■ Number of shooting photos (estimate) Number of shooting photos Resolution Specific Absorption Rate saved in this terminal (SAR) of Mobile Phones 1280 × 960 Approx. 150,000 (1M) This model L-06D JOJO mobile phone complies with Japanese technical regulations and... - Page 265 This mobile phone can be used in positions (in Japanese only) other than against your ear. This mobile phone NTT DOCOMO, INC. Website : satisfies the international guidelines by using http://www.nttdocomo.co.jp/english/ a carrying case or a wearable accessory that...
-
Page 266: Radio Frequency (Rf) Signals
Technical regulations are defined by the Radio Frequency (RF) Ministerial Ordinance Related to Radio Signals Law (Article 14-2 of Radio Equipment Regulations). THIS MODEL PHONE MEETS THE U.S. Regarding the method of measuring SAR GOVERNMENT'S REQUIREMENTS FOR when using mobile phones in positions EXPOSURE TO RADIO WAVES. - Page 267 power level, the actual SAR level of the phone The FCC has granted an Equipment while operating can be well below the maximum Authorization for this model phone with all value. This is because the phone is designed to reported SAR levels evaluated as in compliance operate at multiple power levels so as to use with the FCC RF exposure guidelines.
-
Page 268: Recognition And Conformity
Recognition and Wi-Fi This device is capable of Caution operating in 802.11a/n mode. Conformity For 802.11a/n devices operating in the frequency range of 5.15 - Operate as follows to check the details 5.25 GHz, they are restricted for of specific Recognition on this terminal or indoor operations to reduce any conformity mark (including certification and potential harmful interference for... -
Page 269: Declaration Of Conformity
Declaration of The SAR limit for mobile phones used by the public is 2.0 watts/kilogram (W/ Conformity kg) averaged over ten grams of tissue, recommended by The Council of the The product "L-06D JOJO" is declared to European Union. The limit incorporates conform with the essential requirements of a substantial margin of safety to give European Union Directive 1999/5/EC Radio... -
Page 270: Important Safety Information
European Union Directives Important Safety Conformance Statement Information AIRCRAFT Hereby, LG Electronics Inc. Switch off your wireless device when boarding declares that this product is an aircraft or whenever you are instructed to do in compliance with : so by airline staff. If your device offers a 'flight ★... - Page 271 PETROL STATIONS Hearing Aids Obey all posted signs with respect to the use Some digital wireless phones may interfere of wireless devices or other radio equipment with some hearing aids. In the event of in locations with flammable material and such interference, you may want to consult chemicals.
-
Page 272: Export Administration Regulations
Export Administration Intellectual Property Regulations Right Japan Export Control Regulations ("Foreign Copyrights and Portrait Rights Exchange and Foreign Trade Law" and relevant laws and regulations) may apply to this product You have no right to copy, modify, or distribute and its accessories. U.S. Re-export Regulations contents such as text, images, music, map (Export Administration Regulations) applies to data, or software downloaded from websites... - Page 273 FeliCa owned by the Bluetooth SIG, INC. and any Networks, Inc. use of such marks by NTT DOCOMO, INC. is ★ "mobacas" is a registered trademark of Japan under license. Other trademarks and trade Mobilecasting, Inc.
- Page 274 ★ The abbreviations of operating systems Others (Japanese versions) below are used in this manual. ★ ©LUCKY LAND COMMUNICATIONS/ - Windows 7 stands for Microsoft ® Windows ® SHUEISHA 7 (Starter, Home Basic, Home Premium, ★ Rovi, G-GUIDE, G-GUIDE MOBILE and G-Guide Professional, Enterprise and Ultimate).
-
Page 275: Unlocking Sim
★ FeliCa is a contactless IC card technology Unlocking SIM developed by Sony Corporation. FeliCa is a registered trademark of Sony Corporation. Unlocking SIM is available on this terminal. ★ iWnn of OMRON SOFTWARE Co., Ltd. is Unlocking SIM enables a SIM card from other used for conversion methods for Japanese makers to be used. -
Page 276: Index
Index Setting the Timer …………………………… 210 Number Setting the World Clock …………………… 210 Application List …………………………………… 76 1Seg ………………………………………………… 176 Apps ……………………………………………… 2, 139 1Seg antenna …………………………… 37, 177 Area Mail …………………………………………… 121 Program Schedule …………………………… 181 Settings ………………………………………… 183 Using TV Link …………………………………... - Page 277 Bookmark ………………………………………… 125 Call Log …………………………………………… 101 Browser …………………………………………… 123 Call Settings ……………………………………… 104 Changing Settings …………………………… 125 Advanced call settings ……………………… 106 Opening ………………………………………… 123 Setting network services …………………… 105 Searching for a web page by voice Camera ……………………………………………… 185 entry ………………………………………………...
- Page 278 Searching ……………………………………… 108 Switching Home Application ………………… 84 Sharing …………………………………………… 110 Viewing the Application Screen …………… 89 Viewing the Map of Address ……………… 109 Viewing the Home Screen …………………… 85 Viewing the Route of Address …………… 110 docomo Service ………………………………… 140 Copyrights and Portrait Rights ………...
- Page 279 External Device Connection ………………… 160 Displaying contacts ………………………… 111 Connecting with a PC ……………………… 160 Editing / Deleting …………………………… 112 USB connection ……………………… 148, 162 Registering a contact ……………………… 112 FAQ ………………………………………………… 237 Handling and Care ………………………………… 22 File formats ……………………………………… 261 Home screen …………………………………...
- Page 280 Sending My profile …………………………… 155 Opening Map …………………………………… 206 Initializing ………………………………………… 147 Material List ………………………………………… 20 Initial Settings ……………………………………… 51 Media Player ……………………………………… 195 Intellectual Property Right …………………… 270 Available file formats ………………………… 195 Internal battery …………………………………… 261 Copying Music Files and Videos ………… 195 Life ……………………………………………………...
- Page 281 Closing ……………………………………………… 63 Turning the speaker ON/OFF ……………… 100 Customizing quick settings ………………… 63 Options …………………………………………… 236 Editing quick settings ………………………… 63 Osaifu-Keitai ……………………………………… 166 Opening …………………………………………… 61 Canceling the lock …………………………… 169 Viewing details …………………………………… 63 Holding the Terminal over a Reader …… 168 iC transfer service ……………………………...
- Page 282 PIN unblocking key (PUK) …………………… 144 Screen Display ……………………………………… 58 Places ……………………………………………… 208 Screen Shot ………………………………………… 49 Play Store ………………………………………… 164 Scrolling Screen …………………………………… 47 Install …………………………………………… 164 Security …………………………………………… 141 Purchasing an Application ………………… 165 Security code …………………………………… 142 Uninstalling ……………………………………...
- Page 283 Activating Data Roaming ………………… 235 After Returning to Japan …………………… 230 Automatically Selecting an Available ToruCa ……………………………………………… 169 Network ………………………………………… 235 Touch Screen ……………………………………… 46 Available Services …………………………… 228 Operations ………………………………………… 47 Confirming before Departure ……………… 228 Precautions on Use …………………………… 46 Confirming before Using ……………………...
- Page 284 Windows Media Player ………………………… 151 Wireless LAN (WLAN) ……………………… 27, 52 WIRELESS & NETWORKS …………………… 127 Wallpaper …………………………………………… 87 WORLD CALL ……………………………………… 97 Warranty …………………………………………… 247 Waterproofness …………………………………… 30 Before Using ……………………………………… 31 Charging …………………………………………… 35 Zooming In or Out ………………………………… 48 docomo miniUIM slot cover……………………...
- Page 285 You can view/change your contract details, subscribe to services, and request information materials on the Internet. dmenu on sp-mode u " お客様サポートへ (Customer support)" u " 各種お申込・お手続き (Applications and procedures)" (Toll free for packet communication fee) My docomo (http://www.mydocomo.com/) u 各種お申込・お手続き(Various Applications/Procedures) (in Japanese only) * You need your network password to access from sp-mode.
- Page 286 Be considerate of where you use your terminal and keep your voice and ringtone down ■ Keep your voice down when using this terminal in a quiet place such as a restaurant and hotel lobby. ■ If you are in an outdoor public place, make sure you do not disturb others. Respect privacy Please be considerate of the privacy of individuals around you when shooting and sending photos using camera-equipped mobile phones.
- Page 287 Loss or theft of terminal or payment Failures encountered overseas of cumulative cost overseas 〈Network Support and Operation Center〉 〈docomo Information Center〉 (available 24 hours a day) (available 24 hours a day) From DOCOMO mobile phones From DOCOMO mobile phones International call access International call access -81-3-6832-6600 - 81-3-6718-1414 code for the country code for the country (toll free) (toll free) you stay you stay * You are charged a call fee to Japan when * You are charged a call fee to Japan when calling from a land-line phone, etc. calling from a land-line phone, etc. * Dial +81-3-6832-6600 to make a call via * Dial +81-3-6718-1414 to make a call via L-06D JOJO (touch and hold down 0" to L-06D JOJO (touch and hold down 0" to input +"). input +"). From land-line phones From land-line phones 〈 Universal number〉 〈 Universal number〉 Universal number ...
- Page 288 General Inquiries Repairs 〈docomo Information Center〉 ■ From DOCOMO mobile phones (In Japanese only) 0120-005-250 (toll free) (No prefix) (toll free) * Service available in: English, Portuguese, Chinese, Spanish, Korean. * Unavailable from part of IP phones. * Unavailable from land-line phones, etc. Business hours: 9:00 a.m. to 8:00 p.m. ■From land-line phones (In Japanese only) ■From DOCOMO mobile phones (In Japanese only) 0120-800-000 (toll free) (No prefix) (toll free) * Unavailable from part of IP phones. * Unavailable from land-line phones, etc. Business hours: 24 hours (open all year round) ■From land-line phones (In Japanese only) 0120-800-000 (toll free) * Unavailable from part of IP phones. Business hours: 9:00 a.m. to 8:00 p.m. (open all year round) Please confirm the phone number before you dial. For Applications or Repairs and After-Sales Service, please contact the above-mentioned information center or the docomo Shop etc. near you searched on the NTT DOCOMO website. NTT DOCOMO website http://www.nttdocomo.co.jp/english/ Contact for Samples ■LG Mobile Customer Information Center (In Japanese only) 0120-011-167 Confirm the number so that you do not dial incorrectly. Regarding samples, confirm using this manual. 9:00 a.m. to 6:00 p.m. (Except Saturdays, Sundays, Holidays, Year End and New Year Holidays) Sales: NTT DOCOMO, INC.
Need help?
Do you have a question about the NEXT Series and is the answer not in the manual?
Questions and answers