Table of Contents
Advertisement
Advertisement
Table of Contents
Troubleshooting

Related Manuals for Beko DIS16R10


Summary of Contents for Beko DIS16R10
- Page 1 Instruction Manual Lakeview Lodge...
- Page 2 Dishwasher User’s Manual DIS16R10 DIS15020 DIS15Q20 15 9188 0100_AA_BEKO_45E10_EN/ 03-09-20.(16:26)
-
Page 3: Your Dishwasher
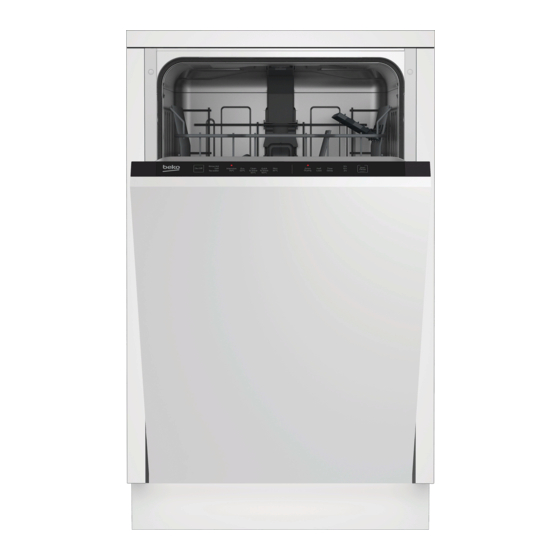
Your dishwasher Overview 1. Upper basket 2. Upper impeller 3. Lower impeller 4. Cutlery basket (depends on model) 5. Door 6. Rating Label 7. Control panel 8. Detergent dispenser 9. Lower basket 10. Filters 11. Salt reservoir lid 12. Upper basket rail 13. -
Page 4: Adding Salt
Adding salt Water softening system needs to be regenerated in order for the product to operate with the same performance continuously. Dishwasher salt is used for this purpose. Use only special softening salts produced particularly for the dishwashers in your machine. You can put about 2 kg of softening It is recommended to use granule- or salt into the salt reservoir. - Page 5 the manufacturer of the detergent for further questions. Do not put solvents into the detergent dispenser. There is the risk of explosion! Put the detergent into the detergent dispenser just before operating the machine as illustrated below. 1. Push the latch to right to open the 3.
-
Page 6: Rinse Aid
Tablet detergents 3. After the empty washing cycle, review the user manual and readjust the water In addition to the conventional tablet hardness level so as to suit the water detergents, there are also commercially supply. available detergent tablets that show water 4. -
Page 7: Items Not Suitable For Washing In The Dishwasher
3. Slightly press the point (B) of the Decorative prints of chinaware as well reservoir lid to close it. as aluminium and silver items may get discoloured or tarnished after washing in the dishwasher just as it happens in handwashing as well. Some delicate glass types and crystals may become dull in time. - Page 8 Suggestions for loading the dishwasher Improper Loading Of Dishware Lower basket Upper basket 21/EN...
-
Page 9: Cutlery Basket
Cutlery basket Upper basket rack (depends on model) (depends on model) Cutlery basket is designed to wash your dishes such as knife, fork, spoon, etc. in an efficient manner. Since the cutlery basket can be moved (A, B), you can create more space while placing your dishes in the lower basket and free up space for your dishes of different sizes. -
Page 10: Collapsible Lower Basket Tines
Collapsible lower basket tines Collapsible lower basket tines (depends on model) (depends on model) Foldable tines (A) located at the lower Foldable tines (A) located at the lower basket of the machine are designed for basket of the machine are designed for an easier placement of large pieces such an easier placement of large pieces such as pans, bowls, etc. -
Page 11: Adjusting The Height Of The Upper Basket
Adjusting the height of the upper To lower the basket, while it is in the uppermost position; basket 1. Hold the upper basket wires with both (depends on model) hands, slightly lift up the basket and The upper basket height adjustment simultaneously push and release the mechanism has been designed for you to latches shown in the figure (B). -
Page 12: Collapsible Upper Basket Wires
Collapsible upper basket wires Upper basket multipurpose service rack (depends on model) You can use collapsible wires when you (depends on model) need a larger space for your dishes in the This accessory located at the upper basket upper basket of your machine. of your machine allows you to easily wash To bring the collapsible wires into horizontal pieces such as extra long ladles and bread... -
Page 13: Operating The Product
Operating the product Auxiliary functions Read “Safety Instructions” section first! Washing programmes of your dishwasher Read “Quick Quide” before this are designed to obtain the best cleaning section. effect, considering the type of the soiling, soiling degree and properties of the dishes to be washed. - Page 14 Super Rinse Function AquaIntense Function (Depends on model) (depends on model) Depending on the type of the detergent AquaIntense impeller used, if a detergent dissolving issue is located under the encountered it will remove the resulting lower impeller helps stains from the dishes and enables the washing your heavily optimum rinsing performance.
- Page 15 SelfDry Floor illumination (Depends on the Model) Warning to show that machine is in Thanks to the “SelfDry” feature on your washing phase machine, the drying effectiveness of your (depends on the model) machine is improved and power is saved. Your machine reflects a light to the floor There are two options, namely “OFF”...
-
Page 16: Starting The Programme
3. Set the desired time by pressing the Pay attention not to open the door of Time Delay key. Each press on the key the machine when it is running. There will increase up to 9 hours with 3-hour may be a rush of vapour when you increments. -
Page 17: Rinse Aid Indicator
1. Open the door of the machine. Rinse Aid Indicator ( ) 2. Press the On/Off key to switch off your Please check the rinse aid indicator on the machine. display to see whether there is adequate 3. Close the tap. amount of rinse aid in the dishwasher or not. - Page 18 InnerClean (depends on model) This programme is recommended to be operated on each 1-2 months for machine cleaning and necessary hygiene. The programme should be operated while the machine is empty. In order to achieve an efficient result, it is recommended to use together with special machine cleaning agents.
-
Page 19: Troubleshooting
Troubleshooting Machine does not start. • Power cable is unplugged. >>> Check if the power cable is plugged in. • Fuse is blown. >>> Check the fuses in your house. • Water is cut. >>> Make sure that the water inlet tap is open. •... - Page 20 • Rinse aid is not sufficient. >>> Check the rinse aid indicator and add rinse aid if necessary. Increase the rinse aid setting if there is enough amount of rinse aid in the machine. • Machine is unloaded right after the programme is over. >>> Do not unload your machine right after washing process is completed.
- Page 21 There is a different odour in the machine A new machine has a peculiar odour. It will fade out after a couple of washes. • Filters are clogged. >>> Check if the filter system is clean. Clean the filter system regularly as illustrated in section “Cleaning and Care”.
- Page 22 • Opening of the detergent dispenser lid is prevented during washing. >>> Place the dishes in a way that will not prevent the detergent dispenser lid from opening and the water going into the machine from impellers. • Detergent is stored under unsuitable conditions. >>> If you are using powder detergent, do not store the detergent package in humid places.
- Page 23 Foam forms in the machine. • Dishes are washed with hand-wash detergent by hand but not rinsed before placing them into the machine. >>> Hand-wash detergents do not contain antifoam. There is no need to hand-wash the dishes before placing them into the machine. Removing the coarse soil on the dishes under tap water, with a tissue paper or fork will be sufficient.
-
Page 24: Microwave Oven
Microwave Oven MGB 25332 BG MGB 25333 BG User Manual... -
Page 25: Controls And Parts
Your microwave oven 2.1 Overview 2.1.1. Controls and parts Power con- 230 V~50 Hz, 1450 W (Microwave) sumption 1. Control panel 1000 W (Grill) 2. Turntable shaft Output 900 W 3. Turntable support 2450 MHz Operating 4. Glass tray frequency 5. -
Page 26: Installing The Turntable
Your microwave oven 2.1.3 Installing the turntable Hub (underside) Göbek (alt kısım) Glass tray Cam tabla Turntable shaft Döner tabla mili Turntable support Döner tabla desteği • Never place the glass tray upside down. The glass tray should never be restricted. •... -
Page 27: Operation
Operation 4.1 Control panel 4.2 Operating instructions 4.2.1 Setting the time When the microwave oven is energized, "0:00” will be displayed in LED screen and buzzer will Microwave ring once. 1. Press (Kitchen Timer/Clock) twice and the Grill/Combination figures for hours will start flashing. 2. - Page 28 Operation 4.2.3 Microwave keypad 3. Press (Start/+30 Sec./Confirm) to confirm instructions and turn to set the cooking time to a value between 0:05 and 95:00. Order Screen Microwave Power 4. Press (Start/+30 Sec./Confirm) again to P100 100% start cooking. Example: If you want to use 80% microwave power to cook for 20 minutes, you can operate the oven with the following steps.
-
Page 29: Quick Start
Operation 4. Turn to adjust the cooking time until the 3. In standby mode, turn counterclockwise to oven displays "10:00". set the cooking time in order to start cooking with 100% microwave power and press 5. Press (Start/+30 Sec./Confirm) to start (Start/+30Sec./Confirm) to start cooking. - Page 30 Operation 1. Press (Kitchen Timer/Clock) for once and Example: If you want to use 00:00 will be displayed in LED screen. “Auto Menu" to cook 350 g fish: 2. Turn to enter the correct time. 1. Turn clockwise until "A-6" is displayed in the 3.
- Page 31 Operation 4.8.1 Auto cooking menu Menu Weight Screen 200 g Pizza 400 g 250 g Meat 350 g 450 g 200 g Vegetable 300 g 400 g 50 g (with 450 ml cold water) Pasta 100 g (with 800 ml cold water) 200 g Potato 400 g...
-
Page 32: Query Function
Operation 4.9 Multi-step cooking 4.10 Query function At most 2 steps can be set for cooking. In multi- 1. In microwave, grill and combination modes, step cooking, if one step is defrosting, then de- press (Microwave) or (Grill/ frosting must be placed in the first step. Combination) and the current power level will If you want to thaw food for 5 min- be displayed for 3 seconds. -
Page 33: Cleaning And Maintenance
Cleaning and maintenance 5.1 Cleaning 9. The roller ring and oven floor should be cleaned regularly to avoid excessive noise. It would be sufficient to wipe the lower surface WARNING: Never use gaso- of the oven with a mild detergent. Roller ring line, solvent, abrasive cleaning may be washed in warm soapy water or in a agents, metal objects or hard... -
Page 34: Troubleshooting
Troubleshooting Normal Microwave oven interferes with TV reception Radio and TV reception may be interfered when microwave oven is operating. It is similar to the interference caused by small electrical appliances, like mixer, vacuum cleaner, and electric fan. It is normal. -
Page 35: Guarantee And Service
Should you experience any difficulty in obtaining service please call the Beko Customer Help-Line on 0845 600 4911/0345 600 4911 Beko Plc, Beko House, 1 Greenhill Crescent, Watford Herts, WD18 8QU, Tel: 0845 600 4911 26 / EN Microwave Oven / User Manual... -
Page 36: Washing Machine
Washing Machine User Manual WIY84540F Document Number= 2820526040_EN/ 27-10-17.(17:37) -
Page 37: Sorting The Laundry
4.5 Preparation 4.5.1 Sorting the laundry • Sort laundry according to type of fabric, colour, and degree of soiling and allowable water temperature. • Always obey the instructions given on the garment tags. LAUNDRY WASH SYMBOLS Machine Wash Symbols WASH Maximum Water Temperatures Symbol(s) Drying Suitable for No Iron Do not dry- Sensitive / Do not dry Do not dry Symbols dryer clean Delicate dry with dryer DRYING Drying Settings Iron - Iron at high Iron at medium Iron at low temperature... -
Page 38: Preparing Laundry For Washing
4.5.2 Preparing laundry for washing • Laundry items with metal attachments such as, underwired bras, belt buckles or metal buttons will damage the machine. Remove the metal pieces or wash the clothes by putting them in a laundry bag or pillow case. • Take out all substances in the pockets such as coins, pens and paper clips, and turn pockets inside out and brush. Such objects may damage the product or cause noise problem. - Page 39 4.5.4 Loading the laundry 1. Open the loading door. 2. Place laundry items loosely into the machine. 3. Push the loading door to close until you hear a locking sound. Ensure that no items are caught in the door. 4.5.5 Correct load capacity The maximum load capacity depends on the type of laundry, the degree of soiling and the washing programme desired.
-
Page 40: Liquid Softener Compartment
4) Right compartment with “ ” symbol (liquid softener compartment) (II) Main Wash Compartment Before starting the washing Programme, put powder detergent into the left compartment with number “II”. Use the detergent manufacturer’s measuring cup and follow the instructions on the package. Powder bleach/stain remover must also be put into this compartment. Put the liquid detergent into the main wash compartment with number “II ” before starting the washing Programme. Liquid stain remover must be put into this compartment. Put the suggested amount of liquid detergent into the left compartment with “II ” symbol and dilute it to the maximum filling level line (max. - Page 41 (I) Pre-Wash Compartment Put the powder pre-wash detergent or powder stain remover into the middle compartment with number “I”. You can also put liquid bleach into this compartment while the machine takes in water during pre-wash or first rinsing step. Adding the liquid bleach while the machine takes in water allows it to be diluted before it is poured onto the laundry.
- Page 42 4.5.7 Tips for efficient washing Clothes Light colours and Delicates/ Colours Dark colours whites Woolens/Silks (Recommended (Recommended (Recommended (Recommended temperature range temperature range temperature range temperature range based on soiling level: based on soiling level: based on soiling based on soiling 40-90ºC) cold-40ºC) level: cold-40ºC)
- Page 43 4.6 Operating the product 4.6.1 Control panel WIY84540F Anti Allergy Cottons Ready Shirts 1400 Cottons Eco Wash 1200 StainExpert Synthetics Rinse Daily Quick Spin Dark Care Super Short Cancel Sports Mixed Fabrics Extra Start/ Temp. Spin Prewash Fast+ Pause Rinse Down Wear Hand Wash Drum...
-
Page 44: Programme And Consumption Table
4.6.4 Programme and consumption table Auxiliary functions Selectable temperature Programme range °C 1400 • • • Cold-90 Cottons 1400 • • • Cold-90 1400 • • • Cold-90 60** 1400 Cold-60 Cottons Eco 60** 1400 Cold-60 40** 1400 Cold-60 1200 • • • Cold-60 Synthetics 1200 •... -
Page 45: Main Programmes
4.6.5 Main programmes Depending on the type of fabric, use the following main programmes. • Cottons You can wash your durable cotton laundry (sheets, bedlinen, towels, bathrobes, underwear etc.) in this programme. When the quick wash function button is pressed, programme duration becomes notably shorter but effective washing performance is ensured with intense washing movements. - Page 46 Allergy UK is the brand of the British Allergy Association. Seal of Approval is created to guide people that require recommendation about a product that the related product restricts / reduces / eliminates the allergens or reduces the allergen content significantly in the ambient where allergy patients exist.
-
Page 47: Special Programmes
• StainExpert The machine has a special stain programme which enables the removal of different types of stains in the most effective way. Use this programme only for durable colourfast cotton laundry. Do not wash delicate and pigmenting clothes and laundry in this programme. Before washing, garment tags should be checked (recommended for cotton shirts, trousers, shorts, t-shirts, baby clothes, pyjamas, aprons, table clothes, beddings, duvet cover, bed sheet, pillowcase, bath-beach towel, towel, socks, cotton underwear that... -
Page 48: Temperature Selection
If you wish to drain only the water without spinning your laundry, select the Pump+Spin programme and then select the No Spin function with the help of Spin Speed Adjustment button. Press Start / Pause button. Use a lower spin speed for delicate laundries. 4.6.8 Temperature selection Whenever a new programme is selected, the recommended temperature value for the selected programme appears on the temperature indicator. -
Page 49: Auxiliary Function Selection
4.6.10 Auxiliary function selection Select the desired auxiliary functions before starting the programme. Furthermore, you may also select or cancel auxiliary functions that are suitable to the running programme without pressing the Start / Pause button when the machine is operating. For this, the machine must be in a step before the auxiliary function you are going to select or cancel. -
Page 50: To Activate The Child Lock
4.6.10.2 Functions/Programmes Selected by Pressing the Function Buttons for 3 Seconds • Drum Clean 3’’ Press and hold the auxiliary function button 1 for 3 seconds to select the programme. Use regularly (once in every 1-2 months) to clean the drum and provide the required hygiene. -
Page 51: Delayed Start
4.6.11 Delayed Start With the Delayed Start function the startup of the programme may be delayed up to 19 hours. Delayed start time can be increased by increments of 1 hour. Do not use liquid detergents when you set Delayed Start! There is the risk of staining of the clothes. -
Page 52: Progress Of Programme
4.6.13 Progress of programme Progress of a running programme can be followed from the Programme Follow-up indicator. At the beginning of every programme step, the relevant indicator light will turn on and light of the completed step will turn off. You can change the auxiliary functions, speed and temperature settings without stopping the programme flow while the programme is running. - Page 53 4.6.16 Cancelling the programme To cancel the programme, turn the Programme Selection knob to select another programme. Previous programme will be cancelled. End / Cancel light will flash continuously to notify that the programme has been canceled. Your machine will end the programme when you turn the Programme Selection knob; however, it does not drain the water inside.
-
Page 54: Maintenance And Cleaning
4.7 Maintenance and cleaning Service life of the product extends and frequently faced problems decrease if cleaned at regular intervals. 4.7.1 Cleaning the detergent drawer Remove any powder residue buildup in the drawer. To do this; a. You can remove the detergent drawer by pulling it towards yourself strongly. If more than a normal amount of softener and liquid detergent mixture starts to remain in the softener compartment, the siphon must be cleaned. -
Page 55: Cleaning The Body And Control Panel
After every washing make sure that no foreign substance is left in the drum. If the holes on the bellow shown in the figure is blocked, open the holes using a toothpick. Foreign metal substances will cause rust stains in the drum. Clean the stains on the drum surface by using cleaning agents for stainless steel. - Page 56 Troubleshooting Problem Reason Solution Programme does not start • *Press the Start / Pause / Cancel Start / Pause / Cancel button was not pressed. button. after closing the door. • Reduce the amount of laundry and It may be difficult to close the loading door in case make sure that the loading door is of excessive loading.
- Page 57 Problem Reason Solution Loading door cannot be Door lock is activated because of the water level • Drain the water by running the Pump or Spin programme. in the machine. opened. • Wait until the programme completes. Machine is heating up the water or it is at the spinning cycle.
- Page 58 Problem Reason Solution Washing performance is Insufficient amount of detergent has been used • Use the recommended amount of detergent appropriate for water over a long period of time. poor: Laundry turns grey. hardness and the laundry. (**) • Select the proper temperature for the Washing was made at low temperatures for a laundry to be washed.
- Page 59 Problem Reason Solution It does not rinse well. The amount, brand and storage conditions of the • Use a detergent appropriate for the washing machine and your detergent used are inappropriate. laundry. Keep detergents closed in an environment free of humidity and do not expose them to excessive temperatures.
- Page 60 Problem Reason Solution Detergent residue in the Detergent is put in wet drawer. • Dry the detergent drawer before putting in detergent. detergent drawer. (**) • Keep detergents closed in an Detergent has gotten damp. environment free of humidity and do not expose them to excessive temperatures.
Need help?
Do you have a question about the DIS16R10 and is the answer not in the manual?
Questions and answers