
Summary of Contents for KegLand KL16728
- Page 1 Splash Guard Semi-Automatic Cannular Assembly Manual Splash Guard Semi-Auto Cannular Assembly KL16728 KegLand Distribution PTY LTD www.KegLand.com.au www.KegLand.com.au Last Updated 5/08/2020 3:12 PM Page 1 of 7...
- Page 2 9. Centre face plate 10. 4mm socket Allen screws and 10mm hex nuts 11. 3mm socket Allen screws and 7mm hex nuts 12. Washers and bump stops 13. Mounting screws www.KegLand.com.au Last Updated 5/08/2020 3:12 PM Page 2 of 7...
- Page 3 Step 2. Place the black bump stops on the back of the face plate on the two upper most holes and secure these using the two longer 3mm socket screws and 7mm nuts as shown below: Step 2 Step 1 www.KegLand.com.au Last Updated 5/08/2020 3:12 PM Page 3 of 7...
- Page 4 Cannular switches. Tighten using a 7mm spanner and 3mm Allen key. Step 4. Attach the left plate to the left bracket using the remaining 3mm socket screws and corresponding 7mm nuts. Tighten using a 7mm spanner and 3mm Allen key. www.KegLand.com.au Last Updated 5/08/2020 3:12 PM Page 4 of 7...
- Page 5 Step 5. Attach swivel brackets to the inside of the left and right hand plates using the 4mm socket Allen screws and 10mm nuts. Do not place a screw in the middle hole yet. Step 6. Place a washer on the unoccupied holes of each swivel bracket www.KegLand.com.au Last Updated 5/08/2020 3:12 PM Page 5 of 7...
- Page 6 Step 7. Attach a mounting bracket to the left and right swivel brackets, using the last two 3mm socket screws and 7mm nuts to hold them in place. Make sure to not over tighten this as they need to swivel freely without too much resistance. www.KegLand.com.au Last Updated 5/08/2020 3:12 PM Page 6 of 7...
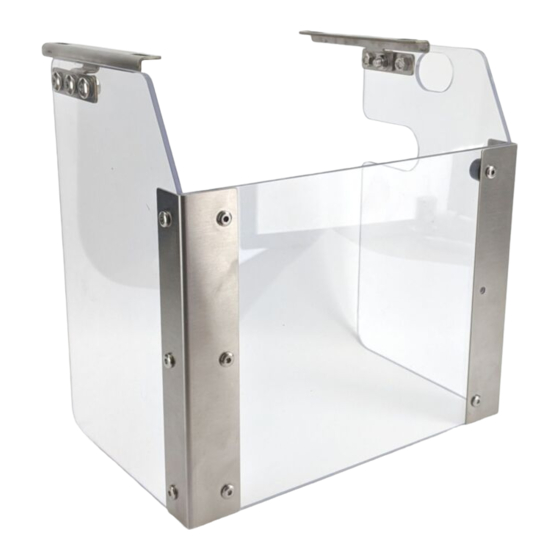
- Page 7 Splash Guard Semi-Automatic Cannular Assembly Manual Step 8. Attach the assembled splash guard to the Semi-automatic Cannular using the mounting screws. www.KegLand.com.au Last Updated 5/08/2020 3:12 PM Page 7 of 7...
Need help?
Do you have a question about the KL16728 and is the answer not in the manual?
Questions and answers