Table of Contents
Advertisement
Advertisement
Table of Contents

Related Manuals for CRG CENTURION Series

Summary of Contents for CRG CENTURION Series
- Page 1 www.crgrentalkar t.com...
-
Page 2: Table Of Contents
IN D E X Declaration of Conformity pag.4 1. Introduction to the Company pag.5 Preliminary Information pag.6 Manual contents and recipient pag.7 Collaboration with the end user pag.7 Regulatory compliance pag.7 Liability pag.8 Client obligation pag.8 Extra note pag.8 1.0. General instructions pag.8-12 1.1. - Page 3 pag.16 4.2. Starting the kart without the driver pag.17 5.0. Brakes pag.18 6.0. Steering system assembly pag.18 6.1. Tire pressure pag.19 7.0. Bleeding brakes pag.20 7.1. Replacing the brake pads pag.21 8.0. Pedals pag.22 8.1. Replacing acceleration cable pag.23 9.0. Front wheel alignment pag.24 9.1.
-
Page 4: Declaration Of Conformity
CRG. On behalf of our founder and president Mr. Giancarlo Tinini we thank you and hope to have the pleasure of your loyal partnership in the many years to come. -
Page 5: Introduction To The Company
CRG chassis (both Racing and Rental) and lives exactly that moment of transformation that Maxter engines. led him to switch from fun for a few enthusiasts to a real sport. It is in this context that CRG arises. www.crgrentalkar t.com... -
Page 6: Preliminary Information
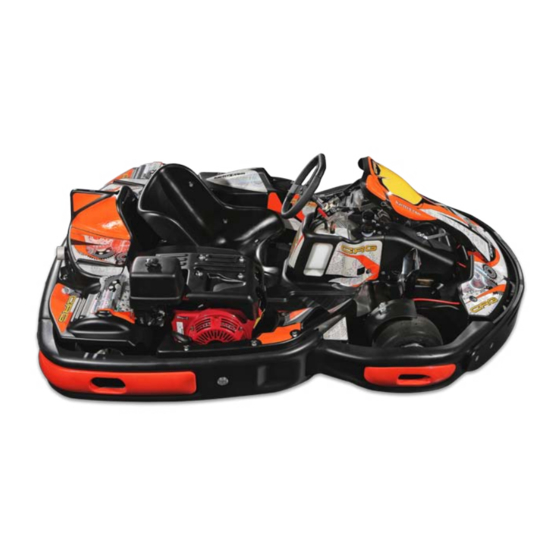
Preliminary information Front width 132 cm Rear width 141 cm Height 68 cm Length 202 cm Weight 167 kg www.crgrentalkar t.com... -
Page 7: Manual Contents And Recipient
Manual contents and recipient Collaboration with the end user The rental karts, to which this technical The rental kart is brand new and in premium publication refers to, are manufactured and condition from the time it is placed on the commercialized by the company. -
Page 8: Liability
Client obligation • UNI EN ISO 12100-2: 2003 Safety of machinery - Basic concepts, general principles for design. Part 2: Technical The client shall scrupulously read and principles. comprehend the prescriptions mentioned herein with particular attention to the following: • UNI EN ISO 3744: 2010 Acoustics - Determination of sound power •... -
Page 9: Information About The Track
1.2.1 Information about the track is working properly and receives proper maintenance regularly. • Ensure a proper track lighting, which will not Before using the kart track, each driver must be impair the drivers vision nor produce glare to made aware of the track’s characteristics. The the same. -
Page 10: Training Of The Facility's Staff Personnel
Minimum Age Velocity Etc. years years years years years years years years years years 30 km/h E + T E + T 45 km/h E + T 65 km/h E + T E + T E + T E + T E + T 70 km/h E + T... -
Page 11: Safety Instructions
remain under the helmet (mandatory). accelerate without the presence of the driver. • Balaclava / under-helmet is mandatory for Pay particular attention to when fueling, proper hygiene & safety. which must be done in safe and controlled • Obligation to wear a helmet, correctly sized setting, allowing the engine to cool and paying particular attention to the presence with an under chin safety closure approved... -
Page 12: Maintenance
• Use tires with the proper grip based on the taking into account the different element track surface (contact CRG if necessary). materials (eg. metal, plastic, rubber, etc ...). • Check and do the proper safety maintenance on the following elements: This is possible by hiring specialized ○ Brake system... - Page 13 DATA LOG REGISTER – Kart verification form serial number. _____________ Verification observations Verifier Verification Type of verification Data Good Standard Insufficient name signiture Remarks: www.crgrentalkar t.com...
-
Page 14: Chassis Maintenance
• Do not operate the go-kart if the brake pads Included in the shipment of you Centurion rental are worn beyond the consented limit. kart complete with Honda engine you will find Utilize only original CRG spare parts. the Honda user’s guide and engine • Make sure the pads are assembled correctly maintenance manual. Please make sure you and that the braking system works efficiently are given the user’s guide and engine... -
Page 15: Fuel Supply
3.0. Fuel supply 3.2. Chain drive transmission Check that the fuel pipes and the tank don’t leak and that the pipes are properly connected to the fuel tank, the fuel filter and the fuel pump. 3.1. Belt drive transmission 1 Chain 2 Chain tightener 3 Self locking nut 4 Adjustment bolt •... -
Page 16: Starting The Kart
4.0. Starting the kart 4.1. First start • Add SAE 10-W-30* in the crankcase. The person who will start the kart must be outside of the kart. If the driver is in the kart he • Add ATF in the D. III* transmission casing. must be sitting down in the driving position and •... -
Page 17: Brakes
5.0. Brakes It’s essential to check the brake system periodically: fluid, master cylinder safety cap, hydrolic brake, level of the fluid, tension of the brake calliper, fixing of the brake pads, brake pads ware, fixing and centering of the brake disc, mechanical contact between the pedal and the master cylinder. If the brake fluid turns black, it is necessary to replace and refill the braking system. The brake is a safety essential. Do not put the kart on the track when the brake system is defective or if you have a doubt. -
Page 18: Steering System Assembly
6.0. Steering system assembly 1 Steering wheel 6.1. Tire pressure 2 Tilted steering wheel boss 3 Steering column 4 Steering rods 5 Stub axle 6 Screws, nuts, washers • Secure the steering wheel (1) with three screws in the tilted steering wheel boss (2). The steering wheel boss should be fixed to the steering column (3). -
Page 19: Bleeding Brakes
7.0. Bleeding brakes • Tighten the bleed screw (2), repeat this procedure many times to secure that the system is completely without air bubbles. • Don’t forget to fill the brake oil reservoir (5) with the brake fluid in order for the master cylinder (6) and the brake caliper to function (7). • Tighten the bleed screw (2) and remove the pipe (1). -
Page 20: Replacing The Brake Pads
7.1. Replacing the brake pads It is highly recommended to drain the braking system after changing the brake pads and change the oil every time to ensure the best braking performance. Remember not to use the kart if the brake pads are worn beyond limits. -
Page 21: Pedals
8.0. Pedals It is essential to check the pedals regularly to prevent accidents. The adjustable pedals ensure a better Before the go-kart is put on the track, check ergonomic position. It’s very important to check that the pedals are inserted in the plate. the slide pedals regularly. -
Page 22: Replacing Acceleration Cable
8.1. Replacing acceleration cable • Check the accelerator cable daily. 1 Upper bolt • Check that the throttle cable adjuster is 2 Accelerator cable regulated properly to avoid a premature ware 3 Outer accelerator cable of the throttle cable. 4 Cable adjuster •... -
Page 23: Front Wheel Alignment
9.0. Front wheel alignment Tighten the two nuts on both steering rods until it is blocked. After each tire change or violent impact, always check the alignment with the procedures shown. A bad alignment can cause excessive wear of the front tire and reduce the ability of the go-kart in the corners. -
Page 24: Measurement Of The Hub On The Rear Axle
9.1. Measurement of the hub on 9.2. Adjusting the drive belt tension the rear axle 1 Self locking nut • The choice of the rear width is essential to 2 Adjustment bolt optimize performance of the kart. 3 Belt • After the first hour of work of the kart control 4 Belt tightener roller that the bolts have not loosened (1),(2). -
Page 25: Adjusting The Chain Tension
9.3. Adjusting the chain tension 9.4. Tire change 1 Self locking nut 1 Tire 2 Adjustment bolt 2 Rim 3 Chain 4 Chain tightener • Place the kart on a trolley. • Remove the front or rear wheel with the •... -
Page 26: Bodywork
10.0. Bodywork 10.1. Fixing bodywork • Check all mounting screws for the side Check that the plastic components of bodywork are not damaged or cut. bodywork. • Ensure that the rear axle cover is secured The components of the bodywork are essential properly. -
Page 27: Mounting Of The Bodywork And Protection
11.0. Mounting of the bodywork 11.2. Right side protection and protection Carefully check that the screws are tight and that it does not protrude from protection. Check that the components of bodywork are not touching the ground, causing a premature consumption of the bodywork. -
Page 28: Front Bumper
11.3. Front bumper 11.4. Rear protection 1 Front central leaf spring 1 Rear protection spring support 2 Leaf 2 Rear central buffer band 3 Front buffer band right/left 3 Rear side buffer band 4 Internal front buffer band 4 Washers 5 Screws •... -
Page 29: Nassau Panel
11.5. Nassau panel 11.6. Spoiler 1 Lower nassau panel support 1 Front bumper cover 2 Master cylinder protection 2 Silentblock 3 Nassau panel 3 Silentblock plates 4 Front fairing elastic pin (R Clip) 4 Clips (for Fitting) 5 Upper nassau panel supports 5 Front spoiler 6 Elastic pin (R Clip) 6 Screws 7 Washers... -
Page 30: Side Fairing Left
11.7. Side fairing left 11.9. Rear fairing 1 Rear side buffer band left 1 Rear fairing 2 Silentblock 2 Rear fairing support 3 Washers 3 Silentblock 4 Nuts M6 4 Blind nuts M6 5 Side fairing left 5 Washers 6 Blind nuts M6 •... -
Page 31: Checklist
12.0. Checklist Item Description Start Nuts for fixing the wheels 25 Nm Bolts for rear hubs for axle 40 Nm Axle bearing nut M14 50 Nm Bolts and nuts for mounting 60 Nm Nuts and bolts for seat 60 Nm Grub screws for steering column bearing 40 Nm Bolts and nuts for steering column boss... - Page 32 MODEL CENTURION TWO SEATS ENGINE HONDA GX 270 MAKE SURE TO RUN IN BEFORE NORMAL USE FOR 10 MINUTES GEARBOX OIL SAE 10 W 30 - 300 ML GEARBOX IS EMPTY UPON DELIVERY, IT MUST BE FILLED BEFORE USE ENGINE OIL SAE 10 W 30 – 1000 ML ENGINE IS EMPTY UPON DELIVERY, IT MUST BE FILLED BEFORE USE CHAIN/DRIVING BELT MUST BE CHECKED AFTER RUNNING IN TYRES TYRE PRESSURE MUST BE CHECKED, 2 BAR – FRONT, 2 BAR – REAR BATTERY CHARGED PLEASE MAKE SURE TO CONNECT THE WIRE TERMINAL RED TO POSITIVE AND THE BLACK TO THE NEGATIVE ON THE BATTERY IF NECESSARY BRAKE OIL DOT 4 OIL DOUBLE CHECK BEFORE USE...
-
Page 33: Cleaning The Chassis
14.0. Cleaning the chassis 14.1. Problem solving • The chassis and components (except for calliper, disc brake and master cylinder) The kart does not stop must be cleaned with a multipurpose cleaner. This spray removes greasy parts, lubricates • Ensure that the brake pedal has not got any and protects where necessary (spindles, problem and has enough play. - Page 34 C.R.G. SPA - Via Mantova 4/f - 25017 Lonato del Garda (BS) - rental@crgrentalkart.com P.I/C.F. 08586340013 - Tel +39 030 9912604 - Fax +39 030 9130714 Capitale sociale € 510.000,00 i.v.a www.crgrentalkar t.com...
Need help?
Do you have a question about the CENTURION Series and is the answer not in the manual?
Questions and answers