Advertisement
Quick Links
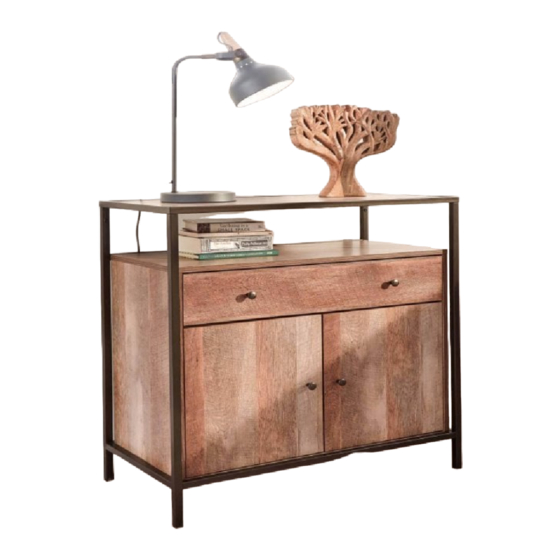
Thank you for purchasing the BRUNEL SIDEBOARD. Please read
PLEASE READ this sheet prior to assembly to familiarise yourself with the various stages of construction.
Carefully open the pack supplied and check the contents against the parts and fittings check list. Do not destroy any of
the packaging until you are certain that you have all the necessary parts for the assembly.
CAUTION: There are small components used in the construction of this unit. These loose items should be kept away
form young children whilst assembling your unit to avoid the danger of choking hazards.
Tools Required
BRUNEL SIDEBOARD
ASSEMBLY INSTRUCTIONS
the instructions carefully to ensure safe operation of the product.
Size: W 800 X D 400 X H 858
X 2
V1 02/20
Page 1 of 20
2
Hour
Set Up
Advertisement

Related Manuals for BIG FURNITURE WAREHOUSE BRUNEL G-BNLSIDMNG


Summary of Contents for BIG FURNITURE WAREHOUSE BRUNEL G-BNLSIDMNG
- Page 1 BRUNEL SIDEBOARD ASSEMBLY INSTRUCTIONS Thank you for purchasing the BRUNEL SIDEBOARD. Please read the instructions carefully to ensure safe operation of the product. Size: W 800 X D 400 X H 858 PLEASE READ this sheet prior to assembly to familiarise yourself with the various stages of construction. Carefully open the pack supplied and check the contents against the parts and fittings check list.
- Page 2 BRUNEL SIDEBOARD ASSEMBLY INSTRUCTIONS IMPORTANT - READ CAREFULLY - RETAIN THESE INSTRUCTIONS FOR FUTURE REFERENCE. INFORMATION • Due to the size of this product we recommend that it is assembled in the room intended for use. • When you are ready to start, make sure that you have the right tools, plenty of space and a clean, dry area for assembly.
- Page 3 BRUNEL SIDEBOARD ASSEMBLY INSTRUCTIONS Please check the pack contents before assembling the product. If any components are missing, please contact your retailer. The fittings pack contains small items that should be kept away from small children. (P6) (P1) (P9) (P3) (P12) (P11) (P10)
- Page 4 BRUNEL SIDEBOARD ASSEMBLY INSTRUCTIONS Parts TOP FRAME & TOP PANEL SIDE FRAME LEFT SIDE FRAME RIGHT BOTTOM SUPPORT 2PCS Carton No: 1 Carton No: 1 Carton No: 1 Carton No: 1 BACK SUPPORT TOP SHELF BOTTOM PANEL SIDE PANEL LEFT Carton No: 1 Carton No: 1 Carton No: 1...
- Page 5 BRUNEL SIDEBOARD ASSEMBLY INSTRUCTIONS Parts DOOR DRAWER FRONT DRAWER BACK DRAWER SIDE LEFT 2PCS Carton No: 1 Carton No: 1 Carton No: 1 Carton No: 1 DRAWER SIDE RIGHT DRAWER SUPPORT DRAWER BOTTOM Carton No: 1 Carton No: 1 Carton No: 1 V1 02/20 Page 5 of 20...
-
Page 6: Table Of Contents
BRUNEL SIDEBOARD ASSEMBLY INSTRUCTIONS Fixings (to scale) Dimensions JCBCW SCREW M6 X 50MM JCBC SCREW M6 X 15MM CSK SCREW M4 X 38MM CSK SCREW M3.5 X 16MM HANDLE SCREW M4 X 19MM DOWEL M8 X 25MM CAM NUT 15MM CAM BOLT PAN HEAD C/B M4 X 30MM PAN HEAD C/B M3.5 X 16MM... - Page 7 BRUNEL SIDEBOARD ASSEMBLY INSTRUCTIONS (Not to scale) Dimensions H9 M4 ALLEN KEY H10 METAL HANDLE H11 DRAWER SLIDER 12" DRAWER SLIDER 12" H14 HINGES 7/8" H17 SHELF SUPPORT L SHAPE BACKPLY STOPPER H19 L BRACKET H20 3MM PVH CAUTION: There are many small components used in the construction of this product. Please keep these components away from young children whilst assembling this product.
- Page 8 BRUNEL SIDEBOARD ASSEMBLY INSTRUCTIONS V1 02/20 Page 8 of 20...
-
Page 9: Dowel M8X25Mm
BRUNEL SIDEBOARD ASSEMBLY INSTRUCTIONS Parts STEP 1 Required (P6) Top Shelf - 1pc (P8) Side Panel Left - 1pc (P6) (P9) (H8) Side Panel Right - 1pc (P11) Front Rail - 1pc (H8) (P14) Drawer Front (H7) - 1pc (P9) (H17) (P16) Drawer Side Left... - Page 10 BRUNEL SIDEBOARD ASSEMBLY INSTRUCTIONS Parts STEP 2 Required (P8) Side Panel Left - 1pc (H11) (P9) Side Panel Right - 1pc (H4) CSK Screw (H4) M3.5x16mm - 6pcs (H11) (P8) Drawer Slider 12" L / R - 1pc (P9) Parts STEP 3 Required (P8)
- Page 11 BRUNEL SIDEBOARD ASSEMBLY INSTRUCTIONS Parts STEP 4 Required (P7) (P8) Bottom Panel - 1pc (P8) Side Panel Left - 1pc (P9) (P9) Side Panel Right - 1pc (H1) (P7) JCBCW Screw M6x50mm - 4pcs (H1) (H9) M4 Allen Key (H9) - 1pc Parts STEP 5...
- Page 12 BRUNEL SIDEBOARD ASSEMBLY INSTRUCTIONS Parts STEP 6 Required (P6) Top Shelf - 1pc (P8) (P6) Side Panel Left - 1pc (P9) Side Panel Right - 1pc (P8) (P12) (P12) Back Panel - 2pcs (P9) Unlock Lock Refer to page 8 Parts STEP 7 Required...
- Page 13 BRUNEL SIDEBOARD ASSEMBLY INSTRUCTIONS Parts STEP 8 Required (P2) Side Frame Left (P2) - 1pc (H9) (H2) (P3) Side Frame Right Bottom (P5) - 1pc (H2) View (P4) Bottom Support (P3) - 2pcs (H2) (P5) (P4) Back Support - 1pc (H2) (H2) JCBC Screw...
-
Page 14: Pan Head C/B M4X30Mm
BRUNEL SIDEBOARD ASSEMBLY INSTRUCTIONS Parts STEP 10 Required (P1) Top Frame & Top Panel - 1pc (H2) (P2) Side Frame Left (H9) - 1pc (P1) (P2) (H2) (P3) Side Frame Right (H2) - 1pc (P3) (H2) (H2) JCBC Screw M6x15mm - 4pcs (H9) M4 Allen Key - 1pc... - Page 15 BRUNEL SIDEBOARD ASSEMBLY INSTRUCTIONS Parts STEP 12 Required (P10) Shelf Panel - 1pc (P8) (P9) Bottom View (P8) (P10) (P9) Parts STEP 13 Required (P8) (P13) (H14) (P8) (P9) Side Panel Left - 1pc (H4) (P9) (H4) Side Panel Right - 1pc Refer to page 8 (P13)
- Page 16 BRUNEL SIDEBOARD ASSEMBLY INSTRUCTIONS Parts STEP 14 Required (P15) Drawer Back - 1pc (P16) Drawer Side Left - 1pc (P16) (P17) Drawer Side Right (H3) - 1pc (H3) (P15) CSK Screw M4x38mm - 4pcs (P17) (H3) Parts STEP 15 Required (P15) Drawer Back - 1pc...
- Page 17 BRUNEL SIDEBOARD ASSEMBLY INSTRUCTIONS Parts STEP 16 Required (P14) Drawer Front - 1pc (P16) (P18) Drawer Side Left - 1pc (P14) (P16) (P17) Drawer Side Right - 1pc (P19) (P18) Drawer Support - 1pc (P19) (P17) Drawer Bottom - 1pc Unlock Lock Refer to page 8...
- Page 18 BRUNEL SIDEBOARD ASSEMBLY INSTRUCTIONS Parts STEP 18 Required (P14) Drawer Front - 1pc (H5) Handle Screw (H5) M4x19mm - 2pcs (H10) (P14) Metal Handle (H10) - 2pcs (H10) (H5) (P14) (H10) (H5) Parts STEP 19 Required V1 02/20 Page 18 of 20...
-
Page 19: H15 Pan Head C/B M3.5 X 16Mm
BRUNEL SIDEBOARD ASSEMBLY INSTRUCTIONS Parts STEP 20 Required (P1) Top Frame - 1pc (H15) Pan Head C/B M3.5x16mm - 6pcs (H15) (H16) (H19) Flat Washer M6x16mm - 2pcs (P1) (H19) L Bracket - 2pcs (H16) STEP 1 BOTTOM VIEW STEP 2 (P1) FRONT VIEW (H19) - Page 20 BRUNEL SIDEBOARD ASSEMBLY INSTRUCTIONS Complete Assembly OVERALL DIMENSIONS COMMENTS: Sideboard Dimensions Template: A - Width - 800mm B- Depth - 400mm C - Height - 858mm D - Bottom Height - 100mm Periodically check to ensure that the components are in their proper position, free from damage. Also, make sure the end of connectors are tight and secure.
Need help?
Do you have a question about the BRUNEL G-BNLSIDMNG and is the answer not in the manual?
Questions and answers