
Subscribe to Our Youtube Channel
Summary of Contents for CHERUBINI MAGO
- Page 1 MAGO La Domotica Bluetooth Bluetooth Domotics Bluetooth-Domotik La domotique Bluetooth La Domótica Bluetooth ISTRUZIONI - INSTRUCTIONS - EINSTELLANLEITUNGEN INSTRUCTIONS - INSTRUCCIONES...
- Page 2 DISPOSIZIONE IMPIANTO IN APPARTAMENTO SYSTEM LAYOUT IN THE APARTMENT ANORDNUNG DES SYSTEMS IN DER WOHNUNG POSITIONNEMENT DE L’INSTALLATION DANS L’APPARTEMENT DISPOSICIÓN DE LA INSTALACIÓN EN UN APARTAMENTO La distanza massima tra i vari dispositivi non deve superare 8 metri. The maximum distance from one device to the next should not exceed 8 metres. Der Abstand zwischen den einzelnen Geräten darf nicht mehr als 8 m betragen.
-
Page 3: Table Of Contents
How to connect MAGO Gateway to the Cloud ............p. 39 How to remove a MAGO item from the system ............. p. 39 How to add a MAGO item to the existing system ..........p. 39 Main menu ......................p. 40 Adding a smartphone to an existing system ............ -
Page 4: Mago Devices And Electrical Connections Introduction
ELECTRICAL CONNECTIONS INTRODUCTION MAGO is a system consisting of various devices connected to each other via Bluetooth in a mesh network. The system can be expanded adding other devices at any time; this allows considerable distances to be covered - even across different floors. The system is only accessible via the MAGO application downloaded to a smartphone. -
Page 5: Mago Switch A510046
SYSTEM SYSTEM CREATION CONFIGURATION MAGO Switch A510046 Wall-mounted button panel for standard wiring motors. L1 N... -
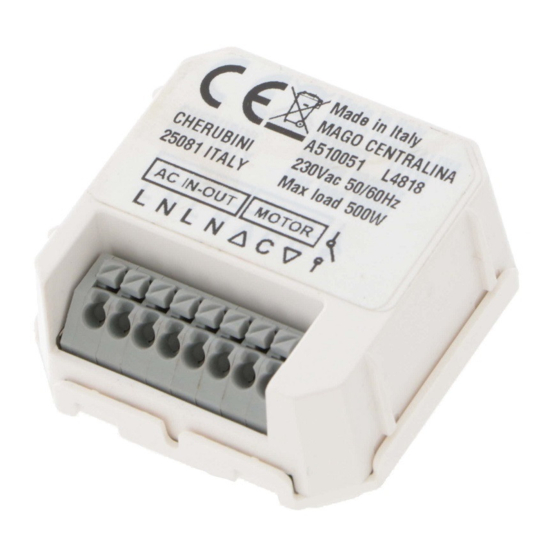
Page 6: Mago Control Unit A510051 For Standard Wiring Motor
MAGO DEVICES AND APP INSTALLATION ELECTRICAL CONNECTIONS MAGO Control unit A510051 Flush-mounted control unit for standard wiring motor optional control L1 N L1 N... -
Page 7: Mago Control Unit A510051 For Rx White Wire Motor
SYSTEM SYSTEM CREATION CONFIGURATION MAGO Control unit A510051 Flush-mounted control unit for RX white wire motor optional control L1 N L1 N L1 N L1 N... -
Page 8: Mago Actuator A510048 On/Off For Two Independent Loads
MAGO DEVICES AND APP INSTALLATION ELECTRICAL CONNECTIONS MAGO Actuator A510048 ON/OFF actuator for two independent loads. optional control L1 N optional control... -
Page 9: Mago Actuator A510048 Thermostat
SYSTEM SYSTEM CREATION CONFIGURATION MAGO Actuator A510048 Thermostat actuator. THERMOSTAT INPUT BOILER/AIR CONDITIONER CONTACT NO... -
Page 10: Mago Dimmer A510047
MAGO DEVICES AND APP INSTALLATION ELECTRICAL CONNECTIONS MAGO Dimmer A510047 Low voltage device to control 2 LED bars. optional control 12/24 V DC... -
Page 11: Mago Gateway A510049
Temperature/humidity sensor and internet gateway. MAGO Gateway’s two main features are: 1) Connection to the Cloud, i.e. ability to remotely access the Mago system via Wi-Fi or a GPRS connection. 2) Through the temperature and humidity sensors integrated in the device, MAGO Gateway allows these values to be displayed on the application home page. -
Page 12: Installing The Mago Application
MAGO DEVICES AND APP INSTALLATION ELECTRICAL CONNECTIONS Installing the MAGO application APP MAGO... -
Page 13: System Creation
CREATION CONFIGURATION MAGO system creation At this point, after connecting all the devices and installing the MAGO application, we can create the system by associating the various components to the Bluetooth system. 1) Open the app, click on“ ”, then “create new system”. -
Page 14: Device Association
Device identification: Press and hold down for 5 seconds the Mago switch stop button (Fig. 1) or the middle of the other devices (Fig. 2) until the LED flashes. On the app, the TEST button of the newly identified device goes green for one minute (Fig. -
Page 15: Description Of The Main Screen
SYSTEM SYSTEM CREATION CONFIGURATION Description of the main screen *Multifunction Main menu button *Connection state System name Temperatura Humidity List of devices Installed devices Rooms Home page Groups Scenarios Favourites Planning *CONNECTION STATE *MULTIFUNCTION BUTTON White Not connected to the system System synchronised Bluetooth connected Yellow... -
Page 16: Mago System Configuration
3) Select “Advanced” IMPORTANT - For the MAGO switch and Mago control unit devices it is essential to set the raising and lowering times, measuring their actual duration in seconds. See the “raising and lowering times” parameters in the advanced settings menu. -
Page 17: Mago Switch And Mago Control Unit Advanced Settings Menu
SYSTEM SYSTEM CREATION CONFIGURATION MAGO Switch and MAGO Control Unit advanced settings menu Parameter Options Description Motor type Standard (default) For motors with a mechanical/electronic limit switch with standard connection (brown, black, blue). The outputs will remain active throughout the travel (up/ down travel time). -
Page 18: Mago Actuator Advanced Settings Menu
Select the MAGO In the “Thermostat” mode it is necessary sensor Gateway device to specify the MAGO Gateway device to be to be used as a used as a temperature/humidity sensor. This temperature/humidity operation is mandatory even if only one sensor MAGO Gateway is installed. -
Page 19: How To Connect Mago Gateway To The Cloud
3) With the multifunction button select “Change” 4) With the multifunction button select “Remove” After this operation the selected MAGO item will become visible again and available to be integrated in another system. How to add a MAGO item to the existing system 1) From the main page, select the word CHERUBINI to display the main menu 2) From the main menu select “Add device”... -
Page 20: Main Menu
MAGO DEVICES AND APP INSTALLATION ELECTRICAL CONNECTIONS Main menu From the main (Home) page select the word CHERUBINI to display the main menu. From this menu you can add devices to the system, manage users, configure the cloud, change language, etc. MAIN... -
Page 21: Mago Devices Reset
CONFIGURATION MAGO devices reset - If a Mago device is removed from the system via the application, it is not necessary to carry out the reset procedure described in this section. - The reset procedure described in this section will not remove the device from the system. -
Page 22: Technical Features
SYSTEM SYSTEM CREATION CONFIGURATION MAGO Gateway reset 5 sec 5 sec green blue 5 sec 5 sec green blue flashing steady TECHNICAL FEATURES MAGO MAGO MAGO MAGO MAGO Switch Control unit Actuator Dimmer Gateway CHARACTERISTICS A510046 A510051 A510048 A510047 A510049... - Page 23 Il mancato rispetto di queste istruzioni annulla la responsabilità e la garanzia CHERUBINI. EU declaration of conformity CHERUBINI S.p.A. declares that the product is in conformity with the relevant Union harmonisation legislation: Directive 2014/53/EU, Directive 2011/65/EU. The full text of the EU declaration of conformity is available upon request at the following website: www.cherubini.it.
- Page 24 CHERUBINI S.p.A. Via Adige 55 25081 Bedizzole (BS) - Italy Tel. +39 030 6872.039 | Fax +39 030 6872.040 info@cherubini.it | www.cherubini.it CHERUBINI Iberia S.L. Avda. Unión Europea 11-H Apdo. 283 - P. I. El Castillo 03630 Sax Alicante - Spain Tel.
Need help?
Do you have a question about the MAGO and is the answer not in the manual?
Questions and answers