
Subscribe to Our Youtube Channel
Summary of Contents for JETFON X-500
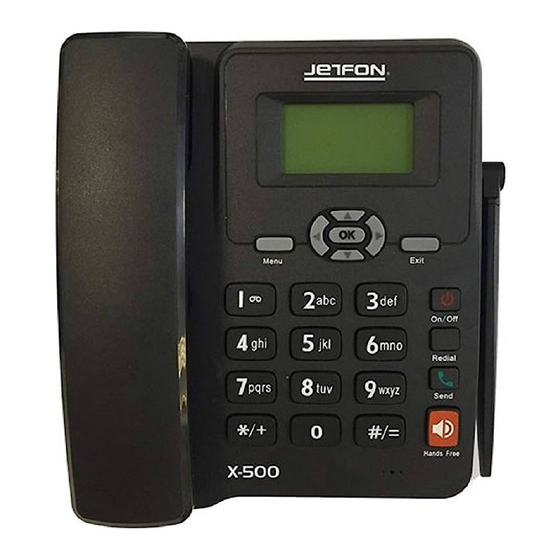
- Page 1 TELEFONO GSM DE SOBREMESA MANUAL INSTRUCCIONES...
-
Page 2: Table Of Contents
INDICE Página SIMBOLOS Y DEFINICIONES INTRODUCCION MANTENIMIENTO Y PRECAUCIONES DE SEGURIDAD DESEMBALADO Y ARTICULOS SUMINISTRADOS CARACTERISTICAS ESPECIFICACIONES TECNICAS INSTALACION FAMILIARIZARSE CON EL TELEFONO FUNCIONAMIENTO 9.1.- ENCENDER Y APAGAR EL TELEFONO 9.2.- REALIZAR UNA LLAMADA 9.3.- MENSAJES 9.4.- CONTRASEÑA 9.5.- CODIGO PIN Y CODIGO PUK 9.6.- INTRODUCIR TEXTO 10.- MENU DE FUNCIONES... -
Page 3: Simbolos Y Definiciones
1.- SIMBOLOS Y DEFINICIONES: Este teléfono GSM de sobremesa está destinado para poder utilizarse en los siguientes estados miembros de la Unión Europea: Este aparato es conforme con la Directiva 2012/19/UE sobre residuos de aparatos eléctricos y electrónicos (RAEE). Esto significa que este producto debe ser retirado mediante un sistema de recogida selectiva ya sea con el fin de poder ser reciclado o bien desmantelado para reducir cualquier impacto en el medio ambiente. -
Page 4: Introduccion
La instalación es fácil y rápida y se puede poner en uso de forma inmediata en una red de telefonía móvil. ● La instalación del JETFON X-500 no requiere de conocimientos específicos técnicos para realizarla. Sólo requiere instalar una tarjeta SIM de cualquier operador, conectar el alimentador AC/DC, y está... -
Page 5: Desembalado Y Articulos Suministrados
● No desconectar el cable de línea del aparato ni retirar o poner la batería mientras está en funcionamiento. ● No intente desmontar el teléfono. Una manipulación del aparato ajena al Servicio Técnico oficial podría producir daños en el mismo. ●... -
Page 6: Especificaciones Tecnicas
Aplicaciones de uso: Uso doméstico y profesional donde las líneas telefónicas cableadas no están disponibles o son muy limitadas. Negocios. Proveedores de servicios telefónicos. Compañías de comunicaciones y transportes. Organización de eventos. Compañías de suministros de electricidad, gas, agua, etc. 6.- ESPECIFICACIONES TECNICAS: ●... -
Page 7: Familiarizarse Con El Telefono
3. Tarjeta SIM: Apagar siempre el teléfono antes de introducir o retirar la tarjeta SIM. Para introducir la tarjeta deberá quitar la tapa inferior de la batería. Retire la batería; deslice la tarjeta SIM dentro de la ranura. Asegúrese de que los contactos de la tarjeta SIM están hacia abajo y que la esquina biselada de la misma coincide con la ranura. -
Page 8: Funcionamiento
Número Tecla Descripción - Accede al menú principal. MENU - Lleva a cabo la función indicada en la parte inferior izquierda de la pantalla. Teclado alfanumérico - Utilice estas teclas para introducir números o caracteres. - Llevan a cabo diferentes funciones bajo diferentes # , * condiciones. -
Page 9: Realizar Una Llamada
9.2.- REALIZAR UNA LLAMADA: Existen dos métodos diferentes de realizar una llamada: ● Primer método: 1. Descuelgue el teléfono o pulse la tecla [HANDS-FREE] (modo manos libres). 2. Introduzca el número al que desea llamar y pulse la tecla [SEND]. ●Segundo método: Seleccione el número desde la agenda de contactos o bien pulse la tecla [SEND] para seleccionar un número de la lista de números a los que ha llamado ya, una vez introducido o seleccionado el... -
Page 10: Introducir Texto
9.6.- INTRODUCIR TEXTO: Operación Método Carácter birmano Mya, presione la tecla hasta que el carácter aparezca. 123, Presione las diferentes teclas numéricas para introducir los Introducción de dígitos números deseados. Abd, abd, ABC, presione la tecla correspondiente hasta que aparezca Introducción de letras la letra deseada. - Page 11 (Llamada en espera) llamada de espera para atender settings > SIM “X” call settings otra llamada entrante. > Call waiting Call barring Restringir el marcado o recibir Menu > Call center > Call (Bloqueo de llamadas) llamadas determinados settings > SIM “X” Call settings números.
-
Page 12: Solucion De Problemas
MP3/Grabadora) New record > List > Settings 11.- SOLUCION DE PROBLEMAS: Si tiene problemas con el funcionamiento del teléfono, siga las instrucciones indicadas en la tabla siguiente. Problema Causa/Posible solución Al encender el teléfono, se le - Teclee el código PIN suministrado junto con la tarjeta SIM. Si solicita introducir el código ha cambiado el código PIN, introduzca el nuevo código PIN. -
Page 13: Declaracion De Conformidad
12.- DECLARACION DE CONFORMIDAD: Español - 13 -... -
Page 14: Garantia
13.- GARANTIA: CERTIFICADO DE GARANTIA Marca del aparato: Modelo: Nº serie: Fecha de compra: Sello del establecimiento vendedor: ADVERTENCIA: La garantía es válida siempre y cuando esté total y debidamente cumplimentada de forma legible y clara, presente el sello del establecimiento vendedor y tenga adjuntado el ticket o factura de compra del aparato. - Page 15 DESKTOP GSM TELEPHONE USER´S MANUAL...
- Page 16 INDEX Page no. DEFINITIONS INTRODUCTION MAINTENANCE AND SAFETY CAUTIONS UNPACKING AND SUPPLIED ARTICLES CHARACTERISTICS TECHNICAL SPECIFICATIONS INSTALLATION GETTING STARTED OPERATION 9.1.- POWER ON/OFF 9.2.- MAKE A CALL 9.3.- MESSAGE 9.4.- PHONE CODE 9.5.- PIN CODE AND PUK CODE 9.6.- TEXT INPUT 10.- MENU FUNCTIONS 11.-...
- Page 17 1.- DEFINITIONS: This desktop GSM telephone is intended for use in the following member states of the European Union: This equipment complies with Directive 2012/19/EU on waste electrical and electronic equipment (WEEE). This means that this product must be disposed of at a designated collection point for the recycling of waste electrical and electronic equipment, with the intention of being either recycled or dismantled in order to reduce any impact on the environment.
- Page 18 Easy and quick installation and can be use immediately in a GSM network. ● The installation of the JETFON X-500 does not require specific technical operations to perform it. It only requires installing a SIM card from any operator, connecting the AC/DC adapter, and is ready to make calls.
- Page 19 ● Don´t unplug the connector of the data cable from the phone, and not install or remove battery, when the power is on. ● Don´t attempt to disassemble the phone, Non-expert handling of the devices may damage them. ● The phone is non-waterproof, keep it dry and store in shady and cool place. ●...
- Page 20 - Communications and transport companies. - Events organization. - Electricity, gas, water supply companies, etc. 6.- TECHNICAL SPECIFICATIONS: ● Frequency operation bands: GSM 900: Uplink: 880-915 MHz. Dowlink: 925-960 MHz. DCS 1800: Unlink: 1710-1785 MHz. Dowlink: 1805-1880 MHz. FM radio: 87.5-108 MHz.
- Page 21 with the SIM card slot. Install the battery again and install the bottom cover. 8.- GETTING STARTED: English - 7 -...
- Page 22 Number Description - Enter main menu. MENU - Performs the function indicated in the left bottom of the screen. Alphanumeric keys - Use these keys to enter numbers and characters. # , * - Perform different functions under different conditions. - Press these keys to scroll cursor to the left, right, up or down when inputting characters or selecting items.
- Page 23 number from the dialled calls list, then press [SEND] key to make the call. Notes: - Add the international prefix, country code and area code (without the leading “0”) before the number when making an international call. 9.3.- MESSAGE: Select messaging in menu. ●...
- Page 24 10.- MENU FUNCTIONS: Function Description Selection Create message Create message and send to others. Menu > Messaging > Write message Read message Read message in Inbox, Outbox, Menu > Messaging > Drafts, Sentbox. Inbox/Outbox/Drafts/Sent Messages Message settings Make some necessary short Menu >...
- Page 25 PIN code Set or change the PIN code. Menu > Setting > Security settings > SIM “X” security > PIN > lock/change PIN Phone code Set or change the phone lock code. Menu > Settings > Phone security > Phone lock > Change password Restore factory settings Switch to the factory default...
- Page 26 12.- DECLARATION OF CONFORMITY: English - 12 -...
- Page 27 13.- GUARANTEE: WARRANTY CERTIFICATE Brand name: Model: Serial number: Date of purchase: Stamp of the sale store: WARNING: The warranty is valid provided it is total and properly executed in a readable and clear way, presents the stamp of the establishment sales and has attached the ticket of purchase of the equipment.
Need help?
Do you have a question about the X-500 and is the answer not in the manual?
Questions and answers