Advertisement
Quick Links
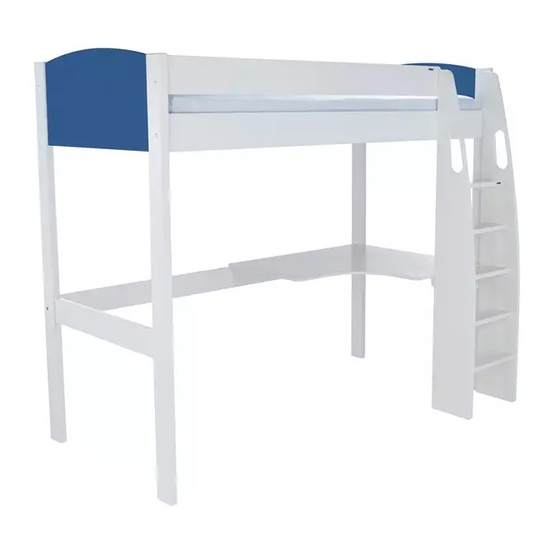
White - 4ft6 Bed with Slats
Assembly Instructions
Dimensions
208,2 cm
Width - 148cm
121,2 cm
Depth - 204cm
178,3 cm
Height -109cm
Important
– Please read these instructions fully before starting assembly
If you need help or have damaged or missing parts, call the Customer Helpline:
T1051-02 NR511-V6/V8
Batch nr:
T1088-02 NR511-106
Batch nr:
- Uno S Highsleeper
- Please keep for future reference
Ladder can be fitted
right or left side
T1088-02
T1051-02
6564942
0844 8008475
Issue 2 - 10/12/14
Issue 3 - 25/08/16
Issue 1 - 22/10/10
Issue 2 - 01/03/18
1 of 14
Advertisement

Related Manuals for Stompa Uno S Highsleeper


Summary of Contents for Stompa Uno S Highsleeper
- Page 1 - Uno S Highsleeper White - 4ft6 Bed with Slats T1088-02 T1051-02 Assembly Instructions 6564942 - Please keep for future reference Ladder can be fitted right or left side Dimensions 208,2 cm Width - 148cm 121,2 cm Depth - 204cm...
-
Page 2: Care And Maintenance
· Always follow the manufacturer`s • The bunk bed meets the european instructions EN 747+A1:2015 standards for security ·Do not use the bed if any structural part and durability. isbroken or missing · Warning! Children can become trapped WARNING • The bunk bed meets the Bunk Beds between the bed and the wall. - Page 3 Components - Fittings Please check you have all the fittings listed below Note: The quantities below are the correct amount to complete the assembly. In some cases more fittings may be supplied than are required. Conformat screw Ø7x 60mm Screw 3.5 x 35mm Dowel Ø8x40 8x40 Wooden dowel x 47 M6x10x13 Cross dowel x 4...
- Page 4 Components 1 Bed rail x 1 (200,6x14,5x2 cm) 10 Bed rail x 1 (200,6x14,5x2 cm) 6 Bed safety rail x 1 (200,6x14,5x2 cm) 9 Ladder side x 2 (172x25x1,8 cm) 4 of 14...
- Page 5 8 Step x 5 5 Slats x 1 (36x11,5x2,5 cm) 7 Front safety rail x 1 (164x14,5x2 cm) 3 Leg x 2 (174x9x3,8 cm) 4 Leg x 2 (174x9x3,8 cm) 11 Bed rail x 1 (200,6x11,5x2 cm) 2 End rail x 2 12 End rail x 2 (80,2x11,5x2 cm) (80,2x40,4x1,9 cm) 5 of 14...
- Page 6 7x34 Metal dowel x 4 7x60 Screw x 4 8x40 Wooden dowel x 20 Glue x 1 6 of 14...
- Page 7 8x40 Wooden dowel x 27 7 of 14...
- Page 8 Fitting Hole At Top Fitting Hole At Bottom D15x18 Cover Cap x 4 D15x12 Locking nut x 4 D=35 Sector x 4 D35 Cover Cap x 4 8 of 14...
- Page 9 Left or Right D15x18 Cover Cap x 6 6,3x70 Screw x 4 M6x75 Bolt x 2 M6x10x13 Cross dowel x 2 9 of 14...
- Page 10 M6x75 Bolt x 2 M6x10x13 Cross dowel x 2 D15x18 Cover Cap x 3 10 x 10 x 10 x 10 x 7x50 Screw x 20 D4x13 Cover Cap x 20 10 of 14...
- Page 11 Max. mattress height! D15x18 Cover Cap x 1 6,3x70 Screw x 1 55/12,5x5(Zn) x 4 5x38 (Zn) Screw x 1 3,5x40 Screw x 30 11 of 14...
- Page 12 D8x13 Cover Cap x 11 12 of 14...
-
Page 13: Customer Notice
Please complete the enclosed Service Form and fax to 0560 1132071 01943 81780 By post: Please complete the enclosed Service From and post to: Nordika Design Ltd. t/a Stompa High Rigg Panorama Drive Ilkley, LS29 9RA We will do our utmost to supply spare parts within 7-10 working days of receipt of request. - Page 14 01943 81780 14 of 14 Page 9 of 9...
Need help?
Do you have a question about the Uno S Highsleeper and is the answer not in the manual?
Questions and answers
How do I partially disassemble the uno s high sleeper to move it to another bedroom in the house?
To partially disassemble the Stompa Uno S Highsleeper for moving:
1. Remove the mattress and any removable accessories like clip-on shelves or chairs.
2. Detach the desk and shelving units if included.
3. Unscrew the main bolts (e.g., M6x75 bolts and cross dowels) connecting the bed frame sections.
4. Carefully separate the bed frame components (side rails, ladder, guard rails).
5. Keep all screws, dowels, and caps organized for reassembly.
Follow the original assembly instructions in reverse and ensure all parts are labeled and stored safely.
This answer is automatically generated