Table of Contents
Advertisement
Quick Links
Advertisement
Table of Contents
Troubleshooting

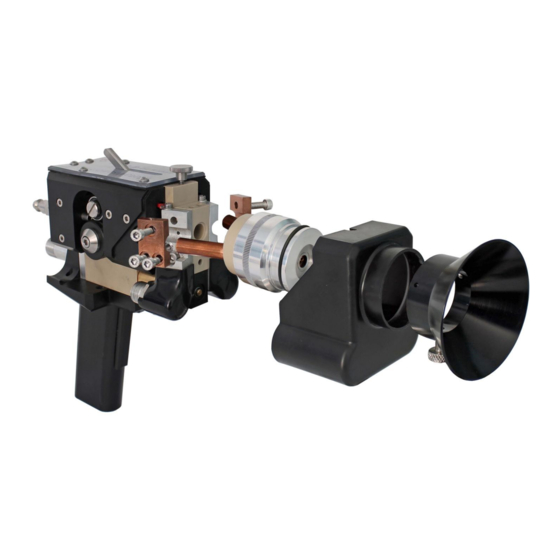
Summary of Contents for Metallisation ARC150-CG23
- Page 1 ssue: 21/11-11 Page 1 of 42...
- Page 2 This maintenance manual must be read and understood before any attempt is made to disassemble the equipment described herein. Under no circumstances should any modifications be made to the equipment without prior written approval from Metallisation. MAN-ARC150-MA Related Manuals: Operation Manuals:...
-
Page 3: Table Of Contents
CONTENTS SECTION 1 SUPPLIES PACKAGES ........................... 4 Standard Supplies............................5 Manifold ..............................6 Extended Supplies ............................6 SECTION 2 MAINTENANCE ............................7 Routine Maintenance ..........................8 Disconnecting the Pistol ..........................9 CG Spray Head – Checking Contact Tips ....................10 CG Spray Head –... -
Page 4: Supplies Packages
SECTION 1 SUPPLIES PACKAGES Standard Supplies Manifold Extended Supplies Page 4 of 42... -
Page 5: Standard Supplies
Standard Supplies The standard Supplies Package is 10 and 20 metres in length with all fittings appropriate to connect to the ARC150 Pistol and S500-PLC Energiser. The table below highlights the consumable parts available for these Supplies. Flexible Drive Shaft 7601 or 7601/20 Wire Conduits 7549/10... -
Page 6: Manifold
30m Supplies pack for power extension trolley (ARC150-PET) SUP150-40EX 40m Supplies pack for power extension trolley (ARC150-PET) Please contact Metallisation if you require any consumable parts for the above Supplies Packs. NB: Extended supplies pack covers are not available for configurations longer than 20m as the cables become too heavy to package together. -
Page 7: Maintenance
SECTION 2 MAINTENANCE Routine Maintenance Disconnecting the Pistol CG Spray – Checking Contact Tips CG Spray Head – Complete Disassembly CG Spray Head Reassembly Advanced Disassembly Drive Unit Maintenance Page 7 of 42... -
Page 8: Routine Maintenance
Routine Maintenance The following table gives a routine maintenance schedule for the ARC150 Arcspray Pistol. NB: Before commencing repairs or maintenance on any part of the Pistol, ensure that the power supply has been isolated. If possible, work should be carried out in a clean environment, if the system has not been used for a period of time it is strongly recommended that all connections are checked before commencing operation. -
Page 9: Disconnecting The Pistol
Disconnecting the Pistol NOTE: Before attempting to disconnect the Pistol always be sure to isolate the Mains Supply. Uncouple Pistol Release roller tension Control Cable. This by pushing the Pinch connection is found on Release Cam in the the rear of the pistol. direction shown. -
Page 10: Cg Spray Head - Checking Contact Tips
CG Spray Head – Checking Contact Tips NOTE: Before attempting to remove the Contact Tips always ensure that the mains power supply is isolated and the wire has been removed from the pistol. already removed, loosen the Pointed Shroud Screw and remove Shroud pulling forward. - Page 11 Continue to remove the Contact Tips using the following technique: At this point the Spray Head will look as shown and the Remove the Air Concentrator by pulling forward. Contact Tips will be accessible. Using suitable spanner, remove the Contact Tips check for damage and clean / replace as...
-
Page 12: Cg Spray Head - Complete Disassembly
CG Spray Head – Complete Disassembly NOTE: Before attempting to disassemble the Spray Head always ensure that the mains power supply is isolated and the wire has been removed from the pistol. Loosen the Thumb Screw and remove the Hood. Check the If not already removed, loosen the Pointed Shroud Screw ‘O’... - Page 13 Taking care not to drop any of the parts, continue to inspect the Spray Head parts using the following technique: Taking care not to drop the any of the Spray Head parts, unscrew and remove the Air Cover. The Air Cover should be easy to unscrew having loosened it whilst attached to the pistol.
-
Page 14: Cg Spray Head Reassembly
CG Spray Head Reassembly Once all Spray Head parts have been cleaned and any damaged parts have been renewed, the Spray Head can be reassembled using the following technique: Press the Transfer Plug into the Contact Tube Support Block until the largest diameter touches the rear of the... - Page 15 Before refitting the Spray Head onto the pistol, ensure that the contact areas on the Terminals and Clamp Pads are clean and undamaged. Poor contact in these areas can cause overheating. Place the Spray Head against the front of the pistol. Ensure the Transfer Plug locates in the Contact Tube Support Block and the Contact Tubes locate in the left and right hand Terminals.
-
Page 16: Advanced Disassembly
Pistol is returned to the nearest Metallisation Factory, Distributor or Agent for repair. If however further disassembly is necessary, the following procedure should be followed but only performed by experienced fully competent maintenance personnel. - Page 17 If removing the Side Plates for inspection / replacing of the Front Wire Guides, continue with the following disassembly procedure: Before the Side Plates can be removed, the Switch must be released from the Side Plates. Using suitable pliers pull the Side Plate Switch Clip upwards until it is freed from the Side Plate.
- Page 18 If inspecting the Trigger Assembly, continue with the following instruction. To inspect the Flywheel go to point 14. Reassembly Pistol Rear Note: The Pinch Roll Pivot Pin MUST be punched out from the left to right to prevent scoring of the internal bore.
- Page 19 If inspecting the Tension Assembly, go to point 17 and continue the strip down procedure: Reassembly Note: Before replacing the ‘O’ Ring, grease with silicon grease. Removing the Flywheel will expose an ‘O’ ring on the underside This is how the Pistol will appear at this point. If problems are experienced with the Tension Assembly, continue to strip the of the ARC150 Pistol Body.
- Page 20 Continue to inspect the Tension Assembly following point 19. If problems are experienced with the Wormshaft or gears, go to point 20 and continue the stip down procedure. In order to remove the Pinch Release Cam for inspection or renewal, first remove the 6mm Ext Circlip using appropriate Circlip Pliers. Then push out the Cam Pivot Pin.
- Page 21 Pistol is returned to the nearest Metallisation Factory, Distributor or Agent Roll Pin for repair. Flex Drive Coupling...
-
Page 22: Drive Unit Maintenance
Section 4.9 shows a detailed explosion of the Drive Unit. Further maintenance of the ARC150 DUA Drive unit should be carried out by your Metallisation Distributor as the Unit itself is not generally repairable. Page 22 of 42... -
Page 23: Fault Finding
SECTION 3 FAULT FINDING Pistol Troubleshooting Drive Unit Troubleshooting – Inverter Messages Page 23 of 42... -
Page 24: Pistol Troubleshooting
Pistol Troubleshooting It is essential that the Metallisation ARC150 Arcspray Pistol is properly maintained and operated. Faults may occur due to incorrect operation, lack of proper maintenance or incorrect component selection. If the problem still persists, then consult the below tables. These are the most commonly occurring problems, their causes and the action that should be taken to rectify the problem. - Page 25 PROBLEM CAUSE REMEDY Check that wires pull easily from the Wire Conduits. Check that drive tension is adequate and that Roller Guides are not loose, choked or worn. Clean or replace as necessary Roller Guides slipping on wire If wires are jammed in the Spray Head, ensure that Contact Tips are the correct size for the wire being used.
-
Page 26: Drive Unit Troubleshooting - Inverter Messages
Motor frequency (H3) and Motor Current (Amps). Displayed parameters are not adjustable by end user. Please contact Metallisation for more Information. In order to display the Trip Log (last four faults) follow the below procedure: Display shows…... - Page 27 -10°C in order to start the drive Faulty thermistor on heatsink Refer to Metallisation Parameters not saved, defaults reloaded. Internal memory fault Try again. If problem recurs, refer to Metallisation Internal drive Fault Refer to Metallisation Internal drive Fault Refer to Metallisation...
-
Page 28: Illustrated Parts List
SECTION 4 ILLUSTRATED PARTS LIST Pistol Overview CG Spray Head Gearbox & Terminal Blocks Cover Plates & Wire Guides Tensioning Components Trigger Assembly The Flywheel Push / Pull Wire Drive & Motor Assembly – Overview Push / Pull Wire Drive & Motor Assembly - Explosion 4.10 Recommended Spares Holding Page 28 of 42... -
Page 29: Pistol Overview
Pistol Overview The illustration below is an exploded view of the Pistol as a whole. For specific assemblies refer to the appropriate Section. Flywheel (4.7) Gearbox & Terminal Blocks (4.3) Tensioning Components (4.5) Trigger Assembly (4.6) Cover Plates & Wire Guides (4.4) CG Spray Head (4.2) -
Page 30: Cg Spray Head
CG Spray Head The CG Spray Head comprises of standard parts that and Contact Tips that vary dependant on the wire being used or the coating required. FIG 1 gives an illustrated view of the Spray Head. Table 1 shows all general parts for the Spray Head. Table 2 shows the Contact Tip variations which are dependant on configuration. - Page 31 TABLE 1. Pistol Parts - Standard PART NO. DESCRIPTION 1007 'O' Ring 6713 Pointed Shroud Screw 6836AM Medium Air Cap (AM) 6844A Air Cover 6891A Shroud 7480 Contact Tube Support Block 7481 Air Concentrator 7490 Contact Tip Support Tube 7507 Support Block Seal Tube 7528 Hood...
-
Page 32: Gearbox & Terminal Blocks
Gearbox & Terminal Blocks 5582 5581 7540 7557 7502 7514 7527 7501 5583 7555 7556 5500 7529 5584 5580 7515 7080 6471 7565 7574 5503 7924 7526 1457 7923 5502 7548 6469 6469 5501 PART NO. DESCRIPTION PART NO. DESCRIPTION 1457 Socket Head Cap Screw 7502... -
Page 33: Cover Plates & Wire Guides
Cover Plates & Wire Guides 7567 5511 5513 5514 7546 7517 7538 5510 7563 5517 5509 1432 PART NO. DESCRIPTION ‘O’ Ring 1432 5509 RH Side Plate 5510 LH Side Plate 5511 Side Plate Switch Clip 5513 ARC150 Cover Plate 5514 ARC150 Cover Plate Gasket 5517... -
Page 34: Tensioning Components
Tensioning Components 7597 7505 5516 7506 7504 7572 7510 7580 7504A 7598 7539 7525 PART NO. DESCRIPTION PART NO. DESCRIPTION Spring Support (Threaded) 7510 Cam Pivot Pin Spring (stainless steel) 7525 Pinch Roll Bearing 5516 Pinch Roll Pivot Pin 7539 Shoulder Screw 7504 Pinch Roll Support... -
Page 35: Trigger Assembly
Trigger Assembly 6501C Trigger Assembly – 5512 – Handle / 6295 Lower Parts Switch Housing 7516 7082 (x6) 7521A 7511A 7561 7509 6295 7560 PART NO. DESCRIPTION PART NO. DESCRIPTION 5512 Handle / Switch Housing 6501C Dowel 6295 Switch 7511A Trigger 7082 Socket Head Cap Screw... -
Page 36: Push / Pull Wire Drive And Motor Assembly - Overview
Push / Pull Wire Drive and Motor Assembly - Overview 7359 7357 7355 7351 7356 2435 / 7566 7350 7352 2344 / 1695 / 2424M / 6591 / FIG 1 7580 / 2338 / 2339 / 2338 2334 / 2339 / 28135 5604 2580... - Page 37 FIG 1 PART DESCRIPTION PART NO. DESCRIPTION BASE MIG & BRACKET 1695 M5 Nyloc Nut 1695 M5 Nyloc Nut 2344 Countersunk Capscrew 2334 M8 Washer 2435 Rubber Feet 2344 Countersunk Capscrew 7350 Dispenser Base Frame 2338 M8 Nut 7355 Location Peg 2339 M8 Spring Washer 7352...
-
Page 38: Push / Pull Wire Drive And Motor Assembly - Explosion
Push / Pull Wire Drive and Motor Assembly – Explosion Fig 1. Shows a complete exploded view of the ARC150-DUAEV Drive Unit Assembly. Fig 2. Shows the 5600 – RH Drive Unit Assembly 2.3mm/2.5mm Serated ‘V’ and the 5601 – LH Drive Unit Assembly 2.3mm/2.5mm Serated ‘V’... - Page 39 FIG 1 PART PART DESCRIPTION DESCRIPTION 5605 Gearmotor B - Pusher Cover Guard Mount Strip Fixings 5585 Gearbox Mount Plate 2334 M8 Washer 5606 Motor Inverter Plate 2338 M8 Nut 5587 Pusher Spacer Ring Insulator 2339 M8 Spring Washer M8 x 25mm Long Countersunk Socket 5588 Pusher Drive Shaft Assembly 28142...
-
Page 40: 4.10 Recommended Spares Holding
4.10 Recommended Spares Holding Quantities shown in the following tables are advisable levels only. Dependant on usage, customers may be advised to hold greater stocks. Contact Tips and Roller Tyres part numbers are dependent on the specific system being used. Contact Tip Support Tubes remain the same. - Page 41 WIRE DRIVE SPARES PART NO. DESCRIPTION 5583 Roller Tyre 2.3mm/2.5mm Serated 'V' 5584 Roller Tyre 1.6mm/2.0mm Serated 'V' 5592 Pusher Rear Wire Guide 5593 Pusher Central Wire Guide 5594 Pusher Front Wire Guide 6469 Socket Head Cap Screw Page 41 of 42...
- Page 44 Fax: +44 1384 237196 Email: support@metallisation.com The information in this manual was correct at the time of publication; Metallisation disclaims liability for any inaccuracies or omissions that may have occurred. Periodically, changes are made to the information herein, and Metallisation reserve...
Need help?
Do you have a question about the ARC150-CG23 and is the answer not in the manual?
Questions and answers