
Related Manuals for Kozyard 12'x20' Alexander hardtop gazebo with double roof

Summary of Contents for Kozyard 12'x20' Alexander hardtop gazebo with double roof
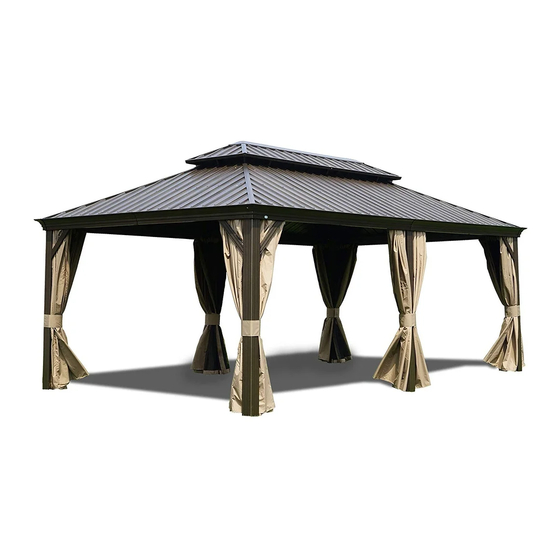
- Page 1 12‘x20’ Alexander hardtop gazebo with double roof Assembly Manual Kozyard LLC Products © Copyright 2016 - 2019 Kozyard LLC. | All Rights Reserved.
- Page 2 1.Two or more people are 5.Use the hex keys in the box. required for assembly. 6.Please use a Phillips screwdriver. 2.You will need one or more stepladders. 7.Do not fully tighten screws prior 3. Wearing protective gloves is to complete assembly. recommended.
- Page 3 A x4 F x6 B x2 G x4 H x6 H1 x6 J1 x4 C x4 C1 x4 J2 x4 C2 x2 K x1 C3 x2 K1 x1 D x4 L1 x2 L x4 D1 x4 ITEM DESCRIPTION Pole Pole D2 x2 Beam Sidewall Track...
- Page 4 U1 x4 M x4 N x2 U2 x4 N1 x4 U3 x4 N2 x2 U4 x8 P x2 U5 x4 P1 x2 Q1 x2 ITEM DESCRIPTION Corner Roof Bar Roof Bar Q2 x2 Roof Bar Roof Bar Finishing Bar Q3 x2 Net Frame Finishing Bar Finishing Bar...
- Page 5 V4 x2 V5 x2 V2 x2 V1 x2 V3 x2 V x8 V6 x2 Roof Panel W1 x2 W2 x2 W3 x2 W4 x2 W5 x2 W6 x2 W7 x2 W8 x2 Roof Panel X1 x2 X2 x2 X3 x2 X4 x2 X5 x2 X6 x2 X7 x2...
- Page 6 Step 1: Parts Required: Set up Poles(Part A&Part B)with stand plates (Part L&Part L1) using screws 1# as shown in diagram. L x4 L1 x2 A x4 B x2 page 4...
- Page 7 Parts Required: C x2 D x2 F x2 C1 x2 D1 x2 C2 x2 D2 x2 Step 2: Connect (Part C&Part D)into one beam using union bar (Part F) with screws 1#. ② ① ③ C&D Connect parts(C2&D2) to the finished beam (C&D) using screws 1# as shown in diagram. Attach Parts(C1&D1)to finished beam (C&D)using screws 1#.
- Page 8 Parts Required: D1 x2 D3 x2 C x2 E2a x2 E2b x2 F x4 C1 x2 C3 x2 E x2 D x2 E1a x2 E1b x2 Long beam overall: Step 3: Connect (Part D,E&C)into one beam using union bar (Part F) with screws 1#. 1# 1# ①...
- Page 9 Parts Required: Step 4: Use Screws (2#&3#) to connect poles and beams together as shown in diagram ② ② ③ ③ ① ① page 7...
-
Page 10: Parts Required
Parts Required: Reminder: with silicone rubber to seal after finishing the assembly it will be better for no water leaking in heavy rain. ① ① ① ① ① ① page 8... - Page 11 Parts Required: J1 x4 J2 x4 Step 5: Affix the frame with corner solidifying bars (Parts J1&J2)using screws 1# as shown in diagram. page 8...
- Page 12 Parts Required: H x4 G x4 Step 6: Finish connecting beams using corner bycorner cover (Part G) and screws 9# as shown in diagram. ① ① ② ② ① ② ② ① ② ② ① If with glass cement to seal after finishing the assembly it will be better for no water leaking in heavy rain.
- Page 13 Parts Required: H1 x6 x152 ③ Step 7: ① ② ② ① ③ After finish hooks into tracks, then put H1 to lock them. ① Put 7 hooks to each slot of sidewall track (Part C1/Part D1) ② Put 7 hooks to each slot of sidewall track Part C1 and 5 hooks to each slot sidewall track Part E1b. ③...
- Page 14 Parts Required: K x1 N x2 N1 x4 N2 x2 M x4 Step 8: Set up roof frame Connect the inside roof connect (Part K) with the conner roof bar(Part M)and roof bar(Part N,N1,N2)using screws1# as shown in diagram. Attach corner roof bar (Part M) and roof bar (Part N2,N,N1) to main frame using screw 1# as shown in diagram.
- Page 15 Parts Required: Q1 x2 P x2 R x4 Q2 x2 ② ① ① ① ① ② ② ① Step 9: Affix finishing bar (Part Q1&Q2) Attach finishing bar(Part P,Q1,Q2)with to roof bars(Part N,N1&N2) finishing end (Part R)using screws 1# using screws 1# as shown to corner roof bar(Part M)as in diagram.
- Page 16 Parts Required: Q3 x2 Q4 x2 P1 x2 Step 10: Attach net frame (Part P1,Q3&Q4) to finishing bar(Part Q1,Q2&P) using screws 11#&1# as shown in diagram. page 13...
- Page 17 Parts Required: K1 x1 Step 11: Connect outside roof connctor (Part K1) to inside roof (Part K) using screws 1# as shown in diagram. page 14...
- Page 18 Parts Required: Step 12: Cover metal brackets (Part Z,Z1,Z2,Z3,Z4) to roof panels as shown in the diagram. page 15...
- Page 19 Parts Required: R x4 R1 x2 T1 x2 T x2 T2 x2 V3 V4 V5 V6 Step 13: Push the roof panels(Part V,V1,V2,V3,V4)to upper roof as shown in diagram. Attach upper roof bar (Part T,T1,T2) to upper roof with Finish ends (PartR& R1) using screws 1# as shown in diagram.
- Page 20 Parts Required: U3 x4 U4 x8 U1 x4 U5 x4 U2 x4 3.3” 5.1” 5.1” 3.3” Attention: Connect the U5 bars at the ends where the holes are 5.1” apart to one another. ① ② ③ ② ② ① ① ②...
- Page 21 Z x32 Parts Required: W3 x2 W6 x2 W4 x2 W5 x2 W2 x2 W7 x2 W1 x2 W8 x2 Step 15: Cover metal bracket(Part Z)to roof panels as shown in diagram. page 18...
- Page 22 Parts Required: Z1 x2 Z x28 Z2 x2 X3 x2 X5 x2 X6 x2 X7 x2 X8 x2 X9 x2 X10 x2 X11 x2 X12 x2 X1 x2 X2 x2 X4 x2 Step 16: Cover metal brackets(Part Z,Z2&Z1)to roof panels as shown in diagram. page 19...
- Page 23 Overall roof assembly: Please put the panels on the frame anti-clockwisely Connect roof as below: page 20...
- Page 24 Parts Required: x100 S x160 Step 17: Affix roof panels using screws and spacers(Part S) as shown in diagram. Attention: Put on one roof panel and fasten it accordingly before attaching second roof panel. ② ① ② ① ② ② ①...
- Page 25 Parts Required: Y x4 Y1 x2 Ya x4 Y1a x2 Step 18: Put on mosquito sidewalls and solid sidewalls as shown in diagram. Ya/Y1a Y/Y1 page 22...
- Page 26 Parts Required: Step 19: When you close the curtain,please tie fabric strape to fix with poles as shown in diagram. There are three ways to secrue your netting and curtains to the legs using the include 4 ties: 1.) Securing just 2.) Securing netting 3.) Use all ties for the netting.
- Page 27 Kozyar © Copyright 2016 - 2019 Kozyard LLC. | All Rights Reserved.
Need help?
Do you have a question about the 12'x20' Alexander hardtop gazebo with double roof and is the answer not in the manual?
Questions and answers