Advertisement
Quick Links
Advertisement

Summary of Contents for Hunter SC-PROBE
- Page 1 SC-PROBE OWNER’S MANUAL SC-PROBE For use with NODE-BT Controllers...
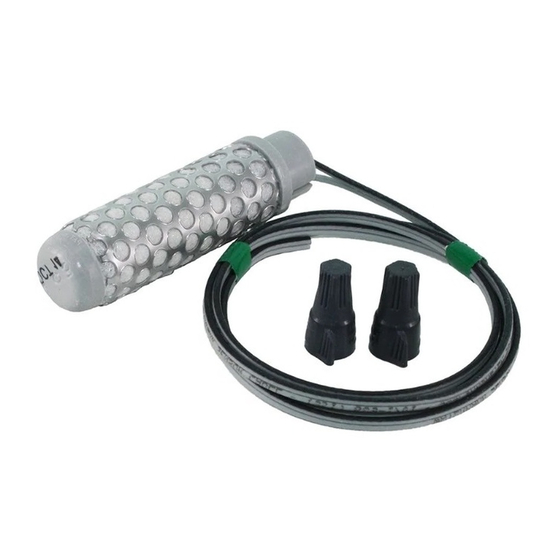
- Page 2 Introduction The SC-PROBE is a soil moisture sensor accessory that transforms the battery-operated NODE-BT controller into a smart solution that detects dry soil conditions at the root level and signals approval for the next scheduled watering cycle to run. If the soil moisture level is above the threshold indicated for watering, the irrigation cycle is suspended.
-
Page 3: Installation
Choose a zone with full sun exposure that is in the fastest-drying area of the landscape. If The SC-PROBE moisture sensor must be installed necessary, move valve wires so that this is the within 100' (30 m) of the NODE-BT controller using last (highest-numbered) station to water. - Page 4 Installation Choosing the Right Spot Select an area with full sun exposure that represents the fastest-drying irrigated area.
- Page 5 Installation Place in the Root Zone In turf applications, the probe should be placed in the root zone, approximately 6" (15 cm) deep. Adjust if necessary for actual turf conditions. For shrubs or trees, select a deeper depth that matches the root zone.
- Page 6 Installation Installing the Probe Use ½" (12 mm) PVC pipe to make a vertical hole Soak the lower two-thirds of the probe for 30 minutes to the desired depth in the soil. The outside diameter before installing. Do not allow water to cover the top cap where the wires are connected.
- Page 7 Installation Installing the Probe (continued) Mix a slurry of native soil and water. Then pour Place the sensor in a vertical position (do not tilt the mixture into the hole. it more than 45°) at the bottom of the hole. Do not install the probe horizontally!
- Page 8 Installation Installing the Probe (continued) Pack native soil tightly around the probe. Soil must Allow the probe to acclimate to the site for two to be in full contact with the probe. three days. Water normally before proceeding to sensor-based irrigation. To locate the probe in the future, install a small valve box near the probe location, and run the cable through the enclosure.
- Page 9 Installation Connecting the Probe to the NODE-BT Cut the clear, waterproof seal on the two gray wires connected to the controller. Connect the gray/black probe wires to the two gray NODE-BT wires with waterproof connections. Note that polarity is not important in this system.
- Page 10 The soil moisture sensor is enabled via the NODE-BT app. The app automatically displays the current soil measurement as a numeric value. When the desired moisture is reached, SC-PROBE will interrupt irrigation either through the controller’s sensor input, or by “breaking” the common wire to the field.
- Page 11 App Programming Programming Moisture Levels A number slider represents the set point where irrigation is suspended. The set point is a number between 0 and 100 representing centibars of soil water tension. Low numbers indicate dry soil, or soil from which it is very difficult for plants to extract moisture.
- Page 12 When in Pause mode, the sensor status is shown as “disabled” on the schedule screen and “OFF” in the settings screen. Press Turn On to resume normal operation. Pause does not pause watering. It overrides the SC-PROBE and allows watering.
- Page 13 App Programming Alarms The SC-PROBE checks the soil moisture level right before scheduled irrigation. When the sensor is active (i.e., the set point has been reached or the threshold is exceeded), the app’s dashboard screen displays the controller status as “Suspended” with “Soil Moisture Sensor” as the cause...
-
Page 14: Troubleshooting Guide
Use handheld sensor meter to verify proper operation or minimum • Replace sensor probe (P/N. SC-PROBE) For more detailed information, application notes, or assistance, visit hunterindustries.com. Find more helpful information about your product, including installation tips, controller programming, and more. - Page 15 Notes...
- Page 16 HUNTER INDUSTRIES INCORPORATED | Built on Innovation® 1940 Diamond Street, San Marcos, California 92078 USA hunterindustries.com © 2020 Hunter Industries Inc. Hunter, the Hunter logo, and all other trademarks are property of Hunter Industries, registered in the U.S. and other countries. RC-108-OM-EN 7/20...
Need help?
Do you have a question about the SC-PROBE and is the answer not in the manual?
Questions and answers