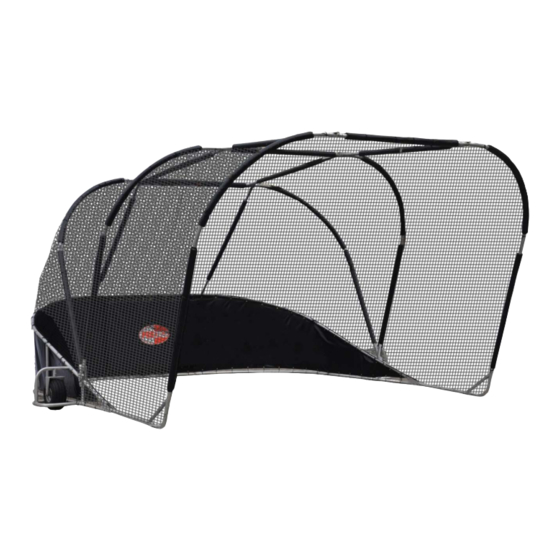
Summary of Contents for TSI Instruments ProCage ROLLAWAY BATTING CAGE
- Page 1 ProCage™ Professional Batting Cage ASSEMBLY INSTRUCTIONS Trigon Sports International, Inc. 488 Cumberland St. Memphis, TN 38112 (888) 313-1303 www.TrigonSports.com...
- Page 2 PACKAGING DETAILS Item Number Description/ Package Contents TCFRM (2) EACH CORNER FRAMES - PACKAGED AS (1) BUNDLE - BUNDLE WEIGHT = 22 LBS TVFRM (2) EACH ‘V’ SHAPED LOWER FRAME ASSEMBLY - PACKAGED AS (1) BUNDLE - BUNDLE WEIGHT = 39 LBS TRIBFRM (10) EACH CURVED ‘RIB’...
- Page 3 BPCAGE HARDWARE IDENTIFICATION ITEM NUMBER DESCRIPTION/ CONTENTS #TLCORD (1) Bag containing lacing cord for net #TCBLTIE (1) Bag containing cable ties #TNETSTRP (1) Bag containing (4) each adjustable net hanging straps #TELBRKT (1) Bundle contains (2) Elbow Brackets for Dolly Assembly #TANGBRKT (1) Bundle contains (4) Angle Brackets #TAHDW (Part A)
- Page 4 SAFETY NOTICE 1. ALWAYS INSPECT THE ROLLAWAY CAGE BEFORE EACH USE. ESPECIALLY AFTER LENGHTY STORAGE PERIODS. 2. INSPECT NETS FOR HOLES BEFORE USE AND REPAIR HOLES BEFORE USE 3. BE SURE ALL PIECES ARE SECURELY FASTENED AND BOLTS/ NUTS PROPERLY TIGHTENED.
- Page 5 PART IDENTIFICATION ITEM # DESCRIPTION TBKFRM BACK FRAME ASSEMBLY TDOLLEY DOLLEY ASSEMBLY TCHPLT COACH PLATFORMS TPSHBAR STRAIGHT PUSH BARS WITH SAFETY PINS TSTFRM STRAIGHT FRAME RIB PIECE TRIBFRM CURVED RIB FRAME PIECE 7 TDSWPRTR SIDE WHEEL PROTECTOR FRAME TVFRM ‘V’ SHAPE LOWER FRAME TSTFRM STRAIGHT FRAME UPRIGHT PIECE Trigon Sports International, Inc.
- Page 6 STEP 1 BEGIN BY FINDING A FLAT DRY SURFACE TO LAY OUT ALL PIECES FOR ASSEMBLY IDENTIFY ALL PARTS AND BE SURE ALL PIECES ARE PRESENT STEP 2 1. Attach EACH Wheel protector frame assembly (#7) to EACH ‘V’ shaped lower frame (#8) Using 16 each 2-3/4”...
- Page 7 Attach each rear section of ‘V’ shape lower frame (#8) to each side of back frame assembly using (2)ea (#6) curved rib frame piece on each side. (Back frame assembly is pre-welded without dolly assembly attached). Use 2” length full thread Allen head bolts from hardware bag (Part F) and Lock washer inserts (also in Part F bag).
- Page 8 1. Attach dolly assembly mounting plates as shown in pictures above. Be sure black mounting shaft is attached to plate as shown using proper ring spacer between tire mounting plate and shaft. 2. Using (2) Elbow brackets, dolly handle, wheel shaft, and hardware in bag (Part E). Begin assembly as shown in pictures above.
- Page 9 STEP 7 (ATTACHING ANGLE BRACKETS) 1. Using same bolts, nuts, and washers from Step 6 above, attach angle bracket to ‘V’ shape lower frame. The bracket will attach midway up the frame on holes provided. NOTE: LOOSELY attach bracket to lower frame assembly only to allow openings to attach rib frame assemblies in Step 8.
- Page 10 2. Begin by attaching curved rib frame to each side of a 78” straight pipe securing with 2” full thread allen head bolts and lock washer inserts. 3. The curved rib frame that is attached in the front of the cage will also need a 64” straight pipe on each side to make up for height and attached to front reinforced corner frame.
- Page 11 STEP 10 (ATTACH FRAME PADDING) 1. Using picture above as reference add padding to each section as shown. Pads will be secured with attached Velcro. At this stage the cage will still be in lowered position. 2. Add pads to each lifting bar. Once completed and using two people, lift the cage into upright position using the lifting bars.
- Page 12 STEP 11 (Net installation) 1. Unpack net and lay out under the cage. Position the net with the attached baffle net on the bottom side of the net and towards the back of the cage. Locate net tags to guide you for correct position. 2.
- Page 13 STEP 12 (Coaches platforms) 1. Install pre-assembled coach’s platforms on each side of dolly assembly by inserting long rod through back frame assembly and inside shaft of coach’s platform as shown in pictures above. Secure with heavy duty cotter pins. 2.


Need help?
Do you have a question about the ProCage ROLLAWAY BATTING CAGE and is the answer not in the manual?
Questions and answers