Advertisement
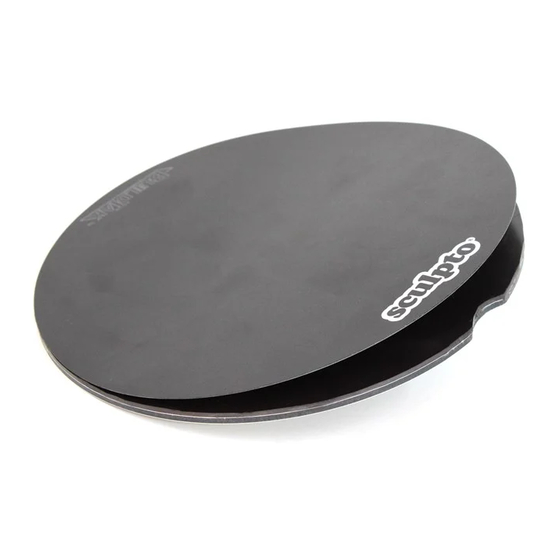
BUILDPLATE PRO WITH FLEX-FUNCTION
Product 45030005
HOW TO INSTALL AND TAKE CARE OF YOUR NEW BUILDPLATE:
INSTALLATION:
Place your new BuildPlate on the Printer's Base. Check that the Buildplate can rotate 360 de-
grees when you attach it to the printer.
MAINTENANCE:
The surface of your BuildPlate –the BUILDTAK– should be cleaned before every print with an
Isopropyl Alcohol and a cloth. It prevents your prints from falling off the buildplate during printing.
USAGE:
1
Start printing. Every time you start to print, check how the first layer of your print looks like:
Picture A: It's all good - the nozzle squeezes the filament onto the Buildplate in fine coherent
layers and the filament can flow freely.
Picture B: The nozzle is too close to the Buildplate and the filament cannot go through the nozzle.
Picture C: The nozzle is too far away from the Buildplate. The print will fall off during printing.
A)
Adjust the nozzle height by 'calibration of Z-axis' OR turning the threaded rod manually while
first layer is being printed. Like this:
2
After printing is done, it's time to remove the print from the BUILDTAK. Start by removing the
entire BuildPlate from the printer's base.
B)
C)
Advertisement
Table of Contents

Related Manuals for SCULPTO BuildPlate Pro

Summary of Contents for SCULPTO BuildPlate Pro
- Page 1 BUILDPLATE PRO WITH FLEX-FUNCTION Product 45030005 HOW TO INSTALL AND TAKE CARE OF YOUR NEW BUILDPLATE: INSTALLATION: Place your new BuildPlate on the Printer’s Base. Check that the Buildplate can rotate 360 de- grees when you attach it to the printer.
- Page 2 Afterwards, detach the BUILDTAK from the base of the BuildPlate. Flex the BUILDTAK with your hands to make the object loosen from the surface (when printing smaller objects, a spatula can be used to help with the process). Now it’s time to place the BUILDTAK back on the BuildPlate – precision is required! Help yourself by placing the BuildPlate between the 2 metal axises on the printer.
Need help?
Do you have a question about the BuildPlate Pro and is the answer not in the manual?
Questions and answers