Reload RSI305755G Installation And Owner's Manual
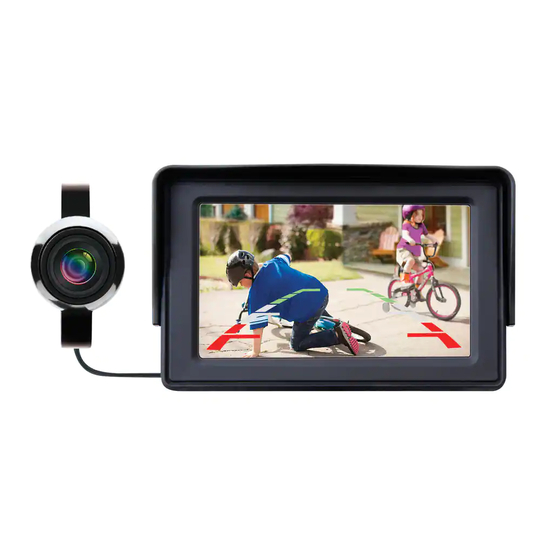
Backup camera 4.3” monitor with suction cup mount
Hide thumbs
Also See for RSI305755G:
- Installation and owner's manual (25 pages) ,
- Installation and owner's manual (24 pages)

Related Manuals for Reload RSI305755G


Summary of Contents for Reload RSI305755G
- Page 1 SKU# 035-0156-8 (RSI305755G) BACKUP CAMERA 4.3” MONITOR WITH SUCTION CUP MOUNT 4.3" Installation and Owner’s Manual Care! Please read this manual carefully before using and keep it for future reference. Installation Video...
- Page 2 Welcome Congratulations on purchasing your new 4.3” backup camera kit. This product uses the latest technology to ensure performance, reliability and durability. The compact design and quick connectors make the system simple to install and ideal for DIY installation. Please read all of the installation instructions carefully before installing this system.
- Page 3 Applicable Car Models & Help This kit is designed for 12V & 24V DC automotive system. G r e a t f o r This kit is designed for passenger vehicles, SUVs, Mini Vans, Vans and some Van Trucks. Please insure this product is applicable to your vehicle before installation.
-
Page 4: Table Of Contents
Contents of the Manual Safety Information Package Contents Product Specification Installation Testing & Adjustment Trouble Shooting Maintenance Warranty 1 877 466 8191 1 877 466 8191... -
Page 5: Safety Information
Safety Information A failure to read, understand and follow these warnings and instructions may result in a serious accident, including damaged property or a serious injury, including loss of life. WARNING • This Reversing Camera system is designed as an aid to the driver in detecting large stationary objects to help avoid damaging the vehicle or property. - Page 6 Safety Information • Do not submerge camera in water, which can cause internal damage to the camera. • Never back up while looking only at the screen. You should always check behind and around the vehicle when reversing. Always make sure your intended path is clear. If you back up while looking only at the monitor, you may hit a vehicle, pedestrian, child, pet, or other object resulting in damage, injury or death.
-
Page 7: Package Contents
Package Contents Please check all the components listed below are in the kit Part A 1 x 4.3" monitor Part B 1 x camera with mounting bracket and 3m (9.84 feet) cable Part C 1 x 8 meter (26.24 feet) main cable with quick connectors Part D... -
Page 8: Product Specification
Product Specification 4.3-inch Color TFT LCD Monitor Operation Voltage DC9 ~ 15V Resolution 480(RGB)x272 Power Consumption < 2.5W Operating Temperature -20 ~ +70°C Camera High Definition Color CMOS TV System NTSC Resolution 420TV Lines Lens Angle 170° (Diagonal Angle ) 110°... -
Page 9: Installation
Installation This is how this product works Both the camera and the monitor are powered by reverse light. You don't need a 12V socket or to wire the monitor into the fuse box. Quick connectors are used for easy connection. When you reverse your car, the reverse light is on and will provide power to the camera and monitor, and the back view image will appear automatically. - Page 10 Installation There are four steps to install the backup camera Connection with reverse light. Install camera (B). Install monitor (A). Running main cable (C) from the monitor (A) to the camera (B). 1 877 466 8191...
- Page 11 Installation Step Connection with reverse light Locate your reverse light by shifting the gear Remove the tail-light cover to access the to reverse position while turning the car reverse light. Locate the wiring behind the ignition switch to "ON" position. reverse light.
- Page 12 Installation Shift the gear to “P” position and turn the car Attach the wire quick connectors (D) to the ignition switch to “Lock” position. reverse light positive wire and negative wire separately. Ensure the wire sits well in the metal slot of the connector. Snap the cap of the connector over and use a clamp to squeeze the cap to ensure solid connection.
- Page 13 Installation Step Install camera (B) Remove your license plate and check Remove part of the interior panel of the whether there is a hole that allows the trunk to ensure the hole you find (in the camera cable to go through. Please see last step) allows the camera wire to go the above two positions that possibly through from outside to inside of the...
- Page 14 Installation If you can't find a hole for the camera Mount the camera (B) on the license cable, you need to drill a hole behind or plate. We suggest mounting the camera around the license plate. on the top-middle of the license plate. Before drilling a hole, please Please clean your license plate ensure there is no obstacle behind...
- Page 15 Installation Step Install monitor (A) Attach the suction cup mount (E) with Find your preferred position to mount the t h e m o n i to r ( A ) a n d e n s u re t h e monitor (A) on the windshield of the connection is secure.
- Page 16 Installation Step Running wire from the monitor (A) to the camera (B). See wiring diagram below for an overview 1 877 466 8191...
- Page 17 Installation Locate the “For monitor” (colored red) end of the main cable (C) and connect with the monitor (A) cable plug. Please ensure the connection is firm. Please note that the monitor cable plug has a locater and must be in-line with the locater on the main cable (C).
- Page 18 Installation Run the main cable (C) to the trunk of Locate the “For camera” end (colored your car. For many cars, the rear seat can black) of the main cable (C) and plug the be folded and the cable can go through camera (B) cable into this socket.
-
Page 19: Testing & Adjustment
Testing & Adjustment Have your car ignition switch to "ON" Please make sure you have the best view position, then shift the gear to reverse you desire. You can bend the camera (B) position, the monitor and the camera bracket gently to achieve that. will be powered by the reverse light and You don't have to bend the the back-view image will appear on the... - Page 20 Testing & Adjustment Organize your wires and tidy up When testing is done and the camera system is functioning correctly, please put all the interior and trunk panels back into position, and conceal any surplus cables. The camera can be adjusted for brightness, color, contrast and RESET.
-
Page 21: Trouble Shooting
Trouble Shooting Phenomenon Diagnose Solution Check whether the gear is Shift the gear to reverse in reverse position. position. Check that the reverse Have reverse lights lights work. repaired. Check whether the wiring Please use the plier to connections with the ensure connection is reverse light are secure. -
Page 22: Maintenance
Maintenance Camera • If dirt, rain or snow attaches to the camera, the monitor may not clearly display objects. If water droplets, snow or mud adhere to the camera lens, rinse with water and wipe with a dry cloth. • Do not use alcohol, benzene or thinner to clean the camera. This will cause discoloration. -
Page 23: Warranty
Warranty Always keep your receipt as proof of purchase! We're here to help! You are covered with one year manufacturer's warranty against defects in workmanship and materials. If you have any questions or comments call our toll-free hotline: 1 877 466 8191 for help.
Need help?
Do you have a question about the RSI305755G and is the answer not in the manual?
Questions and answers