
Summary of Contents for Sinvest VGE Blue Lagoon AOP COMPACT OZONE & UV-C 75W
- Page 1 UV-C and Pool equipment www.bluelagoonuvc.com AOP COMPACT OZONE & UV-C 75W AOP COMPACT OZONE & UV-C 75W SALT WATER MEMBER OF:...
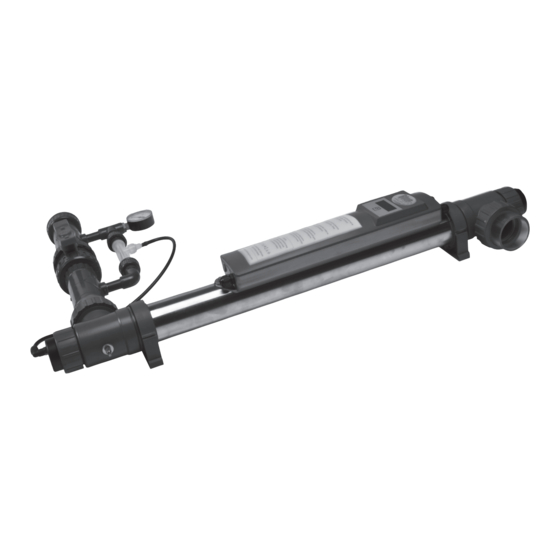
- Page 2 | BLUE LAGOON AOP COMPACT OZONE & UV-C 75W & AOP COMPACT OZONE & UV-C 75W SALTWATER...
- Page 3 AOP COMPAC T OZONE & UV-C 75W AOP COMPAC T OZONE & UV-C 75W SALT WATER UV-C and Pool equipment MANUAL BLUE LAGOON AOP COMPACT OZONE & UV-C 75W AOP COMPACT OZONE & UV-C 75W SALTWATER Blue Lagoon AOP Compact Ozone & UV-C 75W EN 6 - 9 Blue Lagoon AOP Compact Ozone &...
- Page 4 AOP COMPAC T OZONE & UV-C 75W AOP COMPAC T OZONE & UV-C 75W SALT WATER | BLUE LAGOON AOP COMPACT OZONE & UV-C 75W & AOP COMPACT OZONE & UV-C 75W SALTWATER...
- Page 5 UV-C and Pool equipment BLUE LAGOON AOP COMPACT OZONE & UV-C 75W & AOP COMPACT OZONE & UV-C 75W SALTWATER |...
- Page 6 AOP COMPAC T OZONE & UV-C 75W AOP COMPAC T OZONE & UV-C 75W SALT WATER Important read this manual carefully before proceeding to installation and commissioning. INSTALLATION OF THE EARTH (DRAWING 2) 1. Pull the cable (2) through the strain relief (4) before fitting the synthetic strain relief (4) onto the earth bolt (1).
- Page 7 UV-C and Pool equipment INSTRUCTIONS FOR USE OF THE DIGITAL TIMER As soon as the Blue Lagoon UV-C Timer is switched on, the program will carry out a self-test. The display will automatically show the following, one after the other: 8888 - display test ; r and software version number ;...
-
Page 8: Replacing The Lamp
4500 by holding the switch down for 5 seconds. The counter value will then be reset to 4500, and a new value can be set. • “dn” means (down): This option enables you to decrease the meter indication to the desired hour indication. -
Page 9: Technical Specifications
UV-C and Pool equipment from the device. Unscrew the screw top (U) and carefully disconnect the lamp holder from the lamp. Any loose parts, i.e. of the earth etc., must be carefully retained, as they are not supplied with a new housing or electrical unit. In case of any doubt with regard to the connection, consult a recognised fitter. - Page 10 AOP COMPAC T OZONE & UV-C 75W AOP COMPAC T OZONE & UV-C 75W SALT WATER Lesen Sie diese Gebrauchsanweisung vor dem Installieren des Geräts sorgfältig durch. INSTALLATION DER ERDUNG (ZEICHNUNG 2) 1. Bevor Sie die Kunststoff-Zugentlastung (4) am Massebolzen (1) anbringen, müssen Sie erst das Kabel (2) durch die Zugentlastung (4) ziehen.
- Page 11 UV-C and Pool equipment GEBRAUCHSANWEISUNG FÜR DEN DIGITALEN STUNDENZÄHLER Wenn der Blue Lagoon UV-C Timer eingeschaltet ist, führt das Programm einen Selbsttest aus. Auf dem Display erscheinen automatisch nacheinander folgende Anzeigen: 8888; Displaytest ; r und Softwareversionsnummer ; 50H oder 60H Anzeige der Netzfrequenz. Anschließend erscheint auf dem Display der Zählerstand.
-
Page 12: Auswechseln Der Lampe
Wenn der gewünschte Zählerstand erreicht ist, warten Sie 10 Sekunden. Nach 10 Sekunden erscheint die gewählte Stundenzahl, und der Timer beginnt rückwärts zu zählen.Wenn Sie sich z.B. beim Erhöhen des Zählerstands geirrt haben, können Sie den Zähler wieder auf 4500 zurücksetzen, indem Sie den Schalter 5 Sekunden eingedrückt halten. - Page 13 UV-C and Pool equipment AUSWECHSELN DES GEHÄUSES/DES ELEKTRISCHEN TEILS Wenn das Gehäuse oder der elektrische Teil ausgetauscht werden soll, muss erst die Erdung vom Gehäuse gelöst werden (siehe den Abschnitt “Installieren des Massekabels”). Der elektrische Teil des Geräts befindet sich im Displaygehäuse (W) am Gerät. Das Displaygehäuse ist geklebt und kann nicht geöffnet werden.
-
Page 14: Technische Daten
TECHNISCHE DATEN Lamp T5 Yellow base Ozone 75W Max. Durchfluss 23.000 l/h Max. Druck 2 bar Max. Ozon 0,6 Gramm Anschluss Ø 63 mm Länge des Geräts 100 cm Breite des Geräts einschließl. Reaktor 75 cm Artikelnummer: BH03752 Blue Lagoon AOP Compact Ozone & UV-C 75W (230V; 50/60Hz) Artikelnummer: BH09752 Blue Lagoon AOP Compact Ozone &... - Page 15 AOP COMPAC T OZONE & UV-C 75W AOP COMPAC T OZONE & UV-C 75W SALT WATER UV-C and Pool equipment Avant d’installer cet appareil, lire attentivement cette notice d’utilisation. INSTALLATION DU CÂBLE DE MISE À LA TERRE (FIGURE 2) 1. Avant de monter le serre-câble plastique (4) sur la vis de mise à la terre (1), il faut tirer le câble (2) à...
- Page 16 MODE D’EMPLOI DU COMPTEUR HORAIRE NUMÉRIQUE Lorsque le Blue Lagoon UV-C Timer est activé, le programme procède à un autodiagnostic. L’écran affiche automatiquement et successivement les indications suivantes : 8888; test de l’écran ; r et numéro de version du logiciel ; 50H ou 60H, indication de la fréquence du réseau Ensuite, l’écran affiche le statut du compteur.
-
Page 17: Remplacement De La Lampe
UV-C and Pool equipment • “dn” signifie (down): permet de diminuer la valeur du compteur à celle souhaitée. Cette sélection est confirmée par le clignotement successif sur l’écran du paramètre utilisateur sélectionné ”dn” et de la valeur horaire. Ensuite, tenir l’interrupteur (T) enfoncé durant 5 secondes. Après 5 secondes, l’écran n’affiche plus que “dn”. -
Page 18: Caractéristiques Techniques
à conserver soigneusement les diverses pièces distinctes, comme le câblage de la mise à la terre, etc. Celles-ci ne sont pas livrées avec un logement neuf ou une section électrique neuve. En cas de doute concernant le branchement, consulter un installateur agréé. ENTRETIEN/DÉMONTAGE Lors du démontage/de l’entretien de l’appareil, toujours couper l’alimentation de courant. - Page 19 AOP COMPAC T OZONE & UV-C 75W AOP COMPAC T OZONE & UV-C 75W SALT WATER UV-C and Pool equipment Leest u voor het installeren van dit apparaat eerst zorgvuldig deze gebruiksaanwijzing. INSTALLATIE AARDING (TEKENING 2) 1. Voordat u de kunststof trekontlasting (4) op de aardingsbout (1) monteert dient u eerst de kabel (2) door de trekontlasting (4) te halen.
- Page 20 GEBRUIKSAANWIJZING DIGITALE URENTELLER Als de Blue Lagoon UV-C Timer is ingeschakeld gaat het programma zichzelf testen. Het display geeft de volgende indicaties automatisch na elkaar: 8888 - display test ; r en software versie nummer ; 50H of 60H indicatie van de netfrequentie. Daarna springt het display op de tellerstand. Als de UVC lamp voor het eerst is ingeschakeld of nadat de “reset”...
- Page 21 UV-C and Pool equipment • “dn” betekent (down): hiermee kan de tellerstand verlaagd worden naar de door u gewenste urenstand. Deze selectie wordt bevestigd doordat de gekozen gebruikersinstelling ”dn” en de tellerstand in de display afwisselend knipperen. U dient daarna de schakelaar (T) 5 seconden in te houden.
- Page 22 worden en de aardigs bedrading van het apparaat los gemaakt te worden. Schroef het draaideksel (U) los en maak de lamphouder voorzichtig los van de lamp. Let er op dat u de diverse losse onderdelen zoals van de aardings bedrading etc. goed bewaart. Deze worden niet met een nieuwe behuizing of elektrisch gedeelte meegeleverd.
-
Page 23: Technische Specificaties
UV-C and Pool equipment TECHNISCHE SPECIFICATIES Lamp T5 Yellow base Ozone 75W Max. doorstroom 23.000 l/h Max. druk 2 bar Max. ozon 0,6 gram Aansluiting Ø 63 mm Lengte apparaat 100 cm Breedte apparaat incl. reactor 75 cm Artikel nummer: BH03752 Blue Lagoon AOP Compact Ozone & UV-C 75W (230V; 50/60Hz) Artikel nummer: BH09752 Blue Lagoon AOP Compact Ozone &... - Page 24 AOP COMPAC T OZONE & UV-C 75W AOP COMPAC T OZONE & UV-C 75W SALT WATER Antes de instalar este aparato se deberán leer detenidamente las presentes instrucciones. PUESTA A TIERRA DE LA INSTALACIÓN (DIBUJO 2) 1. Antes de montar el sujetacables de plástico (4) al tornillo de puesta a tierra (1) hay que pasar el cable (2) por el sujetacables (4).
- Page 25 UV-C and Pool equipment 8. La cantidad de aire con ozono en el sistema se puede regular por medio de la válvula de esfera (J). Cuanto más cerrada esté la válvula, más aire con ozono entrará en el sistema. La posición ideal del manómetro es 0,4 a 0,7 bar.
-
Page 26: Cambio De La Lámpara
Mediante cortas pulsaciones del interruptor se puede aumentar el valor del cuentahoras, en pasos de 500 horas, desde 4.500 hasta un valor máximo de 9.999. El valor superior seleccionado parpadeará en el visor alternativamente con “UP”. Una vez seleccionadas las horas que se desea, se deberá esperar 10 segundos. A los 10 segundos aparece en el visor el número de horas seleccionado y se inicia la cuenta atrás del temporizador. - Page 27 UV-C and Pool equipment un paño suave. En caso de que haya tocado la lámpara con las manos, límpiela con un paño suave y un poco de alcohol. 2. Coloque cuidadosamente la lámpara nueva en el tubo de cuarzo y acople el portalámpara (V) a la lámpara.
-
Page 28: Especificaciones Técnicas
ESPECIFICACIONES TÉCNICAS Lamp T5 Yellow base Ozone 75W Circulación máx. 23.000 l/h Presión máx. 2 bar Ozono máx. 0,6 gramos Conexión Ø 63 mm Longitud del aparato 100 cm Anchura del aparato, incl. reactor 75 cm Nº de artículo: BH03752 Blue Lagoon AOP Compact Ozone & UV-C 75W (230V; 50/60Hz) Nº... - Page 29 AOP COMPAC T OZONE & UV-C 75W AOP COMPAC T OZONE & UV-C 75W SALT WATER UV-C and Pool equipment Leia atentamente as instruções de uso antes de instalar este aparelho. INSTALAÇÃO DO CABO TERRA (DESENHO 2) 1. Antes de montar o protector sintético (4) no parafuso terra (1), tem de passar primeiro o cabo (2) pelo protector (4).
- Page 30 INSTRUÇÕES DE USO DO CONTADOR DE HORAS DIGITAL Ao ligar o Blue Lagoon UV-C Timer o programa inicia um controle a si próprio. O visor dá as seguintes indicações consecutivas e automáticas: 8888; display test ; r e número de versão de software ; Indicação de rede de frequência 50H ou 60H. Seguidamente o visor mostra o número no contador.
-
Page 31: Substituição Da Lâmpada
UV-C and Pool equipment Se verificar que se enganou durante esta operação do aumento de horas, pode facilmente reajustar o contador para as 4500 horas carregando durante mais de 5 segundos no botão. Neste caso o valor no contador foi reiniciado para 4500 e pode seguidamente ser introduzido um novo valor. •... - Page 32 SUBSTITUIÇÃO DA ARMAÇÃO/COMPONENTE ELECTRÓNICA Caso proceda à substituição da armação ou da componente electrónica deve desligar primeiro a ligação terra da armação (consulte o capítulo instalação da ligação terra). A parte electrónica encontra-se no compartimento do visor (W) sobre o aparelho. Este compartimento do visor foi colado e por tal não se pode abrir.
-
Page 33: Especificações Técnicas
UV-C and Pool equipment ESPECIFICAÇÕES TÉCNICAS Lamp T5 Yellow base Ozone 75W Deslocação máxima 23.000 l/h Pressão máxima 2 bar Max. ozono 0,6 gramas Ligação Ø 63 mm Comprimento aparelho 100 cm Largura aparelho c/ reactor incluído 75 cm Artigo número: BH03752 Blue Lagoon AOP Compact Ozone & UV-C 75W (230V; 50/60Hz) Artigo número: BH09752 Blue Lagoon AOP Compact Ozone &... - Page 34 AOP COMPAC T OZONE & UV-C 75W AOP COMPAC T OZONE & UV-C 75W SALT WATER Перед установкой устройства внимательно ознакомьтесь с этой инструкцией! ПОДКЛЮЧЕНИЕ ЗАЗЕМЛЕНИЯ (РИС. 2) 1. Пропустите кабель (2) через пластиковый держатель (4) и затем наденьте держатель (4) на болт...
- Page 35 UV-C and Pool equipment Оптимальное давление по манометру составляет от 0.4 до 0.7 бар. ИСПОЛЬЗОВАНИЕ ЦИФРОВОГО ТАЙМЕРА После включения устройства Blue Lagoon UV-C Timer запускается программа самотестирования. На дисплее последовательно отображаются следующие данные: 8888; проверка дисплея ; r и номер версии программного обеспечения ; 50H или 60H (частота сети) После...
-
Page 36: Замена Лампы
• “dn” означает “вниз”: Этот пункт позволяет уменьшить показания таймера до желаемого значения. Когда выбран этот пункт, на дисплее попеременно мигают ”dn” и показания таймера. После этого нажмите кнопку (T) на 5 секунд. Через 5 секунд на дисплее появится постоянная индикация “dn”. После этого можно отпустить кнопку. Теперь, коротко... - Page 37 UV-C and Pool equipment сомнения, обратитесь к опытному специалисту по установке. ДЕМОНТАЖ И ТЕХНИЧЕСКОЕ ОБСЛУЖИВАНИЕ Перед техническим обслуживанием или демонтажом устройства обязательно отключите электропитание. Специальную лампу необходимо заменять не более чем через 4500 часов работы. При техническом обслуживании или демонтаже устройства имейте под рукой чертежи. 1.
- Page 38 EN RECYCLE INFORMATION The symbol of the barred bin printed on the product means that it must be collected separately from other rubbish when it will not be anymore in use. The user, at the end of the life of the product, will have to bring it to a proper rubbish collection centre for electric and electrical devices.
- Page 39 UV-C and Pool equipment BLUE LAGOON AOP COMPACT OZONE & UV-C 75W & AOP COMPACT OZONE & UV-C 75W SALTWATER |...
- Page 40 VGE International B.V. Ekkersrijt 4304 5692 DH Son The Netherlands Tel. +31(0) 499 461 099 info@vgebv.nl Made in the Netherlands www.vgebv.com B299017 www.bluelagoonuvc.com...
Need help?
Do you have a question about the VGE Blue Lagoon AOP COMPACT OZONE & UV-C 75W and is the answer not in the manual?
Questions and answers