Table of Contents
Advertisement
Quick Links
Capsule360 User Manual
CONTENT
1. Content of the Package
2. Charging and Operation
9.11. Star Tracking
1. Content of the Package
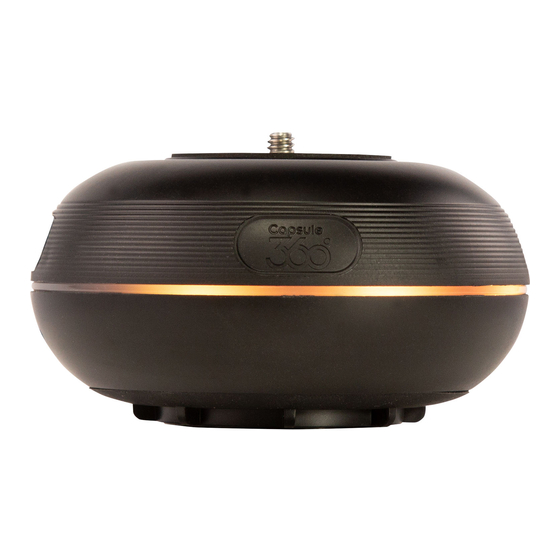
When you purchase a Capsule360, it will be delivered with the following items.
1 x Capsule360
1 x USB Charge Cable
1 x Charger
2. Charging and Operation
Capsule360 comes with a USB charge cable and the battery which lasts up to 7
hours for video shooting and 24 hours for photo shooting with a single charge. The
battery will be charged when you connect Capsule360 to a USB power source.
Charging port is on the side of the Capsule360. You can use your computer USB port
or your regular phone charger for this purpose.
Advertisement
Table of Contents

Subscribe to Our Youtube Channel
Related Manuals for MIOPS Capsule360

Summary of Contents for MIOPS Capsule360
-
Page 1: Table Of Contents
24 hours for photo shooting with a single charge. The battery will be charged when you connect Capsule360 to a USB power source. Charging port is on the side of the Capsule360. You can use your computer USB port or your regular phone charger for this purpose. - Page 2 Depending on the type of the device you are connected to, you will see a letter in the circle. Letter “P” is for the Capsule360 (PAN), letter “S” is for the SLIDER, letter “T” is for the TILT.
-
Page 3: First Use
3. First Use Your Capsule360 may not be delivered with the latest firmware. If a new firmware has been released, before you use it for the first time, you should update the firmware first. To get detailed information about the firmware upgrade, see the Firmware Upgrade Section. -
Page 4: Mobile Application
After opening the mobile app, a list of available devices will appear. In case your device is not shown in the list, make sure that your Capsule360 is turned ON and click the renew button (at the top right-hand side of the screen) again. -
Page 6: Firmware Upgrade
7. Firmware Upgrade Capsule360 has the capability of updating its firmware without needing any cable connection to a computer. You can use the Capsule360 mobile app to check for new firmware version and then update the device with a single click. -
Page 7: Log-In & Create An Account
When you turn your Capsule360 and Capsule360 Mobile App on first thing you will need to do is to connect your Capsule360 to your smartphone. For that, you will see a “renew” icon at the top-right hand of the app screen. Renew the device search by touching the icon. -
Page 8: Smartphone Camera Control
PAN: If you want to control your Capsule360 horizontally, choose the “PAN” mode. TILT: If you want to control your Capsule360 vertically, choose the “TILT” mode. SLIDE: If you want to control your Capsule360 on the slider, choose the “SLIDE” mode. -
Page 9: Saving Preset
8.2 Saving Presets To save the parameters you use, you can touch the save icon on the right-hand side of the screen. To pick between the saved presets, touch the folder icon on the right-hand side of the screen.You can delete the saved presets by swiping them to the left and... -
Page 10: Learn Motion
touching the “delete” icon that appears. 8.3 Learn Motion In this mode, you can control the PAN, TILT and SLIDE motions by manually moving your smartphone in certain ways. 8.3.1 Motion Control by Smartphone You can control the motions of multiple devices at the same time. - Page 11 PAN: Pan motion is done by holding the smartphone horizontally and moving it to the left and right by holding down your finger on the PAN circle. TILT: Tilt motion is done by holding the smartphone horizontally and moving it back and forth by holding down your finger on the TILT circle.
-
Page 12: Features
Before you start shooting, if you want to control shooting area of your camera, you can use the grey button inside of the PAN circle. CCW : Counterclockwise ( Your Capsule360 will turn in counterclockwise direction. CW : Clockwise ( Your Capsule360 will turn in clockwise direction. ) - Page 13 Mode : There are two shooting mode which you prefer such as “Shot move to shot” and “Continuous” mode. Shot move to shot mode When Capsule360 is turning around it pauses to take a shot. After the camera takes the shot Capsule 360 starts turning again. Continuous mode Capsule360 can take a shot when it is moving.
-
Page 14: Long Exposure Timelapse
FPS (Frames Per Second). On the bottom right-hand corner, you will see another shows the number of photos already taken. Motion Settings : To turn Capsule360 to its starting point after the programmed movements are finished, touch the “motion settings” button at the top left-hand side of the app screen. - Page 15 Mode : There are two shooting mode which you prefer such as “Shot move to shot” and “Continuous” mode. Shot move to shot mode When Capsule360 is turning around it pauses to take a shot. After the camera takes the shot Capsule 360 starts turning again. Continuous mode Capsule360 can take a shot when it is moving.
-
Page 16: Bulb Ramping Timelapse
Motion Settings : To turn Capsule360 to its starting point after the programmed movements are finished, touch the “motion settings” button at the top left-hand side of the app screen. Smartphone Button : If you want to use your smartphone`s camera to shooting, turn on the smartphone setting button by touching the white button which is left- hand on the screen. - Page 17 Mode : There are two shooting mode which you prefer such as “Shot move to shot” and “Continuous” mode. Shot move to shot mode When Capsule360 is turning around it pauses to take a shot. After the camera takes the shot Capsule 360 starts turning again. Continuous mode...
- Page 18 FPS (Frames Per Second). On the bottom right-hand corner, you will see another shows the number of photos already taken. Motion Settings : To turn Capsule360 to its starting point after the programmed movements are finished, touch the “motion settings” button at the top left-hand side of the app screen.
-
Page 19: Interval Ramping Timelapse
PAN circle. CCW : Counterclockwise ( Your Capsule360 will turn in counterclockwise direction. CW : Clockwise ( Your Capsule360 will turn in clockwise direction ) Initial Interval : This value defines the initial interval value for starting to shooting. - Page 20 Mode : There are two shooting mode which you prefer such as “Shot move to shot” and “Continuous” mode. Shot move to shot mode When Capsule360 is turning around it pauses to take a shot. After the camera takes the shot Capsule 360 starts turning again. Continuous mode Capsule360 can take a shot when it is moving.
-
Page 21: Hdr Timelapse
Motion Settings : To turn Capsule360 to its starting point after the programmed movements are finished, touch the “motion settings” button at the top left-hand side of the app screen. Smartphone Button : If you want to use your smartphone`s camera to shooting, turn on the smartphone setting button by touching the white button which is left- hand on the screen. - Page 22 Frames Per Second (FPS) : This parameter defines how many pictures are to be taken in one second. If you set the frame number to 0, this will mean that the time-lapse will continue until you stop it. Interval : This parameter defines the duration between each frame. The Interval can have a value from 13 milliseconds up to 100 hours.
-
Page 23: Basic Video
Mode : There are three options to set the starting movement of Capsule 360. One way Capsule 360 moves in only one direction. Two way Capsule 360 will move in both directions only once. Continuous Capsule360 will continuously do the movements you set. - Page 24 Ease IN/ OUT : There are three options of Ease IN/ OUT such as low, medium and high. If you choose; Low : Capsule360 will slowly accelerate. Medium : Capsule360 will accelerate in medium speed. High : Capsule360 will accelerate in high speed.
-
Page 25: Follow Me
You can make the product shootings much more easy if you automate it with your Capsule360. You can shoot your products in the angles and the speed you want! Frame : This parameter shows how many photos are to be taken at one 360 turning of turntable. - Page 26 Automatic In this mode via using MIOPS Mobile Dongle, you will ensure that your camera is triggered. You can manually press your camera’s hot shoe and take a photo when your slider pauses according to the frame numbers that you specified.
-
Page 27: Multi-Row Panorama
Panoramic Photography helps us to capture images that are in very wide angles so that it includes more than our eye’s sight range. With its rotating property, Capsule360 enables us to get 360 degree images. Via a photo editing software you can combine all of the images together and attach them... - Page 28 Angle of view : The term “angle of view” represents the angular extent of the given location that is imaged by the camera. If you are aiming to take a multi-panorama shot, you should adjust the “angle of view” values given below separately. Width Horizontal degree ( This mode should be selected if you are going to shoot with the camera in landscape mode.
-
Page 29: Remote Controller
Frame Delay: The time that has passed from the time when the camera finishes the exposure, to the time when the camera processes the photographs and shows it to you is called “frame delay”. Camera Sensor : Enter the your camera`s sensor type. Landscape Should be chosen if the camera will be used vertically. - Page 30 9.11. Star Tracker With your Capsule360 you can capture the sun, the moon, the stars and the milky way in high resolution. When you input your necessary settings properly, Capsule360 will follow the stars in high precision and make you able to catch the best moments.
- Page 31 Set your tripod screw in a way that is facing north and put the Capsule360 to your tripod. We need to align (turn) the screw of Capsule360 with the Pole star or Polaris. You can find the Polaris by using Capsule360 mobile app provides you angle of view automatically or you can enter it manually.
- Page 32 forget that the long exposure time is affected by accuracy of Polar Alignment and zoom value (focal point) which you used.
-
Page 34: Focus Stacking
9.12. Focus Stacking Warning : This is slide available through a slide device. Focus stacking is a method where multiple photos are captured at slightly different focal positions and these photos are merged together to form a single image using only the focused areas of each of them. -
Page 35: Settings
Step Distance : According to the step distance value that you specified for the slider, mechanism will pause and take photographs. For instance, if you input the step distance value as 7 for a slider that is 70 cms (70/7=10), 1 shot in every 7 cms, in 10 steps 10 shots will be taken. - Page 36 Pulse Length: This parameter is used to determine the pulse length of each trigger signal for those modes which don't have an exposure parameter. HDR Interval: This parameter is used to determine the interval between each frame for HDR mode. Check for Updates : This button is used to check if there is a firmware available.
Need help?
Do you have a question about the Capsule360 and is the answer not in the manual?
Questions and answers