Table of Contents

Summary of Contents for Clavister SG10 Series
- Page 1 Installation and Setup Guide Clavister SG10 Series Clavister AB Torggatan 10 SE-891 33 Örnsköldsvik SWEDEN Phone: +46-660-299200 Fax: +46-660-12250 www.clavister.com Build: 890 Published 2008-06-19 Copyright © 2008 Clavister AB...
- Page 2 DAMAGES OF ANY CHARACTER (E.G. DAMAGES FOR LOSS OF PROFIT, SOFTWARE RESTORATION, WORK STOPPAGE, LOSS OF SAVED DATA OR ANY OTHER COMMERCIAL DAMAGES OR LOSSES) RESULTING FROM THE APPLICATION OR IMPROPER USE OF THE CLAVISTER PRODUCT OR FAILURE OF THE PRODUCT, EVEN CLAVISTER INFORMED...
-
Page 3: Table Of Contents
Table of Contents Preface ........................ 5 1. Product Overview ....................6 1.1. Unpacking the Product ................6 1.2. Ports and Connectors ................7 2. Installation ......................10 2.1. Installation Guidelines ................10 2.2. Connecting Power ..................11 2.3. Resetting to factory defaults ..............12 3. - Page 4 List of Figures 1.1. An Unpacked Clavister SG10 Series Appliance ............. 6 1.2. Rear view of the Clavister SG10 Series..............7 1.3. SG10 Power and Device Status LEDs ..............8 1.4. SG10 Port Status LEDs ..................8 2.1. SG3200 Rear View ..................11 2.2.
-
Page 5: Preface
Preface Target Audience The target audience for this guide is the user who has taken delivery of a packaged Clavister SG10 Series appliance. The guide takes the user from unpacking and installation of the device through to power-up and initial network connection. -
Page 6: Product Overview
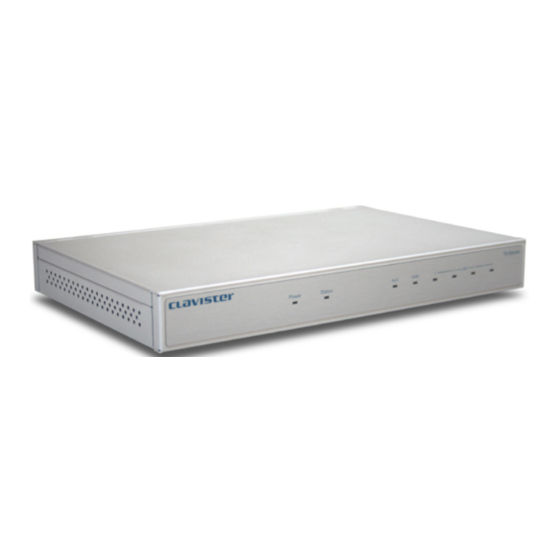
• Ports and Connectors, page 7 1.1. Unpacking the Product This section details the unpacking of the SG10 Series appliance. Open the packaging box used for shipping and carefully unpack the contents. The box should contain the following: The Clavister SG10 Series Appliance. -
Page 7: Ports And Connectors
LAN 1-4. Ethernet Connection Limitations With the SG10 Series there is a limit to how many devices can be connected via the ethernet ports. This number is determined by the type of SG10 license purchased and the size of CorePlus ARP table that the license allows. - Page 8 Chapter 1. Product Overview The front of the SG10 Series device features two LED lights at the left. One is for power, the other indicates CorePlus status. The Power LED should be green when power is applied (see Section 2.2, “Connecting Power”).
- Page 9 Port Status LEDs Chapter 1. Product Overview...
-
Page 10: Installation
Chapter 6, Hardware Specifications. Flat Surface Installation The SG10 Series device can be mounted on any appropriate stable, flat, level surface that can safely support the weight of the appliance and its attached cables. -
Page 11: Connecting Power
Section 3.1.2, “Connecting the Console Port”. The reason for this is that there is no On/Off switch on the SG10 Series and as soon as power is applied the boot-up dialog sequence appears on the console screen. -
Page 12: Resetting To Factory Defaults
In some unusual cases, it may be necessary to reset the SG10 Series device to the state it was in when it left the factory. The recessed button to the left of the power inlet on the back of the SG10 Series can be used to reset the device to its factory defaults. - Page 13 2.3. Resetting to factory defaults Chapter 2. Installation...
-
Page 14: Initial Setup
3.1. Attaching Connectors 3.1.1. Connecting to a Network The initial configuration of the SG10 Series device configures which Ethernet interface is to be used for remote management. Any interface can be used for this purpose. The selected interface can also be used for normal traffic. - Page 15 Chapter 3. Initial Setup Flow Control. • An RS-232 cable with appropriate connectors. The SG10 Series package includes an RS-232 null-modem cable. To connect a terminal to the console port, follow these steps: Set the terminal protocol as described previously.
-
Page 16: Local Rs232 Console Setup
3.2. Local RS232 Console Setup Make sure that a terminal (or a computer running terminal emulation software such as Hyper-Terminal) is connected to the console port on the Clavister SG10 Series hardware as described above in Section 3.1.2, “Connecting the Console Port”. - Page 17 3.2. Local RS232 Console Setup Chapter 3. Initial Setup however, the management workstation is at least one router hop away from the appliance then the Default Gateway needs to be specified so that the appropriate entry is placed in the CorePlus routing table which is otherwise empty.
-
Page 18: Finalizing The Configuration
3.3. Finalizing the Configuration After intial setup, the user should refer to the companion publications found in PDF format on the accompanying CD for information on how to begin to configure the SG10 Series device: Clavister CorePlus This describes the general operation and control of the... - Page 19 3.3. Finalizing the Configuration Chapter 3. Initial Setup...
-
Page 20: Warranty
Start Date (as defined below). The warranty will only apply to failure of the product if Clavister is informed of the failure not later than two (2) years from the "Start Date" or thirty (30) days after that the failure was or ought to have been noticed by the customer. The warranty will not... - Page 21 Clavister's entire liability according to this warranty shall be, at Clavister's option, either return of the price paid, or repair or replacement of the Hardware that does not meet Clavister's limited warranty and which is returned to Clavister with a copy of your receipt.
-
Page 22: Safety
Chapter 5. Safety Safety Information Clavister SG10 Series devices are safety class I products and have protective ground terminals. There must be an uninterrupted safety earth ground from the main power source to the product’s input wiring terminals, power cord, or supplied power cord set. Whenever it is likely that the protection has been impaired, disconnect the power cord until the ground has been restored. - Page 23 Hinweise zur Sicherheit Chapter 5. Safety dépannage, réglage, entretien ou réparation devra être confié exclusivement à un personnel qualifié. Hinweise zur Sicherheit Dies ist ein Gerät der Sicherheitsklasse I und verfügt über einen schützenden Erdungsterminal. Der Betrieb des Geräts erfordert eine ununterbrochene Sicherheitserdung von der Hauptstromquelle zu den Geräteingabeterminals, den Netzkabeln oder dem mit Strom belieferten Netzkabelsatz voraus.
- Page 24 Consideraciones sobre seguridad Chapter 5. Safety momentáneos que entrañen peligro (rayos o alteraciones en la red de energía eléctrica). Manejar con precaución los componentes de metal de la LAN que estén al descubierto. Este aparato no contiene pieza alguna susceptible de reparación por parte del usuario. Todas las reparaciones, ajustes o servicio de mantenimiento debe realizarlos solamente el técnico.
-
Page 25: Hardware Specifications
Chapter 6. Hardware Specifications Below are the key hardware specifications for Clavister SG10 Series installation. Figure 6.1. SG10 Series Dimensions and Weight Height x Width x Depth (mm) 30 x 240 x 160 Device weight 1.1 kg Device form Factor...
Need help?
Do you have a question about the SG10 Series and is the answer not in the manual?
Questions and answers