Advertisement
Quick Links
R
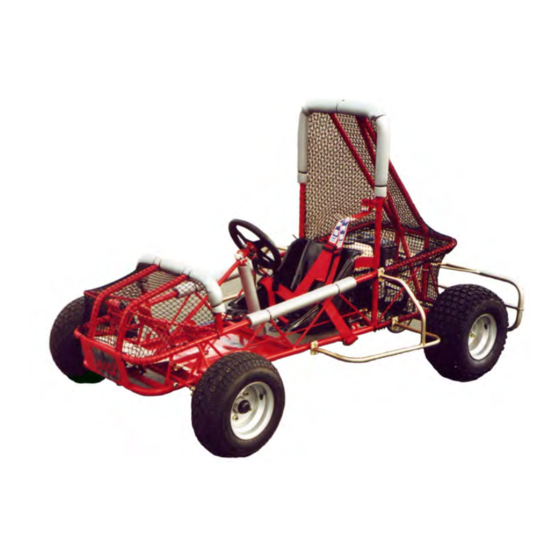
Wasp R500 Pro-Rally Kart
Owners Manual
Assembly
&
Maintenance
R
E DW OOD
E
( UK ) L
N GIN EE RIN G
Assembly
&
Maintenance Manual
Phone: 0044 (0) 1253 713266
Fax: 0044 (0) 1253 728233
E
E DWO O D
NG I N E E R I N G
High Performance Action!
Experience the thrill & exhilaration of being behind
the wheel of your own Rally Kart, blasting up the
gruelling track & broad sliding through the twisting
corners pushing you to the limit!
T D
High ground clearance coupled with a low centre of
gravity, makes for exciting off road performance.
Low ground pressure knobbly tyres, reduces damage to the
countryside while putting down the power.
Race proven hydraulic disc braking, for instant stopping
power.
Low noise Honda 4 stroke engines providing the
'punch' using as little as 1 litre per hour of unleaded
(UK ) L
T D
Advertisement

Summary of Contents for Wasp R500 Pro
- Page 1 (UK ) L E DWO O D NG I N E E R I N G Wasp R500 Pro-Rally Kart Owners Manual Assembly & Maintenance High Performance Action! Experience the thrill & exhilaration of being behind the wheel of your own Rally Kart, blasting up the gruelling track &...
-
Page 2: Important Notice
It is a condition of purchase that the following manual has been read & fully understood. The R500 Pro-Rally Kart is not designed for highway use. Protective clothing & approved safety helmet & eye protection must be worn at all times. -
Page 3: Safety Precautions
Wasp R500 Pro-Rally Kart. Driver briefing. Code of good practice SAFETY PRECAUTIONS The driver must be fully instructed & familiarized with the kart & the terrain, & supervised at all times by a responsible adult or suitably trained instructor. - Page 4 Assembly Instructions Tips & Helpful Notes. Points to note before assembly: Please read carefully the instructions through first before attempting to work on the kart. Take each step in the assembly of the kart slowly with precision. Work in a clean, clutter free ...
- Page 5 Assembly Instructions Assembling rolling chassis (Steps 1 to 29) STEP ONE STEP TWO Grease & mount front stub axles left & right (steering arms on top facing forwards). ” x 5” H.T hex bolt, ” washer, stub axle, ” washer , Stand frame on end (on a kind, level /4”...
- Page 6 Assembly Instructions Assembling rolling chassis (Steps 1 to 26) STEP SEVEN STEP EIGHT Grease & mount front hubs. Heavy washer, castle nut & lock with a Grease & mount both pedals in the split pin. forward position. 2 x M12 nylock . (Be sure that the full movement is free on both pedals, remove any paint).
- Page 7 Assembly Instructions Assembling rolling chassis (Steps 1 to 15) STEP ELEVEN STEP TWELVE When you are happy that the axle is centralized, small indents aprox 2mm to 3mm should be drilled in the axle through the bearing grub screw holes & the grub screws refitted Tap the key into the wheel hubs, centralize axle, &...
- Page 8 M6 screw & locknut do not foul the kart bracket) tighten the calliper to the kart bracket. (Locktite on the calliper bracket to calliper M8 x 20 fixing Spacers are not normally required on Wasp ‘F’ series karts. screws is recommended). STEP THREE...
-
Page 9: Torque-Converter
Fitting the engine & Transmission Torque-converter. The following instructions are for fitting a torque-converter. Points to note Alignment: it is very important to have sprockets, pulleys & shafts in their correct alignment. If they are not lined up accurately excessive wear will occur. If they are badly out of line, the chain or belt will de-rail. - Page 10 Fitting the engine & Transmission Torque Converter. Step One Step Two Fit the pre-drilled eng / Assemble the idle shaft transmission plate to the from the left hand side : chassis slide rails. Mount the engine on top of the plate using the pre-set holes. Using 4x M8 x 65 hex ( up from the underside of the frame) Collar (grub screws removed &...
- Page 11 Fitting the engine & Transmission Torque Converter. Step Seven Step Eight Push the collar to the left of the pulley up very tight against the Undo the idle shaft. Place onto the pulley the drive belt, (N.B pulley spring boss removing any The belt is asymmetrical as are the pulleys.
-
Page 12: Assembly Steps
Wasp R500 Pro-Rally Kart Assembly Steps 17 - 28. Wasp R500 Pro-Rally Kart. Having now fitted your transmission you are now ready to complete the final stages of assembling your kart. Once you have completed your kart it is recommended that you read the ‘Inspection &... - Page 13 Wasp R500 Pro-Rally Kart. Assembly Steps 17 - 28. Step Twenty-One. Step Twenty-Two (a) Fitting the throttle cable. (Honda). Position the seat into a comfortable Fit the cable adjuster to the frame, a position. lock nut either side of the frame brack- et.
- Page 14 Wasp R500 Pro-Rally Kart. Assembly Steps 17 - 28. Step Twenty-Five. The top speed of the kart should be governed to suit the driver’s age & ability, as well as the terrain. The maximum speed for experienced drivers is recommended to be less than 30mph.
- Page 15 Wasp R500 Pro-Rally Kart. Assembly Steps 17 - 28. Step Twenty-Seven Step Twenty-Eight Fit seat harness to the rear roll Fit the aluminium foot plate frame support (steel eye) & the 4 x M8 x 20 soc caps, webbing to the side rails behind M8 washers &...
- Page 16 Inspection & Maintenance Guide To maintain optimum safe performance and long working life of your Wasp “F” Series Kart, it is recommended that the following simple checks and maintenance are made whenever the Kart is used. Work in a clean safe environment. It is good practice to produce a check list (or log) to prevent any part or area of the kart being neglected, Some areas will require more frequent attention than others, This does alter with the many varied conditions, type of usage and duration of usage.
- Page 17 HARNESS & WRIST RETAINERS: Check security to the chassis frame and correct operation any excess webbing should be prevented from hanging loose when a driver is secured in the seat. If the webbing is cut, frayed or damaged in any way, do not use replace.
- Page 18 DRIVER AND SUPERVISER INSTRUCTION. The driver must be fully instructed and familiarised with the kart and the terrain, and supervised at all times by a responsible adult or suitably trained instructor, It is good practice to have ready access to recommended safety equipment such as a suitable fire extinguisher, first aid, and reliable communication equipment.
Need help?
Do you have a question about the R500 Pro and is the answer not in the manual?
Questions and answers