
Related Manuals for Makita GRM02


Summary of Contents for Makita GRM02
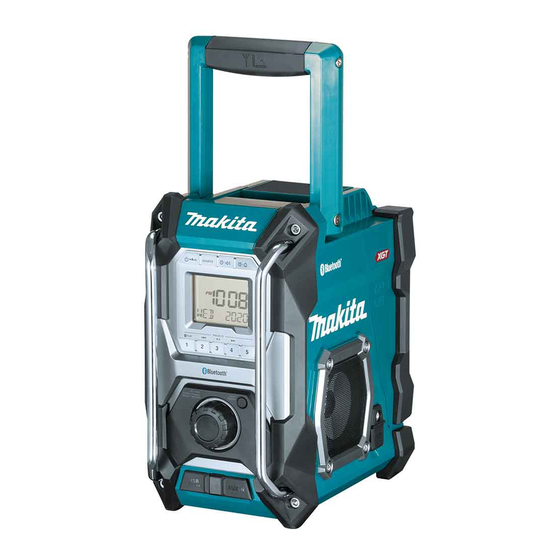
- Page 1 Job Site Radio Instruction manual ESMX Radio de Trabajo Manual de instrucciones GRM02...
- Page 2 7 8 9 10 2 ENGLISH...
- Page 3 3 ENGLISH...
- Page 4 4 ENGLISH...
-
Page 5: Lcd Display
Read instruction manual. ENGLISH (Original Instruction) IMPORTANT SAFETY EXPLANATION OF GENERAL INSTRUCTIONS VIEW (Fig. 1) WARNING: When using electric tools, basic safety precautions should 1. Built-in antenna (AM) always be followed to reduce the risk of fire, electric 2. Handle/Built-in antenna (FM) shock, and personal injury, including the following: 3. - Page 6 12. Follow your local regulations relating to disposal of battery. SAVE THESE INSTRUCTIONS 13. Use the batteries only with the products specified by Makita. Installing the batteries to non-compliant products may result in a fire, excessive heat, SPECIFIC SAFETY RULES explosion, or leak of electrolyte.
- Page 7 ● Replace only with the same or equivalent type. The changes or modifications not expressly approved ● Only use genuine Makita batteries. Use of non- by the party responsible for compliance could void the genuine Makita batteries, or batteries that have user’s authority to operate the equipment.
-
Page 8: Operating Time
OPERATING TIME * The suitable battery packs for this radio listed as the following table. * The following table indicates the operating time on a single charge. AT SPEAKERS OUTPUT = 100mW Battery cartridge voltage Unit: Hour (Approximately) Battery capacity LXT (18V) Radio/AUX Bluetooth play... -
Page 9: Installation And Power Supply
INSTALLATION AND POWER Indicating the remaining battery capacity (Fig. 6-8) SUPPLY 1. Indicator lamps 2. Check button CAUTION: Press the check button on the battery cartridge to indicate ● Be careful not to pinch your fingers when opening the remaining battery capacity. The indicator lamps light and closing the battery cover. -
Page 10: Listening To The Radio
● Use the AC power adaptor supplied with the product or as it is highly possible that it may cause breakdown of specified by Makita only. the units. ● Do not hold the power supply cable and plug by your LISTENING TO THE RADIO mouth. -
Page 11: Fm Stereo (Auto)/Mono
8. To switch off your radio press the Power button. f. Frequency Displays the frequency of the FM for the station listened to. Manual tuning – AM/FM FM stereo (auto)/mono 1. Press the Power button to switch on your radio. 2. -
Page 12: Setting The Clock Time And Date
a. Setting radio alarm time: Setting the clock time and date 1. The radio alarm can be set either when radio is on or 1. Press and hold the Menu/Info button. off. 2. Rotate the Tuning control knob until “CLOCK ADJ” 2. -
Page 13: Listening To Music Via Bluetooth Streaming
DAILY – the alarm will sound everyday. 2. Rotate the Tuning control knob until “LOUD ON” or WEEKDAY – the alarm will sound only on weekdays. “LOUD OFF” appears on the display. Press the Tuning WEEKEND – the alarm will sound only at weekends. control knob to enter the setting. -
Page 14: Auxiliary Input Socket
● If ‘MR002G’ shows in your Bluetooth device list but seconds until “BT PAIR” is shown on the display or turn your device cannot connect with it, please delete the off Bluetooth on your Bluetooth device to disable the item from your list and pair the device with the radio connection. -
Page 15: Specifications
SPECIFICATIONS Power requirements DC 12V 2.5A, center pin AC power adaptor positive UM-3 (AA size) x 2 for Battery back up Slide battery: 10.8V - 36V FM 87.50-108 MHz (0.1MHz/step) Frequency coverage AM (MW) 520-1,710 kHz (10kHz/step) ® Bluetooth ® (The Bluetooth word mark and logos are registered trademarks owned by Bluetooth SIG, Inc.) -
Page 16: Pantalla Lcd
ESPAÑOL SÍMBOLOS (Instrucciones originales) Lo siguiente muestra los símbolos usados por el equipo. Asegúrese de que entiende su significado, antes de usar EXPLICACIÓN DE LA VISTA el equipo. GENERAL (Fig. 1) Lea el manual de instrucciones. 1. Antena integrada (AM) 2. - Page 17 con agua. Si el líquido entrase en contacto con los REGLAS ESPECÍFICAS ojos, busque ayuda médica. El líquido expulsado de DE SEGURIDAD PARA EL la batería puede causar irritación o quemaduras. 11. No use una batería o una herramienta dañada o CARTUCHO DE BATERÍA modificada.
- Page 18 UU.). Estos límites están diseñados para proporcionar equivalente. protección razonable contra interferencias perjudiciales ● Use solo baterías originales Makita. El uso de en una instalación residencial. Este equipo genera, baterías Makita no originales o de baterías que utiliza y puede emitir energía de frecuencias de radio y, hayan sido alteradas podría provocar la explosión...
-
Page 19: Tiempo De Funcionamiento
TIEMPO DE FUNCIONAMIENTO * Las baterías adecuadas para esta radio se enumeran en la siguiente tabla. * La siguiente tabla indica el tiempo de uso con una sola carga. CON LA SALIDA DEL ALTAVOZ = 100 Tensión del cartucho de batería Unidad: hora (aproximadamente) Capacidad de la batería... - Page 20 INSTALACIÓN Y Indicación de la capacidad restante de la batería (Fig. 6-8) ALIMENTACIÓN 1. Luces indicadoras 2. Botón de comprobación PRECAUCIÓN: Pulse el botón de comprobación del cartucho de la batería ● Tenga cuidado de no pellizcarse los dedos al abrir para indicar la capacidad restante de la batería.
-
Page 21: Escuchar La Radio
Cuando no cargue un suministrado con el producto o especificado por dispositivo de bajo voltaje, coloque siempre la cubierta Makita. en el puerto USB. ● No sujete el cable de alimentación y enchufe con la ● No inserte un clavo, un cable, etc. en el interior del boca. -
Page 22: Modos De Visualización - Fm
frecuencia mostrada en el momento actual, y se 2. Presione el botón de banda para seleccionar la banda detendrá automáticamente cuando encuentre una de frecuencia deseada. Sintonice la emisora de radio emisora lo suficientemente fuerte. deseada tal y como se describió anteriormente. 4. -
Page 23: Otros Ajustes
sintonización para acceder a los ajustes. Seleccionar una presintonía en modo 5. Gire el control de sintonización para seleccionar el año AM/FM deseado y presione el control de sintonización para 1. Presione el botón de encendido para encender la confirmar los ajustes. A continuación, gire el control radio. -
Page 24: Apagado Automático
control de sintonización para seleccionar los minutos y WEEKDAY – La alarma solo sonará los días laborables presione el control de sintonización para confirmar los (de lunes a viernes) ajustes de los minutos. WEEKEND – La alarma solo sonará los fines de 4. - Page 25 simplemente presione el botón de encendido para retroiluminación se apagará en 10 segundos. Ahora apagar la unidad manualmente. puede simplemente seleccionar y reproducir cualquier música desde su dispositivo fuente. El control del Compensación volumen puede ajustarse desde el dispositivo fuente o Puede conseguir una compensación para su radio en las directamente desde la radio.
-
Page 26: Mantenimiento
3. Mantenga presionado el botón de siguiente pista o 4. Para tener una mejor calidad de sonido, pista anterior para moverse a través de la pista actual. recomendamos poner el volumen a más de dos tercios Suelte el botón cuando alcance el punto deseado. en su dispositivo de audio y a continuación, ajustar el Nota: volumen de la radio según necesite. -
Page 27: Especificaciones
ESPECIFICACIONES Requisitos de alimentación Adaptador de alimentación DC 12V 2.5A, clavija central positiva 2 UM-3 (tamaño AA) para respaldo Batería Batería deslizante: 10.8V - 36V FM 87.50-108MHz (0.1MHz/intervalo) Cobertura de frecuencias AM (MW) 520-1,710kHz (10kHz/intervalo) ® Bluetooth ® (La palabra Bluetooth y los logotipos son marcas comerciales registradas propiedad de Bluetooth SIG, Inc.) - Page 28 Makita Corporation 3-11-8, Sumiyoshi-cho, Anjo, Aichi 446-8502 Japan GRM02-NA2-2011 www.makita.com 3A81dT5Z2000A...
Need help?
Do you have a question about the GRM02 and is the answer not in the manual?
Questions and answers