
Summary of Contents for Gamma CADIAX compact Series
- Page 1 CADIAX compact A Practical Method for TMJ Registration Operating Instructions 0483 GAMMA Medizinisch-wissenschaftliche Fortbildungs-GmbH...
- Page 3 Firmware version 2.13, CADIAX 4, model A Firmware version 2.13, CADIAX compact 2 Recorder version 2.15.0 Revision: 2020-01-31 © 2020 GAMMA Medizinisch-wissenschaftliche Fortbildungs-GmbH Josef Brenner Strasse 10 3400 Klosterneuburg Austria Phone: +43 2243 34140 Fax: +43 2243 34140 90 E-Mail: office@gammadental.com Internet: www.gammadental.com...
- Page 4 CADIAX compact...
- Page 5 © 2020 GAMMA Medizinisch-w issenschaftliche Fortbildungs-Gm bH This document contains information protected by copyright. All rights reserved. This document may not be duplicated, repro- duced or translated into other languages, fully or partially, w ithout the express w ritten permission of GAMMA Medizinisch- w issenschaftliche Fortbildungs-GmbH.
- Page 6 CADIAX compact...
-
Page 7: Table Of Contents
Content Content Introduction ......................10 Explanation of used symbols on packaging and device ......................10 Important safety considerations ......................12 1.2.1 General safety instructions ......................12 1.2.2 Special information about medical electrical devices ......................14 1.2.3 Contraindications - Limitations to application ...................... - Page 8 CADIAX compact 3.5.5 Determining the joint axis ......................50 3.5.6 Attaching the sensors ......................51 Setting up the CADIAX system ......................52 Face bow parameter input ......................53 3.7.1 Anatomic face bow ......................53 3.7.2 Condylograph ......................54 3.7.3 Condylograph comfort ......................
- Page 9 Content Storage and transport ......................76 Disposal ......................77...
-
Page 10: Introduction
CADIAX compact Introduction Thank you for showing your confidence in us by purchasing the CADIAX system. You have purchased a top-quality medical device, designed based on more than 25 years of experience in the electronic con- dylography registration. In the following pages, we would like to help you get acquainted with the CADIAX device and its soft- ware. - Page 11 Introduction Manufacturer Manufacturing date Serial number Upper and lower limit for temperature Upper and lower limit for relative humidity Upper and lower limit for atmospheric pressure Do not sit on the device Do not step on the device Type B applied part Dispose separately from other waste material Direct Current (DC)
-
Page 12: Important Safety Considerations
CADIAX compact Universal Serial Bus (USB) Foot switch Measuring sensors of the right patient side Measuring sensors of the left patient side Important safety considerations For your own safety, as well as for operational safety, please read these instructions thor- oughly, before beginning to operate the device. - Page 13 Introduction Never attempt to repair the device yourself. All repair work must be done by authorized, trained technicians. In the following cases disconnect the device from the computer and contact a qualified service technician: · If water or other liquid seeps into the device. ·...
-
Page 14: Special Information About Medical Electrical Devices
CADIAX compact 1.2.2 Special information about medical electrical devices 1.2.2.1 Setting up the CADIAX device If the computer connected with the CADIAX device is in the proximity of the patient, it must have been tested in com- pliance with standard EN 60601-1. The patient proximity (definition according to standard EN 60601-1) is the area within which the patient could, intention-... - Page 15 Introduction Avoid using the CADIAX device directly next to other devices or stacked on top of other devices, as this could lead to faulty operation. If, however, it is necessary to use the device in the manner stated, the CADIAX device as well as the other devices must be monitored to ensure they are working properly.
- Page 16 CADIAX compact 4 Connector socket for the foot switch 5 Type label with information regarding the manufacturer and the device 6 USB 2.0 (type B) connector socket for the cable connection to the PC Back side 1.2.2.4 Features of the CADIAX 4 device enclosure (compact sensor set) When using the "compact"...
- Page 17 Introduction 6 Connector socket for the foot switch 7 Type label with information regarding the manufacturer and the device 8 USB 2.0 (type B) connector socket for the cable connection to the PC Back side 1.2.2.5 Status indication of the CADIAX device The CADIAX device indicates its operating state via a green LED on the front side of the enclosure.
-
Page 18: Contraindications - Limitations To Application
CADIAX compact Only use accessories which are explicitly approved for CADIAX devices. Using other ac- cessories, especially cables which are longer than the cable lengths prescribed below, can lead to increased emission of interferences, or to reduced interference immunity of the CADIAX device, which may lead to faulty operation. -
Page 19: Magnet Sensor System
Introduction · Certain diseases in the ear region: Patients with diseases in the ear region which exclude the fixation of the face bow in the auditory canal (e.g., painful inflammations, tinnitus, ear pain, etc.). · Muscle pain in the head and neck region: Patients with extreme muscle pain in the head and neck region that are not able to wear the face bow for the duration of the ex- amination. -
Page 20: User Interface Terminology
The first occurrence of Special Terms that may be used in subsequent descriptions are highlighted in bold and italic font style. User interface terminology All GAMMA software applications use a user interface layout consisting of the following parts: · The Working Area is the area of the application that displays the actual patient data and will therefore re- ceive the highest amount of attention and interaction. -
Page 21: Scope Of Delivery
(e.g. Durelon by 3M). Furthermore, a face-bow system is required for mounting the CADIAX measuring sensors, such as Con- dylograph or Condylograph comfort by GAMMA. Such is not included in the regular scope of delivery of the CADIAX system. -
Page 22: System Requirements
CADIAX compact System requirements A computer is required in order to use the CADIAX system. The following computer system require- ments apply: Component Minimum requirement Windows 7 with Service Pack 1, Windows 8.1 with Update 1, Operating system Windows 10 version 1703 or higher 32-bit or 64-bit Entry-level multi-core processor Processor (CPU) -
Page 23: Preparing To Operate The Cadiax Device
Preparing to operate the CADIAX device Preparing to operate the CADIAX device Before beginning to work with the CADIAX system, several preparatory steps must be carried out. Installing the software Install the software before connecting the CADIAX device to your computer for the first time. This will install the necessary drivers to let your operating system to recognize the device. - Page 24 CADIAX compact Enter your user information and your license code in the corresponding fields and click Next to continue. You find the license code in the accompanying license letter or on your delivery note. In the next step, you will be asked to which directory the program files shall be copied.
-
Page 25: Starting And Activating The Software
CADIAX® compact 2 Recorder) or via the link on the desktop: If the CADIAX recording software is started as a component of GAMMA Dental Software, some features may not be available since these are integrated in the other modules of the software package. - Page 26 If the computer does not have an internet connection, se- lect Offline activation. Send the activation code to GAMMA either via mail, fax, or visit the activation website to activate your software. To avoid mistakes caused by typing the codes by hand, the system provides export and import functionalities.
-
Page 27: Setting The Face Bow
Preparing to operate the CADIAX device Setting the face bow To set the type of the face bow you use for recording, use the menu Settings Face Bow. The various face bows have different scales for entering face geometries. If a wrong face bow is selected or a wrong scale value is entered, the recordings can not be recalculated correctly. -
Page 28: Setting The Articulator
CADIAX compact The fixed reference point indicators P (Patient) and T (Trans- The individual reference point indicator. fer). The fixed reference point indicators are mounted at a height of 22 mm, which cannot be adjus- ted. If the anatomical situation of the patient requires a different height, the individual reference point indicator should be used. - Page 29 Preparing to operate the CADIAX device Hanau 96H2 Hanau Modular Hanau Wide-Vue Ivoclar Vivadent Ivoclar Stratos 200 Ivoclar Stratos 300 KaVo KaVo Protar Panadent GAMMA Reference A Reference I Reference LF Reference SL Whip Mix Model 2240 Model 2340 Model 3040 Model 3140 Model 8500 You can find further information regarding the calculated articulator settings in chapter "Calculating artic-...
-
Page 30: Recording Tmj Movement
CADIAX compact Recording TMJ movement The CADIAX system allows joint movement recording by usage of both anatomic (arbitrary) and kinematically determined (individual) joint axis. For recording on kinematically defined (exact) joint axis, the face bows Condylograph or Condylograph comfort are required. In principle, the registration of mandibular movement is always carried out in the following steps: 1. -
Page 31: Preperations
Entering patient information Next, enter the patient data into the input fields above the coordinate system. If CADIAX compact 2 Recorder was started from GAMMA Dental Software, the patient data will be filled out automatically and cannot be changed. 3.3.2 Fixing the clutch onto the lower jaw teeth There are two different kinds of clutches available for attaching the lower face bow to the lower jaw. - Page 32 CADIAX compact Examine the periodontal status of the lower jaw dentition. In case of a poor periodontal situation, either refrain from using the clutch, or, at the attending dentist's responsibility, take suitable pre- cautionary measures (e.g., blocking out). Areas of the dentition, undercut to the occlusal plane, should always be blocked out with appropriate material (e.g., soft wax), even with patients that have a healthy periodontal status.
- Page 33 Recording TMJ movement Place the filled clutch onto the lower jaw teeth and set the shaft in a median-sagittal position. The patient draws back the lower jaw and closes, thus automatically posi- tioning the shaft so that the smallest possible locked bite is achieved.
- Page 34 CADIAX compact Place the clutch in the patient's mouth and bend the wings to fit on the lower tooth arch. Allow 1-2 mm of space between the teeth and the clutch, for the plastic. Place a wax plate between the upper and lower teeth, and have the patient bite down.
- Page 35 Recording TMJ movement Remove any excess interferences of the plastic material with a sharp knife or a cutter. Use as little plastic as possible. Too much plastic often causes pain in the gums. Check to see whether the clutch fits properly in the mouth.
-
Page 36: Mounting The Anatomic Facebow
CADIAX compact Occlusion paper marks the contacts between the clutch and upper jaw teeth, which have to be removed. If the plastic has not completely set yet, you can lay the clutch aside and begin mounting the upper face bow. Prepare the cement according to the manufacturer's in- formation. -
Page 37: Mounting The Upper Face Bow
Recording TMJ movement 3.4.2 Mounting the upper face bow Pull back the glabella support. The retaining straps are fixed to the face bow. The base of the bite fork is not on the bow. The porus knobs of the anatomical face bow are placed into both ear canals. -
Page 38: Preparing The Writing Bow
CADIAX compact 3.4.3 Preparing the writing bow The two axis locators are inserted into the holes for the left and right stylus and clamped firmly. The writing bow is now ready to be mounted. 3.4.4 Mounting the writing bow The side arms of the lower face bow are pushed com- pletely outwards, then slightly fixated. - Page 39 Recording TMJ movement Tighten the clamp on the lower cross bar. In doing so, support the lower face bow with your second hand to avoid too much force being transferred to the clutch. Strong force can cause pain or loosen the clutch. It is important that the double clamp is tightened after the clamps of the side arms! The axis locators for setting the anatomical axis can now be removed.
-
Page 40: Attaching The Sensors
CADIAX compact 3.4.5 Attaching the sensors Only touch the flags on their borders. Avoid touching the black measuring surface to prevent it from being soiled or scratched. Also make sure that recording mode is turned off while you mount the flags and styli. Fixate the flags on the designated sockets of the upper face bow. -
Page 41: Mounting The Kinematic Facebow
Recording TMJ movement Mounting the kinematic facebow 3.5.1 Condylograph 3.5.1.1 Preparing the upper face bow Before mounting the Condylograph on the patient, the forehead bracings of the upper face bow need to be pulled back. Slightly loosen the side arm clamp screws, so that the side arms are movable in sagittal (upper clamp screw) and transversal (lower clamp screw) direction. - Page 42 CADIAX compact Put the face bow on the patient's head, whereby the gla- bella support is placed on the glabella and the side arms rest above the ears. Lower the forehead supports until they are in skin con- tact and fixate them. An even support on forehead and glabella should be achieved, which stabilizes the face bow and significantly improves the patient's comfort.
- Page 43 Recording TMJ movement Adjust the depth of the side arms and the height of the flag adapters to a comfortable, painless position and fix- ate them. Also here, asymmetries could be caused by a flawed mounting of the bow. Loosen and remove the porus knobs. Attach the orbital pointer on the cross bar of the face bow and adjust it to the orbital.
-
Page 44: Condylograph Comfort
CADIAX compact 3.5.2 Condylograph comfort 3.5.2.1 Preparing the upper face bow Slightly loosen the side arm clamp screws, so that the side arms are movable in sagittal (upper clamp screw) and transversal (lower clamp screw) direction. Loosen and remove the orbital pointer. Fixate the glabella support by pushing it from the side into the center position until it snaps in. - Page 45 Recording TMJ movement Put the face bow on the patient's head, whereby the gla- bella support is placed on the glabella and the side arms rest above the ears. The restraining strap is placed parallel to the side arms and fastened. Now, the face bow should hold firmly on the head without further support.
- Page 46 CADIAX compact Adjust the depth of the side arms and the height of the flag adapters to a comfortable, painless position and fix- ate them. Also here, asymmetries could be caused by a flawed mounting of the bow. Loosen and remove the porus knobs. Attach the orbital pointer on the cross bar of the face bow and adjust it to the orbital.
-
Page 47: Preparing The Lower Face Bow
Recording TMJ movement To indicate the position of the orbital point with a lead mark in a subsequent x-ray, you can now mark the point on the skin. Afterwards, fixate the orbital pointer and remove it from the face bow. 3.5.3 Preparing the lower face bow Move the side arms of the lower face bow into their cen-... -
Page 48: Mounting The Writing Bow
CADIAX compact 3.5.4 Mounting the writing bow The two axis locators are inserted into the holes for the left and right stylus and clamped firmly. The side arms of the lower face bow are pushed com- pletely outwards, then slightly fixated. The patient holds the lower jaw closed and in centric (retral) position. - Page 49 Recording TMJ movement Tighten the clamp on the lower cross bar. In doing so, support the lower face bow with your second hand to avoid too much force being transferred to the clutch. Strong force can cause pain or loosen the clutch. It is important that the double clamp is tightened after the clamps of the side arms! The axis locators for setting the anatomical axis can now be removed.
-
Page 50: Determining The Joint Axis
CADIAX compact 3.5.5 Determining the joint axis Assemble the mechanical writing flags with writing paper. Subsequently, mount the flags on the flag adapters of the extension set using the accompanying screws. Insert the axis needles in the corresponding holes on the end of the side arm and push them in until they are in contact with the writing flag. -
Page 51: Attaching The Sensors
Recording TMJ movement Adjust the setscrews of the side arm in a way that the axis needle solely rotates without drawing a translatory movement on the flag. 3.5.6 Attaching the sensors Only touch the flags on their borders. Avoid touching the black measuring surface to prevent it from being soiled or scratched. -
Page 52: Setting Up The Cadiax System
CADIAX compact Fixate the styli with the respective screws in the retainers of the lower face bow. The cable of the stylus should hang downwards after it is fixated. If the system is mounted properly and the lower jaw is in centric position, the stylus tip should be located in the area of the upper back quarter of the flag. -
Page 53: Face Bow Parameter Input
Recording TMJ movement Subsequently, connect the sensors to the device accord- ing to the labeling on the casing. Face bow parameter input In order to recalculate the recordings according to the mounting of the upper face bow, it is necessary to enter the face bow parameters. -
Page 54: Condylograph
CADIAX compact 3.7.2 Condylograph The following parameters have to be entered when using the Condylograph face bow. X-Shift is the shift of either side arm of the upper bow in anterior or posterior direction. It can be read from the scale on the respective side arm. Values that are located towards posterior, relative to the zero point of the scale, are entered as negative values. -
Page 55: Setting The Reference Position
Recording TMJ movement The anterior face bow height is the difference in height between the marked orbital point and the upper face bow. The value can be read from the vertical scale of the reference point indicator. When using the fixed reference point indicators, the value cannot be changed and is fixed to their mounting height of 22 mm. - Page 56 Registrations with obvious distortions should not be accepted. In such cases, clean the flags and styli thoroughly and repeat the recording. If this doesn't prevent artifacts from appearing, cancel the registration and contact an authorized GAMMA service department. In addition, movement tracks that differ from the expected shape should be treated skeptically and have to be verified with further registrations.
-
Page 57: Condyle Position Measurement (Cpm)
Recording TMJ movement You can specify the curves to be recorded and the order of the recording sequence via the menu Settings Recording. There, you can also specify if the reference position shall be set anew before certain items. 3.9.2 Condyle position measurement (CPM) A condyle position measurement (CPM) describes the measurement of the 3-dimensional offset in the joint between a reference position and any another joint position (e.g. -
Page 58: Finishing The Registration
If CADIAX compact 2 Recorder was started from GAMMA Dental Software, the recorded data can be transferred to the invoking application via the entry Save and Exit in the tool bar. -
Page 59: Data Evaluation
Data evaluation Data evaluation After the registration, the gathered data can be evaluated, for which purpose the graphical display allows measuring and overlaying the curves. It is also possible to use these curves for calculation of the best matching value settings for various articulators. Retrieval and analysis of recordings Recorded curves can be analyzed immediately after re- cording or at a later occasion. -
Page 60: Calculating Articulator Settings
Calculating articulator settings The calculation of articulator settings is not available when the application has been started from GAMMA Dental Software. In that case, the settings can be calculated in the accompanying analysis application. Semi- or fully adjustable articulators can have their simulated movements adapted to the actual move- ments of the lower jaw. - Page 61 Data evaluation · The average angle values of the curves that have been selected for articulator calculation. The retrusive angles are measured on the rotating working side of the mediotrusion curves. The suffix character denotes the quadrant of the coordinate system in which the retrusion movement takes place (refer to chapter "Retrusion direction ").
-
Page 62: Sequence Incisal Table Settings
CADIAX compact · A surtrusive movement in the anterior, upper The designations for the four quadrants of the coordin- ate system in a retrusion movement, illustrated for the right patient side. · A detrusive movement in the posterior, lower · A protrusive movement in the anterior, lower quadrant (+X/+Z). - Page 63 Data evaluation Protrusive: 53° Protrusive: 60° Tooth 3: 58° Tooth 3: 65° Tooth 4: 47° Tooth 4: 52° Tooth 5: 40° Tooth 5: 46° Tooth 6: 33° Tooth 6: 39° The yellow guidance elements are not part of the standard set and can be purchased separately (order number 04-000013Y).
-
Page 64: Data Printout
CADIAX compact Data printout The printing of data is not available when the application has been started from GAMMA Dental Software. In that case, this functionality is provided by the accompanying analysis application. CADIAX compact 2 Recorder allows to create a standard... -
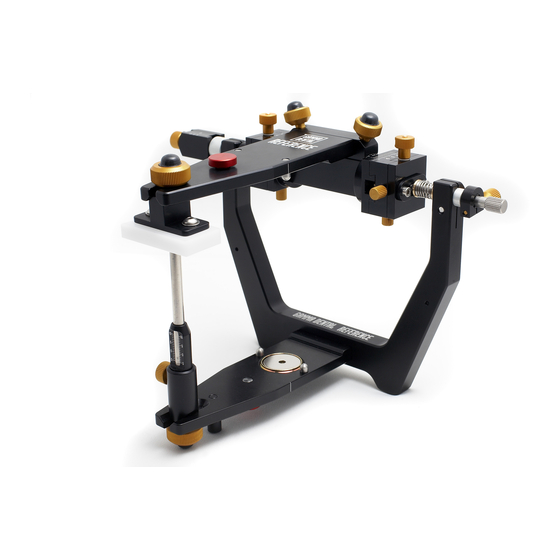
Page 65: Mounting The Articulator
Mounting the articulator Mounting the articulator The CADIAX system uses the axis-orbital-plane as reference plane for recordings and for transferring the jaw position into the articulator (refer to chapter "The reference coordinate system "). For reasons re- lated to construction, the side arms of the face bows will be parallel to that plane when the anterior face bow height is 22 mm. - Page 66 Basically, the transfer can be carried out as follows: The reference points of the GAMMA bow (right and left hinge axis points, plus the anterior reference point) are marked on the skin of the patient. Then, using the face bow corresponding to the articulator system, the transfer of the upper jaw is carried out relative to these marks on the patient's skin.
- Page 67 Mounting the articulator KaVo Direct mounting in KaVo Articulator, Re- Calculations are set Calculations are set ference face bow upgrade with axis pins directly. directly. (order number 06-230491). Scale: Frankfurt ho- Required accessory: KaVo extraneous rizontal. bow reference. Panadent Mounting using Panadent face bow. Calculations are set Calculations are set directly.
-
Page 68: Troubleshooting
There are always two steps involved in correcting errors in the CADIAX system: first, determine the prob- lem and then carry out the recommended solution to eliminate the error. If errors occur that are not covered in this chapter, contact an authorized GAMMA service center to re- solve the problem. - Page 69 Clean the flag surface according to the provided cleaning instruc- tions. A stylus is defective. Contact an authorized GAMMA service center. A flag is defective. Contact an authorized GAMMA service center. The CADIAX device is defective.
- Page 70 Make sure to clean the flag after the recording. A stylus is defective. Contact an authorized GAMMA service center. A flag is defective. Contact an authorized GAMMA service center. The CADIAX device is defective.
-
Page 71: Background Information
Background information Background information In this chapter you will find explanations regarding the terminology and backgrounds of the GAMMA concept. The reference coordinate system In order to aggregate CADIAX condylography data and CADIAS cephalometry tracings, all GAMMA products use the hinge-axis-orbital coordinate system as reference. This allows the reproducible and standardized transfer of recorded data in the analog or virtual articulator. -
Page 72: Exact And Anatomic Hinge Axis
CADIAX compact The movements of the right and left condyle recorded during condylography are visualized in symmetric sub- coordinate systems with identical axis definitions. When recording movements on the patient, the distance between left and right measurement electronics is natur- ally greater than the distance between the right and left condylar guidance elements in the articulator. -
Page 73: Immediate Side Shift (Iss)
Background information bow that is usually used for anatomic recordings and therefore easy to find and adjust to. Recordings on the anatomical hinge axis can be carried out with the devices CADIAX compact 2 as well as CADIAX 4. The advantage of recording on the anatomic hinge axis is in its simple and quick application. -
Page 74: Specifications
CADIAX compact Specifications Technical data ADC resolution: 14 bit (CADIAX compact 2, model A) 16 bit (CADIAX compact 2, model B) 16 bit (CADIAX 4, model A) Measurement data display: 0.01 mm Distance accuracy: ± 5 % Angle accuracy: ± 1.5 ° Supply voltage: 5 V DC (in compliance with USB specifications) Current input:... -
Page 75: Measuring Styli
Specifications 8.2.3 Measuring styli Only wipe off the styli with a dry, lint-free cloth. If necessary, clean the tips with rubbing alcohol. Never treat the sockets and the axes with oil or any other lubricants. 8.2.4 Face bow Parts of the face bow must only be disinfected by spray or wipe disinfection. Wash off any residues un- der running water. -
Page 76: Operating Conditions
These measurements are carried out as supplementary to the required standard tests above. Measurement technology testing are carried out by GAMMA or by a service center authorized by GAMMA. The measuring flags are subjected to relatively high mechanical stresses, and undergo the results of normal attrition. - Page 77 Specifications · Atmospheric pressure: From 700 hPa to 1060 hPa. Disposal After their product life, the CADIAX device and its components have to be disposed of cor- rectly. Doing so, comply with the regulations that are in effect in your country or city, re- garding the disposal of electronic equipment.
- Page 78 CADIAX compact...
- Page 79 CADIAX compact...
Need help?
Do you have a question about the CADIAX compact Series and is the answer not in the manual?
Questions and answers