
Summary of Contents for Iron Bow CLINiC 12 Series
- Page 1 CLINiC-C-12X27-B02 ™ CLINiC Clinical Care Device User Guide Document Version 1.5...
- Page 2 Copyright © 2020 Iron Bow Technologies All Rights Reserved. Specifications subject to change without notice. For general inquiries, contact: Iron Bow Healthcare Solutions 2303 Dulles Station Boulevard, Suite 400 Herndon, VA 20171 Toll: 800.338.8866 Tel: 703.279.3000 www.ironbowhealthcare.com For support, contact: Iron Bow Client Service Center Toll: 833.476.6269 (833.IRONBOW)
-
Page 3: Table Of Contents
Contents Introduction ..............................5 System Description ............................. 6 System Installation ..............................7 Connections ................................ 12 Getting Started ............................14 Powering On and Off ............................14 Control Panel Functions ............................15 Managing Calls ............................16 Answering a Call ..............................16 Managing Video Settings ......................... 17 Enabling and Disabling Video Privacy Mode ....................... - Page 4 ………………………………………. Figure # 15 Control Panel Functions ………………………………………. Figure # 16 CLINiC 12x Rear View Mounting Holes ………………………………………. Figure # 17 Tethered Remote Volume Control ………………………………………. Figure # 18 Connecting Tethered Remote Volume Control ………………………………………. Copyright 2020 Iron Bow Technologies...
-
Page 5: Introduction
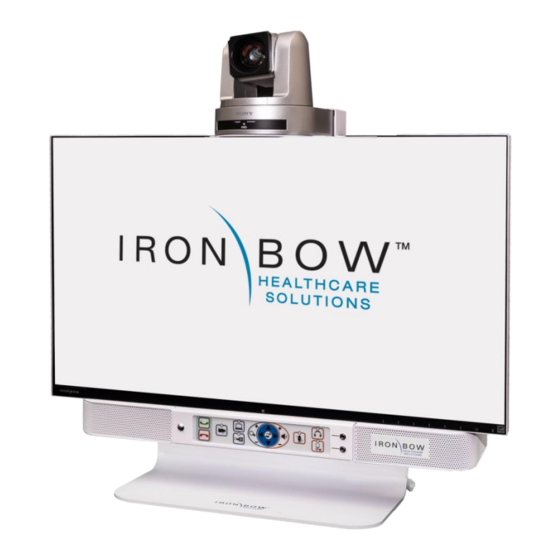
Introduction The CLINiC from Iron Bow Healthcare Solutions is a purpose-built telehealth video and consultation device that enables the delivery of clinical healthcare at a distance. The CLINiC includes a video codec, a high definition video camera, built-in microphone, 27” display, audio speakers and an intuitive touch-control panel. The CLINiC enables high quality video and audio calls between two or more parties. -
Page 6: System Description
3. Integrated Cisco Webex Room Kit Plus (In custom enclosure) 4. Call Status Indicator 5. Integrated Microphone 6. Tactile Membrane control panel with downward-facing speakers 7. Sound Deflector Figure 2. CLINiC 12x system components Copyright 2020 Iron Bow Technologies Description:... -
Page 7: System Installation
3. Line up the four feet of the camera with the large holes in the Camera Mounting Plate 4. Carefully attach the camera mounting plate to the base of the camera with the three provided screws, as shown in Figure 4 below. Copyright 2020 Iron Bow Technologies... -
Page 8: Figure # 4 Camera Plate Assembly
Using the rear mounting holes the camera will overhang more at the front of the system, which may be more suitable for direct wall mounting of the system. Copyright 2020 Iron Bow Technologies... -
Page 9: Figure # 6 Camera Relative Front And Rear Positions
Figure 6 - Camera Relative Front and Rear Positions 7. Connect the three cables that come out at the top of the CLINiC to the corresponding connectors on the rear of the camera as shown in Figure 8 Figure 7 - Camera Connections Copyright 2020 Iron Bow Technologies... -
Page 10: Figure # 8 Attaching Camera Rear Cover
8. Attach the rear camera cable cover using the two screws provided. Figure 8 – Attaching Camera Rear Cover 9. Gently remove any packaging foam and tape from camera to complete system assembly. Copyright 2020 Iron Bow Technologies... -
Page 11: Figure # 9 Clinic 12X Sound Deflector
1. Locate the three central Phillips head screws on the base section of the sound bar at the rear of the chassis. 2. Remove the three Phillips head screws and align the deflector, pointing forward, with the three screw holes and replace screws to secure shield in place. Copyright 2020 Iron Bow Technologies... -
Page 12: Connections
6. Codec maintenance Port (For qualified engineering usage) 7. Auxiliary HDMI Input (Designated for PC Connection) 8. Auxiliary HDMI Input (Designated for Horus Scope usage) 9. Auxiliary Microphone Input 10. RJ45 Connection for optional Cisco Touch 10 control panel Copyright 2020 Iron Bow Technologies... - Page 13 Figure 13 - CLINiC 12x Audio Ports on Integrated Control Panel Description: 1. Headphones Audio Output 2. Electronic Stethoscope Audio Input Copyright 2020 Iron Bow Technologies...
-
Page 14: Getting Started
If you need to move the CLINiC to a different location, simply disconnect and re-connect the AC power, as needed. Copyright 2020 Iron Bow Technologies... -
Page 15: Control Panel Functions
11. Increase speaker volume 12. Mute or unmute microphone. 13. Enable or disable headphone mode for private listening. 14. Enable or disable stethoscope mode. 15. “On Air” Indicator – Illuminates when system is in an active call Copyright 2020 Iron Bow Technologies... -
Page 16: Managing Calls
The Hang Up control is used to end a call. If the system is not in auto answer mode, then the Hang Up control can be used to reject an incoming call from a remote site. Copyright 2020 Iron Bow Technologies... -
Page 17: Managing Video Settings
In this event, the camera can be reset by selecting and Holding the Video Privacy control for 5 seconds. The camera will then go through a short reset routine and resume normal pan/tilt operation. Copyright 2020 Iron Bow Technologies... -
Page 18: Main Camera Pan/Tilt And Zoom Functions
The arrow keys can now be used to move the self-view PIP to the required location on the screen. A second selection of the Self-View control will turn off the on-screen message and the PIP will stay in the selected location every time self-view is activated Copyright 2020 Iron Bow Technologies... -
Page 19: Sharing Content From Connected Devices
LED indicator illuminates. A second selection resumes the room audio transmission. This function mutes both the integrated microphone and optional auxiliary Cisco microphone, if connected, but does not affect transmission of an electronic stethoscope. Copyright 2020 Iron Bow Technologies... -
Page 20: Adjusting Speaker And Headphone Volume
“un-mute” the microphones. In Stethoscope Mode, the stethoscope signal is only sent to the remote end and will not play through the speakers. On activation, the associated LED illuminates above the control button. Copyright 2020 Iron Bow Technologies... -
Page 21: Clinic Administration
4. It is important that after any changes to the configuration are made these are saved using the SAVE button in the top right hand corner Copyright 2020 Iron Bow Technologies... -
Page 22: Change Standby Settings
To disable stand-by mode: Set Standby Control to Off. To enable stand-by mode: Set Standby Control to On and set a Standby delay time Set Standby Delay: Input the required number of minutes between 1 and 480. Save Configuration changes: Select Save Copyright 2020 Iron Bow Technologies... -
Page 23: Change Conference Settings
To change conference call settings, navigate to Setup>Configuration>Conference. To Disable Auto Answering of Incoming Calls: Set AutoAnswer Mode to Off. To Enable Auto Answering of Incoming Calls: Set AutoAnswer Mode to On. Save Configuration changes: Select Save Copyright 2020 Iron Bow Technologies... -
Page 24: System Auto-Dial
A single contact can be auto-dialed from the CLINiC using the connect key To add an auto-dial contact, navigate to Setup>Configuration>Facility/Service. Locate Service 5 and select Call Type: Video Input a identifying User name and associated URL Select Type: Other Select: Save Copyright 2020 Iron Bow Technologies... -
Page 25: Adjusting Audio Level
Noise Reduction to: OFF Microphone 3: Auxiliary Microphone Input (Default value:18) Adjust as required Set Mode to: ON Set Dereverberation to: OFF Mode to: ON Noise Reduction to: ON Following changes to any levels or settings, Select: SAVE Copyright 2020 Iron Bow Technologies... - Page 26 Copyright 2020 Iron Bow Technologies...
-
Page 27: Enabling Wifi Operation
SSID which has the following format: xCommand Network Wifi Configure [AllowMissingCA: AllowMissingCA] [AnonymousIdentity: "AnonymousIdentity"] [Identity: "Identity"] [Password: "Password"] SSID: "SSID" Type: Type Your network may not require all variables for configuration. Check with your administrator. Copyright 2020 Iron Bow Technologies... - Page 28 EAP-TLS EAP-TTLS EAP-FAST PEAP EAP-MSCHAPv2 EAP-GTC The system only remembers one network at a time. If you change between different networks, you have to type in the credentials again. Copyright 2020 Iron Bow Technologies...
-
Page 29: Appendix 1 - Mounting Information
Appendix 1 - Mounting Information The following figure is not to scale and provided for dimensional information only. Figure 16 – CLINiC 12x rear view mounting holes Copyright 2020 Iron Bow Technologies... -
Page 30: Appendix 2 - Tethered Volume Control
Control to reset the camera by selecting and holding both the Volume + and Volume – buttons simultaneously for 5 seconds. The camera will then go through a short reset routine and resume normal pan/tilt operation. Copyright 2020 Iron Bow Technologies... -
Page 31: Connecting Tethered Volume Remote To Clinic System
As the Volume control is tethered and uses a Tactile Membrane panel, it does not require batteries, is not easily lost or misplaced and can easily be cleaned. Figure 18 – Connecting the Tethered Remote Volume Control Copyright 2020 Iron Bow Technologies... - Page 32 2303 Dulles Station Boulevard, Suite 400 Herndon, VA 20171 Toll: 800.338.8866 Tel: 703.279.3000 www.ironbowhealthcare.com Copyright 2020 Iron Bow Technologies...
Need help?
Do you have a question about the CLINiC 12 Series and is the answer not in the manual?
Questions and answers