Table of Contents
Advertisement
ZerOS
Introduction
Compliance
Revisions
Hardware Introduction
Software Introduction
Warnings & Safety
Quick Start
Patching
Controlling Fixtures
Recording Cues
Front Panel
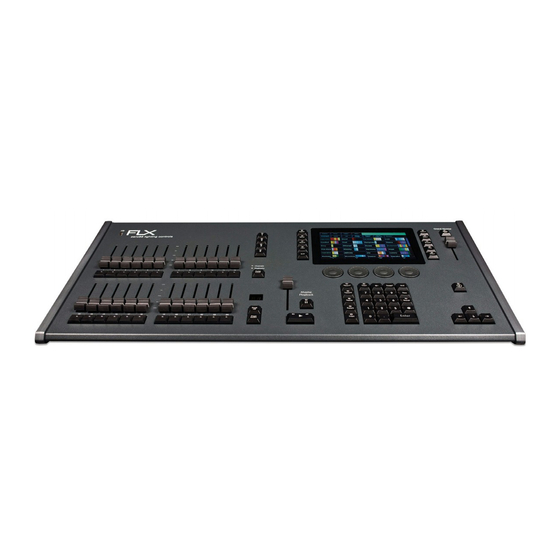
FLX
FLX S48
FLX S24
Solution
ZerOS Wing
Desktops & Windows
FLX S Touchscreen
External Display
External Desktops
View Button
Output Window
Faders Window
Patching
DMX
Add Fixtures
Fixture Schedule
ZerOS Library
Fixture Files
Intensity
MFFs
Commands
Encoder wheels
Groups
Automatic Groups
Recording Groups
Using groups via touch
Using groups via syntax
Referencing Intensity Groups
Naming Groups
Updating Groups
Copying Groups
Zero 88 - ZerOS - Page 1 of 233
Solution Introduction
External Touchscreen
Multi-Part Fixtures
Selecting Fixtures
Patch Groups
Fixture Channel Number
Fixture Names
Alignment
Change Fixture
Edit DMX Address
DMX In
Syntax
Deleting Fixtures
Fixture Editor Guide
Printed: 23/11/2020 12:50:03 JH
Advertisement
Table of Contents

Subscribe to Our Youtube Channel
Related Manuals for Zero 88 FLX Series


Summary of Contents for Zero 88 FLX Series
- Page 1 Intensity MFFs Commands Encoder wheels Groups Automatic Groups Recording Groups Using groups via touch Using groups via syntax Referencing Intensity Groups Naming Groups Updating Groups Copying Groups Zero 88 - ZerOS - Page 1 of 233 Printed: 23/11/2020 12:50:03 JH...
- Page 2 Raise and Lower Move On Dark Advanced Special Playback Functions Playing Back Cues Running Cue Stacks RGB Colour Mixing on Playbacks User Definable Keys Channel Data UDKs Zero 88 - ZerOS - Page 2 of 233 Printed: 23/11/2020 12:50:03 JH...
- Page 3 Phantom ZerOS Networking Building a Network IP Addressing DHCP ZerOS Network Settings Connecting to Capture Example Systems Using the Remote Apps Wireshark Software Updates ZerOS USB Creator Zero 88 - ZerOS - Page 3 of 233 Printed: 23/11/2020 12:50:03 JH...
- Page 4 Software updates are free of charge and can be downloaded from zero88.com/zeros. It is recommended to always be running the latest release of ZerOS. Zero 88 - ZerOS - Page 4 of 233 Printed: 23/11/2020 12:50:03 JH...
- Page 5 Please read this manual before use, especially the Warnings & Safety section. E&OE. Cooper Lighting Solutions reserves the right to make changes to the equipment and specification described in this manual without prior notice. Zero 88 - ZerOS - Page 5 of 233 Printed: 23/11/2020 12:50:03 JH...
- Page 6 Thank you Thank you for choosing the FLX Range by Zero 88 to fulfil your lighting control needs. We sincerely hope that your console will bring you years of trouble free service. We make great efforts to build in reliability and serviceability at every stage of our development and production processes and include a three-year limited warranty - giving you peace of mind for your investment.
-
Page 7: Hardware Introduction
As each FLX range console is different, you can use the filter top right of the manual, so you only see the information relevant to your console. Zero 88 online manuals are updated regularly to ensure you have all the relevant information and useful tips. Check out the Revisions section to see what has been added. -
Page 8: Software Introduction
This manual is written for ZerOS Server running as FLX. This is the default Desk Type of ZerOS Server. Click here for mounting instructions. Software Introduction Zero 88 - ZerOS - Page 8 of 233 Printed: 23/11/2020 12:50:03 JH... - Page 9 It is strongly recommended to always be running the latest release of ZerOS. As well as the FLX range of consoles, other Zero 88 consoles also run ZerOS. This manual will therefore also be applicable to other consoles running ZerOS too:...
- Page 10 Click here now to go to the Google Play store to download the Remote app Click here now to go to the Google Play store to download the Monitor app Zero 88 - ZerOS - Page 10 of 233 Printed: 23/11/2020 12:50:03 JH...
-
Page 11: Warnings And Safety
FLX range consoles must be earthed. Genuine Zero 88 PSUs must be used with FLX S consoles. Zero 88 networking devices are designed for use within a dedicated, stand alone, private, local area network only, for the sole purpose of transmitting and/or receiving nonsensitive entertainment lighting control data. Although they utilize Ethernet networking, these devices should not be connected to the Internet. -
Page 12: Quick Start
This is done by pressing Setup -> Add Fixtures. This takes you to the screen pictured, where you will be able to find the required fixtures, and tap Next >. Zero 88 - ZerOS - Page 12 of 233 Printed: 23/11/2020 12:50:03 JH... -
Page 13: Recording Cues
Apply an effect on your lights, and use the encoders to adjust the effect, such as adjust the speed. Click here to go to the full Controlling Fixtures chapter to learn more. Recording Cues Zero 88 - ZerOS - Page 13 of 233 Printed: 23/11/2020 12:50:03 JH... - Page 14 You can adjust the timings of your cues, by pressing and holding View , and tapping the playback's button, to allow you to see the cue you recorded onto that playback. Click here to go to the full Cues & Playbacks chapter to learn more. Zero 88 - ZerOS - Page 14 of 233 Printed: 23/11/2020 12:50:03 JH...
-
Page 15: Front Panel
Front Panel For an overview of the front panel controls, click your console below... FLX S48 FLX S24 Solution Zero 88 - ZerOS - Page 15 of 233 Printed: 23/11/2020 12:50:03 JH... - Page 16 (like Setup and Shift ). Command Keys Command keys are used during programming to access commands such as Record , Update and Delete . Attribute keys Zero 88 - ZerOS - Page 16 of 233 Printed: 23/11/2020 12:50:03 JH...
- Page 17 On FLX, the USB ports are “overload protected” in pairs. If a USB device tries drawing too much power, FLX will disable that pair or ports until the device is unplugged. FLX S48 Zero 88 - ZerOS - Page 17 of 233 Printed: 23/11/2020 12:50:03 JH...
- Page 18 Zero 88 - ZerOS - Page 18 of 233 Printed: 23/11/2020 12:50:03 JH...
- Page 19 The button in the middle of each encoder is occasionally used to perform an additional, but related, task. / Shift key Zero 88 - ZerOS - Page 19 of 233 Printed: 23/11/2020 12:50:03 JH...
- Page 20 Keyboard & Mouse (mouse on external monitor only), Touchscreen (DVI-D required), External Storage Devices (such as Memory Sticks), ZerOS Wings. FLX S24 Zero 88 - ZerOS - Page 20 of 233 Printed: 23/11/2020 12:50:03 JH...
- Page 21 The button in the middle of each encoder is occasionally used to perform an additional, but related, task. / Shift key Zero 88 - ZerOS - Page 21 of 233 Printed: 23/11/2020 12:50:03 JH...
- Page 22 Leapfrog 48 operates identically to Solution, and Leapfrog 96 operates identically to Solution XL, and so the guide below is also applicable to these consoles too. Zero 88 - ZerOS - Page 22 of 233 Printed: 23/11/2020 12:50:03 JH...
- Page 23 Macros The desk provides 400 user programmable macros. Lock Functions The desk has a lock function which will prevent misuse of the desk. Zero 88 - ZerOS - Page 23 of 233 Printed: 23/11/2020 12:50:03 JH...
-
Page 24: Solution Introduction
Data is output on DMX channels 1 – 512 on four DMX universes as standard. The DMX output sockets on the rear panel of the desk default to outputting universes 1 to 4 only when fixtures are patched onto the respective universes. Solution Introduction Zero 88 - ZerOS - Page 24 of 233 Printed: 23/11/2020 12:50:03 JH... - Page 25 If the mode key is flashing, this indicates that the wheels are in control of this attribute but the MFKs are showing another function. This allows simultaneous selection of fixtures whilst still manipulating attributes, for example. Zero 88 - ZerOS - Page 25 of 233 Printed: 23/11/2020 12:50:03 JH...
- Page 26 The MASTER fader controls the maximum output level of the cue being output on the Master Playback. This fader only affects the dimmer and brightness fixture channels (if applicable). The Colour, Beamshape and Position fixture channels are not affected by the master fader. Zero 88 - ZerOS - Page 26 of 233 Printed: 23/11/2020 12:50:03 JH...
- Page 27 Output Window. Pressing the CLEAR key a second time will clear (undo) all the operations made in the “programmer” since the LED was first lit and the LED in the key goes out. Zero 88 - ZerOS - Page 27 of 233 Printed: 23/11/2020 12:50:03 JH...
- Page 28 Relative, Fan First, Fan Middle, Fan Last, Fan V). For each attribute there is a normal wheel mode which applies when the control wheel is moved and a shifted wheel mode which applies when the SHIFT key is held down and the control wheel is moved. Zero 88 - ZerOS - Page 28 of 233 Printed: 23/11/2020 12:50:03 JH...
- Page 29 Server. A maximum of one ZerOS Wing can be mechanically connected to either side of the FLX lighting console, and up to four ZerOS Wings can be mechanically connected together and placed behind FLX, as shown. Zero 88 - ZerOS - Page 29 of 233 Printed: 23/11/2020 12:50:03 JH...
- Page 30 Two screws under the lip will need to be removed, and then replaced with the bracket in place. The other four screws are included within the bracket pack. Zero 88 - ZerOS - Page 30 of 233 Printed: 23/11/2020 12:50:03 JH...
- Page 31 The currently selected button is highlighted in blue. See below for information on the six icons: Zero 88 - ZerOS - Page 31 of 233 Printed: 23/11/2020 12:50:03 JH...
-
Page 32: External Display
View button controlling the external monitor instead, and some windows will then no longer be available internally. To do this, tap Setup -> Settings and use the Monitor option under Displays. Zero 88 - ZerOS - Page 32 of 233 Printed: 23/11/2020 12:50:03 JH... - Page 33 After pressing the marks, you can draw to ensure the calibration is correct, and then press Enter to complete on FLX/ ZerOS Server, or (Z)/Shift on FLX S48 For testing and demonstrations, the Zero 88 team use Iiyama Prolite T2236MSC-B2. These touchscreens are pretty rugged, and are capacitive and so support multi-touch, which is ideal for use with the consoles.
-
Page 34: View Button
The shortcut to view the Output Window on consoles without a monitor, is by holding Shift and pressing View . If you have an external monitor connected, the Output window is shown on the top half of both the Cues and Faders desktops: Zero 88 - ZerOS - Page 34 of 233 Printed: 23/11/2020 12:50:03 JH... - Page 35 UDK 1/1 - UDK Page 1, UDK 1 P - Programmer D - Default value Pressing “Intensities” reverts back to the usual display, showing the current intensity of every fixture. Zero 88 - ZerOS - Page 35 of 233 Printed: 23/11/2020 12:50:03 JH...
- Page 36 Faders and Cues window on the internal touchscreen. For consoles with an external monitor connected, the Faders window can be viewed on the bottom half of the Faders desktop. Zero 88 - ZerOS - Page 36 of 233 Printed: 23/11/2020 12:50:03 JH...
- Page 37 UDKs are currently doing. On Solution consoles, click the Submasters button to open the Faders window. This will show you the current functionality of the playback faders. Zero 88 - ZerOS - Page 37 of 233 Printed: 23/11/2020 12:50:03 JH...
- Page 38 RigSync removes the need to understand DMX (if your fixtures support “RDM”). This feature is also available on FLX, but must be enabled first within Setup. Zero 88 - ZerOS - Page 38 of 233 Printed: 23/11/2020 12:50:03 JH...
- Page 39 “Beam”, "Shape" and “Position”. A fifth attribute, called “Effect”, manipulates parameters to create effects such as “Circle”, “Ballyhoo” and “Rainbow”. For information on patching, and other settings worth configuring prior to controlling your fixtures, take a look at the training session below... Zero 88 - ZerOS - Page 39 of 233 Printed: 23/11/2020 12:50:03 JH...
- Page 40 All 64 universes can be distributed over an Ethernet network using either “Art-Net”, “Streaming ACN” or “CITP”. FLX supports 2048 DMX channels as standard or can be upgraded in 512 channel blocks to control up to 8192 DMX channels. Zero 88 - ZerOS - Page 40 of 233 Printed: 23/11/2020 12:50:03 JH...
-
Page 41: Add Fixtures
1.5 Classes of data not appropriate for transmission over links designed to this Standard Since this Standard does not mandate error checking, DMX512 is not an appropriate control protocol for hazardous applications. Add Fixtures Zero 88 - ZerOS - Page 41 of 233 Printed: 23/11/2020 12:50:03 JH... - Page 42 After the fixture's mode name, will be the number of channels, or "DMX footprint" of that fixture displayed in brackets. Once you have found your fixture, click Next >. Zero 88 - ZerOS - Page 42 of 233 Printed: 23/11/2020 12:50:03 JH...
- Page 43 For example, pressing and holding channel button 13, and tapping channel button 24, will tell my console I want 12 fixtures, starting at fixture number 13. Zero 88 - ZerOS - Page 43 of 233 Printed: 23/11/2020 12:50:03 JH...
- Page 44 Fixture Schedule, with your newly patched fixtures shown. The fixtures should now have moved to their “Home” positions. You can repeat the Add Fixtures process for every group of fixtures you have. Zero 88 - ZerOS - Page 44 of 233 Printed: 23/11/2020 12:50:03 JH...
- Page 45 Shift key, and tapping the column headers. This will sort them numerically/alphabetically, and a second tap will reverse the order. For example hold Shift and tap "Address" to sort in order of DMX address. Zero 88 - ZerOS - Page 45 of 233 Printed: 23/11/2020 12:50:03 JH...
-
Page 46: Selecting Fixtures
1, and tapping channel button 12, will select fixtures 1 through to 12. Their buttons will light, and I will just see those fixtures displayed in my fixture schedule. To clear your selection, tap the Clear button. You will then see all fixtures in your show file listed. Zero 88 - ZerOS - Page 46 of 233 Printed: 23/11/2020 12:50:03 JH... - Page 47 This selects fixtures 1, 2, 3, 7, 8, and 9. Thru Except Enter 1, And 7 Thru 12, Except 9, This selects fixtures 1, 7, 8, 10, 11 and 12. Zero 88 - ZerOS - Page 47 of 233 Printed: 23/11/2020 12:50:03 JH...
- Page 48 It is recommended that you take some time thinking about numbering your fixtures. For example, it is common to ensure your fixtures are sequential, from stage right to stage left, which won't necessarily be the order of DMX addresses. Zero 88 - ZerOS - Page 48 of 233 Printed: 23/11/2020 12:50:03 JH...
- Page 49 These settings can be changed by touching the relevant cell using the touch screen. Multiple fixtures can be changed at the same time by selecting the fixtures and selecting the appropriate column header buttons labelled “Invert” or “Swap”. Zero 88 - ZerOS - Page 49 of 233 Printed: 23/11/2020 12:50:03 JH...
- Page 50 If RigSync has discovered and patched an RDM fixture, the Change Profiles column can be used to remotely change the mode of the fixture. Zero 88 - ZerOS - Page 50 of 233 Printed: 23/11/2020 12:50:03 JH...
- Page 51 Convert Profiles If you ever see fixtures displayed in red in the Profiles column, this means these fixtures are not included in the Zero 88 Library. Instead, these fixtures may be from one of these sources: Legacy Zero 88 fixture from an older show file...
- Page 52 There is also an "Unlink" button. This can be used to turn the fixture in the console from a RigSync fixture to a normal fixture file. There is then no guarantee your fixture and console will remain synchronised. DMX In Zero 88 - ZerOS - Page 52 of 233 Printed: 23/11/2020 12:50:03 JH...
- Page 53 The option is shown on FLX range consoles for show file compatibility with other ZerOS consoles. On ZerOS consoles with DMX In capabilities, the DMX In address, can be used to remotely control that fixture's intensity level from another lighting console. Syntax Zero 88 - ZerOS - Page 53 of 233 Printed: 23/11/2020 12:50:03 JH...
-
Page 54: Deleting Fixtures
Delete 5, Delete Fixture 5 will be permanently deleted Thru Delete 10 Thru 15, Delete Fixtures 10 through to 15 inclusive will be permanently deleted. Deleting Fixtures Zero 88 - ZerOS - Page 54 of 233 Printed: 23/11/2020 12:50:03 JH... - Page 55 ZerOS Library ZerOS includes the Zero 88 Fixture Library. This is a library which contains information for over 10,000 fixtures, including how they work, what parameters they have, what their default values are etc. This is accessed by tapping Setup ->...
- Page 56 This will then get added to the ZerOS Library, ready for the next fixture library release. If you have created the fixture file, or one of the Zero 88 fixture team has sent you a fixture file, you will be able to load it into your console.
- Page 57 "LED Par", and the mode name is "Mode 1". Then go to the Parameters tab, right click, and choose Add Parameter. Zero 88 - ZerOS - Page 57 of 233 Printed: 23/11/2020 12:50:03 JH...
- Page 58 The “Is Dark” box is used for defining a parameter which blacks out the beam. If defining Colour parameters, you can enter the colour using RGB data. Once all parameter details are entered, press OK to close the Parameter window. Zero 88 - ZerOS - Page 58 of 233 Printed: 23/11/2020 12:50:03 JH...
- Page 59 On your console, then tap Setup -> Load, and choose your new fixture file from USB. You will then be able to tap Add Fixtures, and find and patch the fixture in the usual way. Zero 88 - ZerOS - Page 59 of 233 Printed: 23/11/2020 12:50:03 JH...
- Page 60 When your MFFs are controlling Channels rather than Playbacks, the Faders window will show you the names of the fixture's you are currently controlling, and their intensity percentages. Commands Zero 88 - ZerOS - Page 60 of 233 Printed: 23/11/2020 12:50:03 JH...
- Page 61 This sets the intensity of channels 1, 2, 3, 7, 8, and 9 to 25%. Thru Except Enter 1, And 7 Thru 12, Except 9, @ 5, Zero 88 - ZerOS - Page 61 of 233 Printed: 23/11/2020 12:50:03 JH...
-
Page 62: Encoder Wheels
To do this tap Setup -> Settings and Enable "Always Display Intensity Encoder" under the Attributes section. Zero 88 - ZerOS - Page 62 of 233 Printed: 23/11/2020 12:50:03 JH... -
Page 63: Automatic Groups
“Even – Dimmers” etc, as by selecting “All – Dimmers” you are also selecting these. All automatic groups automatically store the intensities of those fixtures at 100%. Recording Groups Zero 88 - ZerOS - Page 63 of 233 Printed: 23/11/2020 12:50:03 JH... - Page 64 The range of fixtures will select. If you wish to have a reverse order, instead press and hold the last fixture's channel button, and tap the first. Zero 88 - ZerOS - Page 64 of 233 Printed: 23/11/2020 12:50:03 JH...
- Page 65 When Multiple Select is active, touching multiple groups will act as described above, under “Using groups via touch”. The Clear Selection button is highlighted blue when there are channels selected. Pressing it will deselect them all. Using groups via syntax Zero 88 - ZerOS - Page 65 of 233 Printed: 23/11/2020 12:50:03 JH...
- Page 66 This recalls the fixture intensities from Group 5 to only the currently selected fixtures. The fixture selection does not change by using this syntax. Referencing Intensity Groups Zero 88 - ZerOS - Page 66 of 233 Printed: 23/11/2020 12:50:03 JH...
-
Page 67: Naming Groups
Groups can be named by holding Setup and pressing the Group on the touchscreen. An onscreen keyboard will then be displayed to type the group’s name. Press OK to confirm. Zero 88 - ZerOS - Page 67 of 233 Printed: 23/11/2020 12:50:03 JH... -
Page 68: Updating Groups
Update followed by touching the specific group on screen. This updates whichever group you touch on the touch screen. Updating a group will update the contents of that group but will not alter the name of the group. Zero 88 - ZerOS - Page 68 of 233 Printed: 23/11/2020 12:50:03 JH... -
Page 69: Copying Groups
The desk will ask you to confirm this action before the command is executed. Once deleted, a group cannot be recovered but can be recreated manually if required. Zero 88 - ZerOS - Page 69 of 233 Printed: 23/11/2020 12:50:03 JH... - Page 70 Delete Group 1 Thru 6 Except 4, Deletes groups 1, 2, 3, 5 and 6. Delete Group Enter Delete Group 1 And 5, Deletes groups 1 and 5. Zero 88 - ZerOS - Page 70 of 233 Printed: 23/11/2020 12:50:03 JH...
-
Page 71: Controlling Fixtures
Previous can be accessed by holding Shift and tapping the left arrow key. Next and Previous are written in the command line, bringing the added benefit of allowing you to backspace through the commands: 1, Next, Next, Previous, Zero 88 - ZerOS - Page 71 of 233 Printed: 23/11/2020 12:50:03 JH... - Page 72 If the fixture has more than four parameters in the attribute, pressing the attribute button again selects the next group of parameters. The sensitivity, mode and behaviour of the encoder wheels can be changed in Setup. Zero 88 - ZerOS - Page 72 of 233 Printed: 23/11/2020 12:50:03 JH...
- Page 73 This will bring that parameter onto the command line, allowing you to type @ x Enter, where x is the percentage you would like to go to. For example: Shift + Red Enter [Red] @ 50, Colour Zero 88 - ZerOS - Page 73 of 233 Printed: 23/11/2020 12:50:03 JH...
- Page 74 Take a look at the videos below for more information... Subtractive Colour Mixing. Additive Colour Mixing. Palettes Colour palettes can be automatically created, when you have fixtures with colour mixing or colour wheels patched. Zero 88 - ZerOS - Page 74 of 233 Printed: 23/11/2020 12:50:03 JH...
- Page 75 A preview of the colour you have created is shown at the top of the value fader, and in the colour bar top right of the FLX colour window. Zero 88 - ZerOS - Page 75 of 233 Printed: 23/11/2020 12:50:03 JH...
- Page 76 Filters" tab again to go back to the list of mood boards. For more moods and colour ideas, click here to go to the LEE filters website. Zero 88 - ZerOS - Page 76 of 233 Printed: 23/11/2020 12:50:03 JH...
- Page 77 Click here to head to the Palettes chapter to find out more about programming palettes. Position Zero 88 - ZerOS - Page 77 of 233 Printed: 23/11/2020 12:50:03 JH...
- Page 78 Fan Middle is useful if you have a row of movers, and wish to fan their Pan symmetrically, to send your fixtures in to centre stage, or out to the wings. Fan V is useful if you wish to fan the tilt of your fixtures. Defaults Zero 88 - ZerOS - Page 78 of 233 Printed: 23/11/2020 12:50:03 JH...
- Page 79 Delete Home, and then choose Default. This action can't be undone. If intensities are defaulted above 0%, these will be indicated as yellow intensity percentages in the Output Window. Home Zero 88 - ZerOS - Page 79 of 233 Printed: 23/11/2020 12:50:03 JH...
- Page 80 You can do this, by firstly adjusting the fixture's parameters to the values you wish them to be when homed. For information on how to adjust parameters, see each of the attribute sections for Intensity, Colour, Beam, Shape and Position. Zero 88 - ZerOS - Page 80 of 233 Printed: 23/11/2020 12:50:03 JH...
-
Page 81: Max Level
Home is an icon on the touchscreen on FLX S, whereas Home is a physical button on FLX. You can then choose Max Level from the window that opens. Zero 88 - ZerOS - Page 81 of 233 Printed: 23/11/2020 12:50:03 JH... -
Page 82: Attribute Settings
Setup and tap Colour, or on FLX S, you could press and hold Setup, and tap the Colour tab, at the top of the internal touchscreen which opens when a fixture with colour parameters is selected. Zero 88 - ZerOS - Page 82 of 233 Printed: 23/11/2020 12:50:03 JH... - Page 83 “Proportional” uses an exponential algorithm to control attributes based on the speed of the encoder wheel movement. This is the default, and provides the best overall control. Zero 88 - ZerOS - Page 83 of 233 Printed: 23/11/2020 12:50:03 JH...
- Page 84 This option is found in the Colour Settings only, and allows you to switch between controlling fixtures using RGB (Red, Green, Blue) or CMY (Cyan, Magenta, Yellow). ZerOS will convert all fixtures to this colour mixing mode. Tagging Zero 88 - ZerOS - Page 84 of 233 Printed: 23/11/2020 12:50:03 JH...
- Page 85 On FLX, you can tag or untag whole attributes, by pressing and holding Clear , and tapping the attribute key on the console. For example, Clear + Colour . Zero 88 - ZerOS - Page 85 of 233 Printed: 23/11/2020 12:50:03 JH...
-
Page 86: Recording Palettes
Automatic palettes are created based on the fixtures you have patched, so it’s recommended to fully patch your console before choosing Automatically create palettes. Recording Palettes Zero 88 - ZerOS - Page 86 of 233 Printed: 23/11/2020 12:50:03 JH... - Page 87 On FLX, you could therefore use the following syntax: Shift + Record Colour Enter Record All Colour 15 Snapshots the current lighting state and records it into colour palette 15. Advanced Palettes Zero 88 - ZerOS - Page 87 of 233 Printed: 23/11/2020 12:50:03 JH...
-
Page 88: Using Palettes
If any of the selected fixtures are not actually programmed in the applied palette, but there are one or more fixtures of the same type that are programmed, the fixture will use the values programmed for the first fixture of the same type. Zero 88 - ZerOS - Page 88 of 233 Printed: 23/11/2020 12:50:03 JH... -
Page 89: Naming Palettes
Palettes can be named by holding Setup and pressing the Palette on the touchscreen. An onscreen keyboard will then be displayed to type the palette’s name. An external USB keyboard can then also be used. Press OK to confirm. Zero 88 - ZerOS - Page 89 of 233 Printed: 23/11/2020 12:50:03 JH... - Page 90 This is especially useful for touring shows when using positions, to remove the need of updating each cue individually when you move venue. Zero 88 - ZerOS - Page 90 of 233 Printed: 23/11/2020 12:50:03 JH...
-
Page 91: Updating Palettes
This updates whichever position palette you touch on the touch screen. You do not need to press the “position” button if the position window is already displayed. Copying Palettes Zero 88 - ZerOS - Page 91 of 233 Printed: 23/11/2020 12:50:03 JH... -
Page 92: Deleting Palettes
When deleting a palette, ZerOS will go through all the programmed cues and UDKs and replace any references to the palette with the hard values from the palette before deleting it. This ensures cues and UDKs are not changed. Zero 88 - ZerOS - Page 92 of 233 Printed: 23/11/2020 12:50:03 JH... - Page 93 Delete Shape 1 Thru 6 Except 4, Deletes shape palettes 1, 2, 3, 5 and 6. Delete Colour Enter Delete Colour 1 And 5, Deletes colour palettes 1 and 5. Zero 88 - ZerOS - Page 93 of 233 Printed: 23/11/2020 12:50:03 JH...
- Page 94 Auto Effects ZerOS can generate 45 auto effects, by clicking the “Automatically create effect palettes” button. Each palette displays the effect number, content flags and a name. Zero 88 - ZerOS - Page 94 of 233 Printed: 23/11/2020 12:50:03 JH...
- Page 95 Effects 21 - 40 are colour effects for fixtures with colour mixing, such as LEDs. Effects 41 - 45 are Beam/Shape effects, including Iris, Zoom and Focus effects. Intensity Auto Effect Palettes Zero 88 - ZerOS - Page 95 of 233 Printed: 23/11/2020 12:50:03 JH...
- Page 96 Colour Auto Effect Palettes Zero 88 - ZerOS - Page 96 of 233 Printed: 23/11/2020 12:50:03 JH...
- Page 97 Zero 88 - ZerOS - Page 97 of 233 Printed: 23/11/2020 12:50:03 JH...
-
Page 98: Effect Parameters
Effect parameters are Speed, Size, Offset and Rotation. Auto palettes include predefined Speed, Size, Offset and Rotation values, which after applying the effect, can then be adjusted. Zero 88 - ZerOS - Page 98 of 233 Printed: 23/11/2020 12:50:03 JH... - Page 99 Random offset (by group) - each tap of Random offset, creates a new random offset order across your fixtures. Take a look at this quick video for explanation of Effect Offsets. Zero 88 - ZerOS - Page 99 of 233 Printed: 23/11/2020 12:50:03 JH...
- Page 100 Function determines the mathematical function that is applied to the output value of the fixture parameter. Graphs of the available functions are shown below: Zero 88 - ZerOS - Page 100 of 233 Printed: 23/11/2020 12:50:03 JH...
- Page 101 Waveforms window you require, and type in the exact value required for that specific parameter of the fixture, and press Enter to confirm. Zero 88 - ZerOS - Page 101 of 233 Printed: 23/11/2020 12:50:03 JH...
- Page 102 You can then press the Record button which will display the Effect Palettes on the display, and select an empty palette. See the Palettes chapter for more information. Zero 88 - ZerOS - Page 102 of 233 Printed: 23/11/2020 12:50:03 JH...
- Page 103 To access the Cues window on consoles without an external monitor, press View to toggle between the Cues and Faders window. Zero 88 - ZerOS - Page 103 of 233 Printed: 23/11/2020 12:50:03 JH...
-
Page 104: Record Options
You can change when and where the Record Options window opens, in Setup -> Settings , and using the Show Record & Update Window options under Record & Update. Zero 88 - ZerOS - Page 104 of 233 Printed: 23/11/2020 12:50:03 JH... - Page 105 Find out more about the following Record Options... Snapshot & SmartTag Tracking Filters Snapshot & SmartTag Zero 88 - ZerOS - Page 105 of 233 Printed: 23/11/2020 12:50:03 JH...
- Page 106 Cue Only is selected by default, meaning the console is not recording your cues with tracking methodology. See the quick video below, for an overview of what "Tracking" means... Zero 88 - ZerOS - Page 106 of 233 Printed: 23/11/2020 12:50:03 JH...
- Page 107 Setup -> Settings, "Cue Only" will then be displayed with a red background, bottom right of the Cues window on the external desktop. The Record Options will then have a reduced set of options. Zero 88 - ZerOS - Page 107 of 233 Printed: 23/11/2020 12:50:03 JH...
-
Page 108: Record Filters
By default, after tapping Record you will see attributes that are not currently tagged with a blue stripe, and any attributes that have been tagged with a red stripe. Recording Cues Zero 88 - ZerOS - Page 108 of 233 Printed: 23/11/2020 12:50:03 JH... - Page 109 Cancel - cancels the record command, after pressing Cancel tap Clear to continue. After choosing "Create Chase" or "Create Cue 2", you will no longer receive this pop-up when recording another cue onto this playback. Zero 88 - ZerOS - Page 109 of 233 Printed: 23/11/2020 12:50:03 JH...
- Page 110 Fades for each attribute are displayed in columns in the Cues window, and each field can be edited, to customise your fade times. Zero 88 - ZerOS - Page 110 of 233 Printed: 23/11/2020 12:50:03 JH...
- Page 111 This means you could put a delay on the fade up, resulting in your fixtures fading down, and then your fixtures fading up, all from a single cue. Zero 88 - ZerOS - Page 111 of 233 Printed: 23/11/2020 12:50:03 JH...
-
Page 112: Updating Cues
You can however update a cue with tracking enabled, as a method of sending your changes into several cues. Zero 88 - ZerOS - Page 112 of 233 Printed: 23/11/2020 12:50:03 JH... - Page 113 Updates cues 2 thru to 5 with your current lighting state. Cues 3 to 5 are tracking from cue 2. Update Enter Update, 3 And 5, Enter, Updates cues 3 and 5 with your current lighting state. Zero 88 - ZerOS - Page 113 of 233 Printed: 23/11/2020 12:50:03 JH...
-
Page 114: Update Options
To open the Update Options on the internal touchscreen, press and hold Update. Zero 88 - ZerOS - Page 114 of 233 Printed: 23/11/2020 12:50:03 JH... - Page 115 The attribute filters along the bottom of the Update Options, allow you to choose which attributes get included, and which don't. See the Record Filters section for more information. Naming Zero 88 - ZerOS - Page 115 of 233 Printed: 23/11/2020 12:50:03 JH...
- Page 116 This will record the next available cue, within the playback you are currently viewing, and allow you to name it. Record Name This will record cue 5.5, within the playback you are currently viewing, and allow you to name it. Zero 88 - ZerOS - Page 116 of 233 Printed: 23/11/2020 12:50:03 JH...
- Page 117 “from” field, and the number of the cue you wish to copy it to in the “to” field. This will copy cues from and to the currently viewed playback. Zero 88 - ZerOS - Page 117 of 233 Printed: 23/11/2020 12:50:03 JH...
- Page 118 So, in the example above, if Cue 7 didn’t exist, Cue 49 would be left empty. If there was a cue 9.5, a cue 51.5 would be created. Deleting Zero 88 - ZerOS - Page 118 of 233 Printed: 23/11/2020 12:50:03 JH...
- Page 119 Delete 15 Thru 20 Stack 1, This will delete cues 15, 16, 17, 18, 19 and 20 within the playback of the Go button you press, in this example playback 1. Zero 88 - ZerOS - Page 119 of 233 Printed: 23/11/2020 12:50:03 JH...
-
Page 120: Cue Settings
Cues window. After clicking "Add" the Cue Settings window will open, with the cue number and name displayed at the top. Zero 88 - ZerOS - Page 120 of 233 Printed: 23/11/2020 12:50:03 JH... -
Page 121: Cue Triggers
(indicated by the cue being highlighted in yellow in the cues window), and they are then triggered with a press of the "Go" button. However, there are other trigger options available, by using the "Trigger" drop down. Zero 88 - ZerOS - Page 121 of 233 Printed: 23/11/2020 12:50:03 JH... - Page 122 When the trigger is changed to Auto after previous cue, the Settings button for the cue in the Cues window will then display "Auto-A x", where x is the wait time. Zero 88 - ZerOS - Page 122 of 233 Printed: 23/11/2020 12:50:03 JH...
-
Page 123: Cue Macros
In the Cue Settings window, pressing the Macros... button gives you the option to Trigger a playback, Release a playback, or run a Macro, when the cue is executed. Zero 88 - ZerOS - Page 123 of 233 Printed: 23/11/2020 12:50:03 JH... - Page 124 Add again. To remove a macro or playback from the Cue Macros window, simply tap the macro or playback you wish to remove, and then confirm the action. Zero 88 - ZerOS - Page 124 of 233 Printed: 23/11/2020 12:50:03 JH...
- Page 125 Cues window, just like any other playback. You can do this by holding View, and tapping your chase's button. You will notice this playback has (Chase) shown at the top. Zero 88 - ZerOS - Page 125 of 233 Printed: 23/11/2020 12:50:03 JH...
- Page 126 Setup and tap the chase's button. This will take you straight to the chase tab of the playback's settings. You can name your chase from the chase settings by tapping Advanced. Zero 88 - ZerOS - Page 126 of 233 Printed: 23/11/2020 12:50:03 JH...
- Page 127 Setup and pressing the Playback Button of an empty playback, and selecting Global Tap Tempo . The central encoder button or playback button will now work as a Tap Tempo, and the encoder/fader will speed up/slow down the Global BPM. Zero 88 - ZerOS - Page 127 of 233 Printed: 23/11/2020 12:50:03 JH...
-
Page 128: Playback Settings
Advanced Raise and Lower Move On Dark General The “General” tab is split up into four key parts; Intensity Mixing, Fader Function, Fader Controls... and Button Function. Zero 88 - ZerOS - Page 128 of 233 Printed: 23/11/2020 12:50:03 JH... - Page 129 Fader Function options are not available if the playback is a chase. Zero 88 - ZerOS - Page 129 of 233 Printed: 23/11/2020 12:50:03 JH...
- Page 130 For a playback which is set to a chase, the default is Tap Tempo (shifted default: GO (Snap)) Once the button function has been customised, it will not change again automatically, even if the playback “status” changes. Zero 88 - ZerOS - Page 130 of 233 Printed: 23/11/2020 12:50:03 JH...
-
Page 131: Raise And Lower
To find out more about chase settings, click the link below... Chase Settings What is a Chase? Raise and Lower Raise and Lower options allow you to configure how the playback's fader will control the playback. Zero 88 - ZerOS - Page 131 of 233 Printed: 23/11/2020 12:50:03 JH... - Page 132 The lower time can be seen in the Faders window, with the onscreen playback fader annotated with "D" (for Down). Move On Dark Zero 88 - ZerOS - Page 132 of 233 Printed: 23/11/2020 12:50:03 JH...
- Page 133 “Don’t Move Effect” will be enabled, indicated with a red stripe. The Move On Dark timings are displayed in the Playback Status bar at the bottom of the Cues window on the external monitor. Zero 88 - ZerOS - Page 133 of 233 Printed: 23/11/2020 12:50:03 JH...
- Page 134 1. On FLX, you can type in the required Start Number and Increment in the fields provided and then select the OK button in the window. Zero 88 - ZerOS - Page 134 of 233 Printed: 23/11/2020 12:50:03 JH...
-
Page 135: Special Playback Functions
On FLX range consoles, Speed Override, Global BPM, and Programmer Time can also be accessed on the encoder wheels by tapping Z. Click here to find out more. Zero 88 - ZerOS - Page 135 of 233 Printed: 23/11/2020 12:50:03 JH... - Page 136 "Flash", will mean blackout will only be activated when the playback's button is held. The Page Lock option can be used, so that this fader is always your Grand Master, irrespective of the playback page you're on. Zero 88 - ZerOS - Page 136 of 233 Printed: 23/11/2020 12:50:03 JH...
-
Page 137: Playing Back Cues
To manually release a playback, you can press and hold Clear , and tap the button of the playback you wish to release. To release all playbacks, except the Master Playback, press and hold Clear and tap Fader Funct. Zero 88 - ZerOS - Page 137 of 233 Printed: 23/11/2020 12:50:03 JH... - Page 138 Release + Stack - Releases all Playbacks Clear + Fader Funct. - Releases all Playbacks EXCEPT the Master Playback Sub <Playback Number> Release - Releases the individual Playback via syntax Running Cue Stacks Zero 88 - ZerOS - Page 138 of 233 Printed: 23/11/2020 12:50:03 JH...
- Page 139 After the initial press of the pause button, subsequent presses will step backwards through the playback using the current cue fade times. To continue running the playback, press the Go key. Zero 88 - ZerOS - Page 139 of 233 Printed: 23/11/2020 12:50:03 JH...
- Page 140 Record Options Window. It shouldn't have a Red Stripe next to it, if it does tap "SmartTag". Then tap the button under the Playback you wish to control RED. Zero 88 - ZerOS - Page 140 of 233 Printed: 23/11/2020 12:50:03 JH...
- Page 141 0 seconds. You can then use your RGB faders to colour mix on your fixtures. Raising all four will give you full white. Zero 88 - ZerOS - Page 141 of 233 Printed: 23/11/2020 12:50:03 JH...
- Page 142 The console will state the "User Defined Key x/y is already recorded", where x is the UDK page, and y is the UDK number. Zero 88 - ZerOS - Page 142 of 233 Printed: 23/11/2020 12:50:03 JH...
- Page 143 To do this, hold Setup and tap the UDK you wish to configure, to open the UDK Settings. After making changes in the UDK Settings, click OK to save, or Cancel to discard. Zero 88 - ZerOS - Page 143 of 233 Printed: 23/11/2020 12:50:03 JH...
- Page 144 Colour, Beam, Shape and Position times are used to get from the fixture's current values, to the programmed values. They are not used when releasing the UDK. Shortcut UDKs Zero 88 - ZerOS - Page 144 of 233 Printed: 23/11/2020 12:50:03 JH...
- Page 145 Shortcuts can be created for individual key fixtures that you may regularly need to select. If multiple fixtures are required, record a group, and then create a Group UDK. Zero 88 - ZerOS - Page 145 of 233 Printed: 23/11/2020 12:50:03 JH...
- Page 146 After choosing the required option, press OK. In the Faders window, the onscreen UDK will have the Normal function displayed, with the shifted function in (brackets). Zero 88 - ZerOS - Page 146 of 233 Printed: 23/11/2020 12:50:03 JH...
- Page 147 Rem Dim is short for Remainder Dim, and is a method of dimming the remaining fixtures that are not currently selected. Click here to find out more about Rem Dim. Zero 88 - ZerOS - Page 147 of 233 Printed: 23/11/2020 12:50:03 JH...
- Page 148 "PK" at the start of their row in the parameter table at the bottom of the Output window, when the fixture is selected or tagged. Zero 88 - ZerOS - Page 148 of 233 Printed: 23/11/2020 12:50:03 JH...
- Page 149 Rather than using a UDK to access Highlight, the shortcut for Highlight is hold Shift and tap Home. The Home key will flash when Highlight is active. Zero 88 - ZerOS - Page 149 of 233 Printed: 23/11/2020 12:50:03 JH...
- Page 150 The High Value and Low Value can be customised in Setup -> Settings , by choosing High Value or Low Value under the Operational options. The default high value is 100%, and default Low Value is 0%. Zero 88 - ZerOS - Page 150 of 233 Printed: 23/11/2020 12:50:03 JH...
- Page 151 Did you know, there is a free ZerOS Remote app for Apple Watches, that allow you to remotely Highlight and Rem Dim fixtures straight from your wrist, perfect for focusing. Take a look... Zero 88 - ZerOS - Page 151 of 233 Printed: 23/11/2020 12:50:03 JH...
- Page 152 FLX range consoles is 240. You will see fixture macros specific to the fixtures you have patched. To apply a macro, select the fixture, and then tap the fixture macro you need. Zero 88 - ZerOS - Page 152 of 233 Printed: 23/11/2020 12:50:03 JH...
-
Page 153: User Macros
Commands, will simply record the text being typed into the command-line. Therefore if you are simply recording a string of syntax, both Keys and Commands would record the same information. Zero 88 - ZerOS - Page 153 of 233 Printed: 23/11/2020 12:50:03 JH... - Page 154 The playback speed of the macro commands/button presses can be configured in the macro settings. Macro settings can be accessed by holding Setup and tapping the onscreen macro tile, or using syntax: Macro Setup Zero 88 - ZerOS - Page 154 of 233 Printed: 23/11/2020 12:50:03 JH...
- Page 155 After choosing a macro to delete, the console will ask you to confirm this action before the command is executed. Once deleted, a macro cannot be recovered but can be recreated manually if required. Triggering Macros Zero 88 - ZerOS - Page 155 of 233 Printed: 23/11/2020 12:50:03 JH...
- Page 156 Macros can be triggered directly from the Macros window, by tapping the one you need. Alternatively, Macros can also be triggered using syntax: these Macro Enter methods: This triggers macro 1. Zero 88 - ZerOS - Page 156 of 233 Printed: 23/11/2020 12:50:03 JH...
- Page 157 If the show hasn’t yet been named, ZerOS will ask for a name before saving the show file. Zero 88 - ZerOS - Page 157 of 233 Printed: 23/11/2020 12:50:03 JH...
-
Page 158: System Information
The pin must be four numbers long. If you have forgotten your pin, please email support@zero88.com System Information Zero 88 - ZerOS - Page 158 of 233 Printed: 23/11/2020 12:50:03 JH... - Page 159 Desk Info screen. This lists information such as your current software version and current library version installed on the console. If you contact Zero 88 support, we will probably ask you to let us know the information displayed here. The next tab from the top of the System Information window, is Network Overview.
- Page 160 Pressing the middle button returns the Speed Override back to 50%. Speed Override can also be used to speed up or slow down effects running on the currently viewed playback. Zero 88 - ZerOS - Page 160 of 233 Printed: 23/11/2020 12:50:03 JH...
- Page 161 Speed Override, Global BPM, and Programmer Time, can be configured to be controlled by playback faders, as well as the encoders. For more information click here. Zero 88 - ZerOS - Page 161 of 233 Printed: 23/11/2020 12:50:03 JH...
- Page 162 (no need to hold shift), or tap Live at the top of the Output Window. Any programmer data which hasn’t been saved or cleared will be recalled when you next enter Blind Mode. Zero 88 - ZerOS - Page 162 of 233 Printed: 23/11/2020 12:50:03 JH...
- Page 163 For more information on the Fixture Schedule, click here to head to the Patching chapter. Add Fixtures Add Fixtures, allows you to find the fixture you need from the console's fixture library to then patch into the console. Zero 88 - ZerOS - Page 163 of 233 Printed: 23/11/2020 12:50:03 JH...
- Page 164 It is highly recommended to save external backups regularly – especially when leaving the console unattended for any amount of time. To save the show, press Setup and then choose Save on the left hand side of the display. Zero 88 - ZerOS - Page 164 of 233 Printed: 23/11/2020 12:50:03 JH...
- Page 165 Once you have saved a copy of your show file, you can then use the quick save function to periodically create backups to USB. Click here for more information. Load Zero 88 - ZerOS - Page 165 of 233 Printed: 23/11/2020 12:50:03 JH...
- Page 166 Click No if you need to save the current show first, prior to loading in the new show. Zero 88 - ZerOS - Page 166 of 233 Printed: 23/11/2020 12:50:03 JH...
- Page 167 Take a look at this video for an explanation of ASCII show files. Fixture Files If the fixture you need to control is not included in the latest Zero 88 Fixture Library, the file can be created using the Fixture Editor software.
- Page 168 ZerOS Software ZerOS, the software running on FLX and FLX S, is regularly updated as a free update from the Zero 88 website. Click here to download the latest version of ZerOS. Once downloaded, extract/unzip the software to the root of a USB stick, and plug into the console. You will then be able to tap Setup ->...
- Page 169 Changing the Desk Type will completely wipe the ZerOS Server's memory. On the Warning message, click Yes to proceed, or No to allow you to save your show to USB first. Zero 88 - ZerOS - Page 169 of 233 Printed: 23/11/2020 12:50:03 JH...
- Page 170 Please contact Zero 88 for details. On FLX and ZerOS Server, to manually change the monitor's resolution, click “Resolution” and select one of the listed resolutions (or select “Auto Detect”).
- Page 171 Any faders with active playbacks will remain on their previous page, until the respective Playback is released – at which point the fader will change to the current page. Zero 88 - ZerOS - Page 171 of 233 Printed: 23/11/2020 12:50:03 JH...
- Page 172 Setup Window, by pressing Setup and the attribute button together (on FLX S, these are soft buttons along the top of the touchscreen). For more information on Attribute Settings, click here. Zero 88 - ZerOS - Page 172 of 233 Printed: 23/11/2020 12:50:03 JH...
- Page 173 Enabled means that tracking options will be available within the Record and Update windows. Tracking options can be changed at any time without affecting cues that have already been programmed. For more information, click here. Defaults Zero 88 - ZerOS - Page 173 of 233 Printed: 23/11/2020 12:50:03 JH...
- Page 174 Go (Snap) Chase - button function set to Tap Tempo, shifted function set to Go (Snap) For more information on Playback Settings, click here. Zero 88 - ZerOS - Page 174 of 233 Printed: 23/11/2020 12:50:03 JH...
- Page 175 Desk Universes By default, DMX will be enabled. This means as soon as a fixture is patched onto universe 1, DMX will be output from DMX port 1. Zero 88 - ZerOS - Page 175 of 233 Printed: 23/11/2020 12:50:03 JH...
- Page 176 If you have changed the sACN settings in individual Desk Universes, you can choose to “Reset to defaults” (which outputs each Desk Universe on the equivalent number sACN Universe). Zero 88 - ZerOS - Page 176 of 233 Printed: 23/11/2020 12:50:03 JH...
- Page 177 Ethernet. Often, sACN universes are then converted back to DMX universes, using an Ethernet to DMX Gateway. Zero 88 manufacture Gateway 4 and Gateway 8 Ethernet to DMX Gateways. Click here to head to the Gateway 4 page.
- Page 178 Ethernet. Often, sACN universes are then converted back to DMX universes, using an Ethernet to DMX Gateway. Zero 88 manufacture Gateway 4 and Gateway 8 Ethernet to DMX Gateways. Click here to head to the Gateway 4 page.
- Page 179 ZerOS. You will see the parameter values live updating in ZerOS, and "External Level Set" will be displayed in the command line, as ZerOS receives the updates from Capture. Zero 88 - ZerOS - Page 179 of 233 Printed: 23/11/2020 12:50:03 JH...
-
Page 180: Remote Device Management
RigSync can be enabled or disabled within the RDM panel of the “Universes” tab within Setup. On FLX, RigSync is disabled by default. On FLX S, RigSync is enabled by default on DMX port 1. Zero 88 - ZerOS - Page 180 of 233 Printed: 23/11/2020 12:50:03 JH... - Page 181 If you need to remove RDM from a DMX line, Splitter 8 has a switch to allow you to remove RDM data from the DMX Outputs. Watch the video to find out more. Click here to go to the Splitter 8 page. Zero 88 - ZerOS - Page 181 of 233 Printed: 23/11/2020 12:50:03 JH...
- Page 182 2 (or more). This might be useful when visiting a venue as you can have the same data from both Art-Net ports without having to reconfigure the venue’s device. Zero 88 - ZerOS - Page 182 of 233 Printed: 23/11/2020 12:50:03 JH...
- Page 183 Click on the following Devices to find out more... Tracking Backup Art-Net Devices Enttec USB to DMX Devices Remote Apps Remote Apps Zero 88 - ZerOS - Page 183 of 233 Printed: 23/11/2020 12:50:03 JH...
- Page 184 When running the ZerOS Monitor app on Windows 10, keyboard shortcuts are available to remotely control the console. Click here to find out more about keyboard shortcuts. To enable access to the console from these apps, change “Remote” to “Enabled”. Zero 88 - ZerOS - Page 184 of 233 Printed: 23/11/2020 12:50:03 JH...
-
Page 185: Tracking Backup
DMX to the Ethernet devices, using the sACN or Art- Net 4 protocols. See the video to find out about the Zero 88 Gateway 4 and Gateway 8 Ethernet to DMX gateways. Click here to find out more about sACN. - Page 186 Tracking Backup Backup console network settings. You can choose between using a DHCP address, or a static IP address. For information on network settings, see the Networking chapter. Zero 88 - ZerOS - Page 186 of 233 Printed: 23/11/2020 12:50:03 JH...
- Page 187 Backup device will alert you that the Master has come back online (pictured). You can then choose for the Backup device to go back to tracking the master. Zero 88 - ZerOS - Page 187 of 233 Printed: 23/11/2020 12:50:03 JH...
- Page 188 DMX timings to be edited, such as the Break Time (BT), Mark After Break Time (MAB) and DMX Output Rate (Hz). The options available for each device depend on the device present. Triggers Zero 88 - ZerOS - Page 188 of 233 Printed: 23/11/2020 12:50:03 JH...
-
Page 189: Midi Timecode
QLab running on a computer. The MTC clock source is typically started on a computer at the same time as an audio track, to allow lighting, sound, and other departments, to be synchronised. The MIDI Timecode frame rate can be configured in the Triggers tab. Zero 88 - ZerOS - Page 189 of 233 Printed: 23/11/2020 12:50:03 JH... -
Page 190: Midi Show Control
If you choose a Device ID of 127, ZerOS will listen to all Device IDs. Watch the quick video for an introduction to MIDI Show Control. Zero 88 - ZerOS - Page 190 of 233 Printed: 23/11/2020 12:50:03 JH... - Page 191 MIDI Notes only allows for whole note numbers. Therefore if you have point cues you wish to trigger, you will need to renumber the cues in the playback. To do this hold SETUP and tap the playback's button, and from the settings choose Advanced -> Renumber. Zero 88 - ZerOS - Page 191 of 233 Printed: 23/11/2020 12:50:03 JH...
- Page 192 CAN settings will be hidden from the Triggers tab of Setup. CAN will be enabled by default on ZerOS Servers with CAN. When enabled various iCAN settings can be changed. Zero 88 - ZerOS - Page 192 of 233 Printed: 23/11/2020 12:50:03 JH...
- Page 193 ZerOS Server can be configured to emulate a Source Controller. This allows DMX from ZerOS Server to be controlled as ‘physical channels’ of one or more virtual source controllers. Normal source controller operations of programming and outputting scenes are supported. Zero 88 - ZerOS - Page 193 of 233 Printed: 23/11/2020 12:50:03 JH...
-
Page 194: Remote Switches
Clear options allows you to clear certain areas of the console, or reset the console back to factory settings. The Clear Options are split into Showfile Data, and Desk Settings. Zero 88 - ZerOS - Page 194 of 233 Printed: 23/11/2020 12:50:03 JH... - Page 195 After confirming a Factory Reset, the console will need to be restarted. Upgrade FLX, FLX S24, FLX S48 and ZerOS Server have the ability to have their channel count upgraded in individual universe increments. Zero 88 - ZerOS - Page 195 of 233 Printed: 23/11/2020 12:50:03 JH...
- Page 196 Unlock codes are not transferable between consoles. After entering the Unlock code, the console will then ask to be restarted. The next time the console boots, the extra universes will be unlocked. Zero 88 - ZerOS - Page 196 of 233 Printed: 23/11/2020 12:50:03 JH...
- Page 197 Shortcuts Zero 88 - ZerOS - Page 197 of 233 Printed: 23/11/2020 12:50:03 JH...
- Page 198 Fan parameters Shift + dial encoder Highlight Shift + Home Next Shift + -> Previous Shift + <- Select fixtures above 0% Enter Enter 100% Intensity 0% Intensity Zero 88 - ZerOS - Page 198 of 233 Printed: 23/11/2020 12:50:03 JH...
- Page 199 Setup + Playback Button Attribute Settings Setup + Attribute Key UDK Settings Setup + UDK Lock <- + -> + Enter Name a group, palette or playback Setup + tap Zero 88 - ZerOS - Page 199 of 233 Printed: 23/11/2020 12:50:03 JH...
-
Page 200: Keyboard Shortcuts
Phantom ZerOS, or ZerOS Monitor for Windows, for remote use of the console. Normal Keyboard Functions Keyboard functions with Shift held down Keyboard functions with Ctrl held down Zero 88 - ZerOS - Page 200 of 233 Printed: 23/11/2020 12:50:03 JH... - Page 201 Zero 88 - ZerOS - Page 201 of 233 Printed: 23/11/2020 12:50:03 JH...
- Page 202 Phantom will be able to access to load and save files to. Phantom will also be able to access other media, such as USB sticks and disk drives. When configured, press "GO", to boot your Phantom console. Zero 88 - ZerOS - Page 202 of 233 Printed: 23/11/2020 12:50:03 JH...
- Page 203 Click here to find a list of handy keyboard shortcuts to use with Phantom. To hold down virtual buttons on the Phantom Front Panel window, right click on a button to hold it. Right click it again to release. Zero 88 - ZerOS - Page 203 of 233 Printed: 23/11/2020 12:50:03 JH...
-
Page 204: Building A Network
Find out more about Ethernet Networking... ZerOS Network Settings Connecting to Capture Example Systems Using the Remote Apps Wireshark Building a Network IP Addressing DHCP Building a Network Zero 88 - ZerOS - Page 204 of 233 Printed: 23/11/2020 12:50:03 JH... - Page 205 Ethernet switches with many ports, rather than lots of Ethernet switches connected to each other with fewer ports. Zero 88 networking devices are designed for use within a dedicated, stand alone, private, local area network only, for the sole purpose of transmitting and/or receiving nonsensitive entertainment lighting control data. Although they utilize Ethernet networking, these devices should not be connected to the Internet.
- Page 206 192.168.1. The remaining octet "x" is the the host address - each device (or "host") has a unique address within that network number. For example, these two devices could talk: Device 1 - IP: 10.1.1.10, Subnet: 255.255.255.0 Zero 88 - ZerOS - Page 206 of 233 Printed: 23/11/2020 12:50:03 JH...
- Page 207 IP addresses - your device is given all of that information from the DHCP server which will be on the network. Take a look at the quick video below for a description... Zero 88 - ZerOS - Page 207 of 233 Printed: 23/11/2020 12:50:03 JH...
- Page 208 Sometimes, you may see a device on a network, with an IP of 169.254.x.x. If you do, this device is using a "Link Local Address", and means it is expecting to receive an IP address and subnet from a DHCP server, but hasn't. ZerOS Network Settings Zero 88 - ZerOS - Page 208 of 233 Printed: 23/11/2020 12:50:03 JH...
- Page 209 Wi-Fi IP. You will also see an IP of 127.0.0.1. This is your PC's loopback IP, used to allow Phantom ZerOS to communicate with other software packages on the PC, such as visualisation software. Connecting to Capture Zero 88 - ZerOS - Page 209 of 233 Printed: 23/11/2020 12:50:03 JH...
- Page 210 Extract/unzip the Capture download, and find the venue you wish to use within the extracted folder. For training, the Zero 88 team tend to use the "Dockhouse" show. The .exe is the Capture “presentation file”. The .c2p is the original Capture show file (which requires a licensed version of Capture to run).
-
Page 211: Example Systems
If it is listed, ensure it is ticked to have permission. If you are still having difficulty, try running the Capture visualisation as administrator. Example Systems Zero 88 - ZerOS - Page 211 of 233 Printed: 23/11/2020 12:50:03 JH... - Page 212 This system also includes two EtherN.2 RDMs, which could be wall mounted in two different locations within the venue. EtherN.2 has been superseded by the Gateway 4 Ethernet to DMX gateway. Zero 88 - ZerOS - Page 212 of 233 Printed: 23/11/2020 12:50:03 JH...
- Page 213 ZerOS Remote app for remote control. There is no limit to the number of remote monitors that may be connected simultaneously. Using the Remote Apps Zero 88 - ZerOS - Page 213 of 233 Printed: 23/11/2020 12:50:03 JH...
- Page 214 Click here now to go to the Google Play store to download the Monitor app If you're on PC... Click here to download ZerOS Monitor for Windows. Connect your device to the same network as your console Zero 88 - ZerOS - Page 214 of 233 Printed: 23/11/2020 12:50:03 JH...
- Page 215 You can then click on your console to connect. If your console has a password, you can then enter this to connect to your console. By default the password is "zeros" however you can change this on the console, or disable the password. Zero 88 - ZerOS - Page 215 of 233 Printed: 23/11/2020 12:50:03 JH...
- Page 216 Every Monitor can be viewing a different desktops, allowing you to easily add multiple touchscreen displays to your console. Zero 88 - ZerOS - Page 216 of 233 Printed: 23/11/2020 12:50:03 JH...
- Page 217 4. Once done, press the red stop button (second icon on the toolbar, says “Stop Capturing Packets” when you hover over it). 5. If required, you can then save the capture. Zero 88 - ZerOS - Page 217 of 233 Printed: 23/11/2020 12:50:03 JH...
-
Page 218: Software Updates
If any difficulties are encountered at any point, or you are in doubt on any of the instructions below, then do not proceed any further with the update and contact Zero 88 for assistance. The software installation process completely removes all data on the console, including any current show files. If the current show file is still required, please ensure that backups are taken before proceeding with the update. - Page 219 If your ZerOS console is failing to boot into the ZerOS Installer on the USB drive, try the steps below: Zero 88 - ZerOS - Page 219 of 233 Printed: 23/11/2020 12:50:03 JH...
- Page 220 Push OK and your stick will be formatted - the tool will then prompt you to remove and reinsert the stick. After this, try running through the normal upgrade procedure and the stick should work as expected. Zero 88 - ZerOS - Page 220 of 233 Printed: 23/11/2020 12:50:03 JH...
-
Page 221: Technical Information
Universal Serial Bus standard. Ethernet FLX & ZerOS Server is fitted with a Neutrik etherCON RJ45 Ethernet port and is capable of supporting various Ethernet protocols. Zero 88 - ZerOS - Page 221 of 233 Printed: 23/11/2020 12:50:03 JH... - Page 222 A 9 pin D-sub connector providing 8 remote switches (common ground). Short pin 1-8 to pin 9 (common) to simulate a button push. FLX S24 & FLX S48 Zero 88 - ZerOS - Page 222 of 233 Printed: 23/11/2020 12:50:03 JH...
- Page 223 12V DC; MAX 1.25A, 15W The approved Zero 88 power supply included with FLX S should always be used. This power supply should be earthed. Spares / replacements can be ordered, listed under “accessories” on the first page of this guide.
-
Page 224: Troubleshooting
Trouble Shooting Zero 88 - ZerOS - Page 224 of 233 Printed: 23/11/2020 12:50:03 JH... - Page 225 MIDI specification. Although these sometimes work with MIDI Timecode, they do not work with Show Control. Zero 88 - ZerOS - Page 225 of 233 Printed: 23/11/2020 12:50:03 JH...
-
Page 226: Test Mode
Pressing keys will light the LED in that button. For consoles with 7-segment displays, these will cycle to ensure all parts are displaying correctly. Reporting a problem Zero 88 - ZerOS - Page 226 of 233 Printed: 23/11/2020 12:50:03 JH... - Page 227 This debug file contains important information about the behaviour of your desk, and what caused the software issue. Providing this file to the Zero 88 support team can help us to improve the desks performance to ensure that the crashes do not occur in future software releases.
- Page 228 Then choose "Update Software" in the Startup tool. This will give you a warning, where you can click OK. You will then be able to select a software file (.exe) from a USB stick to reinstall the software. Again this will remove the show file. Zero 88 - ZerOS - Page 228 of 233 Printed: 23/11/2020 12:50:03 JH...
-
Page 229: Maintenance
Transportation & storage Care should be taken when transporting your console. Zero 88 are able to supply flight cases for the transportation of their consoles – the cardboard box which your console was supplied in is intended only for one or two journeys and should not be relied upon to keep the console safe for prolonged use. - Page 230 FLX S48 Dimensions 68mm (H) x 669mm (W) x 284mm (D) Weight 5.5 kg Operating temperature range +5 to +40 °C Humidity 5% to 95% non-condensing FLX S24 Zero 88 - ZerOS - Page 230 of 233 Printed: 23/11/2020 12:50:03 JH...
- Page 231 ZerOS Server is designed to be rack mounted into a standard 19” cabinet using 4 x M6 Cage Nuts and 4 x M6 x 16mm screws. Ventilation must be provided in the rack such that ZerOS Server can freely draw air from its rear ventilation slots. ZerOS Wing Zero 88 - ZerOS - Page 231 of 233 Printed: 23/11/2020 12:50:03 JH...
- Page 232 Dimensions 90mm (H) x 339mm (W) x 342mm (D) Weight 3.8 kg Operating temperature range +5 to +40 °C Humidity 5% to 95% non-condensing Zero 88 - ZerOS - Page 232 of 233 Printed: 23/11/2020 12:50:03 JH...
- Page 233 Support At Zero 88 we pride ourselves in providing unrivalled support to our customers, on all products both current and legacy. There are many ways we can help you: Support For general Zero 88 support, email support@zero88.com Fixture Support For any questions specific to a particular fixture, or to request a fixture file to be created and sent to you, email fixturesupport@zero88.com...
Need help?
Do you have a question about the FLX Series and is the answer not in the manual?
Questions and answers