Advertisement
Quick Links
Advertisement

Summary of Contents for StageRight FR-36
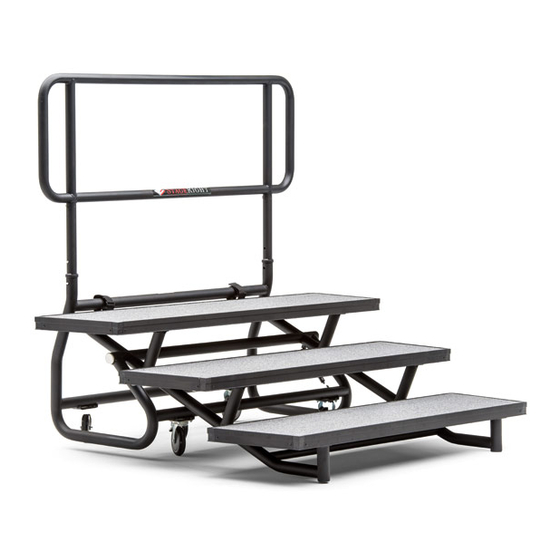
- Page 1 PRODUCT INFORMATION PACKET PRODUCT NAME: FR-36 Fold & Roll Riser...
-
Page 2: Table Of Contents
Table of Contents Introduction………………………………………………………………………………………………………………… General Safety Rules…………………………………………..………………………………………………………… Symbols……………………………………………………………………………………………………………………… Technical Specifications………………………………….……………………………………………………………… Instructions………………………………………………………………………………………………………………… Maintenance………………………………………………………………………………………………………………… Customer Service Information…………………………………………………………………………………………... -
Page 3: Introduction
The care you give your FR-36 Fold & Roll Riser will greatly determine your satisfaction with its performance and service life. Careful study of this manual is encouraged to obtain a thorough understanding of your new FR-36 Fold &... -
Page 4: General Safety Rules
Do not use without railing. Railing must be used at all times for safety. Save these instructions. Refer to them frequently and use them to instruct others who may use FR-36 Fold & Roll Riser Read the Product Information Packet. Failure to read the information packet is considered a misuse of this equipment. -
Page 5: Symbols
Symbols Safety Alert: Precautions that involve your safety Read The Operator’s Manual: To reduce risk of injury, user must read and understand operator’s manual before using this product Pinch Point Warning Label: Failure to keep hands away from pinch points will result in personal injury Level Warning Label: Be sure 4 level legs are engaged when 4... -
Page 6: Technical Specifications
StageRight Corporation Technical Specifications FR-36 Fold & Roll Riser Part # Description Weight (lbs) Shipping Dim. 307003 FR-36 Choral Riser 72”x36”x96” 307004 Level Add-On (FR-36) 76”x21”x5” Construction, Finish, and Hardware - Constructed of ASTM specified steel - Baked-on powder coat finish. - Page 7 StageRight Corporation Technical Specifications Part # Description Weight (lbs) Shipping Dim. 108349 FR-36 Side Rail Kit 69”x17”x38” 107685 Mounting Bracket 55”x5”x3” Shown with Optional Side Rail Kit 108349 Side Rail, (2) Required Side Rail Mounting Bracket Mounting Bracket, (2) Required...
-
Page 8: Instructions
Instructions To fold up the FR-36, lock the wheels, and lift from the bottom tread. The tread assembly will rotate up and into the folded position. To unfold the assembly, lock the wheels, and pull on the bottom tread, the tread assembly will rotate down and into the unfolded position. - Page 9 Lower the fourth level addition onto the lower levels. Insert fas-pins through hole as shown. Insert back rail into addition, making sure spring locks are snapped into place. To keep the riser from tipping after the 4 level addition has been installed, pull the fas-pin out of the outer leg and lower the inner leg as shown.
- Page 10 Unbolt LIFT If multiple risers are being used, a straight or round shape can be made. Each level can be removed by unbolting the four bolts that hold on each tread. Note: Load treads evenly. Do not place people on the top tread alone, as tipping may occur. For a slightly curved shape, place the shortest tread on the bottom, with the shortest side facing forward.
- Page 11 For a straight shape, alternate riser orientation. The first orientation is as shown above, the second is with the longest tread on the bottom, with the longer side facing forward. Use connecting brackets on middle tread to connect multiple risers together. Velcro Straps For improved performance, add Velcro straps to back of the riser.
- Page 12 Instructions: Side Rail Kit (Risers not shown for clarity.) Mounting Brackets The mounting bracket will rest against the riser tube when installed. Stringer Tube Bolt & Washer Position the Mounting Bracket on the stringer tubes as shown. Use a 3/8”-16 hex head bolt, a 3/8”...
- Page 13 A) Using two people attach the Side Rails to the brackets by sliding the rail tubes into the bracket tubes. Be sure to insert the rail tubes evenly to avoid binding. Secure all tubes in place using the provided fas-pin! B) Alternately you can attach the bent rail tubes into the bracket tubes first and then two people can place the side rail into the bent tubes from the top.
-
Page 14: Maintenance
Frequently check to see that all fasteners are properly engaged. Touch up paint can be used to cover any scratches or blemishes sustained through use. Replace any damaged equipment with genuine StageRight parts. Failure to do so may result in unsafe equipment and/or personal injury. -
Page 15: Customer Service Information
Customer Service For parts or service contact StageRight Corporation. When ordering parts be sure to provide all relevant information available including the name and part number of the equipment purchased. This information is located on the technical specification page of this product information package. Customer Service hours are Monday thru Friday from 8:00 a.m.
Need help?
Do you have a question about the FR-36 and is the answer not in the manual?
Questions and answers