
Related Manuals for LinPlug RM IV

Summary of Contents for LinPlug RM IV
- Page 1 LinPlug Virtual Instruments GmbH all rights reserved...
- Page 2 RMIV and to all customers for supporting us over the years LinPlug : Bo Johansen : Chris Share : Ken Fennell : Peter Linsener RM IV user manual : version 1.1...
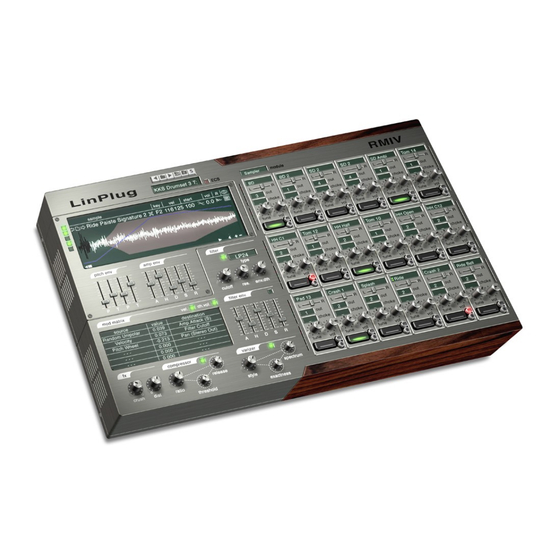
- Page 3 "Varizer" and 2 effects processors (Distortion and BitCrusher) all of which can be set on a per-Pad basis. The RM IV also features a 6 x 6 Modulation Matrix, 32-voice polyphony (selectable per Pad), as well as separate Volume, Output, Tune, Pan, Choke, Mute and Solo controls for each Pad.
-
Page 4: Table Of Contents
CYMBAL 2....................26 CLAPS......................27 PLOP......................28 SAMPLER MODULE....................29 SAMPLE DISPLAY..................30 PITCH ENVELOPE..................34 AMPLITUDE ENVELOPE................35 FILTER........................36 COMPRESSOR.......................38 VARIZER.........................39 EFFECTS........................40 MODULATION MATRIX..................41 KIT BROWSER......................42 THE RM IV KITS......................44 MIDI BROWSER......................45 ECS (EASY CONTROLLER SETUP)..............47 REAR PANEL......................48 RM IV user manual : version 1.1 page 4... - Page 5 GET THE FULL VERSION..................51 APPENDIX A: MODULATION SOURCES AND DESTINATIONS......52 MODULATION SOURCES................52 MODULATION DESTINATIONS..............53 GLOSSARY......................55 MIDI IMPLEMENTATION CHART................57 RM IV user manual : version 1.1 page 5...
-
Page 6: Installation
Installation on Mac The RM IV comes with its own Installer. On the RM IV CD you will find a file named "RM IV Installer.dmg". Double-click this file to decompress and open the image, then double-click the installer program to begin the installation process. - Page 7 S/N edit box. If the serial number has not been entered or it has been entered incorrectly, the full version of the RM IV will not play any notes. To switch back to the main edit screen click the LinPlug or RM IV logos on the rear panel.
-
Page 8: Features/Specifications
Features/Specifications The RM IV contains a range of features designed to make your music-making more efficient and enjoyable. These features are described below: drum synthesis and sample plugin for Mac OSX and PC. Designed for drums but can be used for pitched samples as well. -
Page 9: What's New In The Rm Iv
Sample accurate timing. What's New In The RM IV In comparison with its predecessors the RM III, the RM IV contains a host of new features intended to make your music-making more efficient and enjoyable. These new features are listed below: Contains over 120 Kits including all RM 2 Kits, all RM III Kits, a whole bunch of multisampled acoustic kits, new dance kits and many, many synthesized kits. -
Page 10: Quickstart
The RM IV has been designed to be very easy to use. Using the procedure outlined below you should be able to start making music with the RM IV in a few minutes. After you've installed the RM IV (as detailed in the previous section) and opened the host program here's what to do: 1. - Page 11 "directory" icon in the file section of the Sample Display. The Sample Display is shown in the top left corner of the RM IV when the selected Pad is set to the Sampler algorithm. A file dialog will open. Choose the sample you wish to RM IV user manual : version 1.1...
- Page 12 RM IV's Rear Panel in the Settings Display. To go to the Rear Panel, click on either the "LinPlug" or "RM IV" logos. To return to the Front Panel from the Rear Panel, click on either the "LinPlug" or "RM IV" logos.
-
Page 13: Overview
The RM IV consists of 18 Drum Pads, each of which uses one of the instrument's Audio Generator modules (this can be one of the percussion synthesis modules or the Sampler module) to generate sound. -
Page 14: Controls
Controls Users have the option of controlling all RM IV dials in either a circular or a linear manner depending on the Dial Mode setting on the RM IV's Rear Panel (see the "Rear Panel"... -
Page 15: Drum Pads
Drum Pad, the RM IV's display is updated so that it shows the Audio Generator module of the currently selected Drum Pad. The RM IV's 18 Drum Pads can be used to trigger any one of the RM IV's selection of Audio Generator modules. The modules that use percussion synthesis algorithms to generate sound are described in more detail in the Percussion Synthesis Module section of this manual. - Page 16 The Out(put) control is used to set the output destination of the Drum Pad. Available destinations depend upon the current audio output settings on the RM IV's Rear Panel (for more information about the RM IV's Rear Panel, see below). Note that all stereo outputs are listed first, followed by all of the mono outputs.
- Page 17 The Trigger button allows the Drum Pad to be played using the mouse. Simply click the mouse on the Drum Pad to trigger the sound. If Pad Velocity is enabled on the RM IV's Rear Panel (see below for more information about the RM IV's Rear Panel), the Pad becomes velocity-sensitive.
-
Page 18: Audio Generator Modules
Audio Generator Modules The RM IV contains a range of different Audio Generator modules which it uses to create and play percussion sounds. These include percussion synthesis modules as well as sampling. Each percussion synthesis algorithm is tailored to a particular type of percussion sound, while the Sampler module can be used for playing back any type of sound you wish. -
Page 19: Kick 1
The Noise Volume dial is used to set the amount of noise added to the drum sound. The Noise Colour dial setting determines the frequency spectrum of the noise and the Noise Decay (Time) dial sets the decay time of the noise component of the drum sound. RM IV user manual : version 1.1 page 19... -
Page 20: Kick 2
The decay time changes from short to long as the dial is turned in a clockwise direction. The Noise Volume dial is used to adjust the amount of noise added to the drum sound. RM IV user manual : version 1.1 page 20... -
Page 21: Snare 1
The Noise Decay (Time) dial sets the decay time of the noise component of the drum sound. The Noise Env(elope) Mod(ulation) dial is used to set the degree to which the noise oscillator's filter cutoff frequency is modulated by the oscillator's amplitude envelope RM IV user manual : version 1.1 page 21... -
Page 22: Snare 2
The Mix control is used to adjust the mix of the "Knarks" oscillator and the Noise Oscillator. The Decay control is used to determine the rate at which the mixed sound decays. RM IV user manual : version 1.1 page 22... -
Page 23: Tom
The decay time changes from short to long as the dial is turned in a clockwise direction. The Noise Volume control is used to determine how much noise is mixed with the output of the pitched oscillator. RM IV user manual : version 1.1 page 23... -
Page 24: Open/Closed(Hi)Hat
"body" of their sound. A very similar algorithm is used for both the Open and Closed (Hi) hat sounds but the parameter ranges are different in each case. RM IV user manual : version 1.1 page 24... -
Page 25: Ride Cymb(Al)
Note: this has intentionally only a subtle effect. The Modulation Pitch Env(elope) control can be used to add a decay stage to the oscillator's pitch envelope. The Mix control adjusts the mix of pitched sound and noise. RM IV user manual : version 1.1 page 25... -
Page 26: Cymbal 2
The Env(elope) Shape dial is used to set the shape of the instrument's decay envelope. When the dial is turned anti-clockwise the release is linear. As the dial is turned clockwise, the release becomes exponential. RM IV user manual : version 1.1 page 26... -
Page 27: Claps
The Envelope Shape control sets the shape of the single claps decay as well as the final release. When the dial is turned anti-clockwise it is linear. As the dial is turned clockwise, it becomes exponential. RM IV user manual : version 1.1 page 27... -
Page 28: Plop
The Body Range control is used to set the range (frequency) of the body sound that follows the attack part of the sound. The Body Decay control determines the rate at which the body sound decays to silence. RM IV user manual : version 1.1 page 28... -
Page 29: Sampler Module
Sampler Module The RM IV's Sampler module is used to load up to 30 samples into an individual Drum Pad, and also to edit the samples once they are loaded. This module is made up of three separate components: The Sample Display, The Pitch Envelope and the Amplitude Envelope. -
Page 30: Sample Display
Sample Display The RM IV's Sample Display is modeled on the classic LCD display commonly found on hardware samplers. It consists of 30 "slots" into which samples can be loaded and edited. Selector: The Selector button array is located to the left of the main LCD display. It consists of five small square vertically-aligned buttons which allow you to choose between five screens, each of which displays six sample "slots". - Page 31 Key (continued): A key setting of "All" means that the sample responds to all Note-On commands and can be played over the entire keyboard range (it is useful then, to set up different MIDI channels on RM IV's rear panel so the pitched instrument only responds to a particular MIDI channel and does not accidentally sound when drums are to be played).
- Page 32 For example, if the magnification is 1, then one sample is displayed per pixel. If the display shows 16, then 16 samples are compressed into a single pixel RM IV user manual : version 1.1 page 32...
- Page 33 The topmost button displays the first sample in the Pad. It should be noted that this scrolling does not work if there are gaps between the samples (e.g. If there is a sample in slot 1 and slot 3 but not in slot 2). RM IV user manual : version 1.1 page 33...
-
Page 34: Pitch Envelope
For example, if the Time slider is set to 0.100 seconds, the sample's pitch will move from the value set by the Pitch slider to the sample's base frequency within 100 milliseconds. RM IV user manual : version 1.1 page 34... -
Page 35: Amplitude Envelope
Note-Off message is received. It is shown in the display merely as an example. R(elease): The Release slider determines the length of time that the amplitude envelope takes to move from the Sustain level to 0 after a Note-Off message has been received. RM IV user manual : version 1.1 page 35... -
Page 36: Filter
Filter The RM IV's multi-mode filter is located in the middle of the front panel. It consists of two parts: the Filter section and the Filter Env(elope) section. The filter is switched on or off using the button to the left of the Filter Type display. Eight different types of filter are available: LP12 ("Low Pass 12 dB/Octave"),... - Page 37 (this is impossible with a non-inverted envelope). Don't forget that the filter's AHDSR envelope is shown using a blue line in the Sampler Display when the display is in "Waveform" mode and the filter is switched On. RM IV user manual : version 1.1 page 37...
-
Page 38: Compressor
Compressor The RM IV's Compressor is found on the bottom left of the front panel beside the two effects units. The compressor has been designed to be as easy to use as possible. It has three controls: Ratio, Threshold and Release. The gain of the signal after it is compressed is automatically adjusted for optimum sound quality. -
Page 39: Varizer
Varizer The Varizer is a unique feature of the RM IV. It is located below the Filter Envelope controls. Essentially, the Varizer is used to introduce an element of randomness to the RM IV's playback. Real drummers never play two drum hits in exactly the same way. The RM IV's Varizer is designed to imitate the small variations that occur from drum hit to drum hit when a real drummer plays. -
Page 40: Effects
Effects The RM IV has two independent effects units: Crush (BitCrusher) and Dist (Distortion). These are located at the bottom left of the RM IV's Front Panel. The two effects units operate as "insert" effects (as opposed to "send" effects) which means that they can be set independently for each Drum Pad. -
Page 41: Modulation Matrix
Modulation Matrix The RM IV's Modulation Matrix allows you to create 6 user-defined modulation routings. 23 modulation destinations are available for modulation by 15 modulation sources (see Appendix A for a listing and description of all modulation sources and destinations). -
Page 42: Kit Browser
Kit Browser The RM IV's Kit section is used for all File-related operations. It is located in the upper left of the Front Panel to the right of the LinPlug logo. Using the controls located in this section, you can load and save drum kits in a variety of commonly used formats. - Page 43 The settings of all sections of the RM IV are saved with the Drum Kit. The RM IV loads and saves all of its Kits directly to hard disk so your computer's RAM does not limit the number of available Kits.
-
Page 44: The Rm Iv Kits
The RM IV Kits The RM IV comes with an incredible selection of high-quality drum kits ready for you to use. These include: Manytone A collection of acoustic, multi-sampled drums. The drums in this collection were recorded digitally using 24-bit analog-to-digital converters. The files in this collection are very high quality, contain extremely low noise levels and feature precision edits. -
Page 45: Midi Browser
When the RM IV is in MIDI mode the File I/O controls take on functions that are different to when it is in Kit mode. When in MIDI mode, the RM IV's file I/O section contains six controls. - Page 46 Drag: The button labeled "D" allows you to drag MIDI files from the RM IV directly into the host software. Click on the D-icon to drag the currently loaded MIDI file to your host sequencer.
-
Page 47: Ecs (Easy Controller Setup)
ECS (Easy Controller Setup) The RM IV's ECS (Easy Controller Setup) makes it simple to control the RM IV from an external MIDI controller (either hardware or software). Clicking on the title of the ECS control opens the ECS popup menu. This menu provides the following four options: Off, Learn, Clear and Clear All. -
Page 48: Rear Panel
Rear Panel The "Rear Panel" of the RM IV is accessed by clicking on the "LinPlug" or "RM IV" logos on the RM IV's Front Panel. Several master controls have been located here to make the Front Panel less crowded, and also so that they are not changed accidentally while the RM IV is in use. - Page 49 Fact is, that you must restart the host software after changing the output configuration. This is not the fault of the RM IV but rather a limitation of the current VST design and applies to all VST Instruments. Similarly, if you want to load a different song you must make sure that the current output configuration is the same as that of the song about to be loaded.
- Page 50 Percussion Sample module has the Trigger Note set on a per-sample basis in the Sample window on the RM IV's Front Panel. To switch back to the "Front Panel" click on the "RM IV" or "LinPlug" logos on the RM IV's rear panel.
-
Page 51: Get The Full Version
You can use the demo version of the RM IV for evaluation purposes for a period of up to 30 days. If you then decide that you would like to keep using the RM IV you must obtain a RM IV license. -
Page 52: Appendix A: Modulation Sources And Destinations
(bipolar). Note that this modulation source is only useful for playing pitches sounds, as non pitched sounds does normally have exact one trigger note, so there is no variation in this RM IV user manual : version 1.1 page 52... -
Page 53: Modulation Destinations
(applies only to the Sampler module). Amp. Decay [S] The length of time that the amplitude envelope takes to move from the Attack level to the Sustain level after the Hold time has RM IV user manual : version 1.1 page 53... - Page 54 Crusher The setting of the "BitCrusher" effect. This enables you to modulate the bit depth of the output signal. Reducing the bit depth adds a harsh, noisy quality to the sound. RM IV user manual : version 1.1 page 54...
-
Page 55: Glossary
The frequency that marks the transition from the filter's passband to the filter's stopband. Usually it is defined as the frequency at which the signal is attenuated by 3 dB. FM or "Frequency Modulation" is a process where the frequency of RM IV user manual : version 1.1 page 55... - Page 56 Frequency Modulation is produced. Modulation Matrix: A signal "junction" where a source signal can be patched so that it controls a destination signal. The RM IV's Modulation Matrix is used for tasks such as modulating an envelope parameter by Velocity. Noise: A sound with a distributed spectrum.
-
Page 57: Midi Implementation Chart
ECS and Matrix Program Change System Exclusive System Common Song Position Song Select Tune Request System Realtime Clock Commands Aux Messages Local On/Off All Notes Off Active Sensing System Reset RM IV user manual : version 1.1 page 57...
Need help?
Do you have a question about the RM IV and is the answer not in the manual?
Questions and answers