Table of Contents
Advertisement
Quick Links
Advertisement
Table of Contents

Subscribe to Our Youtube Channel
Summary of Contents for LR DM 80-UMS
- Page 1 OPERATING INSTRUCTIONS Digital DM 80-UMS Pressure Gauge...
- Page 2 Described product Manufacturer LEITENBERGER GmbH, Bahnhofstrasse 32/33 72138 Kirchentellinsfurt, Germany Legal notice This work is protected by copyright. All associated rights remain with LEITENBERGER GmbH. Reproduc- tion of the work or parts thereof is permitted only within the limits of the statutory provisions of copyright law.
-
Page 3: Table Of Contents
Table of Contents Safety ..........4 Safety notes and regulations . -
Page 4: Safety
1. Safety Safety notes and regulations To ensure safe and reliable work with the digital pressure gauge and to protect the user from injuries, the following points are to be observed: Read the operating instructions carefully. The digital pressure gauge may only be operated and installed in systems by trained specialists who possess the necessary expertise and qualifications to perform these tasks, and who are familiar with the applicable standards, regulations and requirements of the field of application. -
Page 5: Explanation Of Symbols
Ambient conditions The DM 80-UMS digital pressure gauge is only intended for use in commercial workshops. It is not approved for ATEX areas and therefore must not be used in potentially explosive areas. -
Page 6: Product Description
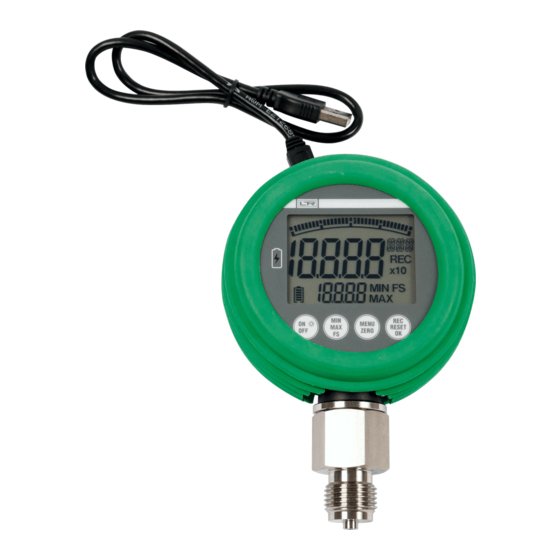
2. Product description The DM 80-UMS is a digital pressure gauge with actual value display as well as min/max display and accuracy class 0.5 FSO. The MIN/MAX memory is permanently updated and overwritten. The sampling rate is 10 milliseconds (100 measurement values/second) for measuring dynamic pressure peaks. The integrated data logger saves the measured data. - Page 7 Item Designation Button Function The bar graph graphically depicts the maximum measuring span. The stored MAX value is displayed as a static, individual bar Bargraph ① (= drag pointer function). The display is updated at an interval of 10 milliseconds. (100 measurements / second) Actual value display, Displays the current pressure.
-
Page 8: Menu Functions
Menu functions The following settings are made using the MENU function – unit: Set the measurement unit (bar, mbar, PSI, kPa, MPa) – Filt: Set the filter function (attenuation) – LOG: Set the sampling rate – Function menu reserved by the manufacturer (locked) –... -
Page 9: Operation
Attention Follow the instructions and specifications of the system manufacturer regarding the tightening torques for fittings, adapters, etc. Install the pressure gauge at the measuring point of the system. To do so, loosen or open the fitting and install the pressure gauge. Tighten fittings to the specified torque. Do not exceed the maximum torque of the pressure gauge connection. -
Page 10: Setting The Filter Function (Attenuation)
Setting the filter function (attenuation) The filter function serves to attenuate the measurement value display. The following filter functions can be set: 0 = no attenuation 1 = weak attenuation 2 = medium attenuation, 3 = strong attenuation Press the MENU/ZERO button to start the menu function. (This does not apply if the menu item is already open) Keep pressing the REC/RESET/OK button until the menu item is displayed. -
Page 11: Fs (Function Menu Reserved By The Manufacturer)
FS (function menu reserved by the manufacturer) Press the MENU/ZERO button to start the menu function. Keep pressing the REC/RESET/OK button until the menu item is displayed. Briefly press the REC/RESET/OK button and call up the date/time. Option: Press and hold the REC/RESET/OK button for 3 seconds to exit the menu. Setting the date and time Press the MENU/ZERO button to start the menu function. -
Page 12: Displaying The Software Version
Displaying the software version Press the MENU/ZERO button to start the menu function. Keep pressing the REC/RESET/OK button until the menu item is displayed. The software version is displayed. Briefly press the REC/RESET/OK button, confirm the measurement unit and call up the measurement unit. -
Page 13: Handling Instructions
5. Handling instructions Care and storage To enable effective working, we designed the digital pressure gauge to be low maintenance. Never- theless, you should still observe a few notes. This helps to ensure trouble-free operation and to preserve the value of the technology. Note: Aggressive cleaning agents or solvents may damage the digital pressure gauge or individual components. -
Page 14: Technical Data, Specifications
6. Technical data, specifications Feature Unit Measurement range relative -1…+16 0…25 0…40 Measurement range absolute Measurement range relative mbar Overpressure Pmax Bursting pressure Accuracy % FS Ambient temperature °C Storage temperature °C Media temperature °C Maximum relative humidity % RH Pressure connection Membrane Materials Seal... - Page 15 Measurement range 0…60 0…100 0…250 0…400 0…600 0…1000 0…2500 1200 2000 3750 1000 2000 3000 5000 5000 ±0.5 -10…+50 -20…+60 -40…+125 1.4301 1.4548 welded 1.078 1.078 1.078 1.078 0…+50 ≥ ±0.035 100 x 10⁶ Li-Ion 500 load cycles @ 23 ±5°C ≥ 800 mAh IP40 bar, PSI, kPa, MPa bar, PSI, MPa...
-
Page 16: Accessories
7. Accessories – Rubber protective cap (not shown) blue, green, black, red, orange A green rubber cap is included but must have been ordered seperately. – Rubber protective cap with hook and wire rope 340 mm blue, green, black, red, orange –...

Need help?
Do you have a question about the DM 80-UMS and is the answer not in the manual?
Questions and answers