
Related Manuals for Crypto AirData 150 S2 USB


Summary of Contents for Crypto AirData 150 S2 USB
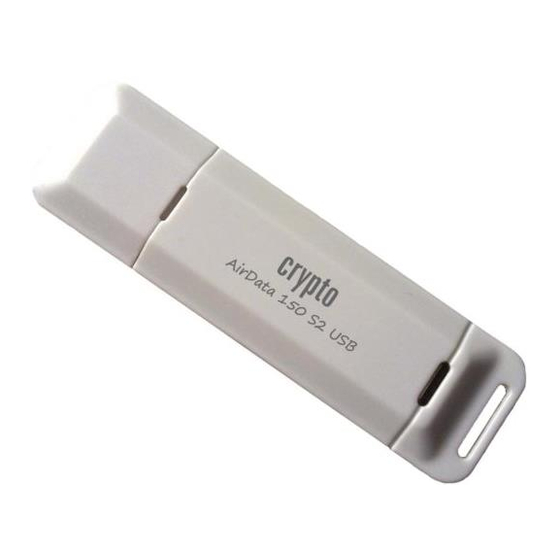
- Page 1 11n Wireless150Mbps USB Adapter Version 1.0...
-
Page 2: Table Of Contents
AirData 150 S2 USB User Manual Contents ........................2 1. Introduction Product Features ......................3 System Requirements ..................... 3 LED Indicator........................3 Package Contents ......................3 ....................3 Installation Procedure For Windows XP......................3 For Vista/7 ........................8 ..............12 Wireless Network Configuration Utility 3.1 For Windows XP...................... -
Page 3: Introduction
It is now possible to create a larger, secure and much more flexible home or office network. In addition to offering fast data transfer rates, the AirData 150 S2 USB Wireless Adapter supports the newest and most advanced security features available today. WEP, WPA-PSK and WPA2 use different kinds of secret keys and can provide an excellent security measure. -
Page 4: Product Features
AirData 150 S2 USB User Manual Product Features ● Compliance with IEEE 802.11n, IEEE 802.11g and 802.11b standards ● Data rates up to 150Mbps for 802.11n ● Strong network security with WEP, WPA, WPA-PSK and AES support ● Windows XP/VISTA/7 compatible System Requirements ●... - Page 5 AirData 150 S2 USB User Manual Insert the Installation CD into your CD-ROM drive, the following window will appear. Click Install Driver & Utility to begin the device driver installation. Please read the following license agreement. Use the scroll bar to view the rest of this agreement.
- Page 6 AirData 150 S2 USB User Manual Click Install to begin the installation.
- Page 7 AirData 150 S2 USB User Manual Please wait, while the adapter is configuring your new software installation. After the setup wizard has successfully installed wireless LAN, click Finish to exit the wizard.
- Page 8 AirData 150 S2 USB User Manual To check if the adapter is properly installed, you can right-click My Computer choose click Device Manager. Properties The Configuration Utility appears as an icon on the system tray of Windows while the adapter is running. You can start the utility by double-clicking on the icon.
-
Page 9: For Vista/7
AirData 150 S2 USB User Manual For Vista/7 The Found New Hardware Wizard below will appear after the USB adapter is installed. Please click Cancel to continue. Insert the Installation CD into the CD-ROM drive, and the following window will appear. - Page 10 AirData 150 S2 USB User Manual Please wait, while the adapter is configuring your new software installation. After the setup wizard has successfully installed the wireless LAN device, click Finish to...
- Page 11 AirData 150 S2 USB User Manual exit the wizard. To check if the adapter is properly installed, you can right-click My Computer choose click Device Manager. Properties The Configuration Utility appears as an icon on the system tray of Windows while the...
- Page 12 AirData 150 S2 USB User Manual Ralink’s wireless utility needs to cooperate with Microsoft AutoConfig service in order to perform scanning and connecting actions, so the AutoConfig service should be enabled beforehand. Once Ralink wireless utility is minimized, the user can click the Ralink Control Menu icon on the taskbar to bring up the control menu.
-
Page 13: Wireless Network Configuration Utility
AirData 150 S2 USB User Manual 3. Wireless Network Configuration Utility 3.1 For Windows XP The Configuration Utility is a powerful application that helps you to configure the Wireless LAN adapter and monitor the link status and statistics during the communication process. - Page 14 AirData 150 S2 USB User Manual When activating WZC, there are some differences in the RaUI status in comparison to the RaUI status when the WZC is not running: (1) Profile button will be gray; profile function is removed since the NIC is controlled by WZC.
- Page 15 AirData 150 S2 USB User Manual Right-click the network connection icon in the task bar. Select “View Available Wireless Networks” and the following window will appear as shown below. Select intended AP and click “Connect” as shown below, then click “Connect Anyway”.
- Page 16 AirData 150 S2 USB User Manual AP1 is successfully connected. If you want to modify the information about the AP, click “Change advanced settings”...
- Page 17 AirData 150 S2 USB User Manual Choose “Wireless Networks” tab. Click “Properties” and then click “OK” button.
- Page 18 AirData 150 S2 USB User Manual After filling the desired value, click the “OK” button. The following notification will appear as shown below. By clicking the Ralink’s icon will bring up the RaUI main window. The user can find the surrounding APs in the list.
-
Page 19: Start
AirData 150 S2 USB User Manual 3.1.1 Start When starting RaUI, the system will connect to the AP with the best signal strength without setting profile or matching the profile setting. It will issue a scan command to wireless NIC. - Page 20 AirData 150 S2 USB User Manual There are three sections in RaUI. These sections are briefly described below. Button Section: include Profile page, Network page, Advanced page, Statistics page, WMM page, WPS page, About button, Radio On/Off button and Help button.
- Page 21 AirData 150 S2 USB User Manual Network Page Advanced Page...
- Page 22 AirData 150 S2 USB User Manual Statistics Page WMM Page WPS Page...
- Page 23 AirData 150 S2 USB User Manual About Page Status Section: Includes Link Status, Authentication Status, AP’s information, Configuration and retrying the connection when authentication is failed. Link Status Authentication Status...
- Page 24 AirData 150 S2 USB User Manual AP’s Information Retry the Connection Configuration At the mean time of starting RaUI, there is also a small Ralink icon that appears within the windows taskbar as shown below. You may double click it to bring up the main menu if you selected to close RaUI menu earlier.
-
Page 25: Profile
AirData 150 S2 USB User Manual Ralink icon in system tray. Besides, the small icon will change color to reflect current wireless network connection status. The status is indicated as follows: -- indicate Connected and Signal Strength is Good. -- indicate Connected and Signal Strength is Normal... - Page 26 AirData 150 S2 USB User Manual key in the value directly. [Icons and buttons] indicates connection is successful on currently activated profile indicates connection is failed on currently activate profile indicates network type is infrastructure mode indicates network type is Ad-Hoc...
- Page 27 AirData 150 S2 USB User Manual Profile Name: The user can chose the name for this profile, or use the default name defined by the system. SSID: The user can key in the intended SSID name or use the pull down menu to select from the available APs.
- Page 28 AirData 150 S2 USB User Manual 3.1.2.2 Example to Add Profile in Profile Click Add in Profile function Add Profile page will pop up. Change profile name to what you want to connect. Pull down the SSID and select one...
- Page 29 AirData 150 S2 USB User Manual intended AP. The AP list is the result of last Network.
-
Page 30: Network
AirData 150 S2 USB User Manual Then, you can see the profile which you set appear in the profile list. Click “Activate” to activate the profile setting. 3.1.3 Network Under the Network function, the system will display the information of surrounding APs from the last scan result. - Page 31 AirData 150 S2 USB User Manual [Definition of each field] SSID: Name of BSS or IBSS network Network Type: Network type in use, infrastructure for BBS, Ad-Hoc for IBSS network Channel: Channel in use. Wireless Mode: AP support wireless mode. IT may support, 802.11b, 802.11g or 802.11n wireless mode.
-
Page 32: Advanced
AirData 150 S2 USB User Manual [Connected Network] When RaUI is executed for the first time, it will select the best AP to connect automatically. If the user wants to connect to another AP, he can click the “Connect” button for the intended AP to make a connection. -
Page 33: Statistics
AirData 150 S2 USB User Manual Show the information of Status Section Hide the information of Status Section 3.1.5 Statistics Statistics page displays the detail counter information based on 802.11 MIB counters. This page translates the MIB counters into a format easier for user to understand. -
Page 34: Wmm
AirData 150 S2 USB User Manual Frames Received Successfully: Frames received successfully. Frames Received With CRC Error: Frames receive with CRC error. Frames Dropped Due To Out-Of-Resource: Frames dropped due to resource issue. Duplicate Frames Received: Duplicate received frames. Reset Counter: Reset counters to zero... - Page 35 AirData 150 S2 USB User Manual Change to “Network” function. Add an AP that supports WMM features to a Profile. The result is illustrated in the following figure at the Profile page. [WMM-Power Save Enable – Enable WMM Power Save]...
- Page 36 AirData 150 S2 USB User Manual Please select which ACs you want to enable. The setting of enabling WMM-Power Save is successful. [Direct Link Setup Enable – Enable DLS (Direct Link Setup)] Click “Direct Link Setup Enable” Change to “Network” function. And add an AP that supports DLS features to a Profile. The...
- Page 37 AirData 150 S2 USB User Manual The Setting of DLS indicates as follow: Fill in the blanks of Direct Link with MAC address of STA. The STA must conform to the following conditions: Connect with the same AP that supports DLS features.
- Page 38 AirData 150 S2 USB User Manual Click “Apply” button. The result is illustrated in the following picture. Description of “DLS Status”: As shown in the figure above, after configuring the DLS successfully, the MAC address of the connected device and the Timeout Value of setting will be shown in the “DLS Status”. In the “DLS Status”...
- Page 39 AirData 150 S2 USB User Manual Double-Click and the result is shown in the figure below. Disconnect Direct Link Setup as shown below: Select a direct link STA. Click the “Tear Down” button. The result is shown in the figure below.
-
Page 40: Wps
AirData 150 S2 USB User Manual 3.1.7 WPS WPS Configuration: The primary goal of Wi-Fi Protected Setup (Wi-Fi Simple Configuration) is to simplify the security setup and management of Wi-Fi networks. Ralink STA as an Enrollee or external Registrar supports the configuration setup using PIN configuration method or PBC configuration setup using PIN configuration method or PBC configuration method through an internal or external Registrar. - Page 41 AirData 150 S2 USB User Manual Each NIC Wireless has only one PIN Code of Enrollee. Config Mode: It illustrates the station role-playing as an Enrollee or an external Registrar. WPS Profile List: Display all of the credentials got from the Registrar. List information includes SSID, MAC address, Authentication and Encryption Type.
- Page 42 AirData 150 S2 USB User Manual Config Methods: Correspond to the methods the AP supports as an Enrollee for adding external Registrars. (A bitwise OR of values) Device Password ID: Indicates the method or identifies the specific password that the selected Registrar intends to use.
-
Page 43: About
AirData 150 S2 USB User Manual Selected Registrar: Indicate if the user has recently activated a Registrar to add an Enrollee. The values are “TRUE” and “FALSE” State: The current configuration state on AP. The values are “Unconfigured” and “Configured”. -
Page 44: Link Status
AirData 150 S2 USB User Manual 3.1.9 Link Status Link Status displays the detailed information for the current connection Status: Illustrates the current connection status. If there is no connection, it will show Disconnected. Otherwise, the SSID and BSSID will be shown here. -
Page 45: For Windows Vista/7
AirData 150 S2 USB User Manual 3.2 For Windows Vista/7 Ralink wireless utility is shown in the figure below. There are 6 setting pages in Ralink wireless utility: Profile Page: Manage the profile. Link Status Page: Display current connection information. - Page 46 AirData 150 S2 USB User Manual Profile Name: The Profile List displays all the profiles and the relative settings of the profiles including Profile Name, SSID, and Channel…etc; preset to PROF* (* indicate 1,2,3,…) SSID: AP to Ad-hoc name. Channel: Channel in use for Ad-Hoc mode.
- Page 47 AirData 150 S2 USB User Manual 3.2.1.1 Add a profile By either pushing the “Add” button in the Profile Page or the “Add to Profile” button in the Site Survey Page, it brings up the profile setting sheet which contains two setting pages --...
- Page 48 AirData 150 S2 USB User Manual [Configuration page] Profile Name: Name of the profile SSID: Name of the desired network Network Type: Network of the desired network, either infrastructure or Ad-Hoc. Infrastructure – This operation mode requires the presence of a wireless Access Point.
- Page 49 AirData 150 S2 USB User Manual [Authentication and Security page] Authentication Type: Authentication of the desired network. For infrastructure network, the available modes are Open, Shared, WPA, WPA-PSK, WPA2, and WPA2-PSK. Open: No authentication is needed among the wireless devices.
- Page 50 AirData 150 S2 USB User Manual WPA2 – Like WPA, WPA2 supports IEEE 802.1 x/EAP authentications or PSK technology. It also includes a new advanced encryption mechanism using the Advanced Encryption Standard (AES). AES is required to the corporate user or government users.
- Page 51 AirData 150 S2 USB User Manual 3.2.1.2 Edit a profile Selecting an exiting profile then clicking the “Edit” button on Profile Page brings up the profile setting sheet filled with the profile information for user modification. 3.2.1.3 Delete a profile You can delete a profile by selecting an existing profile then clicking the “Delete”...
-
Page 52: Link Status
AirData 150 S2 USB User Manual 3.2.1.4 Activate a profile Select an existing profile then click the “Active” button on Profile Page to activate the profile. 3.2.2 Link Status In this section, you can immediately monitor the current connected link status, such as Link... -
Page 53: Site Survey
AirData 150 S2 USB User Manual Status: Current connection status. If no connection, then Disconnected will appear. Otherwise, the SSID and BSSID will be shown here. Extra Info: Display the link status and current channel in use. Channel: Display the number of the radio channel and the frequency used for the networking. - Page 54 AirData 150 S2 USB User Manual SSID: Name of BBS or IBSS network. BSSID: MAC address of AP or randomly generated oρ IBSS. Signal: Receive signal strength of specified network. Channel: Channel in use. Encryption: Encryption algorithm used within BBS or IBSS. Valid value includes WEP, TKIP, AES, and Not Use.
- Page 55 AirData 150 S2 USB User Manual Step 3 – After the profile is saved, click “Activate” button on Profile Page to activate profile. Example 2: WEP-Encrypted Step 1 – Choose “Open” or “Shared” authentication type Step 2 – Choose “WEP” encryption type Step 3 –Enter the WEP KEY...
- Page 56 AirData 150 S2 USB User Manual activate the profile. Example 3: WPA-PSK/WPA2-PSK Step 1 – Choose “WPA-PSK” or “WPA2-PSK” authentication type Step 2 – Choose “TKIP” or “AES” encryption type Step 3 –Enter the pre-shared KEY Step 4 –After the profile is saved, click the “Activate” button on Profile Page to activate the profile.
- Page 57 AirData 150 S2 USB User Manual Example 4:WPA/WPA2 Step 1 – Choose “WPA” or “WPA2” authentication type Step 2 – Choose “TKIP” or “AES” encryption type Step 3 –After the profile is saved, click the “Activate” button on Profile Page to activate the profile.
- Page 58 AirData 150 S2 USB User Manual Step 4 –The Windows profile setting dialog is popped-up for user to modify.
-
Page 59: Statistics
AirData 150 S2 USB User Manual 3.2.4 Statistics The statistics page displays the detail counter information based on 802.11 MIB counters. This page translates the MIB counters into a format easier for the user to understand. You may reset the counters to Zero by clicking “Reset Counter”. -
Page 60: Wps Configuration
AirData 150 S2 USB User Manual 3.2.5 WPS Configuration The primary goal of Wi-Fi Protected Setup (Wi-Fi Simple Configuration) is to simplify the security setup and management of Wi-Fi Networks. WPS Associate IE: If the “WPS Associate IE” option is checked, station will send the association request with WPS IE during WPS setup. - Page 61 AirData 150 S2 USB User Manual Encryption Type: For Open & Shared authentication modes, the available encryption types are None and WEP. For WPA, WPA2, WPA-PSK and WPA2-PSK authentication modes, the available encryption types are TKIP and AES. Config Methods: This attribute contains the configuration methods supported and enabled by the selected Registrar.
-
Page 62: Qos
AirData 150 S2 USB User Manual 3.2.6 QoS The QoS Page of RaConfig. It involves “WMM Enable”, “WMM – Power Save Enable” and “DLS setup Enable”. Configure to enable Wi-Fi Multi-Media If you want to use “WMM – Power Save” or “Direct Link”, you must enable WMM. The setting method of enabling WMM is indicated below: Step1: Click “WMM Enable”... - Page 63 AirData 150 S2 USB User Manual Step3: Change to “Site Survey Page”. Add an AP that supports WMM features to a Profile. The result is illustrated in the following figure in the Profile page. Enable WMM – Power Save Step1: Click “WMM – Power Save Enable”. And Click “Setting…” button.
- Page 64 AirData 150 S2 USB User Manual Step2: After clicking the “Setting…” button, the “Power Save Setting” dialog will appear. Please select which ACs you want to enable and click the “Apply” button. The setting of enabling WMM – Power Save is successful.
- Page 65 AirData 150 S2 USB User Manual Step2: Change to “Site Survey Page” and add an AP that supports DLS features to Profile. The result is illustrated in the following figure in the Profile page The Setting of the DLS: Fill in the blanks of Direct Link with MAC Address of STA. The STA must conform to two...
- Page 66 AirData 150 S2 USB User Manual conditions as follows: Step1: Connect with the same AP that supports DLS features. Step2: Have to enable DLS. Timeout Value represents that it disconnects automatically after some seconds. The value is an integer with values between 0~65535. It represents that it always is connected when the...
- Page 67 AirData 150 S2 USB User Manual Click “Apply” button. The result is illustrated in the following figure. Describe “DLS Status” as follow: As shown in the figure above, after successfully configuring the DLS, the MAC address of the device connected and the Timeout Value of setting in “DLS Status” will be shown. In the “DLS Status”...
- Page 68 AirData 150 S2 USB User Manual Step2: Double click and the result is illustrated in the following figure. Disconnect Direct Link Setup as follows: Step1: Select a direct link STA.
-
Page 69: About
AirData 150 S2 USB User Manual Step2: Click “Tear Down” button. The result is illustrated in the following figure. 3.2.7 About In the “About” tab, you can click the hyperlink to connect the website for the information of the wireless chipset vendor and review basic information about the Utility such as the RaConfig Version, Driver Version, EEPROM Version, IP Address, Sub Mask, and Default Gateway. - Page 70 AirData 150 S2 USB User Manual panel. [via Network icon] Step 1: Right-click connection icon on the task bar, then click “Network and Sharing Center” Step 2: Select “Manage wireless networks” Step 3: Right-click the mouse to bring up the profile manage menu.
- Page 71 AirData 150 S2 USB User Manual [via Control Panel] Step 1: Select “Control Panel” on start menu.
- Page 72 AirData 150 S2 USB User Manual Step 2: Double-click “Network and Sharing Center” icon. Step 3: Select “Manage Wireless network”.
- Page 73 AirData 150 S2 USB User Manual Step 4: Right-click the mouse to bring up the profile managing menu.
-
Page 74: Glossary
AirData 150 S2 USB User Manual 4. Glossary 802.1x: The IEEE 802.1x is a standard for user authentication on networks. Access Point: A hardware device or a computer's software that seamlessly connects wired and wireless networks. Ad-Hoc: An independent wireless LAN network formed by a group of computers equipped with wireless network adapters. - Page 75 AirData 150 S2 USB User Manual EAP: Extensive Authentication Protocol is a framework for extending authentication techniques in PPP (Point-to-Point Protocol) a protocol that is commonly used for dial-up connections. EAP opens up the possibilities to use a range of new authentication protocols, including token cards, one-time passwords etc.
- Page 76 AirData 150 S2 USB User Manual ISM Band: Industrial, Scientific and Medical Band is the 2.4 – 2.483 GHz frequency band. LED: Light Emitting Diode, an electronic device that lights up when electricity is passed through it. MAC Address: Media Access Control Address is a unique HEX number assigned by the manufacturer to any Ethernet networking device.
- Page 77 AirData 150 S2 USB User Manual SSID: Service Set Identifier is a unique name shared among all clients and nodes in a wireless network. The SSID must be identical for all clients and nodes within a wireless network. Subnet Mask: The method used for splitting IP networks into a series of sub-groups, or subnets.
-
Page 78: Technical Support
AirData 150 S2 USB User Manual 5. Technical Support For technical information and support please contact us: Web Site: www.crypto.gr E-mail: support@crypto.gr Disposal of old electrical and electronic equipment If you see this symbol on the product or on its packaging, you should hand the product over to the applicable collection point for the recycling of electrical and electronic equipment.
Need help?
Do you have a question about the AirData 150 S2 USB and is the answer not in the manual?
Questions and answers