Table of Contents
Advertisement
Available languages
Available languages
Quick Links
Advertisement
Table of Contents

Related Manuals for Ayce PLD2233


Summary of Contents for Ayce PLD2233
- Page 1 ÜBERSETZUNG DER ORIGINALBETRIEBSANLEITUNG | TRADUCTION DE LA NOTICE ORIGINALE | TRADUZIONE DELLE ISTRUZIONI ORIGINALI | ORIGINAL INSTRUCTION MANUAL HEISSLUFTGEBLÄSE 2000 W TERMOSOFFIATORE 2000 W PISTOLET À AIR CHAUD 2000 W HOT AIR GUN 2000 W...
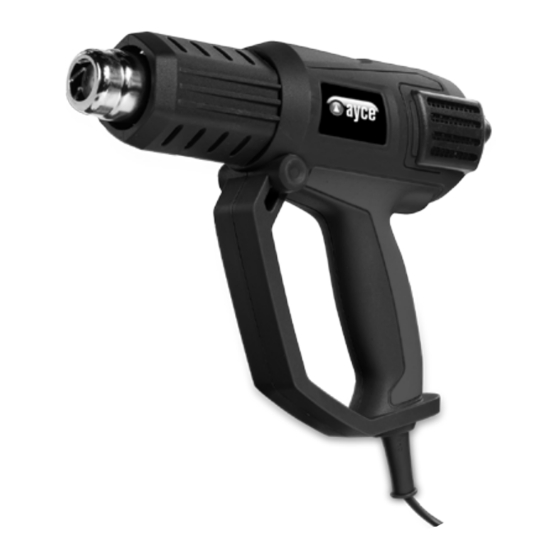
- Page 2 LISTE DER HAUPTTEILE 1 Heissluftdüse Halteflächen für senkrechte 2 Wärmeschutzmanschette Montage des Gerätes 3 Lufteinlassöffnungen 9 Ein-/Ausschalter 4 Griff 10 Flache Düse 5 LCD-Anzeige 11 Reflektordüse Taste zum Erhöhen / Senken der 12 Glasschutzdüse Temperatur 13 Reduktordüse Taste zum Verstärken / Verringern 14 Schaber des Luftstroms...
- Page 3 • Schaber 1 Stk • Bedienungsanleitung 1 Stk WICHTIGE INFORMATIONEN ayce Power Tools behält sich das Recht vor, jederzeit und ohne Vorankündigung Änderungen und Verbesserungen am Design dieses Geräts vorzunehmen. WARNUNG VERWENDUNGSZWECK Das Gerät ist dafür vorgesehen, Plastik oder Kleber zu schmelzen, Farbe zu entfernen...
-
Page 4: Besondere Sicherheitshinweise
BESONDERE SICHERHEITSHINWEISE Lesen Sie alle Sicherheitshinweise und Anweisungen. Die Nichtbeachtung von Sicherheitshinweisen und Anweisungen kann einen Stromschlag, Brand und/oder schwere Verletzungen verursachen. WARNUNG BEWAHREN SIE ALLE SICHERHEITSHINWEISE UND ANWEISUNGEN FÜR ZUKÜNFTIGE FRAGEN AUF. • Dieses Gerät kann von Kindern ab 8 Jahren und Personen, deren körperlichen, sensorischen oder geistigen Fähigkeiten eingeschränkt sind oder denen es an Erfahrung und Kenntnis mangelt, benutzt werden, wenn sie baufsichtigt oder in die sichere Benutzung des Gerätes unterwiesen werden und die damit... - Page 5 04 | 05 • Immer eine Schutzbrille tragen. Die Schutzbrille senkt die Verletzungsgefahr. • Trennen Sie den Stecker vom Stromnetz, bevor Sie Einstellungen durchführen, Zubehör wechseln oder das Gerät ablegen. Diese Sicherheitsmassnahme verhindert, dass das Gerät unbeabsichtigt eingeschaltet wird. • Prüfen Sie Gerät, Kabel und Stecker vor jeder Verwendung.
-
Page 6: Beschreibung Der Symbole
BESCHREIBUNG DER SYMBOLE 1. Sicherheitssymbole Die in diesem Handbuch verwendeten Symbole dienen dazu, Sie auf eventuelle Risiken aufmerksam zu machen. Die Sicherheitssymbole und die dazugehörigen Erläuterungen müssen genau verstanden werden. Die Sicherheitshinweise an sich schliessen keine Risiken aus und sind kein Ersatz für korrekte Massnahmen zur Vermeidung von Unfällen. - Page 7 06 | 07 Klasse-II-Symbol: Dieses Gerät ist doppelt isoliert. Für den Anschluss ist keine geerdete Steckdose erforderlich. Recyceln Sie unerwünschte Materialien anstatt diese zu entsorgen. Alle Geräte und Verpackungen sollten sortiert und einem Recyclingzentrum vor Ort zugeführt werden, damit sie umweltgerecht wiederverwertet werden.
-
Page 8: Bedienung
BEDIENUNG 1. Vor Gebrauch • Entfernen Sie sämtliches Verpackungsmaterial und lose Teile vom Gerät. • Prüfen Sie das Zubehör vor Gebrauch. Es sollte für das Gerät sowie Ihren Verwendungszweck geeignet sein. 2. Funktionen Anbringen einer Düse (Fig. 1) Wird das Werkzeug nicht vom Stromnetz getrennt, kann dies zu einem versehentlichem Start und somit ggf. - Page 9 08 | 09 Vorsicht bei der Heissluftdüse! Es besteht erhöhte Verbrennungsgefahr bei Arbeiten ohne Wärmeschutzmanschette. WARNUNG Um die Wärmeschutzmanschette abzunehmen oder zu montieren, schalten Sie das Gerät aus und lassen Sie es abkühlen. Für ein schnelleres Abkühlen kann das Gerät auch über einen kurzen Zeitraum mit der niedrigsten einstellbaren Temperatur betrieben werden.
- Page 10 Einstellen der Luftmenge (Abb. 4) Die Intensität des Luftstroms kann über Fig. 4 das Bedienfeld in fünf Stufen eingestellt Erhöhen des Luftstroms werden. In der LCD-Anzeige können Sie die von Ihnen ausgewählte Einstellung ablesen. Senken des Luftstroms Ablegen des Gerätes (Abb. 5) Legen Sie das Gerät zum Abkühlen oder Fig.
- Page 11 10 | 11 EIN-/AUS-Schalter (Abb. 6) • Einschalten: Fig. 6 Bringen Sie den Ein-/Ausschalter in Position 1 oder 2. • Ausschalten: Bringen Sie den Ein-/Ausschalter in Position 0. Dieses Gerät muss auf der Abstellvorrichtung abgesetzt werden, wenn es nicht benutzt wird. WARNUNG Einstellen von Luftstrom und Temperatur Bitte halten Sie sich an die folgenden Kapitel „Einstellen der Temperatur“...
- Page 12 Stellen Sie sicher, dass die Versorgungsspannung den Angaben auf dem Typenschild entspricht. Verbinden Sie den Stecker mit dem Stromnetz. Legen Sie immer die geeignete Temperatur für die jeweilige Tätigkeit fest. Prüfen Sie zunächst die Eigenschaften des zu bearbeitenden Materials bei der niedrigsten Temperatureinstellung und erhöhen Sie dann den Luftstrom in einer unauffälligen Stelle.
-
Page 13: Wartung
12 | 13 WARTUNG VORSICHT! Vergewissern Sie sich stets, dass das Gerät von der Stromversorgung getrennt ist, bevor Sie Einstell- oder Wartungsarbeiten vornehmen. Wenn die Netzanschlussleitung dieses Gerätes beschädigt wird, muss sie durch den Hersteller oder seinen Kundendienst oder eine ähnlich qualifizierte Person ersetzt werden, um Gefährdungen zu vermeiden. - Page 14 Herzlichen Glückwunsch! Sie haben mit dem Kauf dieses Qualitätsprodukts eine ausgezeichnete Wahl getroffen. Unsere Qualitätsverpflichtung schliesst auch unseren Kundendienst ein. Jumbo bietet für alle 16 ayce-Elektrowerkzeuge einen ausgezeichneten Reparaturdienst an. Sollte Ihr Gerät entgegen aller Erwartungen bei der privaten Nutzung innerhalb von FÜNF JAHREN ab Kaufdatum einen Mangel aufgrund von Material- oder Herstellungsfehlern aufweisen, können Sie unsere Garantieleistung entsprechend...
- Page 15 14 | 15 GARANTIESCHEIN Vorname Nachname Strasse/Hausnummer Telefon Postleitzahl Mobil Artikelnummer Barcode (EAN) Garantie (bitte ankreuzen) KAUFBELEG NR./DATUM (bitte ebenfalls eine Kopie des Nein Kaufbelegs beifügen) Das Gerät wurde in der folgenden Jumbo Filiale gekauft: Aufgetretene Mängel (bitte auflisten) (Bitte beschreiben Sie das Problem oder die Betriebsstörung Ihres Gerätes so genau wie möglich. So können wir Ihre Beschwerde schneller und effizienter bearbeiten.
- Page 16 EU-Konformitätserklärung 1. Gerätetyp/Produkt: Produkt: Heissluftgebläse Typen : PLD2233 Chargen- oder Seriennummer: 1707-2707 2.Name und Anschrift des Herstellers oder seines Bevollmächtigten: Jumbo-Markt AG CH-8305 Dietlikon Switzerland +41 (44) 805 61 11 3.Die alleinige Verantwortung für die Ausstellung dieser Konformitätserklärung trägt der Hersteller.
- Page 17 16 | 17...
-
Page 18: Technische Zeichnung
TECHNISCHE ZEICHNUNG... - Page 19 18 | 19 ERSATZTEILLISTE Nr. Teilebezeichnung Nr. Teilebezeichnung 1 LINKE GEHÄUSESCHALE 15 HINTERE INNENABDECKUNG 2 STÜTZRING 16 SCHAUMSTOFF 3 VORDERE ABDECKUNG 17 TASTE 4 HEISSLUFTGERÄTEROHR 18 HINTERE ABDECKUNG 5 MICA-BLATT 19 SCHRAUBE 6 VOLLSTÄNDIGES HEIZELEMENT 20 INDUKTIVER WIDERSTAND 7 LÜFTERABDECKUNG 21 SCHALTERGRUPPE 8 SCHRAUBE 22 SCHALTER-ABDECKUNG...
- Page 20 ELEMENTS PRINCIPAUX 1 Buse à air chaud Surfaces de support pour installation verticale de l'appareil 2 Collier de protection thermique 3 Orifices d'admission d'air 9 Interrupteur Marche/arrêt 4 Poignée 10 Buse plate 5 Écran LCD 11 Buse à réflecteur Bouton d'augmentation / diminution 12 Buse à...
-
Page 21: Caractéristiques Techniques
• Racloir 1 pce • Manuel d'utilisation 1 pce INFORMATIONS IMPORTANTES À tout moment et sans préavis, ayce Power tool se réserve le droit de modifier et d'améliorer la conception et les spécifications techniques de ce produit. AVERTISSEMENT UTILISATION PRÉVUE L'appareil sert à... -
Page 22: Consignes De Sécurité Spéciales
CONSIGNES DE SÉCURITÉ SPÉCIALES Lire tous les avertissements de sécurité et toutes les instructions. Ne pas suivre les avertissements et instructions peut donner lieu à un choc électrique, un incendie et/ou une blessure sérieuse. AVERTISSEMENT CONSERVEZ TOUTES LES AVERTISSEMENTS DE SECURITE ET TOUTES LES INSTRUCTIONS POUR CONSULTATION ULTÉRIEURE. - Page 23 22 | 23 • Portez toujours des lunettes de sécurité. Les lunettes de sécurité réduisent le risque de blessure. • Débranchez la fiche de la prise avant d'effectuer un réglage, de changer les accessoires ou de ranger l'appareil. Cette mesure de sécurité empêche tout démarrage accidentel de l'appareil.
-
Page 24: Description Des Symboles
DESCRIPTION DES SYMBOLES 1. SYMBOLES DE SÉCURITÉ L’utilisation des symboles dans ce manuel a pour but d’attirer l’attention sur les risques possibles. Les symboles de sécurité et les explications qui les accompagnent doivent être parfaitement compris. Les avertissements en eux-mêmes ne suppriment pas les risques et ne peuvent se substituer aux mesures correctes de prévention des accidents. - Page 25 24 | 25 Recycler les matériaux indésirables au lieu de les jeter à la poubelle. Chaque outil et emballage doit être trié et déposé au centre de recyclage de la région afin d’être traité de manière écologique. 2. Symboles du produit Les symboles suivants sont utilisés dans ce manuel et/ou sur l'appareil.
- Page 26 UTILISATION 1. Avant utilisation • Retirez tous les éléments d'emballage et les parties desserrées de l'appareil. • Vérifiez les accessoires avant utilisation. Ils doivent correspondre à l'appareil et à votre usage. 2. Fonctions Fixation d'une buse (Fig. 1) Veillez à débrancher l'appareil afin d'éviter tout démarrage accidentel susceptible de provoquer des blessures graves.
- Page 27 26 | 27 Faites attention à la buse d'air chaud ! Quand vous travaillez sans le collier de protection thermique, le risque de brûlure augmente. AVERTISSEMENT Pour enlever ou remonter le collier de protection thermique, éteignez l'appareil puis laissez-le refroidir. Pour accélérer le refroidissement, vous pouvez aussi faire fonctionner l'appareil pendant un bref laps de temps à...
- Page 28 Réglage du débit d'air (Fig. 4) Vous pouvez régler le débit d'air en cinq Fig. 4 Augmentation du étapes au moyen du tableau de débit d'air commande. Le réglage sélectionné s'affiche sur l'écran LCD. Diminution du débit d'air Rangement de l'appareil (Fig. 5) Pour laisser refroidir l'appareil ou pour Fig.
- Page 29 28 | 29 Interrupteur MARCHE/ARRÊT (Fig. 6) • Mise sous tension : Fig. 6 Appuyez sur l'interrupteur et placez-le en position 1 ou 2. • Mise hors tension : Appuyez sur l'interrupteur et placez-le en position 0. cet appareil doit être placé sur son support quand il n'est pas en cours d'utilisation.
- Page 30 3. Mode d'emploi a. Fonctionnement général Avant toute utilisation, veillez à avoir lu et compris les instructions de sécurité, et assurez-vous que l'appareil soit éteint. Vérifiez que la tension de l'alimentation électrique corresponde à celle indiquée sur l'étiquette. Branchez la fiche sur la prise électrique.
-
Page 31: Entretien
30 | 31 ENTRETIEN ATTENTION ! Débranchez toujours l'appareil avant toute opération de réglage ou d'entretien. Si le câble d'alimentation est endommagé, il doit être remplacé par le fabricant, son service après vente ou des personnes de qualification similaire afin d'éviter un danger. Débranchez immédiatement l'alimentation électrique si le cordon électrique est endommagé. -
Page 32: Certificat De Garantie
Félicitations ! Vous avez fait un excellent choix en achetant ce produit de qualité. Notre engagement de qualité inclut également notre service de réparation. Jumbo offre un excellent service de réparation, pour les 16 Outils Électriques Ayce. Si, contre toute attente, vous rencontrez un problème dû à un défaut de fabrication ou de matériau dans le cadre d’un usage... -
Page 33: Carte De Garantie
32 | 33 CARTE DE GARANTIE Prénom Nom de famille Rue/N° Téléphone Code postal Ville Tél. portable : N° de modèle Code barre (EAN) Garantie (cochez la case) Numéro/date du reçu de vente (Fournissez également une copie du reçut de vente) Acheté... - Page 34 Déclaration UE de conformité 1.Modèle d’appareil/produit Produit : PISTOLET à AIR CHAUD Type : PLD2233 numéro de lot ou de série: 1707-2707 2.Nom et adresse du fabricant ou de son mandataire: Jumbo-Markt AG CH-8305 Dietlikon Switzerland +41 (44) 805 61 11 3.La présente déclaration de conformité...
- Page 35 34 | 35...
-
Page 36: Vue Éclatée
VUE ÉCLATÉE... -
Page 37: Liste Des Pièces
36 | 37 LISTE DES PIÈCES N° Dénomination N° Dénomination 1 MOITIÉ DE POIGNÉE GAUCHE 15 COUVERCLE ARRIÈRE INTÉRIEUR 2 BAGUE DE SUPPORT 16 ÉPONGE 3 COUVERCLE AVANT 17 BOUTON 4 CYLNDRE DU PISTOLET À AIR 18 COUVERCLE ARRIÈRE 5 FEUILLE DE MICA 19 VIS 6 ÉLÉMENT DE CHAUFFAGE COMPLET 20 INDUCTANCE 7 COUVERCLE DU VENTILATEUR... -
Page 38: Elenco Dei Componenti Principali
ELENCO DEI COMPONENTI PRINCIPALI 1 Buse à air chaud Surfaces de support pour 2 Collier de protection thermique installation verticale de l'appareil 3 Orifices d'admission d'air 9 Interrupteur Marche/arrêt 4 Poignée 10 Buse plate 5 Écran LCD 11 Buse à réflecteur Bouton d'augmentation / diminution 12 Buse à... -
Page 39: Specifiche Tecniche
• Raschietto 1 pz • Manuale di istruzioni 1 pz INFORMAZIONI IMPORTANTI ayce Power Tool si riserva il diritto di migliorare il design e le specifiche tecniche di questo prodotto in qualsiasi momento e senza preavviso. AVVERTENZA UTILIZZO PREVISTO L'apparecchio è destinato a fondere plastica o colla, a rimuovere vernice, a riscaldare o... - Page 40 ISTRUZIONI DI SICUREZZA SPECIALI Leggere con attenzione tutte le avvertenze e tutte le istruzioni. La mancata osservanza delle istruzioni riportate di seguito potrebbe provocare incidenti quali incendi, scosse elettriche e/o gravi lesioni fisiche. AVVERTENZA CONSERVARE TUTTE LE AVVERTENZE E LE ISTRUZIONI PER RIFERIMENTO FUTURO.
- Page 41 40 | 41 d'infortunio. • Scollegare la spina dalla presa prima di effettuare eventuali regolazione, cambiare accessori o mettere da parte l'apparecchio. Queste misure di sicurezza impediscono l'avvio involontario dell'apparecchio. • Verificare l'apparecchio, il cavo e la spina prima di ogni utilizzo. Non utilizzare l'apparecchio se è...
-
Page 42: Descrizione Dei Simboli
DESCRIZIONE DEI SIMBOLI 1. Simboli di sicurezza L’uso di simboli nel presente manuale ha lo scopo di informare circa i possibili rischi. È opportuno acquisire una perfetta familiarità con i simboli sulla sicurezza e le relative spiegazioni. Le avvertenze implicite non annullano i rischi e non possono sostituire le contromisure corrette per la prevenzione degli incidenti. - Page 43 42 | 43 Simbolo di Classe II: questa macchina è progettata con doppio isolamento. Non è necessario collegarla a una presa con messa a terra. Riciclare i materiali di scarto piuttosto che smaltirli. Tutte le apparecchiature e gli imballaggi devono essere differenziati e portati presso un centro locale di riciclaggio in modo tale da essere trattati in modo ecologico.
-
Page 44: Funzionamento
FUNZIONAMENTO 1. Operazioni preliminari • Rimuovere tutti i materiali di imballaggio e gli accessori dall’unità. • Controllare gli accessori prima dell’uso. Devono essere adatti all’utensile e alla destinazione d’uso. 2. Operazioni Attaccare una bocchetta (Fig. 1) il mancato scollegamento dell'apparecchio dalla presa di corrente comporta il rischio di avvio accidentale con possibili gravi lesioni alle persone. - Page 45 44 | 45 Attenzione alla bocchetta del getto di calore! C'è il rischio di ustionarsi quando si lavora senza l'anello di protezione. AVVERTENZA Per rimuovere o smontare l'anello di protezione, spegnere l'apparecchio e lasciarlo raffreddare. Per facilitare il raffreddamento, è anche possibile far funzionare l'apparecchio per un breve periodo alla temperatura più...
- Page 46 Impostazione della portata d'aria (Fig. 4) La portata d'aria può essere regolata su Fig. 4 Erhöhen des cinque livelli mediante il pannello di Luftstroms controllo. L'impostazione selezionata può essere letta sul display LCD. Senken des Luftstroms Riporre l'apparecchio (Fig. 5) Per raffreddare l'apparecchio o se si Fig.
- Page 47 46 | 47 Interruttore d'accensione/spegnimento (ON/OFF) (Fig. 6) • Accensione: Fig. 6 Premere l'interruttore di accensione sulla posizione 1 o 2. • Spegnimento: Premere l'interruttore di accensione sulla posizione 0. Questo apparecchio deve essere sistemato sul suo sostegno quando non viene utilizzato AVVERTENZA Impostazione della portata d'aria e della temperatura Consultare le sezioni "Impostazione della temperatura"...
- Page 48 3. Modalità d'uso a. Funzionamento generale Prima di utilizzare l'apparecchio, leggere e comprendere le relative istruzioni di sicurezza e accertarsi che sia spento. AVVERTENZA Verificare che la tensione di alimentazione sia la stessa di quella nominale riportata sulla targhetta. Collegare la spina alla presa di alimentazione. Stabilire la temperatura di funzionamento corretta per il lavoro da svolgere.
-
Page 49: Manutenzione
48 | 49 MANUTENZIONE ATTENZIONE! Scollegare sempre l’apparecchio dall’alimentazione prima di effettuare qualsiasi operazione di regolazione o manutenzione. In caso di danneggiamento del cavo di alimentazione, è necessario farlo riparare dal fabbricante o presso un centro assistenza autorizzato in modo da evitare eventuali pericoli. Scollegare immediatamente l’apparecchio dall’alimentazione se il cavo di alimentazione è... -
Page 50: Certificato Di Garanzia
Jumbo dispone di un eccellente servizio di riparazione, per tutti e 16 gli utensili elettrici Ayce. Qualora si riscontrino difetti relativi ai materiali o alla fabbricazione entro CINQUE ANNI dalla data di acquisto del prodotto, l’utente potrà... -
Page 51: Scheda Di Garanzia
50 | 51 SCHEDA DI GARANZIA Nome Cognome Via/Num. Telefono Codice postale Città Telefono cellulare Codice articolo Codice a barre (EAN) Garanzia (contrassegnare con una croce) Numero/data dello scontrino (Allegare una copia dello scontrino di vendita) Sì Acquistato presso un punto vendita Jumbo Problema riscontrato (specificare) (Descrivere il problema nel modo più... - Page 52 Dichiarazione di conformità UE 1.Modello di apparecchio/Prodotto numero di prodotto :PISTOLET à AIR CHAUD tipo :PLD2233 lotto o serie: 1707-2707 2.Nome e indirizzo del fabbricante o del suo rappresentante autorizzato: Jumbo-Markt AG CH-8305 Dietlikon Switzerland +41 (44) 805 61 11 3.La presente dichiarazione di conformità...
- Page 53 52 | 53...
-
Page 54: Vista Esplosa
VISTA ESPLOSA... - Page 55 54 | 55 ELENCO DEI PEZZI DI RICAMBIO N. Nome pezzo N. Nome pezzo 1 INVOLUCRO SINISTRO 15 COPERCHIO INTERNO POSTERIORE 2 ANELLO DI SUPPORTO 16 SPUGNA 3 COPERCHIO FRONTALE 17 PULSANTE 4 INVOLUCRO SOFFIATORE 18 COPERCHIO POSTERIORE 5 FOGLIO DI MICA 19 VITE ELEMENTO RISCALDANTE 20 INDUTTANZA...
-
Page 56: List Of Main Parts
LIST OF MAIN PARTS 1 Heat nozzle 8 Supporting surfaces for vertical installation of the device 2 Heat protection collar 3 Air intake openings 9 On/off switch 4 Handle 10 Flat nozzle 5 LCD display 11 Reflector nozzle Button for increasing / decreasing 12 Glass protector nozzle temperature 13 Reducer nozzle... -
Page 57: Technical Specifications
• Scraper 1 pc • Instruction manual 1 pc IMPORTANT INFORMATION At any time and without prior notice ayce appliance reserves the right to change and improve the design and the technical specifications of this product. WARNING INTENDED USE The appliance is intended for melting down plastic or glue, cleaning paint, heating or... -
Page 58: Special Safety Instructions
SPECIAL SAFETY INSTRUCTIONS Read all safety warnings and instructions. Failure to follow the warnings and instructions may result in electric shock, fire and/or serious injury. WARNING SAVE ALL THE WARNINGS AND INSTRUCTIONS FOR FUTURE REFERENCE. • This appliance can be used children aged from 8 years and above and persons with reduced physical, sensory or mental capabilities or lack of experience and knowledge, if they have been given supervision or instruction concerning use of the appliance in a safe way and understand the hazards involved. - Page 59 58 | 59 Damaged appliances, cords and plugs increase the risk of electric shock. • Provide for good ventilation of your working place. Gas and vapour developing during working are often harmful to one’s health. • Wear safety gloves and do not touch the hot nozzle. Danger of burning. •...
-
Page 60: Description Of The Symbols
DESCRIPTION OF THE SYMBOLS 1. Safety symbols The use of symbols in this manual is intended to draw your attention to possible risks. The safety symbols and the explanations that accompany them must be perfectly understood. The warnings in themselves do not remove the risks and cannot replace correct actions for preventing accidents. - Page 61 60 | 61 Recycle unwanted materials instead of disposing of them. All appliances and packaging should be sorted and tendered at a regional recycling centre into to be processed in an ecological manner. 2. Product symbols In this manual and/or on the appliance the following symbols are used. These represent important information about the product or instructions on its use.
-
Page 62: Operation
OPERATION 1. Before use • Remove any packing material and loose parts from unit. • Check the accessories before use. It should be fit with the machine and your purpose. 2. Functions Attaching a nozzle (Fig. 1) Failure to unplug the tool could result in accidental starting causing possible serious personal injury. - Page 63 62 | 63 Be careful of the hot nozzle! Increased danger of burning exists when working without the heat protection collar. WARNING To remove or mount the heat protection collar, switch the appliance off and allow it to cool down. To speed up the cooling, the appliance can also be operated for a short period with the lowest adjustable temperature.
- Page 64 Setting the air flow rate (Fig. 4) The air flow rate can be adjusted in five Fig. 4 Increase the stages via the control panel. The settings air flow you have selected can be read on the LCD display. Decrease the air flow Placing down the appliance (Fig.
- Page 65 64 | 65 ON/OFF switch (Fig.6) • Switch on: Press the power switch Fig. 6 to position 1 or 2. • Switch off: Press the power switch to position 0. This tool must be placed on its stand when not in use. WARNING Setting the air flow and temperature Please observe the following sections "Setting the temperature"...
- Page 66 3. Operation of the appliance a. General operation Before operation, make sure that you have read and understood all of the safety instructions, also make sure that the tool is switched off. Ensure that the supply voltage is the same as shown on the rating label.
-
Page 67: Maintenance
66 | 67 MAINTENANCE CAUTION! Always disconnect the device before performing any adjustment or maintenance operation. If the supply cord is damaged, it must be replaced by the manufacturer or its service agent in order to avoid a hazard. Disconnect from the power supply immediately, if the supply cord is damaged. Take care not to expose this tool to the rain. -
Page 68: Warranty Certificate
Our commitment to quality also includes our service. Jumbo offers an excellent repair service, exclusively in Switzerland, for all 16 ayce Power Tool products. Should you, contrary to expectations, experience defects due to material or manufacturing faults during private use within FIVE... -
Page 69: Warranty Card
68 | 69 WARRANTY CARD First name Last name Street/No. Telephone Postal Code City Mobil Item-number Barcode (EAN) Warranty (please mark with a cross) Sales receipt number/Date (please also attach a copy of the sales receipt) Purchased at Jumbo store Which error occurred (please specify) (Please describe the problem or malfunction of your device as accurately as possible. - Page 70 EU declaration of conformity 1.Apparatus model/Product Product: HOT AIR GUN type: PLD2233 batch or serial number: 1707-2707 2.Name and address of the manufacturer or his authorised representative: Jumbo-Markt AG CH-8305 Dietlikon Switzerland +41 (44) 805 61 11 3.This declaration of conformity is issued under the sole responsibility of the manufacturer.
- Page 71 70 | 71...
-
Page 72: Technical Drawing
TECHNICAL DRAWING... -
Page 73: Spare Parts List
72 | 73 SPARE PARTS LIST No Part Name No Part Name 1 LEFT CLAMSHELL 15 BACK INNER COVER 2 SUPPORT RING 16 SPONGE 3 FRONT COVER 17 BUTTON 4 HEAT GUN CAN 18 BACK COVER 5 MICA SHEET 19 SCREW 6 HEATING ELEMENT COMPLETE 20 INDUCTANCE 7 FAN COVER... - Page 76 CH-Import & Distribution exklusiv durch: www.ayce.ch Jumbo-Markt AG, 8305 Dietlikon...
Need help?
Do you have a question about the PLD2233 and is the answer not in the manual?
Questions and answers