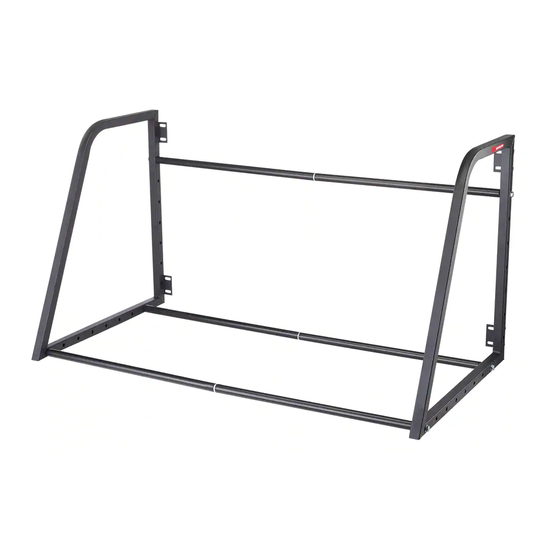
Summary of Contents for Motomaster 009-0078-8
- Page 1 WALL-MOUNTING TIRE RACK model no. 009-0078-8 IMPORTANT: INSTRUCTION Please read this manual carefully before using this product and save it for MANUAL reference.
- Page 2 This MotoMaster product carries a one (1) year warranty against defects in workmanship and materials. At its discretion, MotoMaster Canada agrees to have any defective part(s) repaired or replaced free of charge, within the stated warranty period, when returned by the original purchaser with proof of purchase. This product is not guaranteed against wear or breakage due to misuse and/or abuse.
-
Page 3: Table Of Contents
bars TABLE OF CONTENTS SAFETY INFORMATION INTRODUCTION SAFETY INFORMATION PERSONAL SAFETY INSTRUCTIONS TECHNICAL SPECIFICATIONS tion tabs PARTS LIST ASSEMBLY MAINTENANCE IMPORTANT: This manual contains important safety and operating instructions. Read all instructions and follow them while using the product. -
Page 4: Safety Information
009-0078-8 | contact us 1-888-942-6686 INTRODUCTION the tire rack is noted, the product should be replaced. The MotoMaster Wall-mounting Tire Rack is ® tabs • Work safely. When drilling holes to mount this perfect for storing seasonal tires. Easily holds up product make sure that there are no hidden to 4 vehicle tires. -
Page 5: Parts List
bars PARTS LIST AND PARTS DIAGRAM PART NO. DESCRIPTION QTY. PART NO. DESCRIPTION QTY. Left Frame Lag Screw M8x60 Right Frame Washer 8 Round Tube Hex Bolt M10x55 Tube Adaptor Washer 10 tion tabs TOOLS REQUIRED Power Drill, 3/16” Drill Bit (4.8 mm), 13 mm and 17 mm Wrenches, Stud Finder, Level, Pencil, Safety Goggles, Tape Measure, Ladder. -
Page 6: Assembly
009-0078-8 | contact us 1-888-942-6686 STEP 1 ASSEMBLY tabs tabs Plan for the proper location of the tire rack. The product must be attached to a wall surface with vertical studs, and the supports will be positioned 48” (121.9 cm) (centre to centre) apart. - Page 7 bars Insert three more Lag Screws (5) and STEP 4 Washers (6) in each frame to secure in place. Do not tighten Lag Screws (5) completely at this time. Note: Don’t use an impact driver. Connect each two Round Tubes (3) tion tabs using the Tube Adaptor (4).
-
Page 8: Maintenance
009-0078-8 | contact us 1-888-942-6686 MAINTENANCE tabs Periodically check that all hardware is tight and secure. Frequently check the condition of the tire rack. Make sure all components are in good condition. If the tire rack becomes damaged through accident,...


Need help?
Do you have a question about the 009-0078-8 and is the answer not in the manual?
Questions and answers