Table of Contents
Advertisement
Available languages
Available languages
Quick Links
MANUALE DELL'UTENTE
MACCHINA DA CAFFÈ DA INCASSO
Leggere interamente il manuale d'uso prima di utilizzare l' e lettrodomestico
e conservarlo a portata di mano per futuri riferimenti.
SKSCM2401S
www.signaturekitchensuite.com/it
MFL71690101
Copyright © 2020 Signature Kitchen Suite. All Rights Reserved.
Rev.00_073120
Advertisement
Table of Contents

Subscribe to Our Youtube Channel
Summary of Contents for Signature Kitchen Suite SKSCM2401S
- Page 1 MANUALE DELL’UTENTE MACCHINA DA CAFFÈ DA INCASSO Leggere interamente il manuale d’uso prima di utilizzare l’ e lettrodomestico e conservarlo a portata di mano per futuri riferimenti. SKSCM2401S www.signaturekitchensuite.com/it MFL71690101 Copyright © 2020 Signature Kitchen Suite. All Rights Reserved. Rev.00_073120...
- Page 2 INDICE IND IC E INTR OD U Z IONE P ANOR AM IC A D E L P R OD OTTO Parti Panoramica dei comandi Descrizione degli accessori Descrizione del contenitore latte F U NZ IONAM E NTO Operazioni preliminari Impostazioni del menù...
- Page 3 INTRODUZIONE INTR OD U Z IONE S IM B OLOG IA U TILIZ Z ATA NE LLE P R E S E NTI IS TR U Z IONI Le avvertenze importanti recano questi simboli. Errori nell’osservanza delle indicazioni riportate, possono provocare scosse elettriche, gravi lesioni, scottature, incendi, o danni all’apparecchio La mancata osservanza può...
- Page 4 INTRODUZIONE Uso conforme alla destinazione: questo apparecchio è costruito per la preparazione di bevande a base di caffè, latte ed acqua calda. Ogni altro uso è da considerarsi improprio e quindi pericoloso. Il costruttore non risponde per danni derivanti da un uso improprio dell’apparecchio.
- Page 5 INTRODUZIONE S o l o p e r m e r c a t i e u r o p e i Questo apparecchio può essere utilizzato da bambini di età da 8 anni in su se sotto sorveglianza oppure se hanno ricevuto delle istruzioni riguardanti l’utilizzo dell’apparecchio in sicurezza e se capiscono i pericoli implicati.
- Page 6 INTRODUZIONE AV V E R TE NZ A Questo apparecchio produce acqua calda e quando è in funzione può formarsi del vapore acqueo. Prestare attenzione di non venire in contatto con spruzzi d’acqua o vapore caldo. Utilizzare le manopole o le maniglie. ATTE NZ IONE Non aggrapparsi alla macchina da caffè...
- Page 7 INTRODUZIONE In s t a l l a z i o n e d e l l ’ a p p a r e c c h i o • L’installazione deve essere effettuata da un tecnico qualificato secondo le norme locali in vigore (vedi par. “Installazione ad incasso”).
- Page 8 INTRODUZIONE INS TALLAZ IONE AD INC AS S O Verificare le misure minime necessarie per la corretta installazione dell’elettrodomestico. La macchina da caffè deve essere installata in una colonna e tale colonna deve essere saldamente fissata alla parete con staffe commerciali. ATTE NZ IONE •...
- Page 9 INTRODUZIONE ATTE NZ IONE • Fissare il cavo di alimentazione con l’apposita clip. Il cavo di alimentazione deve essere lungo quanto basta da permettere l’estrazione dell’apparecchio dal mobile durante la fase di riempimento del serbatoio chicchi caffè. La messa a terra è obbligatoria a termini di legge. Il collegamento elettrico deve essere effettuato da un tecnico qualificato secondo le istruzioni.
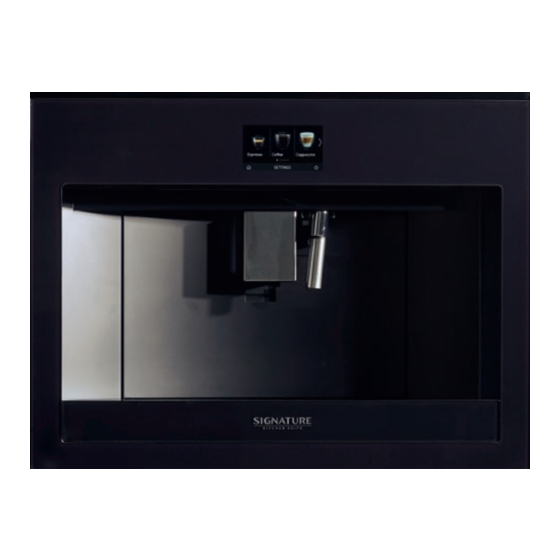
- Page 10 PANORAMICA DEL PRODOTTO P ANOR AM IC A D E L P R OD OTTO P a r t i V a s s o i o p o g g i a t a z z e 1 3 E r o g a t o r e d i c a f f è ( r e g o l a b i l e i n a l t e z z a ) S p o r t e l l o d i s e r v i z i o 1 4 V a s c h e t t a r a c c o g l i g o c c e 1 5 C o p e r c h i o d e l c o n t e n i t o r e p e r i c h i c c h i...
- Page 11 PANORAMICA DEL PRODOTTO P a n o r a m i c a d e i c o m a n d i menù per personalizzare le impostazioni delle selezione quantità bevande freccia di scorrimento menù impostazioni dell’apparecchio Bevande selezionabili (premere sulle frecce di Aroma selezionato scorrimento o per visualizzare tutte le bevande Orologio...
- Page 12 PANORAMICA DEL PRODOTTO D e s c r i z i o n e d e l c o n t e n i t o r e l a t t e M a n o p o l a r e g o l a z i o n e s c h i u m a e f u n z i o n e C LE AN Tu b o e r o g a z i o n e l a t t e s c h i u m a t o r e g o l a b i l e C o p e r c h i o c o n d i s p o s i t i v o m o n t a l a t t e R i v e s t i m e n t o t e r m i c o...
- Page 13 FUNZIONAMENTO F U NZ IONAM E NTO P r o c e d e r e q u i n d i s e g u e n d o l e i s t r u z i o n i i n d i c a t e s u l d i s p l a y d a l l ’...
- Page 14 FUNZIONAMENTO Ac c e n s i o n e d e l l ’ a p p a r e c c h i o S p e g n i m e n t o d e l l ’ a p p a r e c c h i o Ad ogni spegnimento, l’apparecchio esegue un risciacquo NOTA automatico, qualora sia stato preparato un caffè.
- Page 15 FUNZIONAMENTO Im p o s t a z i o n i d e l m e n ù Decalcificazione Per le istruzioni relative alla decalcificazione, fare R i s c i a c q u o riferimento al capitolo “Decalcificazione”. Con questa funzione è...
- Page 16 FUNZIONAMENTO R e g o l a o r a Au t o s p e g n i m e n t o ( s t a n d b y ) S e s i d e s i d e r a r e g o l a r e l ’ o r a s u l d i s p l a y , p r o c e d e r e È...
- Page 17 FUNZIONAMENTO Te m p e r a t u r a c a f f è Il l u m i n a z i o n e t a z z a Se si desidera modificare la temperatura dell’acqua con cui Con questa funzione si attivano o disattivano le luci viene erogato il caffè, procedere come segue: di illuminazione tazza.
- Page 18 FUNZIONAMENTO P r e p a r a z i o n e d e l c a f f è V a l o r i d i f a b b r i c a Con questa funzione si ripristinano tutti i settaggi del menù S e l e z i o n e d e l l ’...
- Page 19 FUNZIONAMENTO P r e p a r a z i o n e d e l c a f f è u t i l i z z a n d o i l NOTA c a f f è i n c h i c c h i •...
- Page 20 FUNZIONAMENTO P r e p a r a z i o n e d e l c a f f è u t i l i z z a n d o i l R e g o l a z i o n e d e l m a c i n a c a f f è c a f f è...
- Page 21 FUNZIONAMENTO P r e p a r a z i o n e d i b e v a n d e NOTA c a l d e c o n l a t t e Agganciare spingendo a fondo il contenitore latte all’ugello la macchina emette un segnale acustico (se la funzione avviso acustico è...
- Page 22 FUNZIONAMENTO R e g o l a r e l a q u a n t i t à d i s c h i u m a NOTA Indicazioni generali per tutte le preparazioni a base di Ruotando la manopola regolazione schiuma posta sul latte coperchio del contenitore latte, si seleziona la quantità...
- Page 23 FUNZIONAMENTO P u l i z i a d e l c o n t e n i t o r e l a t t e d o p o NOTA o g n i u s o • Se si devono preparare più tazze di bevande a base di latte, procedere con la pulizia del contenitore ATTE NZ IONE latte dopo l’ultima preparazione.
- Page 24 FUNZIONAMENTO E r o g a z i o n e a c q u a c a l d a E r o g a z i o n e V a p o r e ATTE NZ IONE ATTE NZ IONE Non lasciare la macchina senza sorveglianza durante Non lasciare la macchina senza sorveglianza durante...
- Page 25 FUNZIONAMENTO P e r s o n a l i z z a r e l e b e v a n d e P u l i z i a d e l l ’ e r o g a t o r e a c q u a c a l d a / v a p o r e d o p o l ’...
- Page 26 FUNZIONAMENTO M e m o r i z z a r e i l p r o p r i o p r o f i l o Con quest’apparecchio è possibile memorizzare 6 profili diversi, ognuno dei quali è associato ad un’icona diversa.
- Page 27 MANUTENZIONE M ANU TE NZ IONE P u l i z i a d e l c o n t e n i t o r e d e i f o n d i d i c a f f è P u l i z i a Quando sul display compare SVUOTARE CONTENITORE FONDI è...
- Page 28 MANUTENZIONE P u l i z i a d e l l a v a s c h e t t a r a c c o g l i g o c c e P u l i z i a d e l s e r b a t o i o a c q u a Pulire periodicamente (circa una volta al mese) e ad ATTE NZ IONE ogni sostituzione del filtro addolcitore(se previsto)
- Page 29 MANUTENZIONE P u l i z i a d e l l ’ i n f u s o r e Una volta inserito, assicurarsi che i due tasti di sgancio colorati siano scattati verso l’esterno. L’infusore dev’essere pulito almeno una volta al mese. AV V E R TE NZ A L’infusore non può...
- Page 30 MANUTENZIONE D e c a l c i f i c a z i o n e Sciacquare l’interno della sede della manopola regolazione schiuma con acqua corrente ed il foro di innesto del montalatte alla macchina. ATTE NZ IONE •...
- Page 31 MANUTENZIONE POSIZIONARE CONTENITORE 2,5l PREMERE OK L’acqua calda esce prima dall’erogatore caffè e PER INIZIARE DECALCIFICA : Posizionare sotto il display visualizza RISCIACQUO IN CORSO, l’erogatore acqua calda/vapore e sotto l’erogatore ATTENDERE PREGO. caffè un contenitore vuoto con capacità minima pari a Quando l’acqua nel serbatoio termina, svuotare 2.5 litri.
- Page 32 MANUTENZIONE P r o g r a m m a z i o n e d e l l a F i l t r o a d d o l c i t o r e d u r e z z a d e l l ’...
- Page 33 MANUTENZIONE Sostituzione del filtro NOTA FAR SCORRERE ACQUA NEI FORI FINCHE’ Sostituire il filtro quando sul display appare SOSTITUIRE FUORIESCE DALLE APERTURE : Per attivare FILTRO ACQUA, PREMERE OK PER INIZIARE : se il filtro, far scorrere dell’acqua di rubinetto nel si desidera procedere subito con la sostituzione, premere foro del filtro come indicato in figura fintantoché...
- Page 34 MANUTENZIONE Rimozione del filtro Se si desidera continuare ad utilizzare l’apparecchio senza il filtro, è necesssario rimuoverlo e segnalare la rimozione. Procedere come segue. Estrarre il serbatoio acqua ed il filtro esaurito. Premere per entrare nel menù. Premere o finché appare sul display FILTRO ACQUA.
- Page 35 MESSAGGI VISUALIZZATI SUL DISPLAY M E S S AG G I V IS U ALIZ Z ATI S U L D IS P LAY M e s s a g g i o v i s u a l i z z a t o P o s s i b i l e c a u s a R i m e d i o R IE M P IR E S E R B ATOIO C ON...
- Page 36 MESSAGGI VISUALIZZATI SUL DISPLAY M e s s a g g i o v i s u a l i z z a t o P o s s i b i l e c a u s a R i m e d i o R IE M P IR E C ONTE NITOR E I c h i c c h i d i c a f f è...
- Page 37 MESSAGGI VISUALIZZATI SUL DISPLAY M e s s a g g i o v i s u a l i z z a t o P o s s i b i l e c a u s a R i m e d i o INS E R IR E G R U P P O D o p o l a p u l i z i a n o n è...
- Page 38 MESSAGGI VISUALIZZATI SUL DISPLAY M e s s a g g i o v i s u a l i z z a t o P o s s i b i l e c a u s a R i m e d i o NE C E S S AR IA In d i c a c h e è...
- Page 39 RISOLUZIONE DEI PROBLEMI R IS OLU Z IONE D E I P R OB LE M I In basso sono elencati alcuni possibili malfunzionamenti. Se il problema non può essere risolto nel modo descritto, si deve contattare l’Assistenza Tecnica. P r o b l e m a P o s s i b i l e c a u s a / R i m e d i o •...
- Page 40 RISOLUZIONE DEI PROBLEMI P r o b l e m a P o s s i b i l e c a u s a / R i m e d i o • Il coperchio del contenitore latte è sporco Il l a t t e n o n e s c e d a l t u b o e r o g a z i o n e −...
- Page 41 DATI TECNICI D ATI TE C NIC I Te n s i o n e 220-240 V~ 50/60 Hz max. 10A P o t e n z a a s s o r b i t a 1350 W P r e s s i o n e 15 bar C a p a c i t à...
- Page 42 PROMEMORIA P R OM E M OR IA...
- Page 43 OWNER’S MANUAL BUILT IN COFFEE MACHINE Read this owner’s manual thoroughly before operating the appliance and keep it handy for reference at all times. SKSCM2401S www.signaturekitchensuite.com/it MFL71690101 Copyright © 2020 Signature Kitchen Suite. All Rights Reserved. Rev.00_073120...
-
Page 44: Table Of Contents
TABLE OF CONTENTS TAB LE OF C ONTE NTS INTR OD U C TION D E S C R IP TION OF TH E AP P LIANC E Parts Control Overview Description of the Accessories Description of the Milk Container OP E R ATION Preliminary Operations Menu Settings... -
Page 45: Intr Od U C Tion
INTRODUCTION INTR OD U C TION S Y M B OL U S E D IN TH E S E INS TR U C TIONS Important w arnings are identified by these symbols. Failure to observe the Instructions for Use could result in electric shock, serious inj ury, burns, fire or damage to the appliance. - Page 46 INTRODUCTION Designated use : this appliance is designed and made to prepare coffee and milk based beverages and hot w ater. Any other use is considered improper and thus dangerous. The manufacturer is not liable for damage deriving from improper use of the appliance.
-
Page 47: Appliance
INTRODUCTION F o r E u r o p e a n m a r k e t s o n l y This appliance can be used by children aged from 8 years and above if they have been given supervision or instruction concerning use of the appliance in a safe w ay and if they understand the hazard involved. - Page 48 INTRODUCTION C AU TION Do not hold on to the coffee machine w hen it is out of the cabinet. Do not rest recipients containing liquids or inflammable or corrosive materials on top of the appliance. Place the accessories required to make the coffee (the measure for example) in the special holder. Do not rest large obj ects w hich could obstruct movement or unstable obj ects on the appliance.
- Page 49 INTRODUCTION In s t a l l i n g t h e a p p l i a n c e • Installation must be performed by a qualified professional in compliance w ith legislation in force in the country of installation (see section “Built-in installation”).
- Page 50 INTRODUCTION B U ILT- IN INS TALLATION Verify the minimum measurements required for correct installation of the appliance. The coffee machine must be installed in a column and the column must be firmly fixed to the w all w ith commercially available brackets.
- Page 51 INTRODUCTION C AU TION • Fix the pow er cable w ith the clip. The pow er cable must be long enough to allow the appliance to be extracted from the cabinet to fill the coffee bean container. The appliance must be earthed in compliance w ith legislation.
-
Page 52: Parts
DESCRIPTION OF THE APPLIANCE D E S C R IP TION OF TH E AP P LIANC E P a r t s C u p h o l d e r t r a y 1 3 C o f f e e s p o u t s ( a d j u s t a b l e h e i g h t ) S e r v i c e d o o r 1 4 D r i p t r a y 1 5 B e a n s c o n t a i n e r l i d... -
Page 53: Control Overview
DESCRIPTION OF THE APPLIANCE C o n t r o l Ov e r v i e w menu to customise beverages settings quantity selection scroll arrow appliance settings menu Selected aroma Selectable drinks (press on the scrolling arrow to see all the drinks Clock scroll arrow Selected quantity... -
Page 54: Description Of The Milk Container
DESCRIPTION OF THE APPLIANCE D e s c r i p t i o n o f t h e M i l k C o n t a i n e r F r o t h a d j u s t m e n t a n d C LE AN f u n c t i o n d i a l Ad j u s t a b l e f r o t h e d m i l k s p o u t Li d w i t h m i l k f r o t h e r Th e r m a l c a s i n g... -
Page 55: Op E R Ation
OPERATION OP E R ATION To p r o c e e d f o l l o w t h e i n s t r u c t i o n s i n d i c a t e d o n t h e a p p l i a n c e d i s p l a y : •... - Page 56 OPERATION Tu r n i n g t h e Ap p l i a n c e ON Tu r n i n g t h e Ap p l i a n c e OF F Every time the appliance is turned off, it automatically NOTE carries out a rinse if it has made a coffee.
-
Page 57: Menu Settings
OPERATION M e n u S e t t i n g s D e - s c a l i n g For instructions on de-scaling, see section “De- R i n s i n g scaling”. Use this function to supply hot w ater from the coffee spouts to clean and heat the appliance’s internal ater filter circuit. - Page 58 OPERATION S e t t i m e Au t o - o f f ( s t a n d b y ) To a d j u s t t h e t i m e o n t h e d i s p l a y , p r o c e e d a s Auto-off can be set so that the appliance goes off f o l l o w s : after 15 or 30 minutes, or 1, 2 or 3 hours of no use.
- Page 59 OPERATION C o f f e e t e m p e r a t u r e Li g h t s To modify the temperature of the w ater supplied to This function enables or disables the lights. The make the coffee, proceed as follow s.
- Page 60 OPERATION M a k i n g C o f f e e D e f a u l t v a l u e s This resets all menu settings and programmed S e l e c t i n g t h e c o f f e e a r o m a quantities back to the default values (w ith the exception of the language w hich remains as set).
-
Page 61: Making Coffee
OPERATION M a k i n g c o f f e e u s i n g c o f f e e b e a n s NOTE • It is possible to prepare 2 cups of ESPRESSO C AU TION coffee at the same time by also pressing Do not use green, caramelised or candied coffee... - Page 62 OPERATION M a k i n g c o f f e e u s i n g p r e - g r o u n d Ad j u s t i n g t h e c o f f e e m i l l c o f f e e The coffee mill should not require adj usting, at least initially, because it has already been set by default...
-
Page 63: Making Milk-Based Hot Drinks
OPERATION M a k i n g m i l k - b a s e d h o t d r i n k s NOTE By pushing the bottom attach the milk NOTE container to the nozzle. The machine w ill let out a noise signal (if the sound notification To avoid milk w ith little froth or large bubbles, function is enabled). - Page 64 OPERATION Ad j u s t i n g t h e a m o u n t o f f r o t h NOTE General indications w hen preparing all milk based Turn the froth adj ustment dial on the milk container drinks lid, to adj ust the amount of froth on the milk delivered w hile making the drinks.
- Page 65 OPERATION C l e a n i n g t h e m i l k c o n t a i n e r a f t e r u s e NOTE • If a number of milk based drinks need to be C AU TION made, only clean the milk container after When cleaning the internal tubes of the milk...
-
Page 66: Delivering Hot W Ater
OPERATION D e l i v e r i n g h o t w a t e r S t e a m D e l i v e r y C AU TION C AU TION Do not leave the appliance unattended w hile hot Do not leave the appliance unattended w hile w ater is being delivered. - Page 67 OPERATION C u s t o m i s i n g b e v e r a g e s C l e a n i n g t h e h o t w a t e r / s t e a m s p o u t a f t e r u s e The aroma (for drinks w here required) and length of...
- Page 68 OPERATION M e m o r i s i n g y o u r p e r s o n a l p r o f i l e The appliance allow s you to memorise 6 different profiles, each associated w ith a different icon. In every profile the customised MY beverages AROMA and QUANTITY values are saved (see section “Customising beverages...
-
Page 69: M Ainte Nanc E
MAINTENANCE M AINTE NANC E C l e a n i n g t h e c o f f e e g r o u n d s c o n t a i n e r C l e a n i n g When the display show s the message EMPTY GROUND CONTAINER, the grounds container must C l e a n i n g t h e m a c h i n e... - Page 70 MAINTENANCE C l e a n i n g t h e d r i p t r a y C l e a n i n g t h e w a t e r t a n k Clean the w ater tank regularly (about once a C AU TION month) and w henever you replace the w ater...
- Page 71 MAINTENANCE C l e a n i n g t h e i n f u s e r Once inserted, make sure the tw o coloured release buttons have snapped out. The infuser must be cleaned at least once a month. W AR NING The infuser must not be removed w hen the appliance is on.
-
Page 72: Descaling
MAINTENANCE D e s c a l i n g Rinse inside the froth adj ustment dial seat and the milk frother connector hole using running w ater. C AU TION • Before use, read the instructions and the labelling on the de-scaler packaging. •... - Page 73 MAINTENANCE PLACE 2.5L CONTAINER UNDER OUTLET When the w ater in the tank has run out, empty PRESS OK TO START DESCALING : Place an the container used to collect the rinsing w ater; empty container w ith a minimum capacity of 2.5 (If the filter is installed) INSERT FILTER litres under the hot w ater/steam spout and coffee INTO ITS HOUSING.
-
Page 74: Programming Water Hardness
MAINTENANCE P r o g r a m m i n g W a t e r H a r d n e s s W a t e r S o f t e n e r F i l t e r The DESCALING NEEDED - PRESS OK TO START Some models are fitted w ith a w ater softener filter : if your model is not equipped w ith one, w e recommend... - Page 75 MAINTENANCE Re lacin t e filter NOTE FILL FILTER WITH WATER UNTIL IT’S Replace the filter w hen the display show s the COMPLETELY FILLED : To activate the filter, message REPLACE WATER FILTER, PRESS OK run tap w ater through the hole in the filter TO START : to replace immediately, press as show n in the figure until w ater comes out...
- Page 76 MAINTENANCE Remo in t e filter If you w ant to use the appliance w ithout the filter, you must remove it and notify the appliance of its removal. Proceed as follow s. Extract the w ater tank and exhausted filter. Press to enter the menu;...
-
Page 77: D Is P Lay E D M E S S Ag E S
DISPLAYED MESSAGES D IS P LAY E D M E S S AG E S D i s p l a y e d M e s s a g e P o s s i b l e C a u s e R e m e d y F ILL W ATE R TANK W ITH W a t e r i n t h e t a n k i s n o t... - Page 78 DISPLAYED MESSAGES D i s p l a y e d M e s s a g e P o s s i b l e C a u s e R e m e d y F ILL B E AN C ONTAINE R Th e c o f f e e b e a n s h a v e r u n o u t .
- Page 79 DISPLAYED MESSAGES D i s p l a y e d M e s s a g e P o s s i b l e C a u s e R e m e d y INS E R T B R E W ING U NIT Af t e r c l e a n i n g t h e i n f u s e r h a s •...
- Page 80 DISPLAYED MESSAGES D i s p l a y e d M e s s a g e P o s s i b l e C a u s e R e m e d y D E S C ALING NE E D E D I n d i c a t e s t h a t t h e m a c h i n e m u s t •...
-
Page 81: Tr Ou B Le S H Ooting
TROUBLE SHOOTING TR OU B LE S H OOTING Below is a list of some of the possible malfunctions. If the problem cannot be resolved as described, contact Customer Services Technical Assistance. S y m p t o m s P o s s i b l e C a u s e s / S o l u t i o n s •... - Page 82 TROUBLE SHOOTING S y m p t o m s P o s s i b l e C a u s e s / S o l u t i o n s Th e m i l k d o e s n o t •...
-
Page 83: Te C H Nic Al D Ata
TECHNICAL DATA TE C H NIC AL D ATA V o l t a g e 220-240 V~ 50/60 Hz max. 10A Ab s o r b e d p o w e r 1350 W P r e s s u r e 15 bar W a t e r t a n k c a p a c i t y 2.5 litres... - Page 84 Customer Information Center For inquires or comments, call: 800-978-866 Printed in Korea...
Need help?
Do you have a question about the SKSCM2401S and is the answer not in the manual?
Questions and answers