Advertisement
Quick Links
Advertisement

Summary of Contents for AGPtek SLO1B
- Page 1 User Manual Solar Light with Remote Control English 01-09 | 日本語 10-18...
- Page 3 Please read this user manual carefully before using the product. Warm Tips You need to press the ON/OFF button on the light to keep the light ON before charging. This product has battery, please keep it away from fire source to prevent danger caused by explosion.
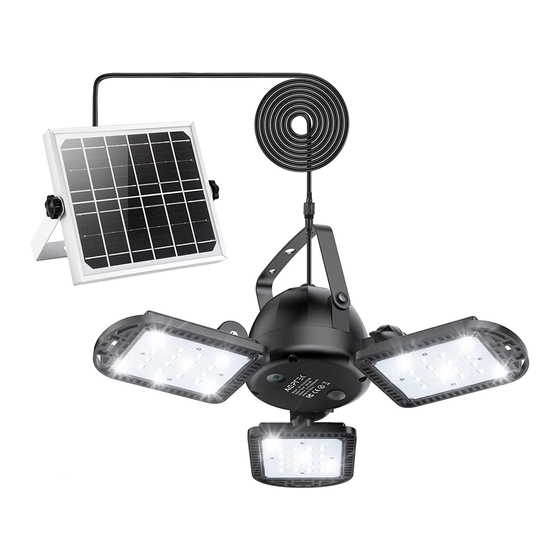
- Page 4 This product can be widely used in rural roads, trails, courtyards, garages, barns, gardens, orchards, fishing grounds and other places where it is not convenient to use electricity. After fully charged, the light can be used separately, suitable to be used as camping and emergency light.
- Page 5 5. 6 Hours Lighting 1. Power ON 6. Working Mode Switch 2. Power OFF 7. Brightness + 3. 2 Hours Lighting 8. Brightness - 4. 4 Hours Lighting Power on button. Press it and the light is on. OFF: Power off button. Press it and can turn off the light under both 2 modes.
- Page 6 Operating Instructions When using for the first time, please press the ON/OFF button which is on the bottom of the light to turn on. When installing, please use the accessories attached to install the lamp in a place exposed to sunlight. After installation, you can use the remote control to operate, and set the working mode as needed:...
- Page 7 Timing Mode: "2H/4H/6H" represents timing working time of 2H, 4H, 6H respectively. Brightness Adjustment: "+/-", 4 levels of light brightness: 25%, 50%, 70%, 100% Mode Switch: "AUTO", the switch between light-sensitive automatic control mode and manual remote control mode. Note: When it is turned off by using remote controller ...
- Page 8 Fix the light to the wall with the attached screws and tighten them with the screwdriver. (Note: If it is difficult to tighten the screw because of the block of the light body, you can remove the bracket and install the bracket first. Then install the light body.) Hoisted On The Garage Beam...
-
Page 9: Troubleshooting
Troubleshooting Trouble Reason Analysis Solution Press the ON/OFF button button on the solar not on light. Connect the solar panel to the light and leave it under battery sunlight charge for at least The light 1 hour. doesn’t Cover the solar ... - Page 10 remote controller runs Replace battery. out of power Press the ON/OFF button on the solar button light to keep the not on light on for normal recharge. Check whether the connection cords Makes positive Fail between the solar and negative of charge panel lamp...
- Page 11 Cover the solar panel to create a dark environment. The light Press AUTO to light-sensitive keeps switch to manual system cannot flashing control mode, tell whether it is and then switch day or night to light-sensitive automatic mode after completely dark.
- Page 12 本製品を御購入頂きありがとうございます。ソーラ ーライトの使用を開始する前に、本書をよくお読み ください。本書を保管し、使用時に参照してくださ い。 注意 充電前に、ソーラーライトの電源ボタンをオン にしてください。 本製品の内部にはバッテリーが含まれているた め、熱源の近くところに置かないでください。 火災や故障の原因となります。 バッテリーの寿命は 5 年以上があるため、頻繁 に電池を交換するのは必要がありません。 ソーラーパネルの表面がきれいになっているこ とを確保してください。製品の充電がより速く するために、2ヶ月に一度は、製品の清掃を行 ってください。 ソ ーラ ーの 充 電効 果は 光 の照 射角 度、 照 射強 度、地元の天候条件などに左右されます。必要 が無ければ、常時点灯モードを設定しないでく ださい。 雨天や下半期の日差しが弱い時には、2 時間また ...
- Page 13 もかかりません。 2. 本製品は屋外の車道、玄関周り、駐車場、庭、 ガーデン、パティオ、廊下、軒先等のところで 設置できます。 3. 本 製 品 は 単 一 使 用 で き で 、 100 % 充 電 さ れ た 後、緊急防災ライトまたはキャンプランタンと しても使用できます。 パッケージ内容 1 x ソーラーライト 1 x ソーラーパネル(5m 接続コード付き) 1 x リモコン 1 x ねじ袋/ライトホルダー 1 x 日本語取扱説明書...
- Page 14 5. 6 時間点灯 1. 電源 ON 6. 動作モード切替 2. 電源 OFF 3. 2 時間点灯 7. 明るさ + 4. 4 時間点灯 8. 明るさ - ON:電源オンボタン。それを押すと、点灯します。 OFF:電源オフボタン。そ れを押すと、消灯しま す。 2H/4H/6H:タイミングボタン。対応する数字ボタ ンを押すと、ライトが一回点滅し、設定時間内に点 灯したままにします。 +/-:明るさ調整ボタン。必要に応じて、ライトの 明 る さ を 25% 、 50% 、 75% 、 100% に 調 整 し ま す。...
- Page 15 使用方法 1. 初回使用時、ライトの底部にある ON/OFF ボタ ンを押すより電源を入れてください。 2. 取付の際は、付属品を使用し、ライトを直射日 光の当たる場所に設置してください。 3. 取付後には、リモコンで動作モードを設定しま す。 1) タイミングモード:点灯時間を 2 時間/4時間/6 時間に設定します。 2) 明るさ調整:+/-ボタンで 25%、50%、70%、...
- Page 16 100%照明の明るさを設定します。 3) モードスイッチ:「AUTO」ボタンを押すより 光センサー制御モードと手動制御モードの間に 切り替えます。 使用上のご注意 リ モコ ンで 電 源を 切り 、 再度 に電 源を 入 れる と、電源を切る前の設定に戻ります。 ライト本体のボタンで電源をオフにしてから再 びオンにすると、出荷時の設定に戻ります。 バッテリーの電圧が 3.7V より低い場合、日光が バッテリーを充電します。 晴れた日には、バッテリーは 6 ー 8 時間で完全に 充電できます。雨の日はさらに充電時間がかか る場合があります。 取り付け 二つの取り付け方法: 壁に設置場合 1) 設置場所に合わせて、寸法を測定し、マークを 付けます。次は、ドリルビッド等のツールを使...
- Page 17 取り付けてから、ライトを取り付けることがで きます。) 車庫のビームで吊り上げる場合...
-
Page 18: 故障かな?と思ったら
故障かな?と思ったら 故障 原因 対処 電 源 が 「 オ ソ ー ラ ー ラ イ ト の フ」になって ON/OFF ボタンで電源 いませんか を入れてください。 ソーラーパネルをライ バッテリー切 トに接続し、日光の下 れ に置いて 1 時間以上充 ラ イ ト が 電してください。 点 灯 し な ソーラーパネルを覆 い場合 ... - Page 19 正常に充電を確保する ために、ソーラーライ 電源ボタンが トの ON/OFF ボタンを オンになって 押してライトを点灯し いません た ま ま に し て く だ さ い。 充 電 で き ソーラーパネルとライ ない ソーラーパネ ト本体間の接続コード ルとライトを が逆に取り付けられて 接続すると、 いないかご確認くださ 正極と負極が い。接続の際は、矢印 逆になってし をよく確認し、接続す まった る穴に合わせてくださ い。 製品の充電がより速く バ ッ テ リ するために、2ヶ月に...
- Page 20 リ モ コ ン で 「AUTO」ボタンを 押して、手動制御モ ードに切り替えてく ださい。完全に暗く なった後、光センサ ーモードに切り替え ます。 対応するタイミングモ ードをもう一度押して タ イ ミ ン タイミングモ ください。ライトが一 グ 機 能 が ードを設定し 回点滅したら、タイミ しません ていません ングモードは正常に設 定しました。 仕様 ソーラーパネル 6V/3.5W バッテリー容量 4400mAh 出力電力 7.0W (全出力) LED 数量 60pcs ルーメン...
Need help?
Do you have a question about the SLO1B and is the answer not in the manual?
Questions and answers