NOCO Genius G750 User Manual
Hide thumbs
Also See for G750:
- Owner's manual & user manual (40 pages) ,
- User manual (36 pages) ,
- User manual
Table of Contents
Advertisement
Available languages
Available languages
Quick Links
DANGER
Welcome.
Read and understand the User Guide before operating the
charger. For questions regarding our chargers, view our
comprehensive support information at www.no.co/support.
To contact NOCO for personalized support (not available in
all areas), visit www.no.co/connect.
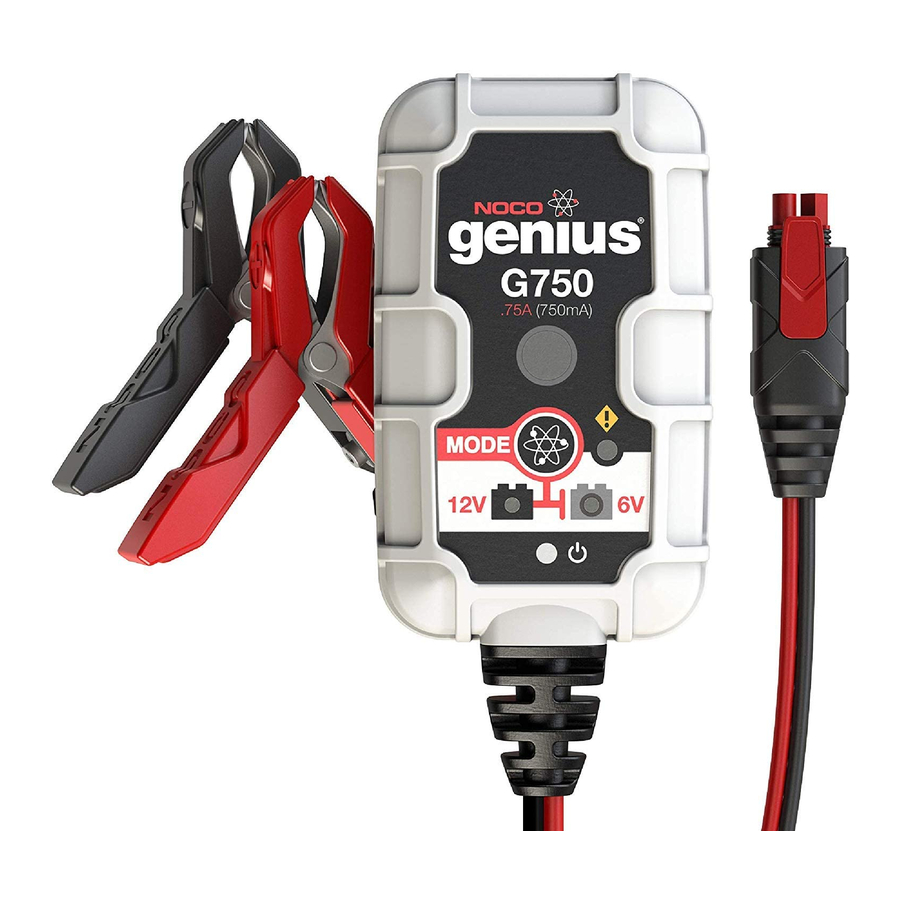
What's In The Box.
• G750 Smart Charger
• (1) Battery Clamp Connectors
• (1) Eyelet Terminal Connectors
• User Guide
• Information Guide and Warranty
G750
User Guide
PRIOR TO USE, READ AND UNDERSTAND
PRODUCT SAFETY INFORMATION.
Failure to follow the instructions may result
in ELECTRICAL SHOCK, EXPLOSION,
or FIRE, which may result in SERIOUS
INJURY, DEATH, DAMAGE TO DEVICE or
PROPERTY. Do not discard this information.
Thank you for buying the NOCO Genius
V2.0
®
G750.
Advertisement
Table of Contents

Related Manuals for NOCO Genius G750


Summary of Contents for NOCO Genius G750
- Page 1 FIRE, which may result in SERIOUS INJURY, DEATH, DAMAGE TO DEVICE or PROPERTY. Do not discard this information. Welcome. Thank you for buying the NOCO Genius G750. ® Read and understand the User Guide before operating the charger. For questions regarding our chargers, view our comprehensive support information at www.no.co/support.
-
Page 2: Getting Started
It is quite possibly the safest and most efficient charger you will ever use. The G750 is designed for charging all types of 6V & 12V lead-acid batteries, including Wet (Flooded), Gel, MF (Maintenance-Free), CA (Calcium), EFB (Enhanced Flooded Battery), and AGM (Absorption Glass Mat) batteries. -
Page 3: Connecting To The Battery
Mode Explanation In Standby mode, the charger is not charging or providing any power to the battery. Energy Save is activated during this mode, drawing microscopic power Standby from the electrical outlet. When selected, an orange LED will illuminate. No Power For charging 12-volt Wet Cell, Gel Cell, Enhanced Flooded, Maintenance-Free and Calcium batteries. -
Page 4: Begin Charging
a negative ground system (most common). If your vehicle is a positive ground system (very uncommon), follow the below instructions in reverse order. 1.) Connect the positive (red) battery clamp or eyelet terminal connector to the positive (POS,P,+) battery terminal. 2.) Connect the negative (black) battery clamp or eyelet terminal connector to the negative (NEG,N,-) battery terminal or vehicle chassis. -
Page 5: Green Led
Understanding Charge LEDs. The charger has one (1) Charge LED. This Charge LED indicates the connected battery(s) state-of-charge (SOC). See the explanation below: Explanation The Charge LED will slowly pulse Pulsing “on” and “off” when the battery is Red LED less than 75% fully charged. - Page 6 Understanding Advanced Diagnostics. Advanced Diagnostics is used when displaying Error Conditions. It will display a series of blink sequences that help you identify the cause of the error and potential solutions. All Error Conditions are displayed with the Error LED and Standby LED flashing back and forth.
- Page 7 Memory Returns to last selected mode when restarted Interactive Alters the charging process based on organic battery feedback Recovery Applies a high-voltage pulse charge when low- voltage, sulfation or lost capacity is detected Safe Protects against reverse polarity, sparks, overcharging, overcurrent, open-circuits, short-circuits and overheating Fast Charges two times faster than traditional...
- Page 8 Optimization Stabilizes internal battery chemistry for increased performance and longevity Maintenance Plus Keeps the battery fully charged without overcharging allowing the charger to be safely connected indefinitely Energy Save Minimizes energy consumption when full power is not needed Load Tracking Charge LEDs dynamically track the batteries state-of-charge when a load outpaces the charge current...
-
Page 9: Charging Steps
Charging Steps. Voltage (V) Step Current (A) Step 1 & 2: Analyze & Diagnose Checks the battery’s initial condition, including voltage, state-of-charge and health, to determine if the battery is stable before charging. Step 3: Recovery Initializes the Recovery desulfation process (if needed) for deeply discharged or sulfated batteries by pulsing small amounts of current. -
Page 10: Step 8: Maintenance
Step 8: Maintenance Continuously monitors the battery to determine when a maintenance charge should be initiated. If the battery voltage falls below its target threshold, the charger will restart the Maintenance cycle until voltage reaches its optimal state and then discontinues the charge cycle. The cycle between Optimization and Maintenance is repeated indefinitely to keep the battery at full charge. -
Page 11: Technical Specifications
Technical Specifications. Input Voltage AC: 110-120 VAC, 50-60Hz Working Voltage AC: 85-130 VAC, 50-60Hz Efficiency: 85% Approx. Power: 13W Max Charging Voltage: Various Charging Current: 750mA (12V), 750mA (6V) Low-Voltage Detection: 2V (12V), 2V (6V) Back Current Drain: <5mA Ambient Temperature: 0°C to +40°C Charger Type: 8 Step, Smart Charger... -
Page 12: Naudojimo Instrukcija
įrenginio pažeidimą. Neišmeskite šios informacijos. Sveikiname. Dėkojame, kad įsigijote „NOCO Genius® G750“. Prieš pradėdami naudoti įkroviklį, perskaitykite ir supraskite vartotojo vadovą. Jei turite klausimų dėl mūsų įkroviklių, peržiūrėkite išsamią palaikymo informaciją svetainėje www.no.co/support. Norėdami susisiekti su NOCO dėl individualizuotos pagalbos (ne visose srityse),... - Page 13 įkroviklis rinkoje, todėl kiekvienas įkrovimas yra paprastas ir lengvas. Tai saugiausias ir efektyviausias įkroviklis, kurį kada nors naudojote. „G750“ yra skirtas įkrauti visų rūšių 6V ir 12V švino rūgšties, įskaitant skysto elektrolito, GEL (želinius), MF (neaptarnaujamus), CA (su kalcio priedais), EFB (patobulintus skysto elektrolito), AGM ir LIB (ličio jonų).
- Page 14 Rėžimai Paaiškinimas Veikiant (standby) budėjimo režimu, įkroviklis akumuliatoriaus nekrauna ir negauna jokios energijos. Energijos taupymas suaktyvinamas šio režimo metu, iš elektros lizdo gaunant Standby mikroskopinę energiją. Pasirinkus užsidegs oranžinis šviesos diodas. Nėra įtampos Įkraunami 12V skysto elektrolito, GEL (želinio elektrolito), EFB, MF ir akumuliatoriai su kalcio priedais.
- Page 15 1.) Prijunkite teigiamą (raudoną) akumuliatoriaus spaustuką arba kilpos gnybto jungtį prie teigiamo (POS, P, +) akumuliatoriaus gnybto. 2.) Prijunkite neigiamą (juodą) akumuliatoriaus spaustuką arba kilpos gnybto jungtį prie neigiamo (NEG, N, -) akumuliatoriaus gnybto arba transporto priemonės kebulo. 3.) Prijunkite akumuliatoriaus įkroviklio kintamosios srovės kištuką prie tinkamo elektros lizdo, prijungdami nelieskite akumuliatoriaus.
- Page 16 „Įkrovimo LED“ supratimas Įkroviklis turi vieną (1) įkrovos šviesos diodą. Šis įkrovos šviesos diodas rodo prijungto akumuliatoriaus (-ių) įkrovos būseną (SOC). Žr. Paaiškinimą žemiau: Paaiškinimas Įkroviklio LED lėtai pulsuoja „įjungta“ ir Pulsuojantis „išjungta, kai baterija įkrauta mažiau nei Raudonas LED 75%.
- Page 17 Išplėstinės diagnostikos supratimas. Išplėstinė diagnostika naudojama, kai rodomos klaidos. Tai parodys mirksėjimo sekų serijas, kurios padės nustatyti klaidos priežastį ir galimus sprendimus. Rodomos visos klaidų sąlygos, kai klaidos šviesos diodas ir budėjimo režimo šviesos diodas mirksi pirmyn ir atgal. Blyksnių skaičius tarp kiekvieno impulso žymi potencialią...
- Page 18 Atmintis Paleidus iš naujo grįžta į paskutinį pasirinktą režimą Interaktyvus Pakeičia įkrovimo procesą, pagrįstą atmintimi Atgaivinimas Kai aptinkama žema įtampa, sulfatacija ar prarasta talpa, taikoma aukštos įtampos impulsų įkrova Saugumas Apsaugo nuo atvirkštinio poliškumo, kibirkščių, perkrovimo, viršsrovių, atvirų jungimų, trumpojo jungimo ir perkaitimo Greitis Įkraunama du kartus greičiau nei tradiciniai įkrovikliai...
- Page 19 Optimizacija Stabilizuoja vidinę akumuliatoriaus chemiją, kad padidintų našumą ir ilgaamžiškumą Priežiūra plius Akumuliatorius visiškai įkraunamas jo neperkraunant, o įkroviklį galima saugiai prijungti neribotą laiką Energijos taupymas Kai nereikia visos galios, sumažina energijos sąnaudas Įkrovimo sekimas Įkrovos šviesos LED diodai dinamiškai parodo akumuliatorių...
- Page 20 Įkrovimo žingsniai Įtampa (V) Žingsnis Srovė (A) 1 & 2 žingsniai: Analizė ir Diagnostika Prieš įkraudamas patikrina pradinę akumuliatoriaus būklę, įskaitant įtampą, įkrovą. 3 žingsnis: Atgaivinimas Inicijuoja giliai išsikrovusių arba sulfatuotų akumuliatorių atstatymo desulfacijos procesą (jei reikia), pulsuodami nedidele srove. 4 žingsnis: Įkrovimo pradžia Pradeda įkrovimo procesą...
- Page 21 8 žingsnis: Priežiūros rėžimas Nuolat stebi akumuliatorių, kad nustatytų, kada turėtų būti pradėtas įkrovimas. Jei akumuliatoriaus įtampa nukrenta žemiau tikslinės ribos, įkroviklis pakartotinai paleis įkrovimo ciklą, kol įtampa pasieks optimalią būseną, ir tada nutrauks įkrovimo ciklą. Ciklas tarp optimizavimo ir priežiūros pakartojamas neribotą laiką, kad akumuliatorius būtų...
-
Page 22: Techninės Specifikacijos
Techninės specifikacijos Įėjimo įtampa (VAC): 220-240 VAC, 50-60Hz Darbinė įtampa (VAC): 220-240 VAC, 50-60Hz Efektyvumas: Apie 85% Galingumas: 13 W maksimalus Įkrovimo įtampa (V): Svyruojanti Įkrovimo srovė (A): 750mA (12V), 750mA (6V) Žemos įtampos aptikimas: 2V (6V), 2V (12V) Atgalinė srovė: <... - Page 23 1.800.456.6626 support@no.co 30339 Diamond Parkway, #102 Glenwillow, OH 44139 United States of America no.co NPD01306014G...
Need help?
Do you have a question about the G750 and is the answer not in the manual?
Questions and answers