Table of Contents
Advertisement
Available languages
Available languages
Quick Links
Advertisement
Table of Contents

Subscribe to Our Youtube Channel
Related Manuals for Creabest VB007


Summary of Contents for Creabest VB007
- Page 1 MANUAL VB007...
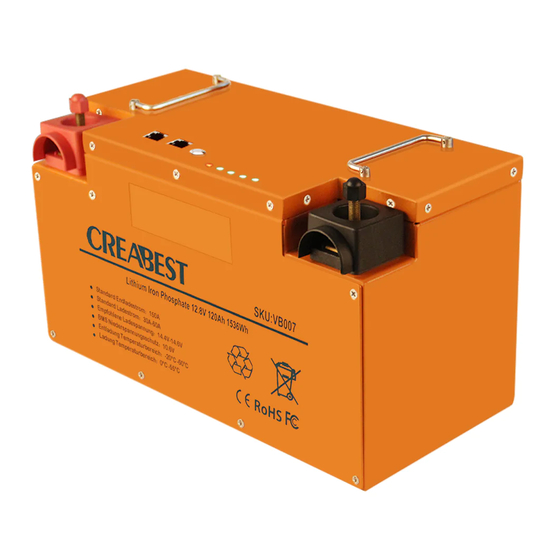
- Page 2 Part 1. Content: 12.8V 120Ah Battery Negative Positive indicator Pole Pole button 2. Blue clamp and red clamp 3. Manual MANUAL VB007 ROHS...
-
Page 3: Part 2. Specifications
Part 2. Specifications: 12.8V -20℃-60℃ Voltage Discharge Temperature 120Ah 0℃-55℃ Capacity Charge Temperature 1536Wh -20℃-60℃ Total Energy Storage Temperature 150A Standard Discharge Current Terminal Type 300A RS485 Peak Discharge Current(1s) Communication RJ45 Standard Charge Current Communication Terminal Dimensions 14.6V 356x169x189.5mm Full Charge Voltage (excluding terminals)... - Page 4 Part 4. Installing Instrucion: Ols and Materials:wire of AWG3/30mm2 or thicker (black and red), wire cutter, M5 screw driver,insulating tape.(these tools and materials should be prepared by user). According to the distance between inverter and battery pack, to prepare the length of the wire, and each terminal copper should be 11-14mm,see below: 11 -14 mm Insert the black wire to blue clamp,red wire to red clamp,and fasten screws tightly, see...
- Page 5 Make sure inverter is power off , and to lock the RED wire to inverter’s POSITIVE pole tightly,and then lock the other terminal to battery’s POSITIVE pole tightly too. Please use insulating tape to protect exposed wire copper. Do not short circuit when locking the wire to the battery poles. The clamps and term- inals must be connected firmly.
- Page 6 See the status and parameter of the battery as Pic 3. Check the battery cell capacity like Pic 4. Pic 3 Pic 4 Select LANGUAGE to change language, select SHARE to share APP to friends and select MANUAL to see the battery manual (see Pic 5, Pic 6, Pic 7). Pic 5 Pic 6 Pic 7...
- Page 7 Handbuch VB007...
- Page 8 Teil 1. Inhalt: 12.8V 120Ah Battery Negative Positive indicator Pole Pole button 2. Blauer Pol und Roter Pol 3. Handbuch Handbuch VB007 ROHS...
-
Page 9: Teil 2. Spezifikationen
Teil 2. Spezifikationen: 12 . 8 V -2 0 ℃ -6 0 ℃ Sp a n n u n g En t l a d e t e mp e ra t u r 12 0 Ah 0 ℃ -5 5 ℃ Ka p a z i t ät La d e t e m p e ra t u r 15 3 6 W h... - Page 10 Ladestrom 85A. 10. Bitte schalten Sie die Batterie aus, wenn sie nicht funktioniert. Um die verbleibende Kapazität über 50% zu halten, sollte der Akku alle 6 Monate aufgeladen werden. 11. Bitte wenden Sie sich an den Kundendienst, wenn Sie RS485 verwenden. 12.
- Page 11 Vergewissern Sie sich, dass der Wechselrichter ausgeschaltet ist,und verbinden Sie das SCHWARZE Kabel fest mit dem NEGATIVEN Pol des Wechselrichters, und ver- binden Sie das andere Kabel ebenfalls fest mit dem NEGATIVEN Pol der Batterie. Verwenden Sie bitte Isolierband, um freiliegenden Kupferdraht zu isolieren.
- Page 12 Scannen Sie den Akku und klicken Sie, um ihn anzuschließen (siehe Bild 2). Drücken Sie die Akkutaste und starten Sie die App neu. Bild 1 Bild 2 Siehe den Status und die Parameter der Batterie als Bild 3. VérifiezSiehen Sie die Akkukapazität wie in Bild 4. Bild 3 Bild 4...
- Page 13 Wählen Sie SPRACHE,um die Sprache zu ändern, wählen Sie TEILEN,um die App an Freunde empfehlen, und wählen Sie HANDBUCH, um das Batteriehandbuch anzuzeigen (siehe Bild 5, Bild 6, Bild 7). Bild 5 Bild 6 Bild 7...
- Page 14 MANUEL VB007...
- Page 15 Partie1. Contenu: 12.8V 120Ah Battery Pôle négatif bouton Pôle positif indicateur 2. Blue clamp and red clamp 3. Manuel MANUEL VB007 ROHS...
-
Page 16: Partie 2. Caractéristiques
Partie 2. Caractéristiques: Tension Temp é ra t u re de d é ch a rg e 12 . 8 V -2 0 ℃ -6 0 ℃ Capacité Temp é ra t u r e de ch a r g e 12 0 A h 0 ℃... -
Page 17: Partie 4. Instruction D'installation
10. Veuillez contacter le service client lorsque vous utilisez RS485. 11. Veuillez éteindre la batterie si elle ne fonctionne pas. Pour maintenir la capacité restante au-dessus de 50%, la batterie doit être chargée tous les 6 mois. 12. Lorsque la batterie ne doit plus être utilisée, veuillez la retourner à votre fournisseur ou l'envoyer à... - Page 18 Assurez-vous que l'onduleur est hors tension et verrouillez fermement le fil NOIR au pôle NÉGATIF de l'onduleur, puis verrouillez fermement l'autre borne au pôle NÉGATIF de la batterie. Veuillez utiliser un ruban isolant pour protéger le fil de cuivre exposé. Assurez-vous que l'onduleur est hors tension et verrouillez fermement le fil ROUGE au pôle POSITIF de l'onduleur, puis verrouillez également l'autre borne au pôle POSITIF de la batterie.
- Page 19 Scan batterie et cliquez pour la connecter (voir Pic 2), si la batterie ne peut pas être trouvée, veuillez appuyer sur le bouton de la batterie et redémarrer l'application; Pic 1 Pic 2 Voir l'état et les paramètres de la batterie comme Pic 3. Vérifiez la capacité...
- Page 20 Sélectionnez LANGUE pour changer de langue, sélectionnez PARTAGER pour partager l'APP avec des amis et sélectionnez MANUEL pour voir le manuel de la batterie (voir Pic 5, Pic 6, Pic 7). Pic 5 Pic 6 Pic 7...
Need help?
Do you have a question about the VB007 and is the answer not in the manual?
Questions and answers