
Related Manuals for Dobot MOOZ-3

Summary of Contents for Dobot MOOZ-3
- Page 1 V4.0 2020-06 Shenzhen Yuejiang Technology Co., Ltd | China ADDRESS: 9-10 Floors, Building No.2, Chongwen Garden, Nanshan i-Park, Nanshan District, Shenzhen, China...
-
Page 2: Table Of Contents
Note: Updated Firmwares, User Manuals, Softwares and Tutorial Videos will be uploaded to our official website www.dobot.cc constantly, please use them for better experience. Any support, please contact us: mooz@dobot.cc. -
Page 3: Fast Assembly
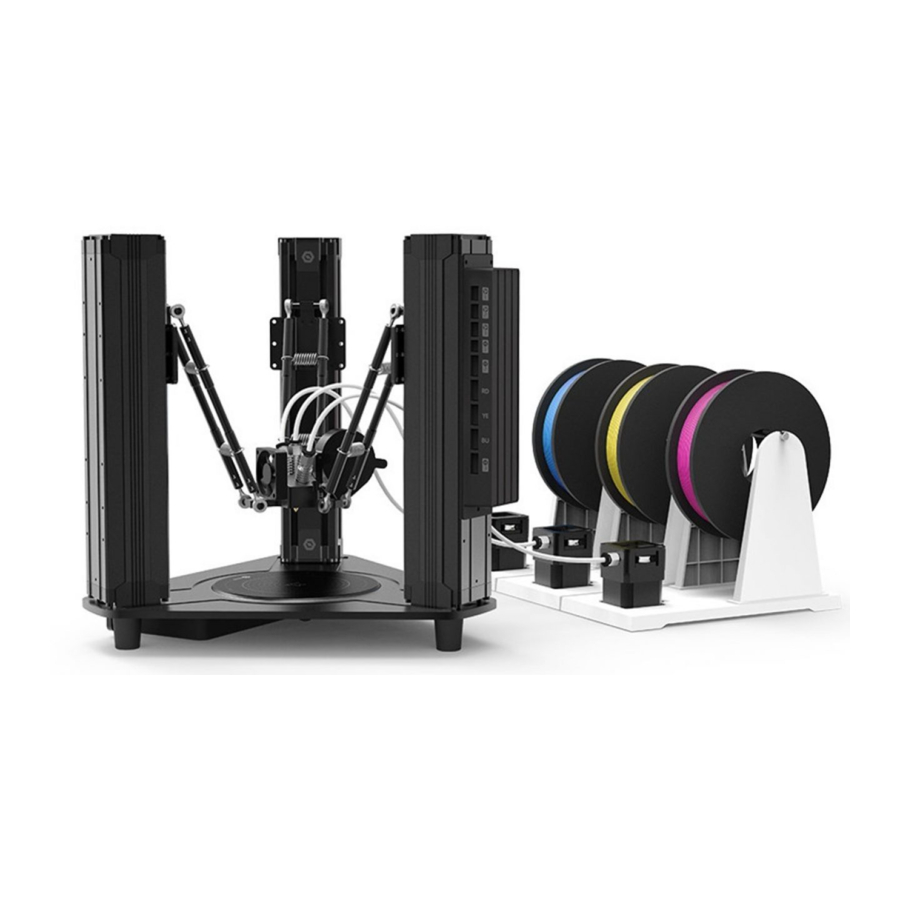
Fast Assembly 1.1 Accessories List Bourdon Pipe x 3 Identical Linear Actuators x 3 Printer Head Module x 1 250g PLA Filament x 3 Base + Main Control Extruder x 3 Board + Heated Bed x 1set Filament Support x 3 LCD Touch Pad x 1 Printer Head Control Board L-type Hex Screwdrive x 2... - Page 4 1.1.4 Install Extruder Motor Power Cables 1.1.3 Connect the Bourdon Pipe to the Print Head Connect the extruders to the corresponding ports of the printer head control Straighten out the filament, insert it into the print head. In the meanwhile, board with cables.
- Page 5 1.1.6 Connect Cables to Printer Head Control Board Warning: Wrong connection of cables may cause burnout of control board! Hot-plug is strictly prohibited! Always make sure that all cables are plugged in place before power-on! Plugging of cables during power-on status will cause malfunction! Before power on the machine, please follow the chart below and connect all cables to the printer head control board correctly.
-
Page 6: Operation Panel
Operation Panel 2.1 Home Page 2.2 3-Point Leveling Interface Display current coordinates Leveling Adjust nozzle downward Entrance to 3-point leveling interface X: 20 Y: 20 Z: 20 Adjust nozzle upward Entrance to le directory interface Step distance switching buttons: It should be used along with “-Z” and Entrance to control tools interface 0.06 mm 1 mm... -
Page 7: Print Functional Module Control Interface
Move Settings Switch languages Calibrate the LCD touch screen Reset X/Y/Z axis linear actuators (Not available for MOOZ-3) Reset all linear actuators, the Restore factory settings corresponding operations will not 0.06 mm 1 mm 10 mm change any settings... -
Page 8: Working Process Control Interface
2.9 Working Process Control Interface 2.10 Switch Mixing Mode Configuration Interface Red lament percentage: Adjustment range: 0~100, 0 means Display execution progress of red filament will not be used to mix current le Display time elapsed Printing... Mixing Yellow lament percentage: Adjustment range: 0~100, 0 means Model1.gcode Display current coordinates... -
Page 9: Printing
3D Printing 3.1 3-Point Leveling Please follow the guide of the machine to record three different points to define a plane parallel to the heated bed, these three points must be recorded in order with nozzle in the areas shown in the drawing below, one in each. The calibration requires to be set only for the first use. Operation steps: Leveling Leveling... -
Page 10: Set The Zero Point
3.2 Set the Zero Point Zero point is the start point for the machine to print, which requires to be set only for the first use. Operation steps: Control Tools Zeroing Zeroing X: 20 Y: 20 Z: 20 X: 20 Y: 20 Z: 20 0 mm... -
Page 11: Install/Remove The Filament
3.3 Install/Remove the Filament Operation steps: Control Tools Function Function T:25℃/ 200℃ T:25℃/ 200℃ B:25℃/ 60℃ B:25℃/ 60℃ Press the “Entrance to control Press the “Entrance to functional Press the “Preheat nozzle” Press " " button until melted tools interface” button module control interfaces”... -
Page 12: Use The Slicing Software
④ The window of installing arduino driver will pop up in the process of installation. Please follow the prompts to complete the installation. 3.4.2 Con guration for Initial Use Description: Please visit www.dobot.cc to download the related tutorial videos and softwares. ① Run Cura 4.6.1 and go “Settings” > “Printer” >... -
Page 13: Online Printing
G92 E1 G1 F200 E3 G1 E-1 F300 G92 E0 Note: Origin of MOOZ-3 is defaulted at the center of heated bed, please be sure to check the “Origin at center” box, otherwise the machine will not work normally. 3.4.3 Printing Load and profile the model: ①... - Page 14 Print settings Description of key profile settings: Fine - 0.1mm Profile ① Layer Height: For the height of each layer of printing, smaller value will produce finer surface, but cost more printing time. Suggested range is 0.05 to 0.3, not exceeding 3/4 of the diameter of the nozzle.
-
Page 15: Configuration Of Color Mixing Scheme
3.4.4 Configuration of Color Mixing Scheme The machine adopts CMY subtractive color mixing model, wherein C stands for Cyan, M stands for Magenta, and Y stands for Yellow. For gradient mixing mode, the gradual color changing process will follow the CMYK chromatography in general. You can use image-editing software, Photoshop for instance, for accurate color configuration. - Page 16 2. Gradient mixing mode 混色 Control Tools Mixing Mixing Mixing Gradient Gradient Gradient Switch Switch Switch Press the “Entrance to Press the “Entrance to color mixing Switch to gradient mixing mode Configure color by adjusting Record the configured color control tools interface”...
- Page 17 Warning: 1. Make sure the machine has been properly leveled and zeroed before executing any Gcode files. We strongly advice you to check if the zero point is suitable by moving the Z coordinate to 0 manually and test the friction status with a piece of A4 paper. 2.
-
Page 18: Power-Loss Resume
3.5 Power-Loss Resume In case of abrupt power failure during printing, the machine will save current printing process and move the functional module away from the print. You may resume or cancle the process after power recovery. Resume Unfinished mission detected ! ! Confirm to continue/cancle/skip? Description Continue: Resume the unfinished printing process... -
Page 19: Troubleshooting
Troubleshooting 4.1 3D Printing Failure Q : Print center is at left-bottom A : Wrong machine setting in slicing software, the “ Origin at center ” box must be checked, refer to corner of the heated bed Section 3.4.2. A : Check if the zero point is appropriate. Methods: Q : The machine prints in the air 1. -
Page 20: Whole Machine Failure
A : 1. Check and make sure the cables are in good connection. Q : Movement of X/Y/Z linear 2. Check crossly(i.e. connect X-axis linear actuator to Y port and Connect Y-axis linear actuator to X port actuator is abnormal and Connect) to decide if the failure is caused by the faulty linear actuator or control board. -
Page 21: Print Functional Module Failure
4.4 Maintenance of 3D Print Functional Module Heating rod fixing scew Bourdon pipe In case of clogging issue, leading to slipping or step losing of extruder motors: Please preheat nozzle to target temperature, press down the plastic part of the Filament barrel fixing screw Quick pipe connector quick pipe connector... -
Page 22: Parameters
Parameters Overall Dimensions: Φ350 * 325mm Adapter Input: 100-240V~50/60Hz, 1.8Amax Adapter Output: 12V~10A Main Material: Aircraft-grade aluminum Operation Panel: 3.5’ LCD touch pad Nozzle Diameter: 0.4mm Layer Resolution: 0.05~0.3mm Nozzle Temperature: 250℃ Max. Heated bed Temperature: 100℃ Max. (at 25℃ ambient temperature) Printing Forming Size: Φ100 * 100mm Applicable Materials: 1.75mm PLA... - Page 23 This equipment should be installed and operated with a minimum distance of 20cm between the radiator & your body. This transmitter must not be co-located or operating in conjunction with any other antenna or transmitter. All RF frequencies are not restricted in EU member states FCC ID: 2AHI4-MOOZ-3...
- Page 24 Shenzhen Yuejiang Technology Co., Ltd | China ADDRESS: 9-10 Floors, Building No.2, Chongwen Garden, Nanshan i-Park, Nanshan District, Shenzhen, China For more information, please visit www.dobot.cc...
Need help?
Do you have a question about the MOOZ-3 and is the answer not in the manual?
Questions and answers