
Summary of Contents for Car-Systems DPM-816
- Page 1 Digital coating thickness tester DPM-816 R2.1 USER MANUAL UPDATED in March 2018 Car-Sys.com...
- Page 2 Introduction Dear owner of thickness meter, thank you for purchasing the device designed and developed in Russian Federation. We are confident that you will find it useful in and it will serve you for many years. We kindly ask you to go through this user manual to make get the most out of your device.
-
Page 3: Cleaning Instructions
Device care information Please keep in mind that the device is a high precision measuring instrument. Avoid dropping or hitting the device. Handle it with care. The device is not waterproof. It cannot be submerged in water or even be used under rain. In case the surface of the device accidentally gets wet, wipe it off immediately with soft and dry piece of cloth. -
Page 4: Storage Information
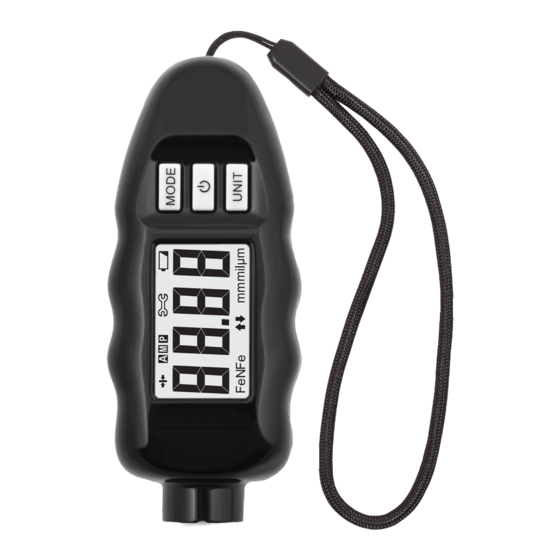
Only use dry, soft piece of cloth to wipe any dust or dirt off the device. Do not use any detergents containing organic solvents. Storage Information Store the device in a warm and dry place away from direct sunlight. Take out the power element for long term storage. Do not store the device in the range of strong magnetic fields or near devices able to generate strong magnetic fields, such as electric motors, power supplies or magnets. - Page 5 “MODE” Button: - Measurement mode change - Thickness increase during calibration - Two-point calibration on-off - 6-point calibration for ferrous metals “PWR” Button: - Device on-off - Backlight on-off - Next calibration point - Save calibration “UNIT” Button: - Change of display units - Thickness decrease during calibration - Activation of zero correction -...
-
Page 6: Included In The Set
Included in the set Please make sure the following items are all included in your set: - D igital coating thickness gauge (the device) - Aluminum calibration base - Steel calibration base - Calibration plate - 700 μm (27,5 mil) thick - Calibration plate - 1000 μm (39,4 mil) thick - User Manual Getting started... -
Page 7: Battery Indicator
Open the battery cover by pressing with your thumb and pushing towards the direction of the arrow. Insert the battery respecting the polarity (according to +/- contacts). Close the battery cover. You will hear a click when the cover is fully closed. Battery indicator The device does not require much current and one battery will be able to power the device for quite a long time. -
Page 8: Backlight On/Off
Switching the device on Press and hold “PWR” button for 2 seconds. Once on, you will see “8888” on the screen and the device will begin the procedures of auto-test and auto-calibration. After 2-3 seconds, the display will show “----” which means that the device is ready for use. -
Page 9: Units Of Measurement
“M” - Displays more detailed and more precise results of measurement. “P” - Display the result table of user calibration. Units of measurement For convenience of the end users from various countries, the device is able to display the measurement results in few units. To choose the units, press “UNIT”... - Page 10 For more precise measurement the device is equipped with pressure stabilization sensor. The probe has the sensitive part of just 2 mm in diameter. Therefore, in order to get precise measurement, it’s required to have only small area of the surface cleaned from dust and dirt. This will allow you to make measurements of the body panels of the car without washing the whole vehicle.
-
Page 11: Calibration Reset
that there was a second layer of paint and lacquer applied to this given part. However, if the measurement is more than 2 times the average value, it means that there is also a layer of putty filler underneath. The higher is the thickness, the less quality repair job was performed. -
Page 12: Two-Point Calibration
Two-point calibration In measurement mode (screen displaying “----”) press and hold “MODE” button for 2 second until “F-0” in displayed. This is zero point of calibration. Perform a measurement on uncoated bare metal plate for which you’re calibrating. While the result of the measurement is displayed, quickly press and release “PWR”... - Page 13 6-point calibration This calibration is available in “P” measurement mode and is required to be able to perform measurements on metals different from supplied base metal plates. In the new device, it’s equivalent to factory calibration. For this type of calibration, base metal plate and 5 calibration plates with known coating thickness are needed.
- Page 14 Calibration First calibration is “0”. Perform a measurement on uncoated metal for which you’re doing the calibration. Wait for stable readings and put the base away from the device. If needed, repeat the measurement. Press and release “PWR” to save the result an go to the next measuring point.
-
Page 15: Device Specifications
Please note that the calibration is not required for normal use with standard base metals. Device Specifications ( updated in March 2018) Measurement range 0-99 mil / 0-3000 μm / 0-3 mm Resolution 0.1 mil / 1 μm / 0.01 mm Maximum measurable thickness ... -
Page 16: Warranty
Ferrous metals, steel, iron Base metals Non ferrous metals, aluminum alloys, zinc, copper Any non metal and non magnetic Coating materials coatings The device is calibrated by manufacturer for steel and aluminum bases. The specifications presented above are general specifications and may vary for some devices. The specifications can be changed by the manufacturer without any notice.
Need help?
Do you have a question about the DPM-816 and is the answer not in the manual?
Questions and answers