Table of Contents
Advertisement
Advertisement
Chapters
Table of Contents

Related Manuals for Xiaomi Redmi Note 9T


Summary of Contents for Xiaomi Redmi Note 9T
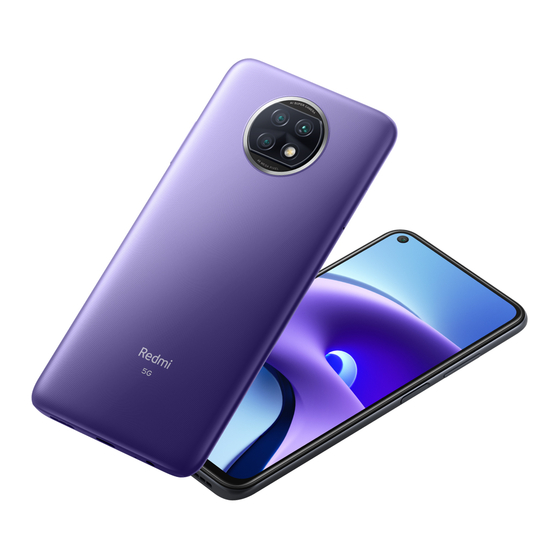
- Page 1 Redmi Note 9T User Guide...
-
Page 3: Table Of Contents
Getting Started Parts & Functions.............. 6 SIM Card................7 Internal Storage and SD Card..........9 Charging Battery.............. 12 Power On/Off..............13 Redmi Note 9T Making Initial Settings............ 14 User Guide Contents Using a Google Account........... 17 Unlocking Screen...............20 Basic Operations Basic Operation..............22 Using Touchscreen............ - Page 4 About Phone (Handset Information) Settings....69 Data Usage Settings............69 Lock Screen Settings............70 Display Settings..............70 Sound & Vibration Settings..........71 Home Screen Settings............71 Password & Security Settings.........72 Battery & Performance Settings........73 Additional Settings............75 Other Settings..............75 Global Services Global Roaming..............80 Making Calls while Abroad..........
-
Page 5: About The User Guide
Introduction About the User Guide In the User Guide, most operation descriptions are based on handset at time of purchase. Unless noted otherwise, descriptions are for Home Screen. Some operation descriptions may be simplified. Before Using This Product Read "Quick Start" and "Safety Precautions" thoroughly for proper usage. -
Page 7: Getting Started
Getting Started Parts & Functions.............. 6 SIM Card................7 Internal Storage and SD Card..........9 Charging Battery.............. 12 Power On/Off..............13 Making Initial Settings............ 14 Using a Google Account........... 17 Unlocking Screen...............20... -
Page 8: Parts & Functions
Parts & Functions Handset (Back/Side) Handset (Front) Part Description Part Description Suppresses noise when speaking into Mic. Second Mic Front Infrared Use to shoot photos or videos of yourself. Not functional on this model. Camera Sensor Proximity/ SIM Card/ Detects ambient light level, etc. Install/remove SD Card and SIM Card. -
Page 9: Sim Card
SIM Card Keys SIM Card is an IC card containing phone number and other customer information. Handling SIM Card For SIM card handling, see following items. IC chip Part Description For SIM card handling, see SoftBank Website. Adjust Volume. Volume Key https://www.softbank.jp/mobile/support/protect/usim/ Long Press for power on/off. - Page 10 Removing SIM Card Pull out SIM Card/SD Card Tray straight Always power off handset beforehand. Insert SIM Removal Pin (complimentary sample) into Tray Removal Hole straight Place SIM Card in SIM Card/SD Card Tray ・Place gently, noting orientation of SIM Card (notch/IC (gold) Pull out SIM Card/SD Card Tray straight chip facing down).
-
Page 11: Internal Storage And Sd Card
Internal Storage and SD Card Place SD Card in SIM Card/SD Card Tray Handset supports SD Cards up to 512 GB. Some SD Cards may not operate properly. When using a new SD card for the first time, always format it on handset. - Page 12 Formatting SD Card Format SD card In Home Screen, (Settings) DONE All data on SD Card is erased. About phone Formatting SD Card Cautions Observe the following when formatting SD Card. ・Formatting erases all data on SD Card. Carefully check any SD Card that was used on another device before formatting.
- Page 13 Unmounting SD Card Removing SD Card Always power off handset beforehand. In Home Screen, (Settings) Insert SIM Removal Pin (complimentary sample) into Tray Removal Hole straight Pull out SIM Card/SD Card Tray straight About phone Remove SD Card from SIM Card/SD Card Tray Storage Insert SIM Card/SD Card Tray in SIM Card/SD Card Slot straight...
-
Page 14: Charging Battery
Charging Battery When charging is complete, unplug AC Charger (complimentary sample) and remove USB Type-C plug on USB Type-C™ Cable Indications while Charging (complimentary sample) from handset Charging progress appears in lock screen. ・"Charging": normal charging ・"Fast charging": rapid charging Charging ends. -
Page 15: Power On/Off
Power On/Off Powering Off Powering On Press and hold Power Key for at least 1 second Press and hold Power Key for at least 5 seconds (Power off) Lock screen appears. ・For details on unlocking screen, see "Unlocking Screen." ・Startup screen appears for the first time handset is powered on. -
Page 16: Making Initial Settings
Making Initial Settings Check the terms of use and privacy policy, then I've read When powering on the first time, an initial settings wizard and agree to the User Agreement and Privacy Policy. appears for optionally making Wi-Fi, Google™ account, and other settings. - Page 17 Set/check Google Services Accept Don't copy ・ Tap Next to copy data from another mobile with Google account settings. Follow onscreen prompts. Continue Sign in with Google Account ・To finish initial settings later and receive a reminder, Tap Leave & get reminder ・For details on Google accounts, see "Creating a Google Account."...
- Page 18 Skip Fingerprint Only screen lock ・ After Tapping ・To not set fingerprint authentication or a screen lock, Tap Add a card , follow onscreen prompts to Skip this step save card information. Follow onscreen prompts to set unlocking using fingerprint Set each item Done for now and a screen lock...
-
Page 19: Using A Google Account
Using a Google Account Google Use a Google account and get more convenience with Google services. A Google account is required to use some services or fully use some applications. Google Account Cautions Be careful not to forget your Google account mail address or password. - Page 20 Set date of birth and gender Next Next Select Gmail address Next Check the privacy policy and terms of usage, then I agree ・ To create a Gmail address, Create your own Gmail address Enter username (mail address) Next Set/check Google Services Enter password Next Accept...
- Page 21 Logging In with a Google Account Enter username (mail address or phone number) Next In Home Screen, (Settings) Enter password Next Accounts & sync Follow onscreen prompts Add account You are signed in to your Google Account. Google Window for signing in to a Google account opens.
-
Page 22: Unlocking Screen
Unlocking Screen Unlocking Screen Screen Lock While screen is locked, press Power Key After a period of inactivity, Display turns off to save battery power (Screen lock active). Screen lock prevents accidental Touchscreen operation. Lock screen appears. Swipe/Flick lock screen up ・Press Power Key while Display is on to lock screen manually. -
Page 23: Basic Operations
Basic Operations Basic Operation..............22 Using Touchscreen............22 Silent Mode............... 23 Airplane Mode..............24 Text Entry.................24 Updating Software............25... -
Page 24: Basic Operation
Basic Operation Using Touchscreen Handset uses a touchscreen-type Display. Operate with your Selecting Options and Navigating fingers on Display. Screens Tap items, icons, onscreen keys, etc. to open assigned items. Contact Display lightly and briefly. Touch & Hold ・ To return to the previous screen, Tap Contact Display lightly;... -
Page 25: Silent Mode
Silent Mode Pinch/Spread Mute ringtones and other handset sounds to avoid disturbing Contact Display lightly, then close/widen fingers. others around you. Silent Mode Cautions Camera shutter, video start/stop tones, Alarm, video/ music, etc. sound even in Silent mode. Using Silent Mode Press Volume Key Volume adjustment bar appears. -
Page 26: Airplane Mode
Airplane Mode Text Entry Disable all functions that emit signals. Handset remains Keyboards powered on. Enter text with onscreen QWERTY keyboard by Tapping each Using Airplane Mode character individually, or by using Glide typing feature and sliding finger from character to character (on by default). Touch &... -
Page 27: Updating Software
Updating Software Switching Character Types (Entry Modes) Check whether updates are required via the Internet, and update as required. In QWERTY keyboard, Tap Before Updating Software Saved data may be lost depending on condition of handset (malfunctioning, damaged, water seepage, etc.). It is recommended that you back up important data before updating software. - Page 28 Check for update Continue by following onscreen prompts. Software update starts.
-
Page 29: Handset Interface
Handset Interface Handset Screens............... 28 Status Bar................. 29 Using Notifications Window..........30 Using Quick Settings............30... -
Page 30: Handset Screens
Handset Screens Navigation Bar Tap or Touch & Hold icons on Navigation Bar (Display bottom) Home Screen Layout for the following functions/operations. Also use gesture action. Item Description Item Description (Back) Return to previous screen. Swipe/Flick down for Notifications Tap for Home Screen. Status Bar Window. -
Page 31: Status Bar
Status Bar Main Status Indicators Status Bar appears at the top of Display. Notification Status Indicators appearing in Status Bar include the Indicators for new mail, etc. and Status Indicators for handset following. appear here. Indicator Description Status Bar Layout Bluetooth ®... -
Page 32: Using Notifications Window
Using Notifications Window Using Quick Settings Swipe/Flick Status Bar down for Notifications Window. Open Swipe/Flick Notifications Window down to open Quick notifications and check handset status. Settings. Tap icons in Quick Settings to enable/disable functions. Opening Notifications Window Opening Quick Settings Swipe/Flick Status Bar down Swipe/Flick Status Bar down Notifications Window opens. - Page 33 Quick Settings Layout Showing Quick Settings in Lock Screen Swipe/Flick Status Bar down Toggle Wi-Fi on/off Toggle mobile data on/off Toggle Bluetooth on/off ® Capture screenshot Lock screen Toggle access to location on/off Turn flashlight on/off Enter/exit Silent mode Toggle screen auto brightness on/off Toggle Airplane mode on/off Activate (Scanner)
- Page 34 Toggle NFC on/off Edit Quick Settings Position of function button sheet Adjust screen brightness...
-
Page 35: Phone
Phone Placing/Answering Calls........... 34 Optional Services..............36 Phone Number..............42 Using Contacts..............42... -
Page 36: Placing/Answering Calls
Placing/Answering Calls Placing Calls How to dial directly to make a call and answer a call, as well as options when a call is arriving/during a call are described. In Home Screen, (Phone) Phone Function Emergency Location Report Making emergency calls (110, 119 or 118) automatically reports handset location to corresponding agency (police, etc.). - Page 37 Answering Calls Swipe/Flick up when call is arriving Handset dials number. Call begins when other party answers. Call begins. To end call, To end call, Call ends. Call ends. Calling the Emergency Number When the Phone's Screen is Locked Arriving Call Operations In lock screen, Swipe/Flick up EMERGENCY Enter...
-
Page 38: Optional Services
Optional Services In-Call Screen Layout/In-Call Operations While in a call, Tap an icon to use these functions. Optional Services The following optional services are available. Service Description Call Divert calls to a preset number when out forwarding of service area or unable to answer. Divert calls to a Voicemail Center to take Voicemail messages when out of service area or... - Page 39 Using Call Forwarding Voice Mail / Call Forwarding Call Forwarding ON In Home Screen, (Phone) Ring Time Select ring time Settings Calls Telephone Number of Forwarding Destination Enter phone number to forward to REGISTER Call service settings Call service settings open. CONFIRM Voice Mail / Call Forwarding Set call forwarding.
- Page 40 Using Voicemail Voice Mail / Call Forwarding Voice Mail ON In Home Screen, (Phone) Ring Time Select ring time Settings Calls CONFIRM Call service settings Voicemail is set. ・ appears in Status Bar for new message. Dial "1416" then Call service settings open. follow voice guidance.
- Page 41 Using Call Waiting for "Call Waiting" ( Requires separate subscription. In Home Screen, (Phone) Call Waiting is set. ・When call arrives during another call, tone sounds. Swipe/ Flick up to begin call. Settings Calls Call Service settings Call service settings open.
- Page 42 Using Group Calling Using Caller ID Notification Requires separate subscription. In Home Screen, (Phone) During a call, Add call Settings Calls Enter number Advanced settings Caller ID When call connects, Merge Caller ID Network default Hide number Show Group Calling starts. number Notify Caller ID is set.
- Page 43 Using Call Barring Outgoing Call Barring Incoming Call Barring Restrict outgoing calls to specific numbers. outgoing/incoming restriction ・When attempting to place call while calling is restricted, a message appears. Message may take time to appear in some areas. In Home Screen, (Phone) Call Barring is set.
-
Page 44: Phone Number
Phone Number Using Contacts Save phone numbers, mail addresses, etc. to Contacts. Checking Your Phone Number Contacts Cautions Information saved in Contacts may be lost or changed if In Home Screen, (Settings) About phone Battery is left uncharged. Accident or malfunction may also cause loss or change to information. - Page 45 Set each item ・ Tap More fields to add a residential address, chat, etc. Save Contact is added. Saving Contacts from Call Window Save a number entered in call window directly to Contacts. In Home Screen, (Phone) Tap dialpad to enter number to save Create new contact each item...
-
Page 47: Messaging
Messaging Using +Message..............46 Using Gmail............... 46... -
Page 48: Using +Message
Using +Message Using Gmail Use Google's webmail service as well as your work/personal Using +Message email. For information on +Message, see SoftBank Website below. Creating/Sending Mail http://help.mb.softbank.jp/app/plusmessage/sp/ (Japanese) In Home Screen, (Google) (Gmail) Mail list opens. Mail composition window opens. - Page 49 Enter recipient/subject/mail text Mail is sent. Operations when Composing Mail Adding Cc/Bcc In mail composition window, in To field Enter recipient Attaching Files In mail composition window, Attach file Select where file is saved Select file to attach ・ Select Insert from Drive to attach files saved in Google Drive.
-
Page 51: Internet
Internet Using Chrome..............50... -
Page 52: Using Chrome
Using Chrome Enter search words or URL Use Chrome simply by entering words to search and URLs. TLS (Transport Layer Security) is a protocol for encrypting sent/received data. While in a screen connected by TLS, data is encrypted to safely send/receive private information, credit card numbers, corporate secrets, etc., and provide protection against online threats (eavesdropping, falsification, impersonation, etc.). - Page 53 Adding Bookmarks Show Web page to add Current Web page is added to Bookmarks. Bookmark Operations Editing Bookmarks In Chrome, Bookmarks Touch & Hold target bookmark Edit items Deleting Bookmarks In Chrome, Bookmarks Touch & Hold target bookmark...
-
Page 55: Camera
Camera Capturing Still Images/Videos......... 54 Viewing Captured Still Images/Videos (Gallery).... 56... -
Page 56: Capturing Still Images/Videos
Capturing Still Images/Videos Aim Camera at subject Still Image/Video Formats File Format for Still Images File format for still images is JPEG. File Format for Videos File format for videos is MPEG-4. ・ Tap Display Swipe/Flick Display up/down to adjust Camera Cautions brightness. - Page 57 Capturing Videos In Home Screen, (Camera) Video recording starts. ・Depending on setting, press Volume Key to start/stop video recording. To stop recording, Photo Viewfinder appears. ・If confirmation appears, follow onscreen instructions. Video Video recording stops and video is saved. Video Viewfinder appears. ・Alternatively, Drag shooting mode to the right for Video Viewfinder.
-
Page 58: Viewing Captured Still Images/Videos (Gallery)
Viewing Captured Still Images/ Videos (Gallery) Tap still image/video Showing Still Images/Videos Show captured or downloaded still images and videos. Supported file formats are as follows. Type File Format JPEG, HEIF, GIF, PNG, BMP, WBMP, WEBP, Still image Still image/video window opens. MP4, MKV, AVI, WMV, WEBM, 3GP, ASF, Video MOV, TS... -
Page 59: Application Basics
Application Basics Applications...............58 Adding/Deleting Application..........59... -
Page 60: Applications
Applications ALLOW ONLY WHILE USING THE APP Setting Required Permissions for Applications Set the operation of applications when activating for the first time. The type and content of a confirmation differs with the application. Activating (Compass) for the first time is described as an example. -
Page 61: Adding/Deleting Application
Adding/Deleting Application Install Download a variety of applications (free/paid) from Google Play. Change the setting of downloaded applications to enable manual or automatic updates. Log in to your Google account beforehand. Installing Applications Many different kinds of applications can be installed on handset from Google Play (provided by Google Inc.). - Page 62 Purchasing Paid Applications Enter password for Google account Verify In Home Screen, (Play Store) Google Play appears. ・If confirmation appears, follow onscreen instructions. Tap paid application Application is downloaded and installed. ・If confirmation appears, follow onscreen instructions. Purchased Applications Payment Tap amount Pay only once.
- Page 63 Updating Applications Setting Automatic Updates for Individual Applications In Google Play, My apps & games In Home Screen, (Play Store) application Enable auto update ・Auto-updating not settable for some applications. Google Play appears. ・If confirmation appears, follow onscreen instructions. My apps & games Tap application to update Update The application is downloaded and installed.
-
Page 65: Wi-Fi Bluetooth
Wi-Fi Bluetooth Connecting by Wi-Fi............64 Using Bluetooth Function..........65 ®... -
Page 66: Connecting By Wi-Fi
Connecting by Wi-Fi Tap Wi-Fi network Handset supports Wi-Fi (wireless LAN). Access the Internet via a household Wi-Fi connection environment. Automatic Updates for Optimizing Wi- Fi Connection While using Wi-Fi, updates for optimizing connection may be received or applied automatically. Selecting and Connecting to a Wi-Fi Network Enter password... -
Page 67: Using Bluetooth ® Function
Using Bluetooth Function ® Bluetooth Connect to a Bluetooth -capable wireless phone, etc. for calls ® or to a hands-free device such as a headset. Hints Cannot use Bluetooth ® Is handset in Airplane mode? If in Airplane mode, Bluetooth function is disabled. - Page 69 Handset Settings Handset Settings.............. 68 About Phone (Handset Information) Settings....69 Data Usage Settings............69 Lock Screen Settings............70 Display Settings..............70 Sound & Vibration Settings..........71 Home Screen Settings............71 Password & Security Settings.........72 Battery & Performance Settings........73 Additional Settings............75 Other Settings..............75...
-
Page 70: Handset Settings
Handset Settings Google Make settings for Google services. Accounts & Make account and sync settings. The User Guide describes main setting options. sync Make privacy settings such as a Privacy permissions manager and password Handset Settings display. Location Make settings for location information. Customize how each function operates on handset. -
Page 71: About Phone (Handset Information) Settings
About Phone (Handset Data Usage Settings Information) Settings Check amount of mobile data transfers and set limit on usage. Check handset name, phone number, etc. Checking Data Usage About Phone (Handset Information) Settings In Home Screen, (Settings) Settable items are the following. Item Description Check whether updates are required via... -
Page 72: Lock Screen Settings
Lock Screen Settings Display Settings Make lock screen settings. Make settings for Display such as brightness, text size, etc. Lock Screen Settings Display Settings Settable items are the following. Settable items are the following. Item Description Item Description Set delay until Display turns off after Light mode/ Sleep Set Light mode or Dark mode. -
Page 73: Sound & Vibration Settings
Sound & Vibration Settings Home Screen Settings Make ringtone, operation tone, and other sound settings. Make settings for Home Screen and application history window. Sound & Vibration Settings Home Screen Settings Settable items are the following. Settable items are the following. Item Description Item... -
Page 74: Password & Security Settings
Password & Security Settings Enabling SIM PIN Set password and security functions such as screen lock, PIN, When PIN is enabled, a window for entering PIN appears to etc. allow handset use each time handset is powered on with SIM Card installed. -
Page 75: Battery & Performance Settings
Battery & Performance Settings Changing SIM PIN Check Battery usage and make settings to save battery power. First enable SIM PIN to change PIN. Battery & Performance Settings In Home Screen, (Settings) Passwords & security Settable items are the following. Privacy Item Description... - Page 76 Setting Whether Display Remains Off (Screen Setting Whether to Receive Notification when Lock) when Notification Arrives Battery Consumed Quickly In Home Screen, (Settings) Battery & In Home Screen, (Settings) Battery & performance Battery saver Don't wake performance Battery drain notifications screen for notifications ・...
-
Page 77: Additional Settings
Additional Settings Other Settings Set date and time, language and input, accessibility, etc. Security Status Additional Settings Set location to be shown if handset is lost, whether to scan handset for security issues, etc. Settable items are the Settable items are the following. following. - Page 78 Connection & Sharing Notifications & Control Center Make settings for VPN, Airplane mode, data usage, etc. Make settings for application notifications, Status Bar, etc. Settable items are the following. Settable items are the following. Item Description Item Description Mi Share Make Mi Share settings.
- Page 79 Privacy Protection Digital Wellbeing & Parental Controls Make permission settings. Settable items are the following. Manage time that handset is used and set parental limitations on use. Settable items are the following. Item Description Item Description Location Allow use of location per application. XXm/XXh Contacts Allow use of contacts per application.
- Page 80 Google Privacy Make settings for Google services. Settable items are the Make privacy settings such as a permissions manager and following. password display. Settable items are the following. Item Description Item Description Manage Set applications with permitted usage per your Google Make Google account settings.
- Page 81 Global Services Global Roaming..............80 Making Calls while Abroad..........81...
- Page 82 Global Roaming Tap provider Handset is Global roaming Service eligible. Use the same handset number outside Japan. Handset connects to an appropriate cellular provider automatically be default. To use a specific provider, select manually. Be sure to also change network type and data roaming settings.
- Page 83 Making Calls while Abroad Changing Data Roaming Setting See SoftBank Website to learn about roaming areas/services, etc. https://www.softbank.jp/en/mobile/service/global/ In Home Screen, (Settings) SIM card & mobile networks International Calls to Japan and Other Countries from Abroad In Home Screen, (Phone) Advanced settings Phone opens.
- Page 84 Calls to Landline Phones/Cell Phones in Country of Stay Enter country code then other party number (omit first 0) Place calls the same way you would within Japan. ・Do not enter country code or omit first 0 from phone numbers. In Home Screen, (Phone) ・Do not omit first 0 from phone numbers when dialing Italy...
- Page 85 Handset dials number. Call begins when other party answers.
- Page 87 Warranty/Specifications/ Customer Services Warranty & After-Sales Service........86 Specifications..............86 Customer Service.............. 87...
- Page 88 Warranty & After-Sales Service Specifications Warranty Handset ・The warranty period is 1 year from the date of newly Item Description purchase. Dimensions (W ・Repairs will be done based on terms of free repair service. Approx. 77.3 x 162.0 x 9.1 mm x H x D) Terms of free repair service is referred to SoftBank website.
- Page 89 Customer Service If you encounter any difficulties or are unsure of anything, contact customer service. SoftBank Customer Support ・From a SoftBank handset, dial toll free at 157 ・From a landline/IP phone, dial toll free at 0800-919-0157 ・Business hours : Call 10:00am - 7:00pm / Chat 9:00am - 8:00pm Smartphone Technical Support Center ・From a SoftBank handset, dial toll free at 151...
- Page 91 Safety Precautions Safety Precautions............90 Material List..............98 Important Product Information........99 Bluetooth /Wi-Fi (WLAN)..........100 ® Intellectual Property Rights..........101 Declaration..............102 Radio Wave Exposure and Specific Absorption Rate (SAR) Information..............103...
-
Page 92: Safety Precautions
Safety Precautions Handset, SIM Card, AC Charger (Complimentary Sample), USB Type- C™ Cable (Complimentary Sample), SIM Read safety precautions before using handset. Removal Pin (Complimentary Sample), Observe precautions to avoid injury to self or others, or Soft Case (Complimentary Sample) damage to property. - Page 93 Do not subject handset to excessive force or break it. Especially when carrying it in your Do not drop, stomp, throw, or otherwise pocket, do not hit it or press it between other subject to strong force, impact, or vibration. objects.
- Page 94 Handset Do not use damaged handsets or related accessories. May cause fire, burns, injury, etc. Do not throw handset into a fire or apply heat. May cause fire, burns, injury, etc. Do not place handset on unstable/uneven surfaces. Be extra careful while the vibrator is set.
- Page 95 For use in hospitals, follow the medical facility's instructions. Do not light up or flash the Flash/Light with the light-emitting part close to other people's Power off handset in a place where its use is prohibited. eyes. Keep away from infants. Cancel any functions that turn on handset automatically.
- Page 96 If Display or Camera lens breaks, be careful with broken parts and exposed handset parts. When using the motion sensor, ensure the safety of the surroundings and hold handset Touching the broken or exposed part may cause burns, firmly, not swinging around more than injury, electric shock, etc.
- Page 97 AC Charger (Complimentary Sample) / USB Type-C™ Cable (Complimentary Sample) Before using handset in a car, check with the car manufacturer or dealer for information about the effects of radio waves. Handset radio waves may affect the vehicle's electronic equipment in some car models. In that case, stop using handset immediately.
- Page 98 Do not apply unnecessary force where Insert or remove the connector of USB Type- connected when handset and USB Type-C™ C™ Cable (complimentary sample) straight Cable (complimentary sample) are connected. against the port without applying force such as pulling the cord. May cause fire, burns, injury, electric shock, etc.
- Page 99 SIM Card Handset Use & Electronic Medical Equipment When handling SIM Cards, be careful of the cut surface so as not to hurt your body parts such Persons with an implanted pacemaker or as fingers. defibrillator should keep handset at least 15 cm away from the device.
-
Page 100: Material List
Material List USB Type-C™ Cable (Complimentary Sample) Redmi Note 9T Main Unit Part Material/Surface Treatment USB Type-A Copper/gold plating Part Material/Surface Treatment Terminal Earpiece/ USB Type-A PC plastic/- Steel/nickel plating Speaker Slot SIM Card/SD USB Type-A PC plastic (10% GF)/coated... -
Page 101: Important Product Information
Important Product Information Internal Battery ・Battery is built in and is not removable. Handset, AC Charger (Complimentary ・Internal Battery replacement incurs fees and requires Sample), USB Type-C™ Cable handset submission to a SoftBank Shop. Contact a SoftBank (Complimentary Sample), SIM Removal Shop or Customer Service. -
Page 102: Bluetooth /Wi-Fi (Wlan)
Bluetooth /Wi-Fi (WLAN) ® Emergency Alerts Connection/operation may not be possible with some ・Receive setting is enabled at time of purchase. Bluetooth /Wi-Fi (wireless LAN) devices. ® ・If "Use full volume" is disabled, alarm does not sound in Handset Bluetooth /Wi-Fi (wireless LAN) communication is ®... -
Page 103: Intellectual Property Rights
Intellectual Property Rights Cautions for General Use The frequency band used by handset Bluetooth /Wi-Fi ® Copyrights and Portrait Rights (wireless LAN) functions is also used for operation by household appliances (microwave ovens) and industrial/ scientific/medical equipment as well as by in-place radio Copyrighted contents you recorded or obtained from Websites stations (requiring a license) and specific low-power radio pages using this product by downloading or other means, such... -
Page 104: Declaration
・To the maximum extent permitted by applicable law, under trademarks or registered trademarks of BB Softservice Corp. no circumstances shall Xiaomi or any of its licensees be ・McAfee and the McAfee logo are trademarks of McAfee LLC responsible for any loss of data or income or any special, in the United States and other countries. -
Page 105: Radio Wave Exposure And Specific Absorption Rate (Sar) Information
Absorption Rate (SAR) Information smartphone/3G model https://www.softbank.jp/mobile/support/sar/ (Japanese) "A001XM" here refers to this mobile phone "Redmi Note 9T". European RF Exposure Information Specific Absorption Rate (SAR) for This Product (for Japan) Your mobile device is a radio transmitter and receiver. It is designed not to exceed the limits for exposure to radio waves This mobile phone 【A001XM】... - Page 106 FCC RF Exposure Information Your handset is a radio transmitter and receiver. It is designed and manufactured not to exceed the emission limits for exposure to radio frequency (RF) energy set by the Federal Communications Commission of the U.S. Government. The guidelines are based on standards that were developed by independent scientific organization through periodic and thorough evaluation of scientific studies.
- Page 107 About Phone (Handset Information) Settings....69 About the User Guide............3 Adding/Deleting Application..........59 Additional Settings............75 Airplane Mode..............24 Applications...............58 Redmi Note 9T User Guide Index B Basic Operation..............22 Battery & Performance Settings........73 Bluetooth /Wi-Fi (WLAN)..........100 ®...
- Page 108 O Optional Services..............36 Other Settings..............75 P Parts & Functions.............. 6 Password & Security Settings.........72 Phone Number..............42 Placing/Answering Calls........... 34 Power On/Off..............13 R Radio Wave Exposure and Specific Absorption Rate (SAR) Information..............103 S Safety Precautions............90 SAR...................103 Silent Mode...............
- Page 110 Redmi Note 9T User Guide April 2021, First Edition SoftBank Corp. Visit SoftBank Shop for assistance Model : Redmi Note 9T Importer : Xiaomi Technology Japan Co., Ltd. Manufacturer : Xiaomi Communications Co., Ltd.
Need help?
Do you have a question about the Redmi Note 9T and is the answer not in the manual?
Questions and answers