
Summary of Contents for Tormach BT30
- Page 1 TECHNICAL DOCUMENT Version 0521A INSTALLATION GUIDE BT30 SPINDLE UPGRADE KIT FOR 1100M+ Page 1 Specifications subject to change without notice. ©Tormach® 2021...
-
Page 2: Product Information
PURPOSE PURPOSE This document gives instructions on installing the BT30 Spindle Upgrade Kit for 1100M+. LOOKING FOR A VIDEO? Before you begin, select the image below to watch a walk-through video of this entire installation procedure. PRODUCT INFORMATION Product: BT30 Spindle Upgrade Kit for 1100M+ (PN 50472) -
Page 3: Required Tools
Torque wrench WD-40® (or similar water displacement oil) BEFORE YOU BEGIN M+ Upgrade Required You must use servo motors with the BT30 spindle. If you haven't yet done so, install 1100M+ Servo Upgrade Kit (PN 39274). Power Drawbar Required You must have a power drawbar to use with the BT30 spindle. Depending on what's installed on your machine, do one of the following: TTS Power Drawbar Installed Use the... - Page 4 Before you begin to install this kit, you must verify that the PathPilot controller is updated to the latest version of PathPilot. This is because only PathPilot v2.4.2 and later has settings required to use a BT30 spindle mill configuration.
- Page 5 Figure 4: Update button on the Status tab. 6. From the Software Update dialog box, select Browse. Figure 5: Software Update dialog box. Page 5 ©Tormach® 2021 tormach.com Specifications subject to change without notice. TD10705: Installation Guide: BT30 Spindle Upgrade Kit for 1100M+ (0521A)
- Page 6 The update file is installed on the PathPilot controller. 9. Follow the on-screen instructions to restart the PathPilot controller. Page 6 ©Tormach® 2021 tormach.com Specifications subject to change without notice. TD10705: Installation Guide: BT30 Spindle Upgrade Kit for 1100M+ (0521A)
-
Page 7: Installation
4. Disconnect any pneumatic air lines on the machine, and verify that the lines are empty. 5. Open the spindle cover and lock it in the up position. Page 7 ©Tormach® 2021 tormach.com Specifications subject to change without notice. TD10705: Installation Guide: BT30 Spindle Upgrade Kit for 1100M+ (0521A) - Page 8 1. Confirm that the top air line is labeled Top, and the bottom air line is labeled Bottom. If the air lines aren't labeled, label them. Page 8 ©Tormach® 2021 tormach.com Specifications subject to change without notice. TD10705: Installation Guide: BT30 Spindle Upgrade Kit for 1100M+ (0521A)
- Page 9 2. Disconnect the 1/4 in. air lines from the top and bottom push-to-connect fittings on the power drawbar cylinder. Figure 3: Power drawbar air lines disconnected. Page 9 ©Tormach® 2021 tormach.com Specifications subject to change without notice. TD10705: Installation Guide: BT30 Spindle Upgrade Kit for 1100M+ (0521A)
- Page 10 Before disassembling the original drawbar, you must put on safety eyewear that meets ANSI Z87+. Page 10 ©Tormach® 2021 tormach.com Specifications subject to change without notice. TD10705: Installation Guide: BT30 Spindle Upgrade Kit for 1100M+ (0521A)
- Page 11 3. Carefully remove the spindle lock arm. Figure 6: Spindle lock arm removed from the original drawbar assembly. Page 11 ©Tormach® 2021 tormach.com Specifications subject to change without notice. TD10705: Installation Guide: BT30 Spindle Upgrade Kit for 1100M+ (0521A)
- Page 12 7. Remove the existing drawbar assembly (including its spring washers) and the R8 collet with a 13 mm and 19 mm open-ended wrench. Page 12 ©Tormach® 2021 tormach.com Specifications subject to change without notice. TD10705: Installation Guide: BT30 Spindle Upgrade Kit for 1100M+ (0521A)
- Page 13 8. Release the tension from the spindle belt, and then remove it from the machine. Figure 10: Removing the spindle belt. Page 13 ©Tormach® 2021 tormach.com Specifications subject to change without notice. TD10705: Installation Guide: BT30 Spindle Upgrade Kit for 1100M+ (0521A)
- Page 14 Figure 12: Removing the retention nut. 11. Remove the power drawbar flange. Note: You'll remove the spindle pulley later in this procedure. Page 14 ©Tormach® 2021 tormach.com Specifications subject to change without notice. TD10705: Installation Guide: BT30 Spindle Upgrade Kit for 1100M+ (0521A)
- Page 15 15. Center the machine table: from the PathPilot interface, in the MDI Line DRO field, type G20 G53 G1 X9 Y-5.5 Z0 F20. Then select the Enter key. The machine table moves to the center position. Page 15 ©Tormach® 2021 tormach.com Specifications subject to change without notice. TD10705: Installation Guide: BT30 Spindle Upgrade Kit for 1100M+ (0521A)
- Page 16 20. Continue to jog the Z-axis up (+Z) to raise the head casting until you can remove the spindle. 21. Discard the following items: Drawbar Power drawbar flange R8 collet Retention nut Spindle Spindle pulley Page 16 ©Tormach® 2021 tormach.com Specifications subject to change without notice. TD10705: Installation Guide: BT30 Spindle Upgrade Kit for 1100M+ (0521A)
- Page 17 6. Clean the inside of the spindle motor housing with Simple Green (or similar mild degreaser). 7. Find the encoder read head and its two button head cap screws provided in this kit. Page 17 ©Tormach® 2021 tormach.com Specifications subject to change without notice. TD10705: Installation Guide: BT30 Spindle Upgrade Kit for 1100M+ (0521A)
- Page 18 Leave the encoder just loose enough to make final adjustments later in this procedure. Figure 16: Encoder read head installed on the head casting. Page 18 ©Tormach® 2021 tormach.com Specifications subject to change without notice. TD10705: Installation Guide: BT30 Spindle Upgrade Kit for 1100M+ (0521A)
- Page 19 12. While holding one of the cable tie mounts, secure the encoder wire with one cable tie. Repeat for all cable tie holders. Once finished, verify that the encoder wire won't become entangled or damaged. Page 19 ©Tormach® 2021 tormach.com Specifications subject to change without notice. TD10705: Installation Guide: BT30 Spindle Upgrade Kit for 1100M+ (0521A)
- Page 20 Pins 2 through 8 follow in sequential order. Figure 19: Triangle on the terminal block, which indicates the location of pin 1. Page 20 ©Tormach® 2021 tormach.com Specifications subject to change without notice. TD10705: Installation Guide: BT30 Spindle Upgrade Kit for 1100M+ (0521A)
- Page 21 Figure 20: Encoder wire connected to J9 on the ECM v1.5 board. 23. Organize the wires into the wire troughs. 24. Put back the top wire trough cover. Page 21 ©Tormach® 2021 tormach.com Specifications subject to change without notice. TD10705: Installation Guide: BT30 Spindle Upgrade Kit for 1100M+ (0521A)
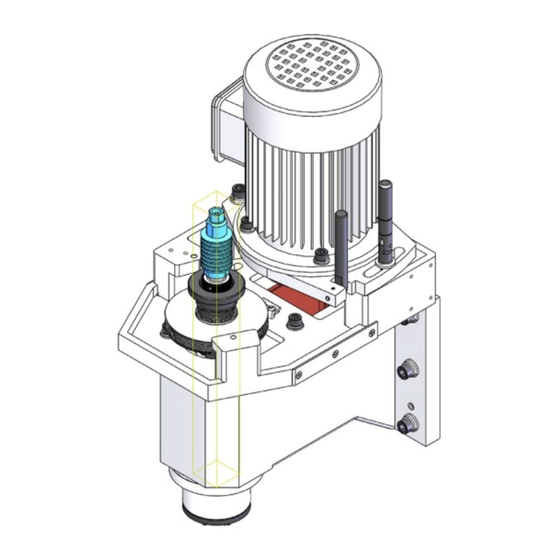
- Page 22 3. Install the motor and its pivot plate assembly back onto the machine. Install the BT30 Spindle and Align the Encoder Tip! For more information while installing BT30 components on the machine, it may help to refer to the "Spindle Cartridge Exploded View" (page 39).
- Page 23 Step 22. Figure 22: Jam nut and disc spring compression nut removed from the drawbar. Page 23 ©Tormach® 2021 tormach.com Specifications subject to change without notice. TD10705: Installation Guide: BT30 Spindle Upgrade Kit for 1100M+ (0521A)
- Page 24 Disc springs, 16 Disc spring guide Figure 23: Disc springs and disc spring guide removed from the drawbar. Page 24 ©Tormach® 2021 tormach.com Specifications subject to change without notice. TD10705: Installation Guide: BT30 Spindle Upgrade Kit for 1100M+ (0521A)
- Page 25 Tip! For a better grip on the pulley, we recommend using the old 260 Poly-V belt to hold it in place. Page 25 ©Tormach® 2021 tormach.com Specifications subject to change without notice. TD10705: Installation Guide: BT30 Spindle Upgrade Kit for 1100M+ (0521A)
- Page 26 4. Put two 3 in. (7.6 cm) blocks of wood on the machine table on either side of the spindle hole. 5. Put a thin coating of WD-40® (or similar water displacement oil) on the outside of the spindle. Page 26 ©Tormach® 2021 tormach.com Specifications subject to change without notice. TD10705: Installation Guide: BT30 Spindle Upgrade Kit for 1100M+ (0521A)
- Page 27 Figure 28: Z-axis jogged down to move the head casting over about half of the BT30 spindle. 8. Slowly jog the Z-axis down (-Z) until the head casting is flush with the spindle flange.
- Page 28 18. Reinstall the retention nut with the provided spanner wrench. Secure it by tightening its three set screws with a 3 mm hex wrench. Page 28 ©Tormach® 2021 tormach.com Specifications subject to change without notice. TD10705: Installation Guide: BT30 Spindle Upgrade Kit for 1100M+ (0521A)
- Page 29 3. Remove the lower wire trough cover from the electrical cabinet and set it aside. 4. Remove the access panel from the VFD with a flat-blade screwdriver and set it aside. Page 29 ©Tormach® 2021 tormach.com Specifications subject to change without notice. TD10705: Installation Guide: BT30 Spindle Upgrade Kit for 1100M+ (0521A)
- Page 30 8. Find the new VFD provided in this kit. Then, remove its access panel with a flat-blade screwdriver, and install it in the electrical cabinet with the four mounting screws that you set aside in Step 6. Page 30 ©Tormach® 2021 tormach.com Specifications subject to change without notice. TD10705: Installation Guide: BT30 Spindle Upgrade Kit for 1100M+ (0521A)
- Page 31 (and the "Spindle Drive (Sheet 4)" (page 33) wire schematic) to verify all connections. Figure 31: VFD wiring. Figure 32: VFD wiring. Page 31 ©Tormach® 2021 tormach.com Specifications subject to change without notice. TD10705: Installation Guide: BT30 Spindle Upgrade Kit for 1100M+ (0521A)
-
Page 32: Verify The Installation
2. From the PathPilot interface, on the Main tab, in the MDI Line DRO field, type ADMIN CONFIG. Then select the Enter key. In the dialog box, select OK. 3. From the Tormach Machine Configuration screen, select 1100MX. Then, select Save and Start. The PathPilot interface loads. 4. Bring the machine out of reset and reference it. - Page 33 RESOURCES RESOURCES Spindle Drive (Sheet 4) Page 33 ©Tormach® 2021 tormach.com Specifications subject to change without notice. TD10705: Installation Guide: BT30 Spindle Upgrade Kit for 1100M+ (0521A)
- Page 34 MACHINE CONTROL BOARD (SHEET 5) Machine Control Board (Sheet 5) Page 34 ©Tormach® 2021 tormach.com Specifications subject to change without notice. TD10705: Installation Guide: BT30 Spindle Upgrade Kit for 1100M+ (0521A)
- Page 35 SPINDLE HEAD EXPLODED VIEW Spindle Head Exploded View Page 35 ©Tormach® 2021 tormach.com Specifications subject to change without notice. TD10705: Installation Guide: BT30 Spindle Upgrade Kit for 1100M+ (0521A)
- Page 36 Pin, 4 mm - 16 mm (PN 30395) Washer, Split Lock, M12 (PN 30321) Washer, Flat, M12 (PN 30322) Pin, Taper, 8 mm - 40 mm (PN 30320) Page 36 ©Tormach® 2021 tormach.com Specifications subject to change without notice. TD10705: Installation Guide: BT30 Spindle Upgrade Kit for 1100M+ (0521A)
- Page 37 Pin, 3.5 mm × 9 mm (PN 38353) Power Drawbar Spring Washer (PN 31319) Screw, Socket Head Cap, M4 × 0.7 - 16 (PN 37751) Page 37 ©Tormach® 2021 tormach.com Specifications subject to change without notice. TD10705: Installation Guide: BT30 Spindle Upgrade Kit for 1100M+ (0521A)
- Page 38 R8-TTS Spindle Cartridge Assembly, 1100M (PN 37269) includes the following balanced and matched parts: #3, #4, #5, #46, and #47. Page 38 ©Tormach® 2021 tormach.com Specifications subject to change without notice. TD10705: Installation Guide: BT30 Spindle Upgrade Kit for 1100M+ (0521A)
- Page 39 SPINDLE CARTRIDGE EXPLODED VIEW Spindle Cartridge Exploded View Page 39 ©Tormach® 2021 tormach.com Specifications subject to change without notice. TD10705: Installation Guide: BT30 Spindle Upgrade Kit for 1100M+ (0521A)
- Page 40 O-Ring, 9 mm × 12 mm × 1.5 mm, Buna-N (PN 39584) Nut, Bearing, M25 × 1.5 (PN 39589) Drawbar Core Assembly, MX BT30 Spindle (PN 39599) — Page 40 ©Tormach® 2021 tormach.com Specifications subject to change without notice. TD10705: Installation Guide: BT30 Spindle Upgrade Kit for 1100M+ (0521A)
-
Page 41: Troubleshooting
TROUBLESHOOTING TROUBLESHOOTING If you're having troubles with your BT30 spindle, read the following troubleshooting procedures: Machining Operations are Loud ("Chattery") Can't Load or Unload a Tool, or the Spindle's Drawbar Drags Against the Power Drawbar Cylinder's Piston Bolt Machining Operations are Loud ("Chattery") Cause: Inappropriate cutting parameters or CAM settings. - Page 42 If you find any cracked or fractured springs, replace all 16 disc springs in the stack with Disc Spring, 40 mm × 20.4 mm × 2.0 mm × 3.10 mm (PN 39689). Page 42 ©Tormach® 2021 tormach.com Specifications subject to change without notice. TD10705: Installation Guide: BT30 Spindle Upgrade Kit for 1100M+ (0521A)
- Page 43 Cause: Incorrect pull stud used for the machine. Probability How-To Steps Verify that all pull studs used in the machine are of the appropriate type. NOTICE! You must only use BT30-45° (ISO7388-3-JF30-45) type pull studs with this machine (Pull Stud, BT30-45° (PN 37553)). Other pull stud types or angles can cause damage to the pull stud clamping mechanism.
- Page 44 0.5 mm (0.020 in.) of the spindle's spring stack when there's no tool loaded in the spindle. 2. Secure the jam nut. Page 44 ©Tormach® 2021 tormach.com Specifications subject to change without notice. TD10705: Installation Guide: BT30 Spindle Upgrade Kit for 1100M+ (0521A)
- Page 45 How-To Steps Very Low 1. Use the BT30 Clamping Unit Installation Tool (PN 50385) that was provided either with your machine or with your upgrade kit to verify that the clamping unit is securely tightened onto the drawbar shaft. If the clamping unit is loose: a.
Need help?
Do you have a question about the BT30 and is the answer not in the manual?
Questions and answers