
Summary of Contents for B&W Tek NanoRam Series
- Page 1 ® NanoRam Series Handheld Raman System Quick Start Manual 19 Shea Way, Newark, DE 19713, USA Tel: +1 (302) 368-7824 Fax: +1 (302) 368-7830 Web: www.bwtek.com • • • 290020255-J (2017/07/28) Copyright 2017 B&W Tek...
-
Page 2: Table Of Contents
® NanoRam Handheld Raman Series Table of Contents OVERVIEW ..............................4 DIAGRAMS OF THE INSTRUMENTS ......................8 1.1. NANORAM ..............................8 1.2. NANORAM MINI ............................9 1.3. Warranty Seal Label ..........................10 1.4. Manufacturer’s Identification Label ......................10 KNOWING YOUR INSTRUMENT ......................11 2.1. - Page 3 ® NanoRam Handheld Raman Series 3.3. Perform Material Investigation ........................27 3.4. Performance Validation..........................30 3.5. Enable Data Transfer ..........................31 3.6. History Review ............................32 NID SOFTWARE............................33 4.1. About NID ..............................33 4.2. Device Connection on NID ........................33 4.3. Login NID Client ............................34 4.4. Data Synchronization ..........................37 19 Shea Way, Newark, DE 19713, USA Tel: +1 (302) 368-7824...
-
Page 4: Overview
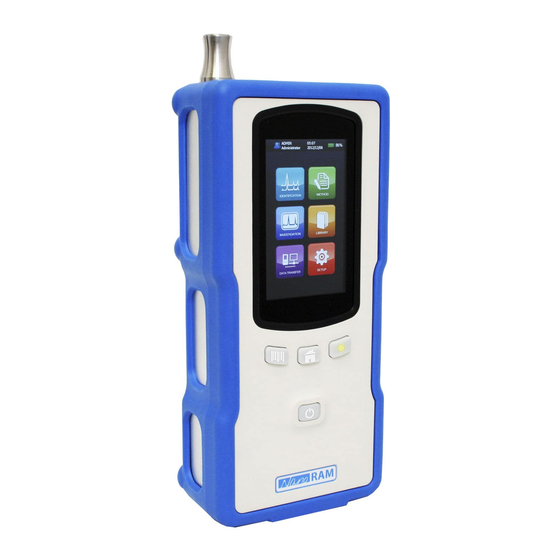
Series 1. Overview The NanoRam Series is a handheld Raman instrument designed for rapid identification of sample material based on their Raman spectrum. The instrument has a touch screen operation with intuitive software for easy operation by specialists and non-specialists alike. - Page 5 ® NanoRam Handheld Raman Series The laser hazard zone is within 30cm (11.8 inches) to the tip of the point-and-shoot adaptor. 1.3. Remote Interlock (for NanoRam only) The remote interlock is located at the bottom of the unit next to the Ethernet port. The remote interlock facilitates the laser ‘on’...
- Page 6 ® NanoRam Handheld Raman Series 1.5. Precautions • Never point the unit directly at a person. • Never look directly into the laser beam path or scattered laser light from any reflective surface. • Never look directly into the laser source. •...
- Page 7 ® NanoRam Handheld Raman Series Center for Devices and Radiological Health Food and Drug Administration 10903 New Hampshire Avenue W066-4613 Silver Spring, MD 20993 USA Tel: 1-800-638-2041 Fax: 1-301-847-8149 dsmica@fda.hhs.gov Laser Institute of America 13501 Ingenuity Drive, Suite 128 Orlando, FL 32826 USA Toll Free: 1-800-345-2737 Tel: 1-407-380-1553 Fax: 1-407-380-5588...
-
Page 8: Diagrams Of The Instruments
® NanoRam Handheld Raman Series 1. Diagrams of the Instruments 1.1. NanoRam Laser emission aperture /Sampling port Home key Laser switch/Acquisition Barcode scan key Power On/Off key Rubber Protection Laser emission indicator Remote Interlock 12V DC Power connector Ethernet Port Battery compartment 19 Shea Way, Newark, DE 19713, USA •... -
Page 9: Nanoram Mini
® NanoRam Handheld Raman Series 2D Barcode scanner Laser emission aperture /Sampling port Shaft 1.2. NanoRam Mini Laser Emission 2D Barcode Scanner Aperture /Sampling Port Home Key Laser Switch/Acquisition Barcode Scan Key Power On/Off Key Rubber Protection 19 Shea Way, Newark, DE 19713, USA •... -
Page 10: Warranty Seal Label
® NanoRam Handheld Raman Series Rubber Jacket’s Ribs 2D Barcode Scanner Laser Emission Aperture and shaft Laser Emission Indicator Ethernet cable Battery Compartment Port 18V DC Power Connector 1.3. Warranty Seal Label The warranty seal labels are positioned on both sides of the system under the blue jacket. Any attempt to open the panel(s) of this device will break these seals and void the warranty. -
Page 11: Knowing Your Instrument
® NanoRam Handheld Raman Series Located on the rear panel of the system, the manufacturer’s general identification label includes warning information and also displays the manufacturer name, address, model number, serial number, and the manufacturing date. 2. Knowing Your Instrument 2.1. - Page 12 ® NanoRam Handheld Raman Series Version A: Hold the ring and turn it counterclockwise 1/8 turn to unlock. Carefully pull out the battery cover and set aside. Insert the provided NanoRam Lithium Ion battery pack into the battery compartment as shown. Battery contacts should be facing down (towards the back of the unit) and to the right.
- Page 13 ® NanoRam Handheld Raman Series Turn the ring clockwise 1/8 turn till the ring is in a vertical position. The cover is now locked. Version B: Hold the ring. Turn it clockwise 1/8 turn to unlock. Turn it counterclockwise 1/8 turn till the ring is in a vertical position to lock.
-
Page 14: Power On/Off
® NanoRam Handheld Raman Series 2.3. Power On/Off To power on the system, press and hold the power on/off key for at least 3 seconds. An initial screen will display, followed by a NanoRam OS (Operating System) screen indicating that the system initialization is in process with a count up in percentage of completion. -
Page 15: User Login
® NanoRam Handheld Raman Series • Hard power down: press and hold the power On/Off key for about 3 seconds. Note: The instrument cannot be hard powered down when it is being charged. Avoid hard powered down unless necessary. An “abnormal power down” error message will be shown if the unit was hard powered down or battery was pulled out during operation. - Page 16 ® NanoRam Handheld Raman Series will facilitate easy and fast sampling. Depending on the type and form of the materials to be measured, the appropriate sampling accessory can be selected. The sample can be placed directly against the adaptor. Point-and-shoot adaptor Liquid vial holder adaptor that holds a 15mm(diameter)x 45mm(height) vial Bottle adaptor for measurement through...
- Page 17 ® NanoRam Handheld Raman Series Never remove the lensed shaft when the instrument is on. The following steps will guide the user to successful installation of the sampling accessory: Make sure the correct shaft is installed onto the laser emission aperture. Standard Lensed Shaft Locate the alignment key on the adaptor and the set pin position at the laser emission aperture.
- Page 18 ® NanoRam Handheld Raman Series Push the adaptor further in until the O-ring is fully inside the emission port. At this point the adaptor should be positioned firmly into its position. Precaution: to avoid accidental exposure to the laser beam do not look directly into laser emission aperture.
- Page 19 ® NanoRam Handheld Raman Series Point-and-shoot adaptor Using the Liquid Vial Holder Adaptor The liquid vial holder can be used for liquid, gel, or powder samples. The liquid vial holder holds a 15 mm (diameter) x 45mm (height) vial. Liquid vial holder adaptor Using the Bottle Adaptor The bottle adaptor can be used for the measurement of samples through transparent containers of less than 5 mm in thickness, such as liquid samples inside bottles, or...
- Page 20 ® NanoRam Handheld Raman Series Point-and-shoot adaptor Liquid vial holder adaptor that holds a 15mm(diameter)x 45mm(height) vial Performance validation cap with built-in polystyrene Right Angle Adapter (optional) The user needs to ensure that the sampling adaptor is installed properly before using the NanoRam Mini.
- Page 21 ® NanoRam Handheld Raman Series Practice caution when measuring dark samples as they may heat up and potentially burn. Lower laser power settings are recommended for dark materials. Using the Liquid Vial Holder Adaptor The liquid vial holder can be used for liquid or gel samples. The liquid vial holder holds a 15mm (diameter) X 45mm (height) vial.
-
Page 22: Barcode Scanner Key
® NanoRam Handheld Raman Series Using the Right Angle Adapter (optional) Slide the adapter all the way in with the locating notch aligned with the location pin on the NanoRam Mini measurement port. Carefully rotate as needed to align the adaptor for proper positioning. -
Page 23: Operator User Quick Start
® NanoRam Handheld Raman Series The laser can be turned on only when the system is in Identification, Investigation, or Library and Method building modes. Pressing the laser button, or Home button during a scan can stop an acquisition. If such an action occurs, the data may not be saved. Note: In case of emergency, the laser can be turned off any time by pressing the Laser switch button or Home button. -
Page 24: Perform Material Identification
® NanoRam Handheld Raman Series The Operator users have access to the functions of select Method, select Operation Preset, perform Identification, perform Investigation, and perform Validation Test, as well as view Library list. The Operator can also perform Data Transfer and thus access the Wireless and Ethernet functions in the Set Up. - Page 25 ® NanoRam Handheld Raman Series the samples within the same Run will carry the same Product name with a suffix of increment of one, starting from #1 (ProductName#1), as the measurement moves to the next sample. Check the option if user chooses to “Use the Method Name as the Product Name”.
- Page 26 ® NanoRam Handheld Raman Series Single Sample: For identification run with a single sample, the result shows the final result. Batch Samples: For identification run with more than one sample, the result shows for each of the samples. When any sample(s) within the run Fail the Identification test, the user will be asked whether to run another sample.
-
Page 27: Perform Material Investigation
® NanoRam Handheld Raman Series 3.3. Perform Material Investigation Before investigation for unknown materials, the corresponding Operation Preset needs to be selected. Press the Set Up icon on the Home page, and then press Operation Preset. The list for the existing Operation Preset will be displayed. Select the desired Operation Preset by tapping on the name. - Page 28 ® NanoRam Handheld Raman Series using the sampling adaptor. Press the Investigation icon , and the “ready to scan” page will be displayed. A screen for sample information will be displayed. Enter the necessary information already set in the “Sample Info Field”. Press the Laser Switch /Acquisition key to start acquiring data. As a safety warning, the NanoRam will emit intermittent acoustic signals and flash a laser warning symbol on the screen before starting the acquisition.
- Page 29 ® NanoRam Handheld Raman Series Note: HQI is a measure of the level of correlation of the sample spectrum against a spectrum from the library by use of a predetermined algorithm. HQI=100 indicates a 100% correlation score between the sample spectrum and the spectrum in the library. HQI=0 indicates a 0% correlation score between the sample spectrum and the particular spectrum in the library.
-
Page 30: Performance Validation
® NanoRam Handheld Raman Series 3.4. Performance Validation Instrument performance validation can be conducted using the performance validation functions. The ‘Performance Validate’ function is intended to validate the accuracy of the instrument in terms of the Raman shift position and peak intensity within a spectral range as compared to a polystyrene spectrum generated at the factory. -
Page 31: Enable Data Transfer
® NanoRam Handheld Raman Series 3.5. Enable Data Transfer To enable Data transfer to the PC with NID Client installed, one must first establish the connection between NanoRam and the PC. Press the Set Up icon on the home screen, then WLAN & Networks. Press Ethernet for connection via Ethernet, or press Wi-Fi for connection via wireless. -
Page 32: History Review
® NanoRam Handheld Raman Series the data transfer via Ethernet connection is enabled. To enable Wi-Fi connection, press the Wi-Fi button. Once the check mark turns green the data transfer via Wi-Fi connection is enabled. See section 5.3 for details on synchronization from NID. 3.6. -
Page 33: Nid Software
® NanoRam Handheld Raman Series 4. NID Software 4.1. About NID NID is a software package included with the NanoRam shipment and is used for management and reporting of data collected with the NanoRam. There are two services designed in the NID software to function on the client’s PC and server, respectively: •... -
Page 34: Login Nid Client
® NanoRam Handheld Raman Series ii) after screen saver is turned on or the connection has been idle (without any data transfer actions) for 15 minutes. A warning message will appear on the screen. Data could be lost if data is being synchronized at the moment. The user needs to login again and re-enable Ethernet or Wi-Fi in Data Transfer. - Page 35 ® NanoRam Handheld Raman Series Click on in the upper right corner. Six languages are available in display: English, Simplified Chinese, Traditional Chinese, Japanese, Korean and Spanish. Once a different display language is selected, user needs to close and then restart the NID Client for the new setting to take effect.
- Page 36 ® NanoRam Handheld Raman Series After the user login to the NID Client program, the PC screen will display the available NanoRam devices that have established connection. The serial number of the system is displayed under the device icon. Note: NanoRam Mini will appear as a different icon on the login page. Click on the NanoRam icon with the serial number of the unit you wish to synchronize.
-
Page 37: Data Synchronization
® NanoRam Handheld Raman Series message prompting the user to “synchronize the unit time to server time” will appear. If “Yes” is selected, the unit’s system clock will be synchronized to the server’s time. Meanwhile,message “Successfully logged in” will appear. At this stage, the NanoRam device login is completed. - Page 38 ® NanoRam Handheld Raman Series 19 Shea Way, Newark, DE 19713, USA • Tel: +1 (302) 368-7824 • Fax: +1 (302) 368-7830 • Web: www.bwtek.com Page 38 of 38 290020255-J (2017/07/28) Copyright 2017 B&W Tek...
Need help?
Do you have a question about the NanoRam Series and is the answer not in the manual?
Questions and answers