Table of Contents
Advertisement
Quick Links
Advertisement
Table of Contents

Related Manuals for HV Racing HVR 50.4 MINI

Summary of Contents for HV Racing HVR 50.4 MINI
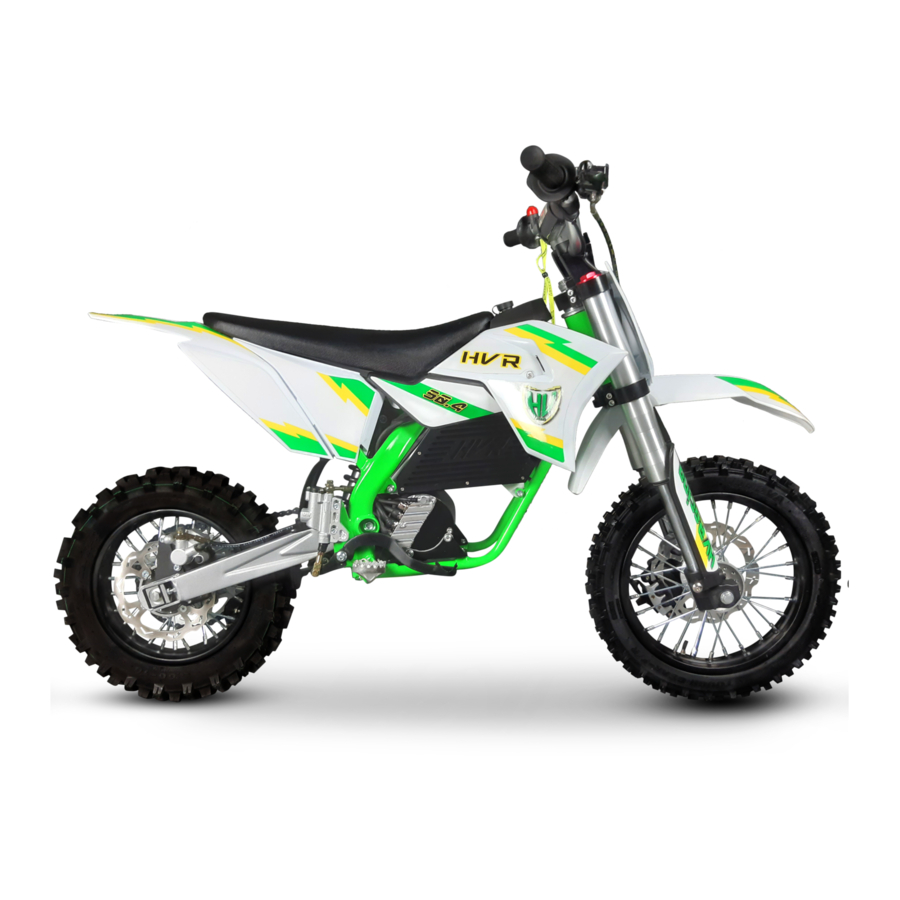
- Page 1 HVR 50.4 MINI – HVR 50.4 HVR 50.4 PRO – HVR 60.4 Manual Page 1 of 36 HVR Manual...
- Page 2 WARNING: Read this manual carefully before operating your HVR! Dear HVR customer, Thank you and congratulations on your purchase of an HVR Electric motorcycle. Read the manual carefully and completely to ensure safe and long operation of the HVR and act prudently during operation.
-
Page 3: Table Of Contents
CONTENTS 1. IMPORTANT SYMBOLS AND DESCRIPTIONS Page 4 2. SAFETY NOTE Page 5 3. TECHNICAL DATA Page 6 4. CONTROL ELEMENTS Page 7 4.1 Battery indicator with on/off switch 5. ELECTRIC DRIVE Page 8 5.1 Battery 5.2 Electric motor and inverter 6. -
Page 4: Important Symbols And Descriptions
13.6 Adjust the back damper Page 29 13.7 Spokes Page 31 13.7.1 Controlling spoke torque 13.8 Handlebar Page 32 13.8.1 Adjust handlebar position 14. SERVICE PLAN Page 33 14.1 Duty works 14.2 Recommended works 15. TORQUE LIST Page 34 16. EU/EC DECLARATION Page 36 1. -
Page 5: Safety Note
2. SAFETY NOTE WARNING: Read this manual carefully before operating the HVR! To ensure safe and long operation, please observe the following instructions: - Your child must be in the mental and physical condition to ride a motorcycle - The minimum age is 6 years - Cycling is the basic requirement for motorcycling - Explain to your child how to handle the motorcycle and discuss this with your child in a way that he or she understands the safe handling of the motorcycle... -
Page 6: Technical Data
3. TECHNICAL DATA HVR 50.4 MINI HVR 50.4 HVR 50.4 PRO HVR 60.4 Class 50 cc (Minicross) 50 cc (Minicross) 50 cc (Minicross) 65 cc (Minicross) Length 1350 mm 1350 mm 1400 mm 1600 mm Wheelbase 930 mm 940 mm... -
Page 7: Control Elements
4. OPERATING ELEMENTS Front brake and Safety killswitch throttle Battery indicator Front brake with with on/off switch compensating tank for brake fluid Charging port Engine control unit Brake fluid display for the rear brake with compensating tank Rear brake Electric motor Battery 4.1 BATTERY DISPLAY WITH ON/OFF SWITCH The on/off switch is in the middle of the display. -
Page 8: Electric Drive
GREEN LED: Battery charge status (abbreviation: SOC) LED 1 - 7 YELLOW LED: Temperature warning (blink) / Temperature shutdown (solid) RED LED: 0% charge state (SOC) or error After pressing of the on/off switch the green LEDs of the battery indicator light up one after the other, the yellow and the red LED briefly light up for the test. - Page 9 The traction battery is the heart of an electric vehicle, performance and range depend to a large extent on the battery. The HVR lithium-ion battery has a specially designed, sophisticated battery management system (BMS) installed to ensure that the battery is always operated within the permissible limits.
- Page 10 WARNING: Risk of fire and burning - NEVER open, damage or burn the battery - NEVER short-circuit the battery poles - NEVER reverse polarity - NEVER bring near high heat or fire. - NEVER try to use another charger than the original HVR charger. 5.2 ELECTRIC MOTOR AND MOTOR CONTROL UNIT (INVERTER) The HVR electric motor and inverter ensure an easy-to-control power delivery.
-
Page 11: Charging
WARNING: The motor housing can get very warm after high-performance rides, so don't touch it. NOTE: The cooling fluid is a special oil that is completely non-toxic and does not attack components or is harmful to the environment. NOTE: The cooling fluid is only used for better dissipation of heat from the inside of the engine, even if it is driven without a cooling fluid, there is no damage to the vehicle. - Page 12 ▷ Connect the charger's charging plug to the charging port of the motorcycle (bayonet closure), charging now starts automatically and the LED on the HVR charger lights up red. ▷ The flashing green LED on the motorcycle shows the current SOC. SOC (charging state) LED display on motorcycle 0 to 16%...
- Page 13 Normal charging Motorcycle fully charged The battery is too hot or too cold to charge The battery is charged, The battery is fully charged. If the yellow LED on the gradually more and more 60 seconds later the motorcycle and the green green LEDs (the last motorcycle turns off and the LED on the charger light up,...
-
Page 14: Setting With The Hvr App
NOTE: Charging over 90% is much slower due to the balancing of the cells, so it is recommended, to charge the bike only 90% full during the break at the track during training to maximize the training time. ▷ Remove the charging plug from the motorcycle and close the dust cap of the charging port ▷... - Page 15 NOTE: The APP code can be found in the extradition document and on the inverter under the seat. Now the motorcycle is registered and available in the list of registered motorcycles. When it is within range, it can be connected by pressing the name of your motorcycle in the APP. This process is also described in the Quick Start Guide! Page 15 of 36 HVR Manual...
-
Page 16: Adjusting The Motorcycle Setting
7.2 MONITOR DATA WATCH The MONITOR function shows the current parameters such as SOC, temperatures, voltage, current, etc. of the motorcycle: Tap on your motorcycle Press CONNECT Monitor screen 7.3 ADJUSTING THE MOTORCYCLE SETTING ATTENTION: The motorcycle must be jacked up (with the rear wheel in the air) and must be at a standstill during adjustment. - Page 17 Press TUNE Tap on your motorcycle There are 3 preset mappings available: LET´S WIN LET´S GO LET´S START For real racers For advanced For beginners Page 17 of 36 HVR Manual...
- Page 18 SPEED: 6 - 70 km/h PERFORMANCE: 1000 - 8000 watts RECUPERATION: no engine brake / Recuperation strong engine brake / Recuperation Adjust the values accordingly and press SEND to transmit the set parameters to the motorcycle. The display starts flashing and the motorcycle turns off after successful transmission of the data. From the next start, the new parameters are activated.
-
Page 19: Transport
WARNING: After each adjustment, check if the motorcycle behaves as you expect and the maximum speed is set correctly. Hold the motorcycle well, then turn the throttle handle and let the rear wheel turn in the air, making sure that no one is injured on the rotating parts. 8. -
Page 20: Cleaning
11. CLEANING After driving in the terrain, first carefully clean the motorcycle with a scraper or spatula to remove the coarse dirt. ATTENTION: Do not use a scraper or spatula made out of metal, this could lead to damage to the motorcycle. Then wash the motorcycle with a soft water jet, do not aim the water jet directly at electronic components and cables. -
Page 21: Checking Chain Tension
13.1.2 CHECK CHAIN TENSION WARNING: Excessive chain tension can lead to increased wear on the chain, chain sprocket and possibly other components tearing or even breaking them. Too low chain tension can cause the chain to jump off the chain pinion or sprocket. If this is the case, the rear wheel can block or the motor may be damaged. -
Page 22: Setting Chain Tension
60.4 13.1.3 SETTING CHAIN TENSION WARNING: A rear wheel that is not properly mounted can lead to damage to the components and accidents The chain tension is adjusted by loosening the rear wheel axle and is set with the nuts via the two chain tensioners. -
Page 23: Tires
13.2 TIRES 13.2 AIR PRESSURE WARNING: If the tire air pressure is too low, the wear increases and the tire valve can tear off. Excessive tire air pressure leads to over-stressing of the material and may cause the tire to burst. Therefore, check the air pressure of the cold tires before driving. -
Page 24: Checking Brake Pads
WARNING: Worn brake discs reduce braking effect, which can lead to accidents, injuries and damage to the components! Therefore, check the brake disc thickness regularly! To do this, measure the thickness of the brake discs on the front and rear wheels in several places. NOTE: Each braking process reduces the brake disc thickness in the area between the brake pads. -
Page 25: Changing Brake Fluid
WARNING: Worn brake discs reduce braking effect, which can result in accidents, injuries and damage to components. Therefore, check the brake pad thickness regularly! To do this, measure the strength of the brake pads on the front and rear wheels. NOTE: Each braking process reduces the brake pad thickness in the area between the brake pads. -
Page 26: Foot Brake Lever
WARNING: Care must be taken to ensure that the brake discs are grease-free and clean, otherwise the braking effect is not guaranteed and accidents can occur! 13.4 FOOT BRAKE LEVER 13.4.1 POSITION OF THE FOOT BRAKE LEVER Check that the foot brake lever is in line with the footrest. This is the default position If this is not the case, adjust the position of the foot brake lever correctly. -
Page 27: Fork
▷ Loosen the counter nut 1 ▷ Remove the bending splint ▷ Remove the bolt ▷ Use thread 2 to adjust the position of the brake lever as it suits you. The recommendation for this is to align it in a horizontal line to the footrest. ▷... - Page 28 ▷ Make sure that the fork legs are set to the same height. ▷ Tighten the 4 screws 1 with a torque of 10Nm NOTE: The recommendation is to adjust the sides one after the other, as the second side remains fixed and so an unintentional slipping of the fork is prevented.
- Page 29 Over time, however, dirt may get behind the dust seal. If this dirt is not removed, the oil seals behind can leak. WARNING: Oil or grease on the brake discs reduces braking effect. Therefore, always keep the brake discs oil- and grease-free and clean the brake discs with brake cleaner if necessary.
- Page 30 This means that the tensile stage damping is low and the shock springs out quickly. 50.4 / 50.4 MINI Damper adjustment Counterclockwise clicks (open) Shock absorber rebound Sport Normal Comfort 50.4 PRO Counterclockwise clicks (open) Damper adjustment Fork Shock absorber Rebound Compression Rebound Compression...
- Page 31 13.7 SPOKES 13.7.1 CONTROL SPOKE TENSION WARNING: If spokes are too tight, they can cause damage to wheel. If they are too loose, the wheel can become uncetered and further spokes can loosen. After the first 3 battery charges, check the spoke tension at regular intervals, especially on a new vehicle.
- Page 32 13.8 HANDLEBAR 13.8.1 SETTING THE HANDLEBAR POSITION SLOPE ▷ Loosen the 4 screws 1 ▷ Adjust the slope of the handlebars as desired ▷ Fix the 4 screws 1 POSITION The handlebar holder can be mounted on the fork bridge in two positions. ▷...
- Page 33 14. SERVICE PLAN 14.1 DUTY WORKS Every 10 hours Every hour Check the brake pads of the front brake ○ ● ● Check the brake pads of the rear brake ○ ● ● Check the brake discs ○ ● ● Check brake lines for damage and tightness ○...
- Page 34 14.2 RECOMMENDED WORK Every 40 hours / 1x a year Every 10 hours Every hour Change the brake fluid of the front brake ● Change the brake fluid of the rear brake ● Lubricate the steering head bearings ● 15. TORQUE LIST 50.4 / MINI / PRO 60.4 Label...
- Page 35 M6x1 M6x1 Brake caliper fastening rear 10 Nm 10 Nm L-16mm L-12mm M6x1 Cooling grill 10 Nm L-12mm M6x1 Side paneling at the front of the L=30mm 8 Nm cooling grill (Countersunk head) M6x1 M6x1 Seat holding point front 8 Nm 8 Nm L-65mm L-65mm...
- Page 36 D-91085 Weisendorf Email: info@HVR-bikes.com hereby declares as the manufacturer that the childrens motorcycles HVR 50.4 MINI / HVR 50.4 / HVR PRO and HVR 60.4 comply with the provisions of the relevant European Community harmonisation legislation applicable to these products.
Need help?
Do you have a question about the HVR 50.4 MINI and is the answer not in the manual?
Questions and answers