Table of Contents
Advertisement
Quick Links
Advertisement
Table of Contents

Summary of Contents for EG Xcellerex XDUO 2500
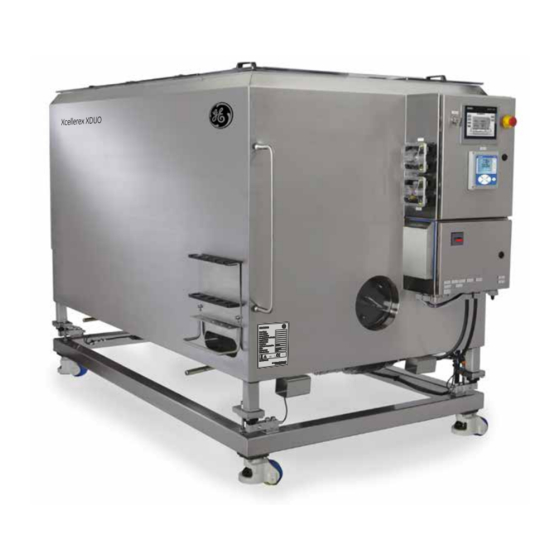
- Page 1 Xcellerex ™ XDUO 2500 Mixer Operating Instructions Original instructions...
-
Page 2: Table Of Contents
3.4.2 Local control panel ........................3.4.3 Data access ............................Temperature control unit ........................Disposable components ........................3.6.1 Disposable bag assembly ......................3.6.2 Probe sheath assembly ....................... User interface ....................... General description ..........................Xcellerex XDUO 2500 Mixer Operating Instructions 29146667 AH... - Page 3 Control the temperature ........................Manage mixer weight ......................... Add liquid contents ..........................Add solid contents ..........................7.10 Finish a batch run ..........................7.10.1 Collect the product ........................7.10.2 Remove the disposable bag ...................... Xcellerex XDUO 2500 Mixer Operating Instructions 29146667 AH...
- Page 4 Health and Safety Declaration Forms ..................Appendix A Information about Appendix ............Appendix B Add and remove users in local control software ......Appendix C Download audit and data logs ............Index ........................Xcellerex XDUO 2500 Mixer Operating Instructions 29146667 AH...
-
Page 5: Introduction
This chapter contains important user information and regulatory information about Xcellerex XDUO 2500 Mixer. In this chapter Section See page 1.1 About this manual 1.2 Important user information 1.3 Regulatory information 1.4 Abbreviations Xcellerex XDUO 2500 Mixer Operating Instructions 29146667 AH... -
Page 6: About This Manual
Software items are identified in the text by bold italic text. A colon separates menu levels, thus File:Open refers to the Open command in the File menu. Hardware items are identified in the text by bold text (for example, Power). Xcellerex XDUO 2500 Mixer Operating Instructions 29146667 AH... -
Page 7: Important User Information
You should be acquainted with the use of general biomanufacturing equipment and with handling of biological materials. • You must read and understand the Safety instructions chapter in this manual. • The system must be installed by a GE representative. Xcellerex XDUO 2500 Mixer Operating Instructions 29146667 AH... - Page 8 Note: A note is used to indicate information that is important for trouble-free and optimal use of the product. Tip: A tip contains useful information that can improve or optimize your procedures. Xcellerex XDUO 2500 Mixer Operating Instructions 29146667 AH...
-
Page 9: Regulatory Information
Björkgatan 30, SE 751 84 Uppsala Sweden In this section Section See page 1.3.1 EU directives 1.3.2 Eurasian Customs Union 1.3.3 Regulations for USA and Canada 1.3.4 Korean regulatory information 1.3.5 Other regulations and standards Xcellerex XDUO 2500 Mixer Operating Instructions 29146667 AH... -
Page 10: Eu Directives
Operating Instructions or user manuals, and • used in the same state as it was delivered from GE, except for alterations described in the Operating Instructions or user manuals. Xcellerex XDUO 2500 Mixer Operating Instructions 29146667 AH... -
Page 11: Eurasian Customs Union
GE Healthcare Life Sciences Presnenskaya nab., 10C, 12th floor RU-123 317 Moscow, Russian Federation Telephone 1: + 7 495 411 9714 Fax nr: + 7 495 739 6932 Email: LSrus@ge.com Xcellerex XDUO 2500 Mixer Operating Instructions 29146667 AH... -
Page 12: Regulations For Usa And Canada
Operation of this equipment in a residential area is likely to cause harmful interference in which case the user will be re- quired to correct the interference at his own expense. Xcellerex XDUO 2500 Mixer Operating Instructions 29146667 AH... -
Page 13: Korean Regulatory Information
When used in a residential environment, there is a concern of radio interference. 주의사항 A급 기기 (업무용 방송통신 기자재) 이 기기는 업무용환경에서 사용할 목적으로 적합성평가를 받은 기기 로서 가정용 환경에서 사용하는 경우 전파간섭의 우려가 있습니 다. Xcellerex XDUO 2500 Mixer Operating Instructions 29146667 AH... -
Page 14: Other Regulations And Standards
EN 60204-1 Safety of Machinery - Electrical equipment of machines. Part 1: General requirements. EN 61326-1 Electrical Equipment for Measurement, Control, and Laboratory Use. (Emission according to CISPR 11, Group 1, class A) Xcellerex XDUO 2500 Mixer Operating Instructions 29146667 AH... -
Page 15: Abbreviations
SD card Secure Digital card setpoint The process target value defined by a user or the system, that the PID controller tries to reach by adjusting the pro- cess control outputs. Xcellerex XDUO 2500 Mixer Operating Instructions 29146667 AH... - Page 16 1 Introduction 1.4 Abbreviations Term/Abbreviation Definition SPHL setpoint high limit SPLL setpoint low limit hygienic tubing connection temperature control unit uninterruptible power supply Xcellerex XDUO 2500 Mixer Operating Instructions 29146667 AH...
-
Page 17: Safety Instructions
In this chapter Section See page 2.1 Safety precautions 2.2 Labels 2.3 Emergency procedures 2.4 Interlocks 2.5 Security levels 2.6 Recycling information 2.7 Declaration of Hazardous Substances (DoHS) Xcellerex XDUO 2500 Mixer Operating Instructions 29146667 AH... -
Page 18: Safety Precautions
XDUO 2500 Mixer and the entire process. Xcellerex XDUO 2500 Mixer Operating Instructions 29146667 AH... - Page 19 This can result in damage to the equipment and/or cause personal injury. Personal protection WARNING Slipping hazard. Remove any spillage on the floor immediately to minimize the risk for slipping accidents. Xcellerex XDUO 2500 Mixer Operating Instructions 29146667 AH...
- Page 20 Disposable gloves Always use clean disposable gloves when manually handling parts. WARNING Personal Protective Equipment (PPE). Whenever packing, unpack- ing, transporting or moving the system, wear protective footwear, preferably with steel toe cap. Xcellerex XDUO 2500 Mixer Operating Instructions 29146667 AH...
- Page 21 WARNING Electrical installation. All electrical installation must be performed by authorized personnel only. WARNING Access to power switch. The power switch must always be easy to access. Xcellerex XDUO 2500 Mixer Operating Instructions 29146667 AH...
- Page 22 XDUO 2500 Mixer is not ap- proved for work in a potentially explosive atmosphere, in areas classified as Zone 0 to Zone 2 according to IEC 60079-10:2002. Xcellerex XDUO 2500 Mixer Operating Instructions 29146667 AH...
- Page 23 WARNING Improper use of jacking bolts. Improper use of jacking bolts may cause the instrument to collapse on the operator. Xcellerex XDUO 2500 Mixer Operating Instructions 29146667 AH...
- Page 24 Liquid expands during heating. A bag completely filled with cold liquid might burst when heated. CAUTION Spread of hazardous and biological substances. Do not overfill the bag. An overfilled bag might burst. Xcellerex XDUO 2500 Mixer Operating Instructions 29146667 AH...
- Page 25 Maintenance WARNING Trained personnel. Maintenance of this product must be performed by properly trained personnel only. Xcellerex XDUO 2500 Mixer Operating Instructions 29146667 AH...
- Page 26 Always follow all environmental, health, and safety guidelines pertaining to the materials used. CAUTION Contamination hazard. Before performing any service work on XDUO 2500 Mixer, make sure that the system has been properly decontaminated. Xcellerex XDUO 2500 Mixer Operating Instructions 29146667 AH...
-
Page 27: Labels
The system label is located near the I/O Cabinet. Note: The label shown below is an example. Actual data printed on the system label is specific for each individual system and may vary from system to system. Xcellerex XDUO 2500 Mixer Operating Instructions 29146667 AH... - Page 28 Electrical power requirements in frequency (Hz). SCCR: Short circuit current rating (A). Largest Motor: Horsepower rating of the motor (hp). Protection Class: I/O Cabinet ingress protection. Electrical Documentation: Electrical schematic drawing number. Xcellerex XDUO 2500 Mixer Operating Instructions 29146667 AH...
- Page 29 The registration number of the product will appear beside the symbol. This equipment has been tested and found to comply with the limits for a Class A digital device. ICES- The system complies with Canadian Interference-Causing Equipment 001/NMB-001 Standard. Xcellerex XDUO 2500 Mixer Operating Instructions 29146667 AH...
- Page 30 Warning and entanglement hazard hand in gears. Moving parts can crush and cut. Turn off power and Lock-Out / Tag-Out (LOTO) before ser- vice. Xcellerex XDUO 2500 Mixer Operating Instructions 29146667 AH...
-
Page 31: Emergency Procedures
XDUO 2500 Mixer. In this section Section See page 2.3.1 System power switch and Emergency Stop button 2.3.2 Emergency shutdown 2.3.3 Power or communication failure Xcellerex XDUO 2500 Mixer Operating Instructions 29146667 AH... -
Page 32: System Power Switch And Emergency Stop Button
The system power switch positions are described in the following illustrations. Illustration Description The system power switch in the O OFF position: Power is disconnected from XDUO 2500 Mixer. • Xcellerex XDUO 2500 Mixer Operating Instructions 29146667 AH... - Page 33 The EMERGENCY STOP button is engaged by being pushed. To reduce the risk of injury, all power is removed from the pumps, when the EMERGENCY STOP button is engaged. The EMERGENCY STOP button is disengaged by turning the button clockwise. Xcellerex XDUO 2500 Mixer Operating Instructions 29146667 AH...
-
Page 34: Emergency Shutdown
Data logging continues, if enabled. • If XDUO 2500 Mixer is a FlexFactory connected system: E-Stop Active is displayed on the XDUO Mixer • overview screen. Data logging continues. • Xcellerex XDUO 2500 Mixer Operating Instructions 29146667 AH... - Page 35 Disconnect the power cord. • Turn off the main circuit breaker. • Note: The main circuit breaker is provided by the user. The location of the circuit breaker depends on the facility. Xcellerex XDUO 2500 Mixer Operating Instructions 29146667 AH...
- Page 36 Turn on the mains power supply by turning the system power switch to I ON position. Disengage the EMERGENCY STOP button by turning it clockwise. Result: The EMERGENCY STOP button pops out. Xcellerex XDUO 2500 Mixer Operating Instructions 29146667 AH...
- Page 37 If a batch was running prior to emergency stop, the user should verify the status of all PID control loops and setpoints before restarting the batch after power restoration. Xcellerex XDUO 2500 Mixer Operating Instructions 29146667 AH...
-
Page 38: Power Or Communication Failure
Turn on the mains power supply by turning the system power switch to I ON position. Tap RESET on the local control software screen. Result: All control loops remain in safe state with nothing running. FlexFactory connected system returns to Local control mode. Xcellerex XDUO 2500 Mixer Operating Instructions 29146667 AH... - Page 39 • FlexFactory fails stop. Communication recovery pH control and temperature control loops stay • in a safe state. The agitator remains turned off. • XDUO 2500 Mixer remains disconnected from • FlexFactory. Xcellerex XDUO 2500 Mixer Operating Instructions 29146667 AH...
-
Page 40: Interlocks
Interlock status The interlock status is shown in the local control software as follows: Interlock button Description The interlock is active. The interlock is not active. Xcellerex XDUO 2500 Mixer Operating Instructions 29146667 AH... -
Page 41: Security Levels
Monitor and control the temperature • Monitor the vessel weight • Operate the agitators • Operate the pumps • View and configure trends • Configure alarms • Add and remove users • Xcellerex XDUO 2500 Mixer Operating Instructions 29146667 AH... -
Page 42: Recycling Information
Waste electrical and electronic equipment must not be disposed as unsorted municipal waste and must be collected separately. Contact an authorized representative of the manufacturer for information concerning the decommissioning of the equipment. Xcellerex XDUO 2500 Mixer Operating Instructions 29146667 AH... - Page 43 Dispose of electronic components as specified by local guidelines depending on material used in the construction of the components. Contact the local processing facility or government official for specific disposal requirements. Xcellerex XDUO 2500 Mixer Operating Instructions 29146667 AH...
-
Page 44: Declaration Of Hazardous Substances (Dohs)
EFUP shall be done in accordance with the Product Maintenance Procedures. This product must not be disposed of as unsorted municipal waste, and must be collected separately and handled properly after decommissioning. Xcellerex XDUO 2500 Mixer Operating Instructions 29146667 AH... - Page 45 Indicates that this hazardous substance contained in at least one of the homogeneous materials used for this part is above the limit requirement in GB/T 26572. Data listed in the table represents best information available at the time of publication. • Xcellerex XDUO 2500 Mixer Operating Instructions 29146667 AH...
-
Page 46: System Description
This chapter provides a description of XDUO 2500 Mixer and an overview of its compo- nents. In this chapter Section See page 3.1 Safety system 3.2 System overview 3.3 Mixer vessel components 3.4 XDUO 2500 Mixer control 3.5 Temperature control unit 3.6 Disposable components Xcellerex XDUO 2500 Mixer Operating Instructions 29146667 AH... -
Page 47: Safety System
I/O Cabinet and is labeled EMERGENCY STOP. The EMERGENCY STOP button is engaged by being pushed. See Emergency shutdown, on page 34 for more detailed description. Xcellerex XDUO 2500 Mixer Operating Instructions 29146667 AH... - Page 48 Seismic restraints (optional) Seismic restraint system might be needed in earthquake-prone areas. Local requirements must be followed. Mixers with seismic restraint systems are custom-made according to the requirements specified at the time of ordering. Xcellerex XDUO 2500 Mixer Operating Instructions 29146667 AH...
-
Page 49: System Overview
This section provides the overview of XDUO 2500 Mixer hardware, available options, and information about XDUO 2500 Mixer connectivity to other systems. In this section Section See page 3.2.1 System hardware 3.2.2 System options 3.2.3 System connectivity Xcellerex XDUO 2500 Mixer Operating Instructions 29146667 AH... -
Page 50: System Hardware
The mixing process is monitored using probes that are inserted into the disposable bag through sterile connections. The finished product is collected through drain tubing at the bottom of the disposable bag. Xcellerex XDUO 2500 Mixer Operating Instructions 29146667 AH... - Page 51 3 System description 3.2 System overview 3.2.1 System hardware Illustration of the system Part Description Mixer vessel Communication cable Coolant tubing Temperature control unit (TCU) Xcellerex XDUO 2500 Mixer Operating Instructions 29146667 AH...
-
Page 52: System Options
Audit trail • Conductivity monitoring • pH monitoring • pH control • PROFIBUS™ connection to FlexFactory • Weight monitoring Temperature monitoring is available as an optional function for non-jacketed XDUO 2500 Mixer. Xcellerex XDUO 2500 Mixer Operating Instructions 29146667 AH... - Page 53 Temperature sensors and TCU for vessel temperature control, monitoring, and recording Remote control functionality XDUO 2500 Mixer can be remotely monitored and controlled using Wonderware software, if the mixer is part of FlexFactory. Xcellerex XDUO 2500 Mixer Operating Instructions 29146667 AH...
-
Page 54: System Connectivity
Connection via OPC interface XDUO 2500 Mixer can be connected to other Xcellerex systems through OPC interface, using the Ethernet connection port. Contact your GE representative for additional infor- mation. Xcellerex XDUO 2500 Mixer Operating Instructions 29146667 AH... -
Page 55: Mixer Vessel Components
Introduction This section provides the overview of the components of the mixer vessel. In this section Section See page 3.3.1 Mixer vessel 3.3.2 I/O Cabinet 3.3.3 Agitators 3.3.4 Load cells 3.3.5 Pumps Xcellerex XDUO 2500 Mixer Operating Instructions 29146667 AH... -
Page 56: Mixer Vessel
Three lid parts are without openings. The fourth lid part has two openings: • A semicircular opening for connecting a hopper or a powder bag for addition of solid material. • A rectangular opening for accommodation of liquid addition lines. Xcellerex XDUO 2500 Mixer Operating Instructions 29146667 AH... - Page 57 The following illustration shows the front view of the jacketed XDUO 2500 Mixer. Part Function I/O Cabinet Side access door (2) Cable holder (2) Push bar (4) Load cell (4) Probe window and probe support bar Agitator handle (2) Test tube rack Caster (4) Xcellerex XDUO 2500 Mixer Operating Instructions 29146667 AH...
- Page 58 The following illustration shows the front view of the non-jacketed XDUO 2500 Mixer. Part Function Vessel frame Viewing window Push bar (4) I/O Cabinet Cable holder (2) Load cell (4) Side access door (2) Caster (4) Xcellerex XDUO 2500 Mixer Operating Instructions 29146667 AH...
- Page 59 Illustration of the mixer lid Part Function Handle Lid part (4) Opening for liquid addition lines Opening for powder addition port Powder addition port is designed for connecting hopper or powder bag to the disposable bag. Xcellerex XDUO 2500 Mixer Operating Instructions 29146667 AH...
- Page 60 The following illustrations show the locations of connecting points for the TCU on the jacketed mixer vessel. Part Function Coolant outlet (Return) Vent valve Burst disc Safety valve outlet Drain valve Coolant inlet (Supply) The coolant inlet is also used to drain the coolant. Xcellerex XDUO 2500 Mixer Operating Instructions 29146667 AH...
- Page 61 A set of two step ladders is provided as an accessory to XDUO 2500 Mixer. Illustration of a step ladder The following illustration shows a step ladder attached to the mixer vessel. Xcellerex XDUO 2500 Mixer Operating Instructions 29146667 AH...
-
Page 62: I/O Cabinet
The following optional equipment can be connected to the I/O Cabinet: • pH/conductivity measurement • Pumps for automated pH control • Temperature measurement • Temperature control (jacketed models only) • Weight measurement Xcellerex XDUO 2500 Mixer Operating Instructions 29146667 AH... - Page 63 USB connection port with protective cover Local control panel touchscreen EMERGENCY STOP button Door lock pH/conductivity transmitter display Power, probe and network connections (connection ports underneath) Ventilation hood System power switch Pump Xcellerex XDUO 2500 Mixer Operating Instructions 29146667 AH...
- Page 64 The I/O Cabinet is equipped with a USB memory stick connection port. The USB memory stick should be removed and the protective cover in place when not actively using the port, or during cleaning. Xcellerex XDUO 2500 Mixer Operating Instructions 29146667 AH...
-
Page 65: Agitators
The impeller inside the disposable bag comprises a 90 mm long impeller shaft and four blades. Xcellerex XDUO 2500 Mixer Operating Instructions 29146667 AH... - Page 66 3 System description 3.3 Mixer vessel components 3.3.3 Agitators Overview of the agitator system The following illustration shows the location of the agitator motors. Xcellerex XDUO 2500 Mixer Operating Instructions 29146667 AH...
- Page 67 Illustration of the agitator The following illustration shows the agitator motor and drive head. Part Function Agitator motor Agitator drive head Telescopic handle The following illustration shows a close-up view of the impeller. Xcellerex XDUO 2500 Mixer Operating Instructions 29146667 AH...
- Page 68 Fluid swirls upwards (forward agitation). If the instrument is connected into FlexFactory system, clockwise agitation is shown as a downward pointing arrow in Wonderware, and counterclockwise agitation as an upward pointing arrow. Xcellerex XDUO 2500 Mixer Operating Instructions 29146667 AH...
-
Page 69: Load Cells
The accuracy of the mixer weight measurement should be verified when the mixer has been moved a short distance (for example during cleaning). Load cells are an optional component. Xcellerex XDUO 2500 Mixer Operating Instructions 29146667 AH... - Page 70 3 System description 3.3 Mixer vessel components 3.3.4 Load cells Illustration of a load cell Part Description Top nut Bottom nut Jacking bolt Vessel frame Load cell Xcellerex XDUO 2500 Mixer Operating Instructions 29146667 AH...
-
Page 71: Pumps
XDUO 2500 Mixer. The pumps operate at variable speed. Changing the CV between 0% and 100% increases the speed linearly over the range. For the characteristics of the pumps see Section 10.3 Pump characteristics, on page 282. Xcellerex XDUO 2500 Mixer Operating Instructions 29146667 AH... - Page 72 3 System description 3.3 Mixer vessel components 3.3.5 Pumps Illustration of a model 520 pump Part Description Tube clamp Retention pin Roller Tube guide roller Follower roller Cover Xcellerex XDUO 2500 Mixer Operating Instructions 29146667 AH...
-
Page 73: Xduo 2500 Mixer Control
This section provides the overview of mixer system control and automation possibilities. In this section Section See page 3.4.1 XDUO 2500 Mixer automation and control 3.4.2 Local control panel 3.4.3 Data access Xcellerex XDUO 2500 Mixer Operating Instructions 29146667 AH... -
Page 74: Xduo 2500 Mixer Automation And Control
The following features are available, if your system has an audit trail option: • Data and audit trail are logged on the SD card on HMI. Note: The SD card is available only to a GE service engineer. Xcellerex XDUO 2500 Mixer Operating Instructions 29146667 AH... - Page 75 Authorization is needed to make changes to local process values. Graphical display of the mixer system layout is available. pH and temperature monitoring and control are available. Weight and conductivity monitoring are available. Xcellerex XDUO 2500 Mixer Operating Instructions 29146667 AH...
-
Page 76: Local Control Panel
PLC can act as a controller or as a remote input/output system, depending on XDUO 2500 Mixer mode of operation. The local control panel is mounted on the I/O Cabinet. Illustration of the local control panel Xcellerex XDUO 2500 Mixer Operating Instructions 29146667 AH... -
Page 77: Data Access
Microsoft Excel Data and audit trail are logged on the SD card when the mixer is in local mode. Note: The SD card is available only to a GE service engineer. Xcellerex XDUO 2500 Mixer Operating Instructions 29146667 AH... -
Page 78: Temperature Control Unit
The TCU setpoint is provided by the XDUO 2500 Mixer PLC system. The TCU gets a remote input from the mixer via a cable that connects the TCU with the mixer I/O Cabinet. Consult the manufacturer's manuals for more information about the TCU. Xcellerex XDUO 2500 Mixer Operating Instructions 29146667 AH... -
Page 79: Disposable Components
Disposable components Introduction This section provides information about the disposable components that are needed for a mixing process. In this section Section See page 3.6.1 Disposable bag assembly 3.6.2 Probe sheath assembly Xcellerex XDUO 2500 Mixer Operating Instructions 29146667 AH... -
Page 80: Disposable Bag Assembly
A hopper or a powder bag is connected to the disposable bag assembly via a TC-clamp port when solid ingredients need to be added. Custom bag configurations are available on request. Xcellerex XDUO 2500 Mixer Operating Instructions 29146667 AH... - Page 81 The following illustration shows an overview of the Plus bag. The Basic bag is similar to the Plus bag. Part Function Drain and addition lines, probe ports Impeller (inside the disposable bag) Powder addition port, i.d. 3″, capped See separate images for more details. Xcellerex XDUO 2500 Mixer Operating Instructions 29146667 AH...
- Page 82 3 System description 3.6 Disposable components 3.6.1 Disposable bag assembly The following illustration shows a detailed view of the drain and addition lines of the Plus bag. Xcellerex XDUO 2500 Mixer Operating Instructions 29146667 AH...
- Page 83 Function Impeller (inside the disposable bag) Powder addition port, i.d. 3″, capped Sample line, i.d. ⅛″, with clamp, Luer lock connector Drain line, i.d. 1″, plugged Liquid addition line, i.d. 1″, plugged Xcellerex XDUO 2500 Mixer Operating Instructions 29146667 AH...
- Page 84 The recommended storage temperature for the disposable bag assembly is between 10°C and 34°C. Information about the storage temperature is shown on the bag label. Operating temperature The disposable bag assembly is rated for temperatures between 2°C and 60°C. Xcellerex XDUO 2500 Mixer Operating Instructions 29146667 AH...
-
Page 85: Probe Sheath Assembly
The probe sheath assembly has to be autoclaved before it is connected to a probe port of the bag assembly. Illustration of the probe sheath assembly The following illustration shows a pH probe. Part Description Threaded connector plug O-rings pH sensor Xcellerex XDUO 2500 Mixer Operating Instructions 29146667 AH... - Page 86 Aseptic connection device (male end) Sterile membrane Anti-actuation ring Bellows End plug Illustration of the probe sheath with inserted probe The following illustration shows a probe sheath assembly with the inserted probe. Xcellerex XDUO 2500 Mixer Operating Instructions 29146667 AH...
-
Page 87: User Interface
In this chapter Section See page 4.1 General description 4.2 Adjustment and control screens 4.3 Alarm screens 4.4 pH and conductivity overview screen 4.5 Detail screens 4.6 Transmitter Offsets screen 4.7 Trend screens Xcellerex XDUO 2500 Mixer Operating Instructions 29146667 AH... -
Page 88: General Description
A home screen (start screen) is provided to act as a gateway and general overview of the process. Buttons on the home screen display the current values of the relevant process variables. Tapping the button opens the corresponding process variable detail screen. Xcellerex XDUO 2500 Mixer Operating Instructions 29146667 AH... - Page 89 Agitator Detail - Synced Motors PID Settings Tare ALARM ALARM ALARM ALARMS TREND ALARMS TREND ALARMS TREND CONFIG CONFIG CONFIG pH Detail Conductivity Detail PID Settings Pumps Setup ALARM ALARM ALARMS TREND ALARMS TREND CONFIG CONFIG Xcellerex XDUO 2500 Mixer Operating Instructions 29146667 AH...
- Page 90 Nothing is displayed when the mixer is in normal operation. Temperature Tapping Temperature opens the Tempera- ture Detail screen, see Temperature Detail screen, on page 114. Displays the temperature of both tempera- ture sensors. Xcellerex XDUO 2500 Mixer Operating Instructions 29146667 AH...
- Page 91 All detail screens have the following buttons at the bottom of the screens: Button Description Tapping HOME returns the user to the start (home) screen. Tapping ALARMS opens the corresponding alarm screen for the processed parameter. Xcellerex XDUO 2500 Mixer Operating Instructions 29146667 AH...
- Page 92 If XDUO 2500 Mixer has both pH and conductivity monitoring, the top data row on the pH/Cond display shows the pH value and the bottom data row shows the conductivity value. Both rows show pH values, if XDUO 2500 Mixer has dual pH monitoring. Xcellerex XDUO 2500 Mixer Operating Instructions 29146667 AH...
- Page 93 Tap the button to switch between these two modes. Numerical entry box Tapping a text box for numeric entry opens a keypad, which allows the user to enter the numerical value. The following illustration shows the numeric keypad. Xcellerex XDUO 2500 Mixer Operating Instructions 29146667 AH...
- Page 94 Agitator Detail - Synced Motors • Agitation Trend Batch Timer can be used independently of agitation. The following illustration shows the Batch Timer location on the Agitator Detail - Indi- vidual Motors screen. Xcellerex XDUO 2500 Mixer Operating Instructions 29146667 AH...
-
Page 95: Adjustment And Control Screens
Button to access the Mixer Control Mode screen, which allows switching between local control and FlexFactory control. CONTROL PANEL Button to access the Control Panel screen, which allows access to Windows CE Control Panel. Xcellerex XDUO 2500 Mixer Operating Instructions 29146667 AH... - Page 96 The following illustration shows the screen for setting time and date. Part Description Value entry fields for date and time information Current date and time Button to set the date and time Xcellerex XDUO 2500 Mixer Operating Instructions 29146667 AH...
- Page 97 If the button text displays Request FlexFactory Control, the mixer is • in the local control mode. If the button text displays Release FlexFactory Control, the mixer is in • the FlexFactory control mode. Status display. Xcellerex XDUO 2500 Mixer Operating Instructions 29146667 AH...
-
Page 98: Alarm Screens
4.3 Alarm screens Alarm screens Introduction This section provides information of the alarm overview screen and alarm configuration screens. In this section Section See page 4.3.1 Alarm overview screen 4.3.2 Alarm configuration screens Xcellerex XDUO 2500 Mixer Operating Instructions 29146667 AH... -
Page 99: Alarm Overview Screen
(for example drain the excess liquid from the mixer to clear the weight High High Alarm). Illustration of the alarm overview screen The following illustration shows an example of the alarm overview screen. Xcellerex XDUO 2500 Mixer Operating Instructions 29146667 AH... -
Page 100: Alarm Configuration Screens
Detail, Temperature Detail and Weight Detail screens, tapping ALARM CONFIG at the bottom of the screen. Alarm functionality When an alarm is issued, a warning is displayed. The system continues to run. Xcellerex XDUO 2500 Mixer Operating Instructions 29146667 AH... - Page 101 Display Function High High Alarm SP Critical high limit alarm High Alarm SP Warning high limit alarm Low Alarm SP Warning low limit alarm Low Low Alarm SP Critical low limit alarm Xcellerex XDUO 2500 Mixer Operating Instructions 29146667 AH...
-
Page 102: Ph And Conductivity Overview Screen
Interlock indicators. The button is selected if an interlock is active. See further down for Agitators On Interlock an illustration. Mixer Overweight Interlock For more information about interlocks, see Section 2.4 Interlocks, on page Xcellerex XDUO 2500 Mixer Operating Instructions 29146667 AH... - Page 103 4 User interface 4.4 pH and conductivity overview screen The interlock status is shown as follows: Interlock button Description The interlock is active. The interlock is not active. Xcellerex XDUO 2500 Mixer Operating Instructions 29146667 AH...
-
Page 104: Detail Screens
This section provides descriptions of the local control software detail screens for agitators, pH, conductivity, and temperature. In this section Section See page 4.5.1 Agitator screens 4.5.2 pH screens 4.5.3 Conductivity screen 4.5.4 Temperature screens Xcellerex XDUO 2500 Mixer Operating Instructions 29146667 AH... -
Page 105: Agitator Screens
If the button text displays CW, the agitator runs in clockwise direction. • Agitator motor speed setpoint (SP), text box for input and output, for each agitator. Process variable (PV) value displays for each agitator. Xcellerex XDUO 2500 Mixer Operating Instructions 29146667 AH... - Page 106 If the button text displays Synced Agitators, the agitator motors are • in synchronized mode. Batch Timer label and display. Agitation direction, on page 68 for more information on agitation direction. Xcellerex XDUO 2500 Mixer Operating Instructions 29146667 AH...
- Page 107 If the button text displays Individual Agitators, the agitator motors • are controlled individually. If the button text displays Synced Agitators, the agitator motors are • in synchronized mode. Batch Timer label and display. Xcellerex XDUO 2500 Mixer Operating Instructions 29146667 AH...
- Page 108 Stopped, the agitator motor drive is defective. Agitator state indicators (Running or Stopped). Process variable (PV) value displays for each agitator. Agitation direction, on page 68 for more information on agitation direction. Xcellerex XDUO 2500 Mixer Operating Instructions 29146667 AH...
-
Page 109: Ph Screens
PID controller output (controlled variable, CV) display. Note: The value is calculated by the PLC, when in Auto mode. In Manual mode, PHC_125 Man- ual CV is used as PHC_125 pH CV. Xcellerex XDUO 2500 Mixer Operating Instructions 29146667 AH... - Page 110 Note: Button text shows which probe is currently in use. PID Settings Tapping PID Settings opens the pH PID set- tings screen. Pumps Setup Tapping Pumps Setup opens the Prime Pumps screen. Xcellerex XDUO 2500 Mixer Operating Instructions 29146667 AH...
- Page 111 I-Term (integral) D-Term (derivative) pH PID controller output (controlled variable, CV) display. Note: The value is calculated by the PLC, when in Auto mode. In Manual mode, Manual CV is used as CV. Xcellerex XDUO 2500 Mixer Operating Instructions 29146667 AH...
- Page 112 Shown SC_202 Base PID CV in % of total pump speed range. Factory default values for the parameters on the pH PID Settings screen are suitable for most applications. Xcellerex XDUO 2500 Mixer Operating Instructions 29146667 AH...
-
Page 113: Conductivity Screen
The Conductivity Detail screen is reached by tapping Conductivity on the pH and con- ductivity overview screen. The following illustration shows an example of the Conductivity Detail screen. The data in the text box shows the process variable (PV) value for the conductivity probe. Xcellerex XDUO 2500 Mixer Operating Instructions 29146667 AH... -
Page 114: Temperature Screens
CV) display, shown in % of config- ured TCU temperature range. Note: In Auto mode, this value is calculated by the PLC. In Manual mode, TC_163 Manual CV is used as TC_163 Temperature CV. Xcellerex XDUO 2500 Mixer Operating Instructions 29146667 AH... - Page 115 Auto or Manual mode. If Auto is displayed, the mixer is in Auto • mode. If Manual is displayed, the mixer is in • Manual mode. PID Settings Button to open the Temperature PID screen. Xcellerex XDUO 2500 Mixer Operating Instructions 29146667 AH...
- Page 116 Temperature PID controller output (controlled variable, CV) display, shown in % of config- ured TCU temperature range. TE_161 PV The tag name and process variable (PV) dis- play for the currently selected temperature TE_162 PV sensor. Xcellerex XDUO 2500 Mixer Operating Instructions 29146667 AH...
- Page 117 The CV limits specify the allowed temperature range for the TCU. Note: It is recommended to keep the default CV limit values. The TCU performance may be less good, if the limit range is increased. Xcellerex XDUO 2500 Mixer Operating Instructions 29146667 AH...
-
Page 118: Transmitter Offsets Screen
Part Description Function Xmitter Displays of the actual process variable (PV) value. Offset Parameter offset values (positive or negative), text boxes for input. Displays of process variable (PV) values after offset adjustment. Xcellerex XDUO 2500 Mixer Operating Instructions 29146667 AH... -
Page 119: Trend Screens
0 to 160 mS/cm 0 to 14 0% to 100% 0 to 14 Temperature 0°C to 100°C 0% to 100% 0°C to 100°C Weight Not applicable Not applicable 0 to 2700 kg Xcellerex XDUO 2500 Mixer Operating Instructions 29146667 AH... - Page 120 The following illustration shows an example of a Trend screen. If two probes are available for a functionality, two process variable (PV) curves are shown on the relevant Trend screen. Part Description Measurement unit Graph area Legend Xcellerex XDUO 2500 Mixer Operating Instructions 29146667 AH...
-
Page 121: Installation
Components not covered in this manual must not be installed by the customer. In this chapter Section See page 5.1 Safety precautions 5.2 Site requirements 5.3 Installation of the system 5.4 Install accessories 5.5 Connect temperature control unit Xcellerex XDUO 2500 Mixer Operating Instructions 29146667 AH... -
Page 122: Safety Precautions
• WARN people who wear pacemakers or implanted heart defib- rillators from getting too close to the magnets. WARNING Access to power switch. The power switch must always be easy to access. Xcellerex XDUO 2500 Mixer Operating Instructions 29146667 AH... - Page 123 Indoor use only. The product is designed for indoor use only. CAUTION Dusty and damp atmosphere. Do not use the instrument in a dusty atmosphere or close to spraying water. NOTICE Do not remove jacking bolts from the installed system. Xcellerex XDUO 2500 Mixer Operating Instructions 29146667 AH...
-
Page 124: Site Requirements
Section 10.1 System specifications, on page 279. 1670 mm (65¾ in) 2610 mm (102¾ in) A: 1260 mm (49⅝ in) B: 1360 mm (53⅝ in) A: probe support excluded B: probe support included Xcellerex XDUO 2500 Mixer Operating Instructions 29146667 AH... - Page 125 NOTICE In order to allow convenient working conditions during the use, sufficient space should be provided on all sides of XDUO 2500 Mixer when installed at the intended production location. Xcellerex XDUO 2500 Mixer Operating Instructions 29146667 AH...
- Page 126 100-120 V AC, 50 or 60 Hz, 12 A 220-240 V AC, 50 or 60 Hz, 6 A Supply voltage, TCU See the manufacturer's documentation. Number of electrical outlets Two outlets for the following units: XDUO 2500 Mixer • • Xcellerex XDUO 2500 Mixer Operating Instructions 29146667 AH...
- Page 127 TCU. NOTICE The temperature control unit needs to be disconnected before moving the equipment. Connection to FlexFactory A PROFIBUS cable must be installed between the mixer I/O Cabinet and FlexFactory PLC Cabinet. Xcellerex XDUO 2500 Mixer Operating Instructions 29146667 AH...
-
Page 128: Installation Of The System
Secure jacking bolts. Do not move the instrument without engaging the jacking bolts. Always secure the instrument using the jacking bolts to prevent damage to the load cells, thereby avoiding damage to the equipment and injury to operators. Xcellerex XDUO 2500 Mixer Operating Instructions 29146667 AH... - Page 129 Configure the local control software It is recommended to configure the Administrator account when the instrument hard- ware has been installed. See Manage the administrator account, on page 295 for more information. Xcellerex XDUO 2500 Mixer Operating Instructions 29146667 AH...
-
Page 130: Install Accessories
An integrated probe support with test tube rack is installed on the XDUO 2500 Mixer by the manufacturer. The accessory hangs on two screws. The following illustration shows an installed probe support and test tube rack. To remove or install the accessory, follow the instructions below. Xcellerex XDUO 2500 Mixer Operating Instructions 29146667 AH... - Page 131 5 Installation 5.4 Install accessories Action Instruction Remove Lift the accessory up and pull it off the screws. Install Hang the accessory on the two screws on the mixer vessel. Xcellerex XDUO 2500 Mixer Operating Instructions 29146667 AH...
- Page 132 Together with your assistant, lift the step ladder and put the ladder holder onto the mixer vessel frame. Push the step ladder downwards, so that the ladder holder fits tightly onto the vessel frame. Xcellerex XDUO 2500 Mixer Operating Instructions 29146667 AH...
- Page 133 Tighten the bolts until the step ladder is correctly set in position on the mixer frame. Follow the same procedure for the second step ladder. The following illustration shows the correctly installed step ladder. Xcellerex XDUO 2500 Mixer Operating Instructions 29146667 AH...
-
Page 134: Connect Temperature Control Unit
Follow the instructions below to connect the TCU to XDUO 2500 Mixer. Step Action Connect the TCU to the power supply. Connect the communication cable to the applicable port on the TCU. Xcellerex XDUO 2500 Mixer Operating Instructions 29146667 AH... - Page 135 At least 39.5 L liquid is needed to fill the XDUO 2500 Mixer vessel jacket. Follow the instructions below to fill the vessel jacket with the coolant. Step Action Make sure that the vent valve and the drain valve of the mixer vessel jacket are closed. Xcellerex XDUO 2500 Mixer Operating Instructions 29146667 AH...
- Page 136 5 Installation 5.5 Connect temperature control unit Step Action Connect the TCU outlet tubing to coolant inlet (Supply) under the mixer vessel. Xcellerex XDUO 2500 Mixer Operating Instructions 29146667 AH...
- Page 137 5 Installation 5.5 Connect temperature control unit Step Action Connect the TCU inlet tubing to the coolant outlet (Return). Xcellerex XDUO 2500 Mixer Operating Instructions 29146667 AH...
- Page 138 Result: The locking ring moves back and emits a click. The connector is locked. Remove the reservoir cap on the TCU and and fill the reservoir with coolant. Reinstall the cap and turn on the TCU. Xcellerex XDUO 2500 Mixer Operating Instructions 29146667 AH...
- Page 139 Spilling the coolant on the floor makes the floor slippery and may cause acci- dents. Follow the instructions below to empty the vessel jacket. Xcellerex XDUO 2500 Mixer Operating Instructions 29146667 AH...
- Page 140 Connect the Snap-tite connector of the drain tubing to the coolant inlet tubing (connected to Supply). Fill the vessel jacket, on page 135 for more information about Snap-tite connector. Wait until all fluid has drained out from the mixer vessel jacket. Xcellerex XDUO 2500 Mixer Operating Instructions 29146667 AH...
-
Page 141: Preparation
This chapter provides required information to prepare XDUO 2500 Mixer for operation. In this chapter Section See page 6.1 Safety precautions 6.2 Stabilize the mixer vessel 6.3 Prepare the disposable bag 6.4 Prepare and install the probes 6.5 Prepare the pumps Xcellerex XDUO 2500 Mixer Operating Instructions 29146667 AH... -
Page 142: Safety Precautions
Lock-Out / Tag-Out (LOTO). CAUTION Use caution. Use caution close to moving parts, stored energy, pressurization, and electrical sources. Xcellerex XDUO 2500 Mixer Operating Instructions 29146667 AH... -
Page 143: Stabilize The Mixer Vessel
This section provides information about how to make sure that XDUO 2500 Mixer is in stable position during preparation and operation. In this section Section See page 6.2.1 Use jacking bolts 6.2.2 Use leveling feet Xcellerex XDUO 2500 Mixer Operating Instructions 29146667 AH... -
Page 144: Use Jacking Bolts
The jacking bolts must be engaged during each move (including short moves, such as cleaning under the wheels of the instrument). Xcellerex XDUO 2500 Mixer Operating Instructions 29146667 AH... - Page 145 The jacking bolts are fully engaged in the mixer vessel frame. • Each of the nuts turns freely using fingers alone. • Turn each top nut to the highest point on the jacking bolt with your fingers. Xcellerex XDUO 2500 Mixer Operating Instructions 29146667 AH...
- Page 146 Turn each bottom nut up to the support plate (1) with your fingers. Tighten the bottom nuts with 0.5 to 1 turn of a wrench. Turn the top nuts down the bolts to the support plates with your fingers. Xcellerex XDUO 2500 Mixer Operating Instructions 29146667 AH...
- Page 147 Result: The jacking bolts are engaged and the load cells are protected from the possible damage caused by movement. Disengage jacking bolts Follow the instructions below to disengage the jacking bolts. Step Action Loosen each top nut with a wrench. Xcellerex XDUO 2500 Mixer Operating Instructions 29146667 AH...
- Page 148 6.2 Stabilize the mixer vessel 6.2.1 Use jacking bolts Step Action Turn the top nuts to the highest point on the jacking bolts with your fingers. Loosen each bottom nut with the wrench. Xcellerex XDUO 2500 Mixer Operating Instructions 29146667 AH...
- Page 149 Before starting batch operations Before starting batch operations, verify that the instrument is clear of obstructions. De- pending on site requirements, a functional check or load cell calibration might be required before starting a batch. Xcellerex XDUO 2500 Mixer Operating Instructions 29146667 AH...
-
Page 150: Use Leveling Feet
Follow the instructions below to lower the leveling feet. Step Action Turn the nut (1) counterclockwise to move the leveling foot (2) downwards, until the leveling foot reaches the ground. Use your fingers to turn the nut. Xcellerex XDUO 2500 Mixer Operating Instructions 29146667 AH... - Page 151 Continue turning the nut using a wrench, until the wheel (3) is lifted from the ground and the leveling foot (2) supports the weight of the mixer vessel. Verify that the vessel frame is level. Xcellerex XDUO 2500 Mixer Operating Instructions 29146667 AH...
- Page 152 Continue to turn the nut using your fingers, until the leveling foot reaches the highest position and the wheel (3) fully supports the vessel weight. Xcellerex XDUO 2500 Mixer Operating Instructions 29146667 AH...
-
Page 153: Prepare The Disposable Bag
Prepare the disposable bag Introduction This section provides information how to unpack and install the disposable bag assembly. In this section Section See page 6.3.1 Unpack the disposable bag assembly 6.3.2 Install the disposable bag Xcellerex XDUO 2500 Mixer Operating Instructions 29146667 AH... -
Page 154: Unpack The Disposable Bag Assembly
Use only your fingers to remove protective wrappings and zip ties from the disposable bag assembly and from the lines. Scissors and cable tie cutters might puncture the bag assembly and the lines. Follow the instructions below to start the unpacking. Xcellerex XDUO 2500 Mixer Operating Instructions 29146667 AH... - Page 155 6.3 Prepare the disposable bag 6.3.1 Unpack the disposable bag assembly Step Action Open the box and remove the packing materials. Take out the disposable bag assembly and place the bag on the inspection table. Xcellerex XDUO 2500 Mixer Operating Instructions 29146667 AH...
- Page 156 6 Preparation 6.3 Prepare the disposable bag 6.3.1 Unpack the disposable bag assembly Step Action Carefully open the outer protective bag and take out the disposable bag assembly. Xcellerex XDUO 2500 Mixer Operating Instructions 29146667 AH...
- Page 157 NOTICE Do not remove the wrap from the tubing ports, tubing connectors, and filters. These items need protection during bag installation. The wrap can be removed after the bag has been installed. Xcellerex XDUO 2500 Mixer Operating Instructions 29146667 AH...
- Page 158 The label above is an example. Actual data printed on the label is specific for each bag. Verify that the gamma irradiation dot (2) on the bag label is red, indicating successful sterilization. Xcellerex XDUO 2500 Mixer Operating Instructions 29146667 AH...
- Page 159 Do not remove the protective bags from the probe ports, tubing connectors, and filters. Unprotected connectors may be damaged or contaminated during the installation of the disposable bag. Remove the protection after the installation. Xcellerex XDUO 2500 Mixer Operating Instructions 29146667 AH...
- Page 160 Remove the bubble wrap from the liquid addition lines. NOTICE Do not remove zip ties that hold the lines together. Loose lines can be damaged during bag installation. Remove the bubble wrap from the drain line. Xcellerex XDUO 2500 Mixer Operating Instructions 29146667 AH...
- Page 161 Remove any additional wrapping at the top of the disposable bag. Result: The disposable bag assembly is ready to be installed into the vessel. Dispose of the box according to local procedures. Xcellerex XDUO 2500 Mixer Operating Instructions 29146667 AH...
-
Page 162: Install The Disposable Bag
Before starting the disposable bag installation, wipe clean and dry the vessel wall if necessary. Water on the vessel wall might be mistaken for bag leakage. Follow the instructions below to start the installation of the bag assembly. Xcellerex XDUO 2500 Mixer Operating Instructions 29146667 AH... - Page 163 6 Preparation 6.3 Prepare the disposable bag 6.3.2 Install the disposable bag Step Action Remove the lid parts from the mixer. Xcellerex XDUO 2500 Mixer Operating Instructions 29146667 AH...
- Page 164 Drain opening with drain plate at the bottom corner of the vessel (2). • Probe window at the side corner of the vessel (3). • Access doors at both sides of the vessel (4). • Check that the drain plate is in place. Xcellerex XDUO 2500 Mixer Operating Instructions 29146667 AH...
- Page 165 Carefully transfer the disposable bag assembly to the vessel and lower the bag into the vessel. If you are installing a Plus bag assembly, make sure that the probe connec- tors (1) face the probe window (2). Xcellerex XDUO 2500 Mixer Operating Instructions 29146667 AH...
- Page 166 6 Preparation 6.3 Prepare the disposable bag 6.3.2 Install the disposable bag Step Action Position the impeller baseplates above the magnetic drive heads. Xcellerex XDUO 2500 Mixer Operating Instructions 29146667 AH...
- Page 167 6.3 Prepare the disposable bag 6.3.2 Install the disposable bag Step Action Remove the side access doors on both sides as follows: Hold the door handle tightly. Turn the door counterclockwise. Remove the door. Xcellerex XDUO 2500 Mixer Operating Instructions 29146667 AH...
- Page 168 Adjust all bag corners to vessel corners. Stretch out the bag to avoid wrinkles. CAUTION Pinch hazard. Use caution to avoid pinching fingers between the impeller baseplate and the magnetic drive head. Re-install the side access doors. Xcellerex XDUO 2500 Mixer Operating Instructions 29146667 AH...
- Page 169 6.3.2 Install the disposable bag Step Action Insert the drain line through the drain opening. Carefully pull the line through the opening. Tip: The drain line is more easily reached from the underside of the vessel. Xcellerex XDUO 2500 Mixer Operating Instructions 29146667 AH...
- Page 170 Keep holding the handle and let the spring retract the handle back under the mixer vessel. Use light force to control the movement. Note: Verify visually that the impeller assembly is in contact with the agitator drive head. Xcellerex XDUO 2500 Mixer Operating Instructions 29146667 AH...
- Page 171 Result: The protective collar surrounding the impeller baseplate is raised. The impeller baseplate is disconnected from the agitator drive head. Xcellerex XDUO 2500 Mixer Operating Instructions 29146667 AH...
- Page 172 Pull all lines away from the sides of the bag assembly and hang the lines over the rim of the mixer vessel. Note: If the lines are arranged, they do not impede the adjustment of the disposable bag inside the mixer vessel. Xcellerex XDUO 2500 Mixer Operating Instructions 29146667 AH...
- Page 173 Step Action Install the hopper, if applicable. A. Disconnect the TC-clamp from the disposable bag powder addition port. B. Make sure that the O-ring stays in place on the powder addition port. Xcellerex XDUO 2500 Mixer Operating Instructions 29146667 AH...
- Page 174 6 Preparation 6.3 Prepare the disposable bag 6.3.2 Install the disposable bag Step Action C. Place the hopper onto the powder addition port and secure it with the TC-clamp. Xcellerex XDUO 2500 Mixer Operating Instructions 29146667 AH...
-
Page 175: Prepare And Install The Probes
This section is relevant for the Plus bag assembly. In this section Section See page 6.4.1 Calibrate the pH probe 6.4.2 Prepare the conductivity probe 6.4.3 Autoclave probe sheath assembly 6.4.4 Insert probes into the disposable bag Xcellerex XDUO 2500 Mixer Operating Instructions 29146667 AH... -
Page 176: Calibrate The Ph Probe
Connect the pH probe with the probe cable so that no thread is visible on the probe. NOTICE Do not cross-thread the probe cable. Tighten the connection properly. Carefully push the connector together when tightening it. Xcellerex XDUO 2500 Mixer Operating Instructions 29146667 AH... - Page 177 Action Locate the pH/DO transmitter display on the transmitter cabinet. Press MENU (1). Result: A menu is displayed on the transmitter screen. Use the navigation keys to make selections in the menu: Xcellerex XDUO 2500 Mixer Operating Instructions 29146667 AH...
- Page 178 Consult the probe manufacturer's manual for acceptable slope value range. Press EXIT (3) repeatedly until you reach to the main screen. Rinse the pH probe with de-ionized water. Disconnect the probe cable from the pH probe. Xcellerex XDUO 2500 Mixer Operating Instructions 29146667 AH...
- Page 179 Measure the pH of your sample using an external calibrated pH meter. Perform the standardization as follows, using the pH/DO transmitter display on the transmitter cabinet: Xcellerex XDUO 2500 Mixer Operating Instructions 29146667 AH...
- Page 180 3 Select pH and press ENTER. 4 Select Standardize and press ENTER. 5 Enter the externally measured pH value of your sample and press ENTER. 6 Press EXIT (3) repeatedly until you reach to the main screen. Xcellerex XDUO 2500 Mixer Operating Instructions 29146667 AH...
-
Page 181: Prepare The Conductivity Probe
Do not cross-thread the probe cable. In the accompanying manual, locate the cell constant value. Locate the pH/conductivity transmitter display on the I/O Cabinet. Press MENU (1). Result: A menu is displayed on the transmitter screen. Xcellerex XDUO 2500 Mixer Operating Instructions 29146667 AH... - Page 182 Disconnect the probe cable from the probe. This procedure is sufficient for most applications. If additional procedures are needed (changing an offset or resetting the system), see the manufacturer's documentation. Xcellerex XDUO 2500 Mixer Operating Instructions 29146667 AH...
-
Page 183: Autoclave Probe Sheath Assembly
Follow the instructions below to prepare the probe sheath for autoclaving: Step Action Verify that the probe cable is not connected to the probe. Draw 1 to 2 mL deionized water into a disposable pipette. Xcellerex XDUO 2500 Mixer Operating Instructions 29146667 AH... - Page 184 Remove the pipette. Verify that the O-rings are present on the probe. Insert the probe into the probe sheath assembly through the threaded hole in the probe sheath assembly end plug. Xcellerex XDUO 2500 Mixer Operating Instructions 29146667 AH...
- Page 185 Use a probe assembly holder (optional) to position the probe sheath assembly correctly during autoclaving. Contact your GE representative for more infor- mation. Start the autoclave. See Conditions, on page 183 for sterilization conditions. Xcellerex XDUO 2500 Mixer Operating Instructions 29146667 AH...
-
Page 186: Insert Probes Into The Disposable Bag
Side cutters or pliers (similar to the ones used to remove a cable tie) can be used for the purpose. Follow the instructions below to prepare for installation of the probe sheath assembly into the disposable bag. Xcellerex XDUO 2500 Mixer Operating Instructions 29146667 AH... - Page 187 (2 to 3 teeth en- gaged). NOTICE Do not tighten the clamps too much, otherwise they prevent the insertion of the probe into the disposable bag. Xcellerex XDUO 2500 Mixer Operating Instructions 29146667 AH...
- Page 188 Install probe sheath assembly Before inserting the probe sheath assembly into the disposable bag, make sure you have a clamp tightening tool accessible. Follow the instructions below to install the probe sheath assembly. Xcellerex XDUO 2500 Mixer Operating Instructions 29146667 AH...
- Page 189 Hold the male ACD connector (on the probe sheath assembly) and align it with the female connector (on the probe port on the disposable bag), so that the white membrane strips are facing each other as they exit the flat sides of the connectors. Xcellerex XDUO 2500 Mixer Operating Instructions 29146667 AH...
- Page 190 Holding the bodies of both connectors with one hand, grip both white membrane strips with the other hand and pull them (perpendicular to the connectors) simultaneously away from the bodies of the connectors in one smooth continuous motion. Xcellerex XDUO 2500 Mixer Operating Instructions 29146667 AH...
- Page 191 ACD connector. Remove the anti-actuation ring, which prevents unintentional engagement before the ACD connectors have been correctly connected. Xcellerex XDUO 2500 Mixer Operating Instructions 29146667 AH...
- Page 192 Push the thumb rest of the male connector down towards the base of the body of the connector until the thumb rest meets the body. Note: A ratchet sound is heard from the male ACD connector during this motion. Xcellerex XDUO 2500 Mixer Operating Instructions 29146667 AH...
- Page 193 If there is any indication that the connection might not be aseptic, immediately clamp off this probe sheath assembly on the short section of silicone tubing be- tween the disposable bag and the female ACD connec- tor. Xcellerex XDUO 2500 Mixer Operating Instructions 29146667 AH...
- Page 194 Hold the mated connectors with one hand and push the end plug of the probe sheath assembly inwards toward the disposable bag, compressing the bellows section of the probe sheath assembly. Result: The bellows section is fully compressed, as shown below. Xcellerex XDUO 2500 Mixer Operating Instructions 29146667 AH...
- Page 195 Result: The tip of the probe extends above the surface at the inside of the disposable bag for about 8 mm. The probe is now ready to be connected to the appropriate cable. Xcellerex XDUO 2500 Mixer Operating Instructions 29146667 AH...
- Page 196 Repeat steps 1 to 11 above to connect the next probe. Collect all loose probe cables and place the cables into the cable holders on the short side of the mixer vessel. Clamp off any unused probe port connections. Xcellerex XDUO 2500 Mixer Operating Instructions 29146667 AH...
- Page 197 Install the temperature probe Follow the instructions below to install the temperature probe into XDUO 2500 Mixer disposable bag. Step Action Slowly and carefully remove the zip tie from the thermowell. Xcellerex XDUO 2500 Mixer Operating Instructions 29146667 AH...
- Page 198 Carefully insert the temperature probe into the thermowell adjacent to the probes. Attach the temperature probe cable to the probe support bar (for example with a zip tie) to prevent operators from accidentally removing the temper- ature probe from the thermowell. Xcellerex XDUO 2500 Mixer Operating Instructions 29146667 AH...
- Page 199 6.4 Prepare and install the probes 6.4.4 Insert probes into the disposable bag Step Action Place the temperature probe cable into the cable holders on the short side of the mixer vessel. Xcellerex XDUO 2500 Mixer Operating Instructions 29146667 AH...
-
Page 200: Prepare The Pumps
Addition of base solution Install tubing in pump model 520 To install the tubing in pump model 520 follow the instructions below. Step Action Unlock the pump head cover with a screwdriver. Open the cover. Xcellerex XDUO 2500 Mixer Operating Instructions 29146667 AH... - Page 201 Align the roller assembly so that it is not blocked by the retention pin on the roller assembly. Push the tubing into the space around the roller assembly. Xcellerex XDUO 2500 Mixer Operating Instructions 29146667 AH...
- Page 202 Step Action Turn the roller clockwise to move the insertion space forward all the way around the roller assembly. Press up the second lever with your thumb and firmly insert the tubing. Xcellerex XDUO 2500 Mixer Operating Instructions 29146667 AH...
- Page 203 6 Preparation 6.5 Prepare the pumps Step Action Close the pump head and lock it using the screwdriver. Xcellerex XDUO 2500 Mixer Operating Instructions 29146667 AH...
-
Page 204: Operation
7.3 Operate agitator motors 7.4 Prepare the pump 7.5 Control the pH 7.6 Control the temperature 7.7 Manage mixer weight 7.8 Add liquid contents 7.9 Add solid contents 7.10 Finish a batch run Xcellerex XDUO 2500 Mixer Operating Instructions 29146667 AH... -
Page 205: Safety Precautions
CAUTION Hot surface. Do not touch the vessel inner surface during high temperature runs. The temperature of the vessel inner surface may be higher than 60°C. Xcellerex XDUO 2500 Mixer Operating Instructions 29146667 AH... - Page 206 CAUTION Secure pump tubing. Make sure that the pump tubing is secure and in good condition before using the pump. Do not block or kink the tubing downstream of the pump. Xcellerex XDUO 2500 Mixer Operating Instructions 29146667 AH...
-
Page 207: Start Up The System
Follow the instructions below to start local control on XDUO 2500 Mixer. Step Action Make sure that the EMERGENCY STOP button is disengaged. Turn the system power switch to I ON position. Xcellerex XDUO 2500 Mixer Operating Instructions 29146667 AH... - Page 208 Type your user name and password in the text boxes. Tap OK. Result: The user is logged in. The LOGON button text changes to LOGOFF. Tap RESET on local control software home screen. Result: The local control of the mixer is enabled. Xcellerex XDUO 2500 Mixer Operating Instructions 29146667 AH...
- Page 209 Log in to FlexFactory software as described in FlexFactory Automation User Manual. When the XDUO Mixer screen is visible on the M-Station OIT, tap RESET (1) on the XDUO 2500 Mixer local control software home screen. Xcellerex XDUO 2500 Mixer Operating Instructions 29146667 AH...
- Page 210 Data logging saves the data to the non-system memory card on the HMI. The data can then be transferred manually to the USB. Follow the instructions below to start or stop logging data. Xcellerex XDUO 2500 Mixer Operating Instructions 29146667 AH...
- Page 211 Step Action Tap START LOGGING on the home screen to log data locally. Result: Data logging starts. The START LOGGING button text changes to STOP LOGGING. To stop logging, tap STOP LOGGING. Xcellerex XDUO 2500 Mixer Operating Instructions 29146667 AH...
-
Page 212: Operate Agitator Motors
Tap HOME to go back to the home screen. Tap Agitation on the home screen. Depending on the system settings, the Agitator Detail - Individual Motors screen or Agitator Detail - Synced Motors screen opens. Xcellerex XDUO 2500 Mixer Operating Instructions 29146667 AH... - Page 213 Operating the agitator in viscous solutions may cause the agitator blade to decouple. A clicking or knocking sound is heard if this happens. Decreasing agitator speed helps to prevent the agitator blade from decoupling. Xcellerex XDUO 2500 Mixer Operating Instructions 29146667 AH...
- Page 214 Tap HOME to go back to the home screen. Tap Agitation on the home screen. Depending on the system settings, the Agitator Detail - Individual Motors screen or Agitator Detail - Synced Motors screen opens. Xcellerex XDUO 2500 Mixer Operating Instructions 29146667 AH...
- Page 215 Operating the agitator in viscous solutions may cause the agitator blade to decouple. A clicking or knocking sound is heard if this happens. Decreasing agitator speed helps to prevent the agitator blade from decoupling. Xcellerex XDUO 2500 Mixer Operating Instructions 29146667 AH...
- Page 216 Agitator Detail - Individual Motors screen. On the Agitator Detail - Individual Motors screen, tap Stop to stop each agitator motor. On the Agitator Detail - Synced Motors screen, tap Stop to stop both agitator motors. Xcellerex XDUO 2500 Mixer Operating Instructions 29146667 AH...
- Page 217 On the home screen, tap Agitation to open the Agitator Detail - Synced motors or Agitator Detail - Individual Motors screen. Find the agitator direction buttons. On the Agitator Detail - Synced motors screen: • On the Agitator Detail - Individual motors screen: • Xcellerex XDUO 2500 Mixer Operating Instructions 29146667 AH...
- Page 218 To set the agitator working in counterclockwise direction, tap If the button text displays CCW, the agitator is running in counterclock- • wise direction. To set the agitator working in clockwise direction, tap CCW. Xcellerex XDUO 2500 Mixer Operating Instructions 29146667 AH...
-
Page 219: Prepare The Pump
Follow the instructions below to prime the pump. Step Action On the home screen, tap pH/Cond to open the pH and conductivity overview screen. Tap pH to open the pH Detail screen. Xcellerex XDUO 2500 Mixer Operating Instructions 29146667 AH... - Page 220 To prime the base pump, tap and hold Base. • Result: The pump rotates at the 35% of maximum speed (CV = 35%), while the button is pressed. Release the button when the pump is primed. Xcellerex XDUO 2500 Mixer Operating Instructions 29146667 AH...
-
Page 221: Control The Ph
On the pH Detail screen, press the Probe 1/Probe 2 button (1) to select the correct probe. Make sure that the instrument is in Auto mode (2). If the Manual button is shown, tap the button to set the pH control to Auto mode. Xcellerex XDUO 2500 Mixer Operating Instructions 29146667 AH... - Page 222 Type the chosen pH value into the PHC_125 pH SP text box. Result: The pH of the disposable bag contents is controlled by acid and base pumps to the given setpoint. Note: Other text boxes on the screen are inaccessible in Auto mode. Xcellerex XDUO 2500 Mixer Operating Instructions 29146667 AH...
- Page 223 On the pH Detail screen, press the Probe 1/Probe 2 button (1) to select the correct probe. Make sure that the instrument is in Manual mode (2). If the Auto button is shown, tap the button to set the pH control to Manual mode. Xcellerex XDUO 2500 Mixer Operating Instructions 29146667 AH...
- Page 224 PHC_125 Manual CV text box. Result: The instrument keeps the pump speed as specified, using a split range control loop. Note: Other text boxes on the screen are inaccessible in Manual mode. Xcellerex XDUO 2500 Mixer Operating Instructions 29146667 AH...
-
Page 225: Control The Temperature
Make sure that no interlocks are active. Note: The button is selected when an interlock is active. Tap HOME to go back to the home screen. Tap Temperature on the home screen to open the Temperature Detail screen. Xcellerex XDUO 2500 Mixer Operating Instructions 29146667 AH... - Page 226 Type an applicable temperature setpoint value into the TC_163 Temperature SP text box. Result: The control of mixer vessel temperature is enabled. Note: Other text boxes on the screen are inaccessible in Auto mode. Xcellerex XDUO 2500 Mixer Operating Instructions 29146667 AH...
- Page 227 Tap HOME to go back to the home screen. Tap Temperature on the home screen to open the Temperature Detail screen. On the Temperature Detail screen, press the Probe 1/Probe 2 button (1) to select the applicable sensor. Xcellerex XDUO 2500 Mixer Operating Instructions 29146667 AH...
- Page 228 Type an applicable value (% of total TCU remote setpoint range) into the TC_163 Manual CV text box. Result: The control of mixer vessel temperature is enabled. Note: Other text boxes on the screen are inaccessible in Manual mode. Xcellerex XDUO 2500 Mixer Operating Instructions 29146667 AH...
-
Page 229: Manage Mixer Weight
The mixer vessel jacket can be filled with the coolant. On the home screen, tap Weight to open the Weight Detail screen. On the Weight Detail screen, tap Tare. Result: The tare confirmation dialog box opens. Xcellerex XDUO 2500 Mixer Operating Instructions 29146667 AH... - Page 230 Verify that the WT_176 Weight PV value is reset to approximately 0.0 kg. Tap No/Return (2) to close the tare confirmation dialog box. Tap HOME to go back to the home screen. Xcellerex XDUO 2500 Mixer Operating Instructions 29146667 AH...
-
Page 231: Add Liquid Contents
Verify that the liquid addition lines are not kinked and are free from obstruc- tions. Verify that the liquid addition lines do not prevent the adjustment of the disposable bag inside the mixer. Xcellerex XDUO 2500 Mixer Operating Instructions 29146667 AH... - Page 232 Add liquids into the disposable CAUTION Check floor safety limits. Before filling the TCU and the mixer with liquid, verify that the total system weight is below the established floor loading safety limits of the facility. Xcellerex XDUO 2500 Mixer Operating Instructions 29146667 AH...
- Page 233 Reach inside the mixer vessel through the side access opening and adjust • the bottom corners of the bag assembly. Pull the top corners of the bag assembly toward the correct position. • Xcellerex XDUO 2500 Mixer Operating Instructions 29146667 AH...
- Page 234 Continue filling the disposable bag with liquid. During filling, gently adjust the bag position so that the bag shape fits the mixer vessel shape. Make sure that the bag corners fit into the mixer vessel corners. Xcellerex XDUO 2500 Mixer Operating Instructions 29146667 AH...
- Page 235 Set the lid with the center opening on top of the vessel. Tip: The lid helps to protect the top of the bag and to hold the powder addition port in place. Xcellerex XDUO 2500 Mixer Operating Instructions 29146667 AH...
- Page 236 (1). Slide another lid section in place (2) to secure the powder addition port in the opening, keeping the TC-clamp above the lids. Pull the lines through the rectangular lid opening. If needed, clamp the fill lines and disconnect the liquid source. Xcellerex XDUO 2500 Mixer Operating Instructions 29146667 AH...
-
Page 237: Add Solid Contents
Heavy object. The container with solid ingredients is heavy. Use caution, to avoid personal injury, when filling the disposable bag from the top of the mixer. Step Action Set the lid with the center opening on top of the vessel. Xcellerex XDUO 2500 Mixer Operating Instructions 29146667 AH... - Page 238 (1). Slide another lid section in place (2) to hold the powder addition port in place, keeping the TC-clamp above the lids. Disconnect the TC-clamp from the powder addition port. Remove the protective cap from the powder addition port. Xcellerex XDUO 2500 Mixer Operating Instructions 29146667 AH...
- Page 239 Make sure that the O-ring stays in place on the powder addition port. Place the hopper onto the powder addition port (1) and attach the hopper to the port with the TC-clamp (2). Xcellerex XDUO 2500 Mixer Operating Instructions 29146667 AH...
- Page 240 Slide the vessel lid section outwards for easier access to the powder addition port. Install the protective cap on the powder addition port. Install the TC-clamp. Slide the lid back into place around the base of the TC-clamp. Xcellerex XDUO 2500 Mixer Operating Instructions 29146667 AH...
-
Page 241: Finish A Batch Run
7.10 Finish a batch run Introduction This section provides information how to finish a batch run. In this section Section See page 7.10.1 Collect the product 7.10.2 Remove the disposable bag 7.10.3 Shut down the system Xcellerex XDUO 2500 Mixer Operating Instructions 29146667 AH... -
Page 242: Collect The Product
Tip: You can loosen a clamp on an liquid addition line to reduce the vacuum in the disposable bag and facilitate the draining. Allow all contents to drain from the disposable bag. Xcellerex XDUO 2500 Mixer Operating Instructions 29146667 AH... -
Page 243: Remove The Disposable Bag
Remove and clean the pH and conductivity probes according to facility procedures. Autoclave and store the probes in a clean place according to manufacturer's instructions. Clamp all probe connector ends. Disconnect all lines. Xcellerex XDUO 2500 Mixer Operating Instructions 29146667 AH... - Page 244 Follow the instructions below to remove the disposable bag from XDUO 2500 Mixer. Step Action Remove the side access door as follows: Hold the door handle tightly. Turn the door counterclockwise. Remove the door. Xcellerex XDUO 2500 Mixer Operating Instructions 29146667 AH...
- Page 245 Follow the instructions below to dispose of the used disposable bag assembly. Step Action If the site policy requires decontamination of the bag prior to disposal, rinse the walls of the empty bag with a bleach solution, then drain. Xcellerex XDUO 2500 Mixer Operating Instructions 29146667 AH...
- Page 246 7 Operation 7.10 Finish a batch run 7.10.2 Remove the disposable bag Step Action Dispose of the bag assembly according to national and local environmental regulations. Xcellerex XDUO 2500 Mixer Operating Instructions 29146667 AH...
-
Page 247: Shut Down The System
Disconnect the power cord • Turn off the power supply circuit breaker. • Note: The main circuit breaker is provided by the customer. The location of the circuit breaker depends on the facility. Xcellerex XDUO 2500 Mixer Operating Instructions 29146667 AH... -
Page 248: Maintenance
See page 8.1 Safety precautions 8.2 Maintenance schedules 8.3 Lock-Out / Tag-Out (LOTO): turn-off procedure 8.4 Lock-Out / Tag-Out (LOTO): turn-on procedure 8.5 Cleaning 8.6 Hardware maintenance 8.7 Storage, moving and reinstallation Xcellerex XDUO 2500 Mixer Operating Instructions 29146667 AH... -
Page 249: Safety Precautions
Turn off equipment. Turn off the system and Lock-out / Tag-out (LOTO) the electrical equipment before doing maintenance. CAUTION Contamination hazard. Before performing any service work on XDUO 2500 Mixer, make sure that the system has been properly decontaminated. Xcellerex XDUO 2500 Mixer Operating Instructions 29146667 AH... -
Page 250: Maintenance Schedules
Copy the form you need from Section 10.7 Health and Safety Declaration Forms, on page 292 or print it from the PDF file available on the User Documentation CD. Xcellerex XDUO 2500 Mixer Operating Instructions 29146667 AH... - Page 251 Replace fuses GE service engineer Contact your GE represen- tative. Verify agitator speed ac- curacy If the instrument is used less than 12 times a year, the verification can be made annually. Xcellerex XDUO 2500 Mixer Operating Instructions 29146667 AH...
- Page 252 See the manufacturer's monitoring function (1 personnel trained by GE manual. weight calibration) As needed Conductivity transmitter Calibration technician See the manufacturer's calibration manual. pH transmitter calibra- Calibration technician See the manufacturer's tion manual. Xcellerex XDUO 2500 Mixer Operating Instructions 29146667 AH...
-
Page 253: Lock-Out / Tag-Out (Loto): Turn-Off Procedure
Turn off the instrument Follow the instructions below to turn off XDUO 2500 Mixer. Step Action Turn the system power switch to O OFF position. Attach a tag-out device onto the system power switch. Xcellerex XDUO 2500 Mixer Operating Instructions 29146667 AH... - Page 254 Turn off the TCU following the manufacturer's instructions. Empty the mixer vessel jacket as described in Empty the vessel jacket, on page 139. Attach a tag-out device onto the XDUO 2500 Mixer coolant inlet. Xcellerex XDUO 2500 Mixer Operating Instructions 29146667 AH...
-
Page 255: Lock-Out / Tag-Out (Loto): Turn-On Procedure
Remove the tag-out device from the XDUO 2500 Mixer coolant inlet. Connect the coolant tubing and fill the mixer vessel jacket as described in Fill the vessel jacket, on page 135. Remove the tag-out device from the system power switch. Xcellerex XDUO 2500 Mixer Operating Instructions 29146667 AH... - Page 256 8 Maintenance 8.4 Lock-Out / Tag-Out (LOTO): turn-on procedure Step Action Turn the system power switch to I ON position. Xcellerex XDUO 2500 Mixer Operating Instructions 29146667 AH...
-
Page 257: Cleaning
Never immerse any part of the equipment in liquid or spray liquid on the equipment. Always make sure that the equipment is com- pletely dry before plugging it in. Always follow all environmental, health, and safety guidelines pertaining to the materials used. Xcellerex XDUO 2500 Mixer Operating Instructions 29146667 AH... - Page 258 1 Scrub areas of surface rust with an extra-fine mildly abrasive cleaning pad. 2 Wipe the treated areas with a surface passivation chemical. 3 Wipe the treated areas with a cloth soaked in Water For Injection (WFI) to remove the chemical. Xcellerex XDUO 2500 Mixer Operating Instructions 29146667 AH...
-
Page 259: Hardware Maintenance
Use only the replacement parts approved by GE. If the cause for the rupture is not known, contact your GE representative. Follow the instructions below to replace the burst disc. Xcellerex XDUO 2500 Mixer Operating Instructions 29146667 AH... - Page 260 Tilt the pipe (3) outwards and remove the ruptured burst disc. Insert the new burst disc. See the manufacturer's documentation for more information. Attach the clamp. Close the clamp with the screw. Xcellerex XDUO 2500 Mixer Operating Instructions 29146667 AH...
- Page 261 Use water or weights to increase the mixer weight: Add a known quantity of water into the disposable bag installed inside • the mixer, place a known quantity of weights onto the mixer. • Xcellerex XDUO 2500 Mixer Operating Instructions 29146667 AH...
- Page 262 Verify that the weight displayed in the WT_176 Weight PV text box corre- sponds to the added weight. Result: Mixer weight monitoring functionality is verified. Note: If the weight reading is not correct, contact your GE representative for assis- tance. Xcellerex XDUO 2500 Mixer Operating Instructions 29146667 AH...
-
Page 263: Storage, Moving And Reinstallation
8 Maintenance 8.7 Storage, moving and reinstallation Storage, moving and reinstallation Contact your GE representative for instructions on how to store, move and re-install the instrument. Xcellerex XDUO 2500 Mixer Operating Instructions 29146667 AH... -
Page 264: Troubleshooting
See page 9.1 Agitation 9.2 Burst disc 9.3 FlexFactory connectivity 9.4 Local control panel 9.5 pH equilibrium 9.6 pH/Conductivity monitoring or control 9.7 Pumps 9.8 Temperature control 9.9 Temperature monitoring 9.10 Weight monitoring Xcellerex XDUO 2500 Mixer Operating Instructions 29146667 AH... -
Page 265: Agitation
The system is in Manual mode 1 Set the system to Auto and cannot accept the setpoint. mode. 2 Specify the setpoint. Note: When the system is in Manual mode the setpoint is ignored. Xcellerex XDUO 2500 Mixer Operating Instructions 29146667 AH... - Page 266 The agitator drive head rubs against the agitator base plate support and a grinding sound is emitted. Plastic filings might be generated. Xcellerex XDUO 2500 Mixer Operating Instructions 29146667 AH...
-
Page 267: Burst Disc
See Replace burst disc, on page259 for instructions. If the cause for the rupture • is not known, contact your GE representative for sup- port. Use only replacement parts approved by GE. Xcellerex XDUO 2500 Mixer Operating Instructions 29146667 AH... -
Page 268: Flexfactory Connectivity
A terminating resistor in the Verify that a terminating resistor the PROFIBUS network alter- network, upstream of the sys- is present only on the last unit in nates on/off. tem, is switched on. the chain. Xcellerex XDUO 2500 Mixer Operating Instructions 29146667 AH... -
Page 269: Local Control Panel
A specific screen is not accessi- The mixer configuration is not Contact your GE representative ble from the local control panel. correctly set up. for assistance with configuration adjustment. Xcellerex XDUO 2500 Mixer Operating Instructions 29146667 AH... -
Page 270: Ph Equilibrium
Quantity of media • The pump type • Concentration of acid / base • Mapping strategy • Buffering capability of media • Mixing of the mixer vessel contents • (weight and viscosity dependent). Xcellerex XDUO 2500 Mixer Operating Instructions 29146667 AH... -
Page 271: Ph/Conductivity Monitoring Or Control
PID parameters enough for the application. plied acid or base, are not suffi- for your system and available cient. reagents. Xcellerex XDUO 2500 Mixer Operating Instructions 29146667 AH... - Page 272 One of the pH probes is not cali- Calibrate pH probes before use. lution show different pH read- brated. ings. Probe may be at the end of its Replace the probe. life cycle. Xcellerex XDUO 2500 Mixer Operating Instructions 29146667 AH...
-
Page 273: Pumps
2525 kg. The system is automatically preventing an overfilling event. A fuse has blown. Use a functional pump head until a re- pair can be made. Contact your GE representative for service. Xcellerex XDUO 2500 Mixer Operating Instructions 29146667 AH... -
Page 274: Temperature Control
4 Inspect the whole length of the cable for damage. 5 Verify that the controller is set up to accept a remote input. See Mokon manufacturer's manual for this procedure. Xcellerex XDUO 2500 Mixer Operating Instructions 29146667 AH... -
Page 275: Temperature Monitoring
2 If the second input is not present or is not working, replace the probe. Temperature probe is not inserted Insert temperature probe into the into the disposable bag. thermowell. Xcellerex XDUO 2500 Mixer Operating Instructions 29146667 AH... -
Page 276: Weight Monitoring
The configuration on the load Contact your GE representative. cell transmitter is incorrect or corrupt. Load cells must be calibrated. Contact your GE representative and schedule the calibration of the load cells. Xcellerex XDUO 2500 Mixer Operating Instructions 29146667 AH... - Page 277 Load cell has failed (physically Contact the metrology depart- or electrically broken). ment to do a test (cornering test) and determine which load cell has failed. Weight transmitter configuration Contact your GE representative. incorrect or corrupt. Xcellerex XDUO 2500 Mixer Operating Instructions 29146667 AH...
-
Page 278: Reference Information
Section See page 10.1 System specifications 10.2 SP, CV and PV units and ranges 10.3 Pump characteristics 10.4 TCU 10.5 Temperature probe calibration 10.6 Ordering information 10.7 Health and Safety Declaration Forms Xcellerex XDUO 2500 Mixer Operating Instructions 29146667 AH... -
Page 279: System Specifications
Polycarbonate Casters Stainless steel / polyamide Ambient temperature XDUO 2500 Mixer 5°C to 30°C Relative humidity XDUO 2500 Mixer 20% to 85% RH, non-condensing Sound level XDUO 2500 Mixer < 70 dB(A) Xcellerex XDUO 2500 Mixer Operating Instructions 29146667 AH... - Page 280 Polycarbonate Casters Stainless steel / polyamide Ambient temperature XDUO 2500 Mixer 5°C to 30°C Relative humidity XDUO 2500 Mixer 20% to 85% RH, non-condensing Sound level XDUO 2500 Mixer < 70 dB(A) Xcellerex XDUO 2500 Mixer Operating Instructions 29146667 AH...
-
Page 281: Sp, Cv And Pv Units And Ranges
0 to 150 mS/cm 0 to 14 0% to 100% 0 to 14 Pumps Not applicable 0% to 100% 0% to 100% Vessel temperature 0°C to 60°C 0% to 70% 0°C to 60°C Xcellerex XDUO 2500 Mixer Operating Instructions 29146667 AH... -
Page 282: Pump Characteristics
XDUO 2500 Mixer comprises Watson-Marlow pumps model 520. Parameter Value Maximal speed 190 rpm Maximal flow rate 1.3 L/min This value is valid for the liquid addition lines on the disposable bag, i.d. ¼″. Xcellerex XDUO 2500 Mixer Operating Instructions 29146667 AH... -
Page 283: Tcu
10.4 TCU 10.4 TCU Introduction This section provides information about the requirements and specifications for TCU. In this section Section See page 10.4.1 TCU requirements 10.4.2 Temperature control optimization 10.4.3 TCU coolant specifications Xcellerex XDUO 2500 Mixer Operating Instructions 29146667 AH... -
Page 284: Tcu Requirements
Remote control Setpoint 4 to 20 mA 4 to 20 mA interface On/Off emergency stop Required Required Supported by XDUO 2500 Mixer. This information is given as an example of a smaller TCU. Xcellerex XDUO 2500 Mixer Operating Instructions 29146667 AH... -
Page 285: Temperature Control Optimization
2500 1700 The PID parameters are defined on the pH PID Settings screen. See Temperature PID screen, on page 116 for detailed information about the temperature control in the local control software. Xcellerex XDUO 2500 Mixer Operating Instructions 29146667 AH... -
Page 286: Tcu Coolant Specifications
< 0.05 mg/L Sulfate < 250 mg/L Chloride < 250 mg/L < 40 mg/L Bacteria < 1000 CFU/mL TCU coolant composition Refer to the manufacturer's manual for information regarding TCU coolant composition. Xcellerex XDUO 2500 Mixer Operating Instructions 29146667 AH... -
Page 287: Temperature Probe Calibration
If additional circulating baths are available, they can be set to the two end- point calibration temperatures. This would allow to shorten the total cali- bration time, as there would be no need to change the temperature of the primary circulating bath. Xcellerex XDUO 2500 Mixer Operating Instructions 29146667 AH... - Page 288 If the probe contains two temperature sensors, record the temperature • for both sensors. The standard probe temperature is displayed by the temperature indica- • tor on the standard probe. Xcellerex XDUO 2500 Mixer Operating Instructions 29146667 AH...
- Page 289 Offset = standard temperature reading - probe reading. Note: Use the data obtained at operating temperature (the middle calibration point) for best overall accuracy. If the probe contains two temperature sensors, calculate the offsets for both sensors. Xcellerex XDUO 2500 Mixer Operating Instructions 29146667 AH...
- Page 290 If the calibration of the new temperature probe does not bring the system into tolerance, contact your GE representative for service. Xcellerex XDUO 2500 Mixer Operating Instructions 29146667 AH...
-
Page 291: Ordering Information
• Training • Ordering information Contact information Contact information can be found on the back page of this document. For more advanced technical information, contact the manufacturer. See Manufacturing information, on page Xcellerex XDUO 2500 Mixer Operating Instructions 29146667 AH... -
Page 292: Health And Safety Declaration Forms
GE and GE monogram are trademarks of General Electric Company. GE Healthcare Bio-Sciences Corp, 800 Centennial Avenue, P.O. Box 1327, Piscataway, NJ 08855-1327 © 2010-14 General Electric Company—All rights reserved. First published April 2010. DOC1149542/28-9800-26 AC 05/2014 Xcellerex XDUO 2500 Mixer Operating Instructions 29146667 AH... - Page 293 GE Healthcare Bio-Sciences Corp, 800 Centennial Avenue, P.O. Box 1327, Piscataway, please call local technical support or customer service. NJ 08855-1327, US © 2010-14 General Electric Company—All rights reserved. First published April 2010. DOC1149544/28-9800-27 AC 05/2014 Xcellerex XDUO 2500 Mixer Operating Instructions 29146667 AH...
-
Page 294: Appendix A Information About Appendix
Appendix B Add and remove users in local control software, on page 295 Appendix C Download audit and data logs, on page 301 Appendix B and C are provided in English only. Xcellerex XDUO 2500 Mixer Operating Instructions 29146667 AH... -
Page 295: Appendix B Add And Remove Users In Local Control Software
It is recommended to change the administrator account password before starting to use the instrument. Follow the instructions below to change the password. Step Action Log in as administrator using factory settings for administrator account. Xcellerex XDUO 2500 Mixer Operating Instructions 29146667 AH... - Page 296 Type the user password in the text box and tap Return. Result: The password dialog box re-opens. Close the dialog box by tapping the close button Result: The new administrator password is saved and hidden. Xcellerex XDUO 2500 Mixer Operating Instructions 29146667 AH...
- Page 297 The logoff time specifies how long time a user can be inactive before being automatically logged out. Type the applicable time in the text box and tap Return. Result: The new user account is created. Xcellerex XDUO 2500 Mixer Operating Instructions 29146667 AH...
- Page 298 Result: The new entry is recorded in the software. The user cannot log in with previous name or password anymore. Tap the user group button (3) for the applicable user. In the group list, tap the new group name. Tap Return. Xcellerex XDUO 2500 Mixer Operating Instructions 29146667 AH...
- Page 299 In the group list, tap the applicable group name. Tap Return. Result: The user account is unlocked. Delete a user account Follow the instructions below to delete a user account. Note: Predefined users (for example Administrator) cannot be deleted. Xcellerex XDUO 2500 Mixer Operating Instructions 29146667 AH...
- Page 300 Tap the user name button (1). Delete the user name and tap Return. Result: The user account is deleted. NOTICE Do not delete the HMIAdmin account. This account is used by GE service personnel. Xcellerex XDUO 2500 Mixer Operating Instructions 29146667 AH...
-
Page 301: Appendix C Download Audit And Data Logs
Temperature (sensor 2) °C WT-176 Mixer vessel weight Displayed if XDUO 2500 Mixer has dual pH monitoring (PH1 and PH2). Displayed if XDUO 2500 Mixer has both pH (PH1) and conductivity (Cond) monitoring. Xcellerex XDUO 2500 Mixer Operating Instructions 29146667 AH... - Page 302 Click the Login link in the upper left corner of the screen (2) and log in using the Windows CE administrator account password. User ID: Administrator • Password: admin • Result: You are logged in. The link name changes to Logout. Xcellerex XDUO 2500 Mixer Operating Instructions 29146667 AH...
- Page 303 C Download audit and data logs Step Action Click File Browser in the left pane. Click Storage Card SD in the File Browser pane. Xcellerex XDUO 2500 Mixer Operating Instructions 29146667 AH...
- Page 304 Follow the instructions below to download the audit or data logs with a USB memory stick. Step Action Remove the protective cover from the USB connection port on the front of the I/O Cabinet and insert a USB memory stick into the port. Xcellerex XDUO 2500 Mixer Operating Instructions 29146667 AH...
- Page 305 If you want to create a graph using your exported time data, verify that the computer region and language settings in Control Panel are set to English (United States). This makes sure that your time data format is compatible with Excel. Xcellerex XDUO 2500 Mixer Operating Instructions 29146667 AH...
-
Page 306: Index
Motors screen, 105 Batch Timer, 94 Agitator Detail - Synced Mo- Burst disc tors screen, 107 description, 48 Agitator motor location, 60 illustration, 67 replace, 259 Agitators troubleshooting, 267 illustration, 66 Agitator speed Xcellerex XDUO 2500 Mixer Operating Instructions 29146667 AH... - Page 307 Control mode screen, 97 Download Coolant, 286 audit logs, 301 Copy data logs, 301 audit logs, 301 to USB, 304 data logs, 301 using Ethernet, 302 Counterclockwise agitation, 68 Dual pH monitoring, 92 Xcellerex XDUO 2500 Mixer Operating Instructions 29146667 AH...
- Page 308 77 maintenance, 259 Historization, 75, 77 Home screen, 90 Labels location, 27 I/O Cabinet safety, 30 check connection, 274 system, 27 cleaning, 258 Leveling feet connection to TCU, 78 lower, 150 Xcellerex XDUO 2500 Mixer Operating Instructions 29146667 AH...
- Page 309 Parameter abbreviations, 301 schedule, 251 Manual mode, 94 Auto mode, 221 Manufacturing information, 9 Manual mode, 223 Maximal power consump- measuring units, 281 tion, 279–280 monitoring, dual, 92 Mixer PID control loop, 221 Xcellerex XDUO 2500 Mixer Operating Instructions 29146667 AH...
- Page 310 243 prepare installation, 186 probe support, 130 Probe sheath assembly Replace autoclave, 183 burst disc, 259 compatibility, 85 Restart compressed, 196 after emergency stop, 36 description, 85 after power failure, 38 Xcellerex XDUO 2500 Mixer Operating Instructions 29146667 AH...
- Page 311 74 requirements, 284 Standardize pH probe, 179 troubleshooting, 274 Standards, 14 water quality, 286 Start Temperature Detail stand-alone mixer, 207 screen, 114 Start mixer, 207 Temperature monitoring Step ladder, 61 troubleshooting, 275 Xcellerex XDUO 2500 Mixer Operating Instructions 29146667 AH...
- Page 312 304 Weight export data, 304 interlock, 102 User local control software, 229 add account, 297 tare, 229 change account proper- Weight monitoring ties, 298 accuracy, 261 change password, 298 calibration, 252 Xcellerex XDUO 2500 Mixer Operating Instructions 29146667 AH...
- Page 313 GE, the GE Monogram, FlexFactory, and Xcellerex are trademarks of General For local office contact information, visit Electric Company. www.gelifesciences.com/contact Actril is a trademark of MEDIVATORS, INC. Wonderware is a registered trademark of Schneider Electric. Environ and LpH are registered trademarks of STERIS GE Healthcare Bio-Sciences AB Corporation.
Need help?
Do you have a question about the Xcellerex XDUO 2500 and is the answer not in the manual?
Questions and answers