
Related Manuals for Independence paragliding Trigon


Summary of Contents for Independence paragliding Trigon
- Page 1 Owner´s manual Fassung 1.0 vom 20.07.2018 Rescue system Trigon Fly market GmbH & Co. KG Am Schönebach 3 D-87637 Eisenberg Tel.: +49-8364-9833-0 Fax: +49-8364-9833-33 Mail: info@independence.aero...
-
Page 2: Table Of Contents
Inhaltsverzeichnis 1. Technical Data 2. Intended use 3. Operating limits 4. Necessary documentation 5. Mode of operation 6. usage of steering lines 7. Control and inspection of the parachute 8. Behaviour if damages are noticed 9. Storage 10. Maintanance 11. Cleaning 12. -
Page 3: Technical Data
It is not allowed to use this rescue parachute for skydiving! According EN 12491: Not suitable for use at speeds in excess of 32 m/s (115 km/h) The paragliding rescue systems of the Trigon series are certified according EN 12491 (European standard) and LTF 91/09 (German type approval). -
Page 4: Intended Use
If you do not have enough height anymore, just focus on the ground and prepare yourself for a landing fall. 6. Usage of steering lines The Trigon is equipped with a system that pre-brakes the canopy after opening by shortened steering lines which prevents a forward speed. -
Page 5: Control And Inspection Of The Parachute
With a shoulder suspension on the harness, depending on the position of the suspension points, it can be difficult to turn the head and see the control handles. Very often, these rescue system suspension are mounted on the harness far in the back area and the position of the control handles can therefore only be felt. -
Page 6: Repairs
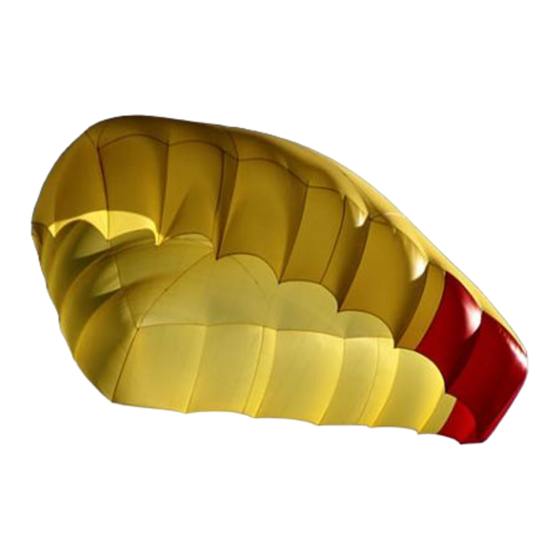
12. Repairs Repair jobs have to be done only by the manufacturer or a workshop which is certified by the manufacturer. 13. Nature and environment friendly behaviour Please do our nature-near sport in a way which do not stress nature and environment! Please do not walk beside the marked ways, don´t leave your litter, don´t make unnecessary loud noises and respect the sensitive balance in the mountains. - Page 7 construction of riser: suspension lines riser upper part steering lines pre-brake control handles marking marking front right/left mounting points riser front riser rear The deployment bag is made of nylon fabric and gets closed at 5 points. lower side: upper side: inner flap loop in points...
-
Page 8: Packing The Parachute
2. Slid on the numbered packing loops on a packing cord 1. Set the pre-brake of the control handles. Teh steering and hook in the packing cord. The Trigon 100 has 16 lines have an eye at 40 cm. Through this the hard part of the packing cords, Trigon 125 has 20. - Page 9 8. Arrange panel 7. This panel is shorter! 7. Arrange panel 8. 9. Arrange panel 6. This panel is shorter! 10. Arrange panel 5. 11. Arrange panel 4. 12. Arrange panel 3.
- Page 10 13. Arrange panel 2. 14. Arrange panel 1 (this panel is shorter!) and place a packing weight on the hem. 15. Fold the right side on the left side. 16. Place panel 10 centered to the floor and arrange panel 9 to the side.
- Page 11 20. Arrange panel 5. 19. Arrange panel 6.. This panel is shorter! 21. Arrange panel 4. 22. Arrange panel 3. 23. Arrange panel 2. 24. Arrange panel 1 (this panel is shorter!) and place a packing weight on the hem.
- Page 12 Schematic illustration S-fold 26. Fold left side S-shaped (Step 2). 25. Fold right side S-shaped. (Step 1). 27. Remove packing cord and place deployment bag under 28. Fold the rest of the canopy in S-folds in the deployment the canopy. bag.
-
Page 13: Mounting In A Container
31. Place „8-shaped“ hanks on the deployment bag. 32. Close the last, outer flap with the suspension lines. 18. Mounting in a container 1. Connect the release handle at the loop in the middle of 2. Close the two lateral flaps of the outercontainer with two the deployment bag. -
Page 14: Mounting / Integration To A Harness
19. Mounting / integration to a harness The adaption of the Trigon on the harness is possible at the attachment points for rescue systems in the shoulder area or in the main suspension. -
Page 15: Specialities For Winch Towing
When using such a system ensure that the deployment bag is compatible and tested to the rescue system used. Therefore consult the deployment bag / harness manufacturer if this deployment bag is suitable for the Trigon. The use of other (than the original) deployment bags are in full responsibility of the manufacturer.
Need help?
Do you have a question about the Trigon and is the answer not in the manual?
Questions and answers