
Related Manuals for Carrom 752.69

Summary of Contents for Carrom 752.69
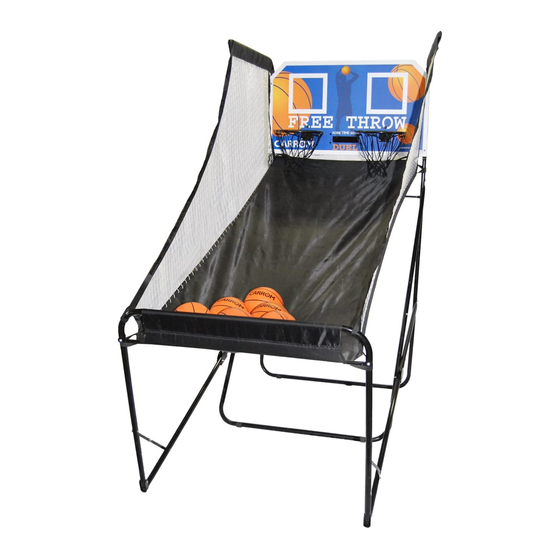
- Page 1 Quality Family Games Basketball Instructions Model 752.69 Product Registration Visit www.carrom.com to register your product to receive the latest product updates, special offers, and other product related information. 752.69 08/14/14...
- Page 2 Part List for Duel Basketball Game Pipe 1 2 Pieces Support Bar Pipe 8 1 Piece 2 Pieces Pipe 2 2 Pieces J Hook Pipe 9 2 Pieces 1 Piece Pipe 3 2 Pieces Chute Pipe 10 1 Piece 2 Pieces Pipe 4 1 Piece Pipe 5...
- Page 3 Part List Continued 60mm Bolt 45mm Bolt “L” Wrench 2 Pieces 4 Pieces 1 Piece Electronic Scorer 40mm Bolt Power Pack 2 Pieces 1 Piece 1 Piece Plastic Foam Block Basketballs 1/8” x 3/4” Screw 6 Pieces 8 Pieces 1 Piece Pump Flat Washer 1 Piece...
- Page 4 Step 1 using bolts #20, washer #30, and lock nuts Connect pipes #4 with #3 on each side - #31. Add pipe #2 to pipe #3 (push button push buttons should lock. Connect pipes lock), then connect pipe #7 and pipe #8 #6 and #3 using bolts #24, washer #30, (push button lock).
- Page 5 Step 2 using bolt #24, washer #30, and lock nut Attach pipes #10 into bracket of pipe #6 #31. Attach hinge #12, with hinge folding (use end of tube with two holes close to upward, to pipes #10 and #11 using end and bolt into hole at very end) using bolt #24, washer #30, and lock nut #31.
- Page 6 Step 4 washer #30, and lock nut #31 through the Connect pipes #5 and #2 using bolt #24, two top holes on backboard. Attach washer #30, and lock nut #31. Slide pipes J hook #15 and backboard together using #1 and #2 together. Attach the backboard bolt #27, washer #30, and lock nut #31 in #17 to pipes #1 and #2 using bolt #27, bottom holes.
- Page 7 Step 5 screws #29. Make sure the sensors with Attach electronic scorer #21 to the back of the “Top” sticker go in the top hole and the the back of backboard #17 using bolt #25 sensors with the “Bottom” sticker go in the and lock nut #32.
- Page 8 Step 7 backboard as shown in the inset drawings. Attach the ends of pipe #13 to both ends of Attach velcro strap from chute around pipe pipe #11 as shown below. Affix the chute #13. to the other end of the game near the...
- Page 9 Step 8 bolts #24, washer #30, and lock nuts #31 Attach the support bar #14 over the chute as shown below. and on outside end of pipe #13 using...
- Page 10 To secure the unit upright when not in the bracket hole then through the second use, simply fold the unit up by folding hole on the pipe and then through the the hinge #12, lift up bar #10, secure bracket hole. clevis pin lock by inserting the pin into...
- Page 11 Power Pack Connection 1. Plug the power pack cord into the scoring unit. 2. Plug the power pack into the wall outlet. Power Pack Safety Unplug the Make sure the Keep liquids power pack power cord away from the when not in does not cross power pack.
-
Page 12: Important Notes
Limited Warranty • Carrom Company warrants all games to be free from defect in material and workmanship for a period of ninety (90) days from the dates of original purchase. Should any defects in material or workmanship appear during that warranty period, the components will be repaired or replaced at Carrom location •...
Need help?
Do you have a question about the 752.69 and is the answer not in the manual?
Questions and answers